Heat tape for pipes not working is a frustrating discovery in the middle of a cold snap. You installed the cable, plugged it in, and trusted it to protect a vulnerable line, only to find a faucet that sputters or a pipe that feels cold to the touch. The good news is that heat tape failures usually fall into a small number of predictable categories: power supply problems, a thermostat that is not triggering, physical cable damage, or an installation mistake that keeps the heat from reaching the right part of the pipe.
This guide walks through those causes in a logical diagnostic order, explains the checks a homeowner can safely perform, and covers the safety rules that apply to any electrical heating cable. It also explains the difference between a power indicator and actual heating, because that distinction solves a surprising number of “my heat tape isn’t working” calls.
Understand What “Not Working” Actually Means
Heat tape problems get confusing because “not working” can describe several different failures. The cable may have no power at all, it may have power but not heat, it may heat only part of its length, or it may heat correctly but not the section of pipe that is actually frozen. Each of those situations has a different cause and a different fix.
A power indicator light on the plug or the end cap confirms that electricity is reaching the cable. It does not confirm that the heating element is producing heat. Many products use a single indicator for power only, and some thermostatically controlled cables will sit plugged in and cold until the sensor detects a low enough temperature. That is normal operation, not a failure.
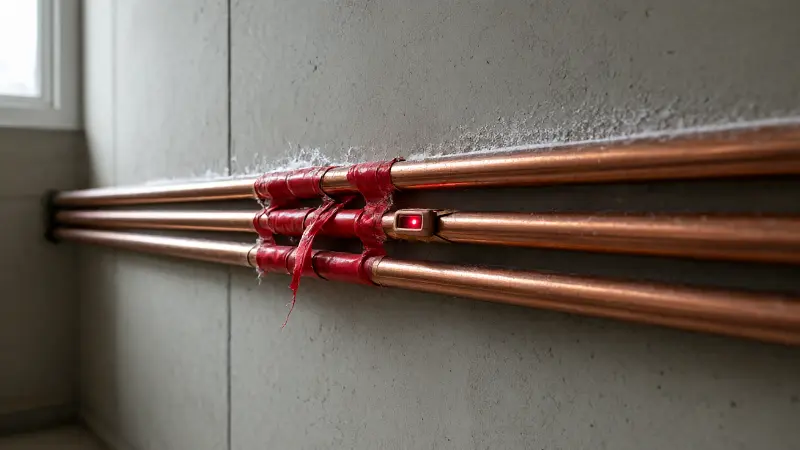
Separating these layers is the key to efficient troubleshooting. Start by asking whether the cable has power, then whether it is actively heating, and finally whether it is heating the right area. The answers narrow the diagnosis quickly and prevent unnecessary replacement.
The failures that actually cause damage tend to cluster around a few points. Most heat tape problems trace back to the power supply, a tripped GFCI, a thermostat that is not sensing the cold, a damaged section of cable, or insulation that is missing or installed over the cable instead of around the pipe.
Cause One: Power Supply and GFCI Problems
The most common reason a heat cable stays completely cold is that it is not receiving power. Start at the outlet. Confirm that the plug is fully seated and that the outlet is energized by testing it with a small lamp or a circuit tester. If the outlet is dead, check the circuit breaker that feeds it.
Heat tape should be plugged into a GFCI-protected outlet, and many manufacturers require it. A GFCI that has tripped will cut power to the cable, and the reset button on the outlet may be easy to miss. Press the reset firmly and see whether the indicator light on the cable returns. If the GFCI trips again immediately, stop resetting it and investigate the cause.
A GFCI that trips repeatedly usually indicates a ground fault in the cable or the wiring, not a faulty GFCI. Moisture intrusion at a splice, a nick in the jacket, or a crushed section of cable can create a leakage path that the GFCI detects. Repeated resetting does not fix the fault and can damage the cable further.
Check for an overloaded circuit as well. Heat cable can draw significant current, especially during a cold start, and a shared circuit may exceed the breaker’s capacity. If the breaker trips only when the heat tape is plugged in, move the cable to a dedicated circuit or reduce the load on that circuit. A buzzing or humming sound at the panel before the trip is a sign the circuit is at its limit.
Confirm the outlet is actually GFCI-protected
Not every outdoor or garage outlet is GFCI-protected, and an older outlet may not have test and reset buttons. Use a plug-in GFCI tester to confirm protection, and replace a non-GFCI outlet with a GFCI receptacle if the manufacturer requires it. The protection is there for a reason: water and electrical heating cable are a combination that deserves a ground-fault device.
Cause Two: The Thermostat Is Not Triggering
Many heat cables include a built-in thermostat that turns the heating element on only when the sensed temperature drops to a set point, often around 37°F. If the thermostat is not sensing cold, the cable will remain plugged in and cold even though nothing is broken. This is one of the most misunderstood “failures” in residential heat tape.
The thermostat’s location matters more than most homeowners expect. It needs to be in contact with the coldest part of the pipe and exposed to the air so it can sense the actual conditions. If the thermostat is buried under insulation, tucked into a warm corner, or mounted on a section of pipe that stays warmer than the rest of the run, it may never trigger.
A simple test can confirm whether the thermostat is working. Place an ice pack or a bag of crushed ice against the thermostat sensor for a few minutes, then check whether the cable begins to warm. If it does, the thermostat is functional and the problem is placement or temperature, not failure. If it does not warm with the sensor chilled, the thermostat may be faulty.
Some cables use a separate thermostat module rather than a sensor built into the cable. That module should be exposed to the air, not buried in insulation or installed inside a wall. Follow the manufacturer’s placement instructions exactly, because moving or bypassing the thermostat can create a safety hazard and may void the listing.
Bypassing the thermostat is not a fix
It is tempting to bypass a thermostat that seems to be keeping the cable off, but that removes a safety and energy-saving control. A heat cable that runs continuously can overheat if it is not designed for continuous duty, and it can waste energy for months. Fix the placement or replace the thermostat rather than defeating it.
Cause Three: Cable Damage and Partial Failures
If the cable has power and the thermostat has triggered but the pipe still freezes, inspect the cable for physical damage. Look for cuts, nicks, crushed sections, chew marks, or a jacket that has been pulled tight around a sharp corner. Damage can be caused by staples, screws, zip ties pulled too tight, or a cable that was dragged over a rough edge during installation.
Self-regulating cables use parallel bus wires and a conductive core. A break in one of the bus wires or a section of cable that has taken on water will stop heating beyond that point. The result is a cable that feels warm near the plug but cold farther along the run. That pattern is a strong sign of internal damage, and the affected section cannot be restored by patching.
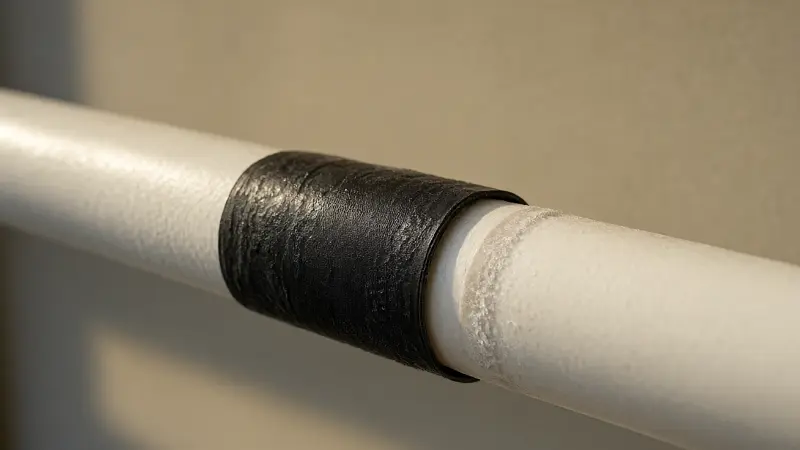
Water intrusion is a common cause of partial failure. The cable jacket is water-resistant, but a nick or a damaged end seal can let moisture reach the conductive core. Once water is inside, the heating circuit beyond that point may fail or the GFCI may trip intermittently. A cable that trips the GFCI after a rain or a thaw is showing exactly this pattern.
Splice kits are available for some cables, and a repair is sometimes possible if the damage is fresh and the cable has not been exposed to moisture. In practice, a water-damaged cable is difficult to repair reliably, and replacement is the more dependable choice. If the cable heats only partway, replacing the entire run is usually the correct fix.
Test with a multimeter if you are qualified
A multimeter can measure the resistance of the heating element and compare it with the value printed on the cable label. An open circuit or a reading far outside the specified range indicates a failed cable. Testing a heat cable involves working with electrical equipment, so it should be done with the power disconnected and only by someone comfortable with the procedure.
Cause Four: Installation Mistakes That Defeat the Heat
Even a working cable can fail to protect a pipe if it is installed incorrectly. The most common mistake is wrapping the cable over insulation instead of directly on the pipe. Heat tape must be in contact with the pipe to transfer warmth; if it is separated by insulation, most of the heat goes into the air or the insulation rather than the water line.
Another common error is compressing insulation tightly around the cable or using an insulation type that is not rated for the cable’s operating temperature. Some foam insulation can soften or deform when it is in direct contact with a heat cable. Use the insulation specified by the cable manufacturer, and do not crush it in a way that leaves air gaps.
The wrap pattern matters too. Some cables are designed to run straight along the pipe, while others can spiral around it. Crossing or overlapping the cable is not permitted on many products because it can create a hot spot. Follow the manufacturer’s drawing rather than improvising a pattern that seems more thorough.
Check the cold lead and the end seal as well. Most heat tape failures occur at the connection points rather than along the heating element. A cold lead that is pulled tight, a splice that is not sealed properly, or an end cap that has come loose can interrupt the circuit or let moisture in. Inspect those points first when the cable is not heating.
Insulation is part of the system
Heat tape is not a substitute for insulation. A cable on an uninsulated pipe loses most of its heat to the surrounding air, and the pipe may still freeze in severe cold. Pipe insulation over the cable, installed correctly and sealed at the seams, keeps the heat where it belongs. Missing insulation at fittings and valves is a frequent reason a protected run still freezes at one spot.
Cause Five: The Cable Is Heating the Wrong Section
Sometimes the cable is working perfectly and the pipe still freezes because the ice blockage is somewhere the cable does not reach. A heat cable protects only the length it covers. If the freeze is past the end of the cable, at a valve or elbow the cable bypasses, inside an exterior wall, or at a foundation penetration, the protected section can be warm while the water remains blocked elsewhere.
Trace the entire plumbing run and compare it with the cable layout. Look for hidden freeze points: where the pipe passes through an exterior wall, where it transitions from a crawl space to a conditioned space, where it enters a foundation, or where it emerges from the ground. A pipe can pass through several unheated zones before it reaches a fixture, and protecting only one section will not restore flow if another section is frozen.
Use your hand or an infrared thermometer to check the pipe temperature along the run. A section that is warm indicates the cable is working there. A section that is cold may be beyond the cable’s coverage or may be a spot where the cable is not making contact. Compare the readings with the cable layout to see where the protection ends.
If the cable covers the vulnerable section but the pipe still freezes, the issue may be that the cable’s heat output is insufficient for the pipe diameter, the insulation, or the severity of the cold. A higher-output cable or a second run may be needed, but that decision should follow the manufacturer’s guidance and a load calculation rather than guesswork.
Safety First: What Not to Do When Heat Tape Fails
Heat tape is electrical equipment, and improper handling can cause fire or shock. Do not cut a fixed-length cable to fit, do not overlap or cross the cable unless the instructions explicitly permit it, and do not puncture the jacket with staples or screws. Use the attachment method specified by the manufacturer, such as fiberglass tape, aluminum tape, or plastic zip ties, and avoid sharp edges.
If the GFCI trips repeatedly, stop resetting it. A ground fault is a real fault, and repeated resets can damage the cable or create a shock hazard. Disconnect the cable and have it assessed or replaced. The same applies to a cable that shows scorch marks, a burnt smell, or a melted jacket. Moisture-related electrical faults are not unique to heat tape, and outdoor holiday lights after rain often show similar GFCI and connection problems.
Do not use a heat cable that is not listed for the application. A roof de-icing cable is not a substitute for a pipe heating cable, and an indoor-rated cable is not suitable for a wet outdoor location. Check the product listing and the manufacturer’s instructions for the specific application before installation.
If a pipe is already frozen, a heat cable is not designed to thaw it. The cable is for freeze prevention, and using it to thaw a frozen line can leave the pipe unattended during the thaw. Thaw the pipe with a hair dryer or warm towels following safe procedures, and use the heat tape to keep it from freezing again.
Prevention and Seasonal Checks
Inspect the heat cable before each heating season. Look for jacket damage, loose attachments, moisture at the connections, and damaged insulation. Test the GFCI and confirm that the cable warms when the thermostat is triggered. A few minutes of inspection in the fall can prevent a cold-weather emergency.
Keep the cable accessible. Heat tape should not be buried inside a wall or ceiling where it cannot be inspected or replaced. If a vulnerable pipe runs through a finished wall, the cable should be installed on the accessible portion, and the wall cavity should be insulated and air-sealed to reduce the risk to the concealed section.
Check the thermostat placement every season. Make sure the sensor is on the coldest part of the pipe, exposed to the air, and not buried under insulation. If the thermostat has drifted or been moved during other work, reset it according to the instructions.
For broader freeze protection around the home, the same principles apply to other vulnerable systems. A guide to thawing frozen pipes under a sink covers the cabinet and faucet checks that complement a heat cable on an exterior wall. And if a heat tape failure has left a pipe frozen, the thawing steps matter as much as the repair.
Other winter equipment has its own electrical troubleshooting logic. A holiday light timer that stops working and a heat cable that stops heating are different devices, but both require checking power, connections, and controls in a logical order. A guide to timer for holiday lights not working covers a similar diagnostic approach for a different load.
Quick Reference: Heat Tape Symptoms and Fixes
The table below matches common heat tape failures with the conditions that most often produce them. Use it to organise your checks, and stop if a step involves live voltage, a damaged cable, or a part you are not trained to service.
| Symptom | Likely Cause | Safe First Step | When to Replace or Call a Pro |
|---|---|---|---|
| Cable completely cold, no indicator light | No power, tripped breaker, or tripped GFCI | Test the outlet; reset the GFCI and breaker once | GFCI trips again immediately |
| Cable has power but stays cold | Thermostat not triggered or faulty | Chill the sensor with ice to test activation | No heat with the sensor chilled |
| Cable warm near the plug, cold farther along | Internal cable damage or water intrusion | Inspect for nicks, crushed sections, or damaged ends | Partial heating confirmed |
| GFCI trips repeatedly | Ground fault from damaged jacket or moisture | Stop resetting; disconnect the cable | Always, for a recurring ground fault |
| Pipe still freezes with the cable warm | Cable covering the wrong section or missing insulation | Trace the run and compare with the cable layout | Coverage or output is insufficient |
| Cable heats but the pipe is cold at a fitting | Cable bypasses a valve, elbow, or fitting | Check cable contact at fittings | Fitting cannot be covered safely |
| Scorch marks, burnt smell, or melted jacket | Overheating or cable damage | Turn off power immediately | Any heat damage requires replacement |
| Cable runs continuously and wastes energy | Thermostat bypassed or failed closed | Check thermostat placement and function | Thermostat cannot be restored |
Use the table to narrow the likely cause, but remember that heat tape is only one part of a freeze-protection system. Insulation, air sealing, and pipe placement all affect whether the cable can do its job. A cable that tests perfectly can still fail to protect a pipe if the surrounding conditions are wrong.
FAQ
Why is my heat tape plugged in but not heating?
The most common reasons are a tripped GFCI or breaker, a thermostat that has not sensed a low enough temperature, or a damaged cable. Test the outlet, chill the thermostat sensor with ice to see whether the cable activates, and inspect the cable for cuts or crushed sections. If it stays cold with power and a chilled sensor, the cable is likely failed.
Does the indicator light mean my heat tape is working?
Not necessarily. On many products the light confirms only that electricity is reaching the plug, not that the heating element is producing heat. Some thermostatically controlled cables remain cold until the sensor detects low temperature. Check the manual for what the indicator is designed to show.
Can I repair a heat tape that heats only partway?
A partial failure usually means internal damage or water intrusion, and a reliable repair is difficult. Some splice kits are available, but a water-damaged cable is not a good candidate. Replacing the entire run is the more dependable choice, especially for a cable protecting a vulnerable pipe.
Why does my heat tape keep tripping the GFCI?
A recurring GFCI trip points to a ground fault in the cable or the wiring, often from a damaged jacket, moisture at a splice, or a crushed section. Stop resetting it and disconnect the cable. Inspect for visible damage and replace the cable if the fault cannot be resolved.
Should heat tape be covered with insulation?
Yes, but the insulation must be installed over the cable and around the pipe in the manner the manufacturer specifies. The cable itself must be in contact with the pipe, not wrapped over the insulation. Missing or incorrect insulation is a common reason a working cable still fails to protect the pipe.
Conclusion
Heat tape for pipes not working usually comes down to one of five causes: no power or a tripped GFCI, a thermostat that is not sensing the cold, physical damage to the cable, an installation mistake that keeps heat from reaching the pipe, or a cable that is heating the wrong section of the run. Start with the power supply and the GFCI, then test the thermostat, then inspect the cable for damage and correct installation.
Separate the question of power from the question of active heating. An indicator light confirms electricity, not warmth, and a thermostatically controlled cable may sit cold until the sensor is chilled. If the cable has power and the thermostat is working but the pipe still freezes, trace the run and confirm that the cable covers the actual freeze point.
Replace a damaged or partially heating cable rather than patching it, and never bypass a thermostat or defeat a GFCI to force the cable on. A few minutes of seasonal inspection and correct installation will keep the heat tape working and the pipe protected through the coldest nights.