A hose bib that bursts after a freeze usually announces itself in one of two ways. Sometimes water sprays out of the spigot body or from behind the wall the moment the ice melts, and sometimes the leak stays hidden inside the wall cavity until a stain appears on the interior drywall or the siding starts to drip. Both cases share the same root cause: water trapped in the fixture or the pipe behind it expanded as it froze and split the metal.
The repair itself is usually straightforward, but the sequence matters. Shutting off the water, confirming where the break is, and drying the wall cavity before closing anything up will determine whether you have a one-afternoon fix or a much larger repair. This guide walks through that sequence, explains the difference between frost-proof and standard sillcocks, and covers the steps that keep the same fixture from bursting again next winter.
Why a Hose Bib Bursts in the First Place
A standard hose bib is a simple valve at the end of a pipe that runs through the exterior wall. When a garden hose is left connected, or when the fixture itself is not drained, water stays in the body of the valve and in the short section of pipe behind it. As the temperature drops, that water freezes and expands, and the expanding ice has nowhere to go.
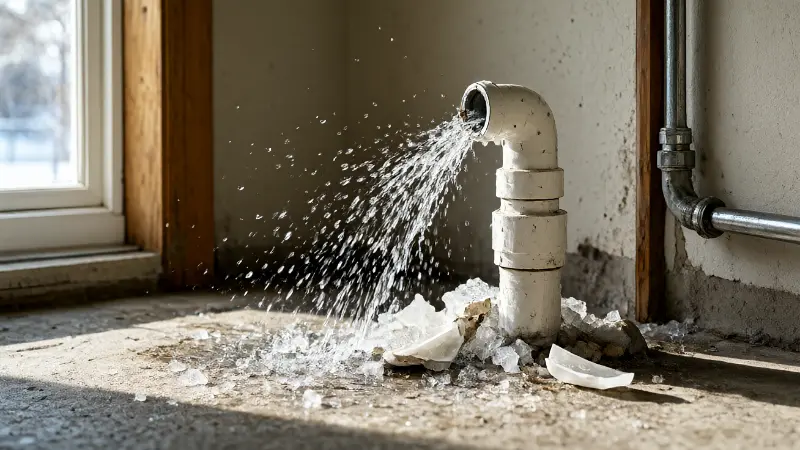
The split typically appears in the valve body or in the pipe just inside the wall, not necessarily at the spigot opening. Copper splits along a seam, brass can crack at a casting, and the pipe behind the wall may fail at a fitting. That is why the leak you see at the spigot is sometimes only part of the story.
Frost-proof sillcocks, sometimes called freeze-proof hydrants, are designed to reduce this risk. The valve seat sits deep inside the wall, and the exposed portion of the fixture is supposed to drain when the handle is closed and the hose is removed. They still fail if a hose is left attached, if the fixture is installed with the wrong slope, or if the interior shutoff is missing or left open.
The single most common mistake is leaving a hose connected through the first freeze. A hose traps water in the fixture and prevents the frost-proof design from draining. Disconnecting the hose in fall is a two-minute habit that prevents most of these repairs.
Step One: Shut Off the Water Immediately
If water is actively spraying or running, close the fixture’s interior shutoff valve first. It is usually located inside the house on the same pipe, often in a basement, crawl space, or utility room, sometimes behind an access panel. Turn it clockwise until it stops.
If there is no interior shutoff, or if you cannot find it, close the main water valve for the house. That stops the flow to the burst fixture and limits the damage while you work. Open a nearby faucet to relieve pressure from the line, and expect some water to continue draining from the broken section.
Water near electrical outlets, exterior lighting, or a panel is a separate hazard. Do not reach into a wet wall cavity with the power on. If water is near electrical equipment, turn off the affected circuit at the breaker before you continue, and call an electrician if the equipment is already wet.
Once the water is off, contain what you can. Place a bucket under the drip, move hoses and outdoor furniture away from the spray, and protect the siding and foundation from a steady stream. If the leak is inside the wall, place towels at the interior baseboard and watch for water tracking along the sill plate.
Step Two: Confirm the Location of the Break
With the water off, remove the hose and any insulation cover from the spigot. Dry the fixture and look closely at the body, the packing nut, and the point where the pipe enters the wall. A crack in the valve body is usually visible as a hairline split, a bulge, or a bright line of exposed metal.
If the spigot looks intact, the break may be on the pipe behind the wall. Restore the water briefly, with someone watching the interior side of the wall, and shut it off again as soon as you confirm the leak. A short, controlled test is safer than leaving the water on while you search.
Look at the interior wall for a matching clue. A damp patch, a bulge in the paint, a musty smell, or a water stain near the baseboard suggests that water is running down the inside of the cavity. In a basement or crawl space, check the rim joist area where the pipe enters the house.
Not every burst is dramatic. A hairline crack in a valve body can weep slowly for weeks before anyone notices. If you have had a freeze event and the spigot drips only when the water is on, treat the fixture as damaged even if the leak is small.
Step Three: Decide Between Repair and Replacement
For a standard hose bib with a cracked body, replacement is usually the practical choice. The valve is inexpensive, and a cracked casting cannot be repaired reliably. For a frost-proof sillcock, the decision depends on where the damage is. If only the exterior vacuum breaker or the handle assembly is damaged, a rebuild kit may solve it. If the body or the internal rod is split, the whole unit usually needs replacement.
A split in the copper pipe behind the wall is a plumbing repair. The damaged section must be cut out and replaced with new pipe and fittings. That work may be accessible from the interior through a small opening, or it may require work from the exterior if the wall assembly allows it.
Cost and access both matter. A simple standard spigot replacement is a modest DIY project for someone comfortable with basic plumbing. A frost-proof unit that must be unscrewed from inside the wall, or a repair that requires opening finished drywall, is a larger job. If the wall is brick, stone, or has a finished interior, the labor of opening and closing the assembly can exceed the cost of the fixture by a wide margin.
If the damage is limited to a fitting or a short section of pipe and the surrounding materials are sound, a targeted repair is reasonable. If the wall cavity is wet, the repair and the drying need to happen together, because closing a wet cavity invites mold.
Step Four: Replace the Hose Bib
Shut off the water and confirm it is off before you start. Remove the old fixture by unscrewing it from the pipe or the fitting behind the wall. On a frost-proof unit, the body is long and passes through the wall, so it must be withdrawn carefully to avoid damaging the siding or the wall cavity.
Clean the threads on the pipe and inspect them for damage. Apply pipe thread sealant or use the sealing method specified for the fitting type, then thread the new fixture in by hand before tightening. Avoid over-tightening, which can crack a brass fitting or distort the pipe.
For a frost-proof sillcock, confirm that the unit is installed with the correct downward slope toward the exterior so it drains properly. Check that the length matches the wall thickness and that the interior connection is accessible. The manufacturer’s instructions specify the required slope and installation details, and those details are what make the freeze protection work.
If the repair involves cutting out a section of copper pipe, use a tubing cutter for a clean, square cut and deburr the inside of the pipe. Push-fit fittings are a practical option for homeowners without soldering experience, provided the pipe end is clean and inserted to the marked depth. Soldered joints are durable and economical but require a torch and fire precautions near framing and insulation.
Install an interior shutoff if one is missing
If the fixture has no interior shutoff valve, adding one is worth the effort. It allows you to drain the exterior line in fall and to isolate the fixture if it fails again. A quarter-turn ball valve is easy to operate and easy to see at a glance.
Step Five: Dry the Cavity and Check for Hidden Damage
Water that ran inside the wall has to be dried before the opening is closed. Remove wet insulation, which loses its value and holds moisture against the framing. Set up a fan and a dehumidifier, and use a moisture meter if you have one to confirm that the framing and sheathing are dry.
Check the sill plate and the rim joist for soft wood or dark staining. A slow leak that ran for weeks can rot the framing at the base of the wall, which turns a plumbing repair into a carpentry repair. If the wood is soft, the damaged section should be replaced rather than covered.
Look at the interior finish as well. Drywall that was soaked should be cut back to dry material and replaced after the cavity is dry. Paint that has blistered or peeled will need to be removed and the surface prepared before repainting.
If water reached the exterior siding or brick, check for efflorescence and staining after the wall dries. A hose bib that sprays for hours can drive water into the wall assembly and leave mineral deposits on the exterior. Cleaning and repointing may be needed after the plumbing is sound.
Other appliance water damage follows similar rules. A leak that reaches a freezer door or the surrounding cabinetry can cause warping and finish damage that is separate from the plumbing. A guide to a broken plastic freezer door covers repair options when a water event or a failed hinge damages a component rather than the pipe itself.
Prevent the Next Burst
Start with the hose. Disconnect it in fall, drain it, and store it. A hose left connected is the leading cause of hose bib freeze damage, and it defeats the frost-proof design that is supposed to protect the fixture.
Close the interior shutoff valve and open the exterior spigot to drain the line. Leave the exterior spigot open through the winter so any residual water has somewhere to go. If the fixture is a frost-proof type, the handle should be closed and the hose removed so the barrel can drain.
Install an insulated cover over the spigot for additional protection. Covers help most when the fixture is already drained and the interior shutoff is closed. A cover alone, with water still in the line, does not guarantee protection in a severe cold snap.
Check the slope and installation of any frost-proof sillcock. If the unit tilts toward the house instead of the exterior, water will sit in the barrel and freeze. Correcting the slope during a replacement is far easier than correcting it later.
During cold snaps, open cabinet doors that share a wall with exterior plumbing and let warm room air reach the pipe. If a fixture has a history of freezing, add pipe insulation to the accessible section inside the wall or crawl space. Insulation slows heat loss but does not replace draining and shutting off the line.
When to Call a Plumber
Call a plumber if you cannot find or operate the interior shutoff, if the burst is in the pipe behind a brick or stone wall, if the repair requires soldering in a tight or combustible cavity, or if water has reached electrical equipment. Also call if the wall cavity is wet and the framing shows signs of rot or mold.
A plumber can also advise on upgrading a standard hose bib to a frost-proof model, which reduces the freeze risk for future winters. That upgrade is worth considering during any replacement, especially on a fixture that has frozen before.
If a pipe freezes without bursting, the response is different and less urgent, but it still needs attention. A guide to a pipe that froze but did not burst explains how to thaw gently and confirm that the pipe survived. If a pipe has already burst and water is spreading, the sequence for a frozen pipe burst scenario covers shutting off water, protecting electrical equipment, and documenting damage.
Quick Reference: Hose Bib Burst Decisions
The table below maps common post-freeze situations to the safest first action and the point at which to bring in a professional. Use it as a planning aid, and stop if a step involves live electricity or a wall assembly you cannot open safely.
| Situation | Likely Cause | Safe First Action | When to Call a Pro |
|---|---|---|---|
| Water spraying from the spigot body | Cracked valve casting from ice expansion | Close the interior shutoff or main valve | No interior shutoff or wall access is difficult |
| Leak appears only when the water is on | Hairline crack or failed packing | Shut off; dry and inspect the body and nut | Crack confirmed in the body or pipe |
| Interior wall stain near the fixture | Split pipe or fitting behind the wall | Shut off water; open a small inspection area | Repair requires soldering or brick work |
| Frost-proof sillcock drips after closing | Wrong slope, hose left connected, or damaged rod | Remove hose; verify slope; check for a rebuild kit | Body or internal rod is split |
| No interior shutoff valve present | Original installation without isolation | Use the main valve for now | Add a shutoff during the repair |
| Wet insulation and soft sill plate | Long-running hidden leak and rot | Remove wet material; dry the cavity | Framing repair or mold assessment needed |
| Water near exterior outlets or lighting | Electrical hazard | Turn off the circuit; keep clear | Electrician if equipment is wet |
| Fixture freezes every winter | Hose left on, no shutoff, or poor slope | Drain and shut off; add cover and insulation | Upgrade to frost-proof or re-slope the unit |
Use the table to choose the first step, but remember that the visible leak is only part of the repair. The wall cavity, the insulation, and the framing all need to be assessed before the opening is closed. A quick fix that leaves moisture in the wall is a larger problem postponed.
FAQ
Can a hose bib be repaired after it freezes and bursts?
A cracked valve body usually cannot be repaired reliably, and replacement is the practical choice. If the damage is limited to the packing nut, the handle assembly, or a vacuum breaker, a rebuild kit may solve it. Damage to the pipe behind the wall requires cutting out and replacing the affected section.
Why did my frost-proof hose bib still burst?
Frost-proof sillcocks rely on the hose being removed and the fixture draining properly. A hose left connected traps water in the barrel, and a unit installed with the wrong slope holds water instead of draining it. A missing interior shutoff or a damaged internal rod can also cause a failure.
How do I shut off a hose bib that has no interior valve?
Use the main water valve for the house to stop the flow, then add an interior shutoff during the repair. A quarter-turn ball valve on the same pipe is a common and durable choice. If you cannot locate the main valve, contact your water utility for guidance.
Should I replace a burst hose bib with a frost-proof model?
A frost-proof sillcock reduces the risk of a repeat freeze, especially on a fixture that has already failed. It must be installed with the correct slope and a matching interior shutoff to work as designed. Discuss the wall thickness and access with a plumber before choosing a replacement.
Conclusion
A hose bib that bursts after a freeze is usually a repairable problem if you shut off the water quickly and dry the wall cavity before closing it up. Close the interior shutoff or the main valve, confirm whether the break is in the fixture or the pipe behind the wall, and replace the damaged section rather than patching a cracked casting.
Frost-proof sillcocks reduce the risk but do not eliminate it. A hose left connected, a missing interior shutoff, or a fixture that slopes toward the house will still freeze. Disconnect the hose in fall, drain the line, and confirm that the exterior spigot is open through the winter.
If the repair involves a brick wall, a hidden pipe, or a wet cavity with rot, call a plumber and address the water damage as part of the same project. A careful repair and a simple seasonal habit will keep the fixture working and the wall dry for the next cold season.