Holiday candle soot on walls is one of those decorating problems that shows up quietly and then becomes obvious all at once. You light a few scented jar candles for ambiance, the room smells wonderful for a week, and then you notice gray shadows above the sconces, a dark halo around the candle shelf, or a smudgy film along the wall behind the dining table. The soot can settle on paint, wallpaper, trim, ceilings, and even curtains.
The good news is that most candle soot is cleanable, and the process is less about scrubbing hard and more about matching the method to the surface. This guide explains why candles deposit soot, how to identify what you are dealing with, which cleaning approaches are safe for different finishes, and how to keep the problem from returning before the next gathering.
Why Holiday Candles Leave Soot on Walls
Soot is the visible result of incomplete combustion. When a candle does not burn cleanly, tiny carbon particles rise with the heat plume and settle on nearby surfaces. Scented candles, decorative shapes, and clusters of candles in a closed room tend to produce more of these particles than a single well-trimmed candle in a ventilated space.
Wick length plays a large role. A wick that is too long creates a larger flame than the candle can feed efficiently, and the flame begins to smoke. Many candle labels specify a trim length, and following that guidance matters more than most people expect. A wick trimmed before each burn reduces the chance of a smoky flame.
Drafts are another common culprit. A candle placed near a heating vent, a return grille, an open doorway, or a ceiling fan burns unevenly and may smoke intermittently. The flame leans, the wax melts unevenly, and the combustion becomes less efficient. The soot then travels with the room’s air currents and deposits wherever those currents slow down.
Fragrance oils and dyes add to the load. Heavily fragranced candles can produce more visible residue, particularly when burned for long periods in a small room. Jar candles that are allowed to burn near the bottom can also overheat, which changes how the wax vaporizes and can increase smoking.
Identify the Soot and the Surface Type First
Not all wall residue is the same. Fresh candle soot is often a dry, powdery gray-black film that wipes away fairly easily. Older soot can combine with kitchen grease, cooking aerosols, and humidity to form a sticky, oily layer that smears when you wipe it. Treating the second type like the first can spread the mess instead of removing it.
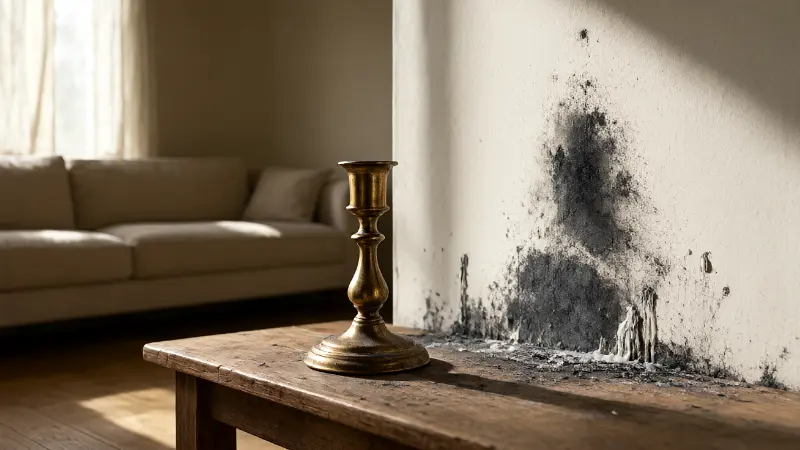
Look at where the deposit sits. Soot directly above a candle shelf or sconce is likely from that candle. A broad film across a wall near the kitchen may be a combination of cooking residue and candle smoke. Dark streaks near vents, ceiling corners, or cold exterior walls can indicate that particles are being carried by airflow and settling where the wall is cooler.
Identify the finish before you touch it. Flat paint, eggshell, satin, semi-gloss, wallpaper, and faux finishes all respond differently to cleaners. Flat paint is the least forgiving because it has more pigment at the surface and can show scrub marks readily. Knowing the finish helps you choose the gentlest effective method.
Check whether the soot is dry or oily
Press a clean white paper towel or a white microfiber cloth against an inconspicuous area. If it lifts a dry gray powder, start with dry removal methods. If the towel comes away with a greasy brown smear, plan for a mild degreasing step after the dry pass.
Test Every Cleaning Method in a Hidden Spot
Before you clean a visible wall, test your method somewhere out of sight. A spot behind a piece of furniture, inside a closet, or near the floor behind a sofa is usually suitable. Apply the cleaner to a cloth rather than directly to the wall, then blot and wipe gently, and let the area dry fully.
Dry testing matters because some cleaners change the sheen of paint or lift color. A spot that looks fine while wet can dry with a visible ring or a dull patch. Wait until the test area is completely dry and check it under both daylight and the room’s normal lighting.
If the test leaves a mark, try a weaker approach before moving to a stronger one. Water alone, a dry sponge, or a lightly dampened microfiber cloth may handle light soot. Escalating too quickly is the most common way homeowners create a bigger problem than the soot itself.
Clean Soot From Painted Walls Step by Step
Start with dry removal, because wiping a dry powdery deposit with a wet cloth can drive particles into the paint. A vacuum with a soft brush attachment works well if you use light pressure and keep the brush moving. A dry chemical sponge, often sold as a soot sponge, can lift loose residue without water.
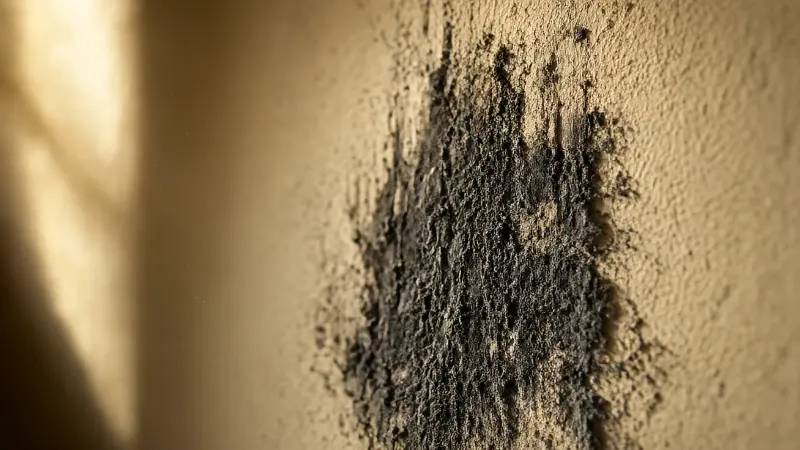
Work from the top of the deposit downward and use overlapping strokes rather than scrubbing back and forth. Change or rotate the cloth frequently so you are not redistributing soot. Keep a trash bag nearby for used cloths, and avoid pressing hard enough to burnish the paint.
For the remaining film, mix a small amount of mild dish soap in warm water and apply it with a damp microfiber cloth. Wring the cloth out well so it is damp rather than wet. Wipe in sections, rinse with a clean damp cloth, and dry immediately with a soft towel to reduce streaks.
If the residue is oily, a mild degreaser formulated for painted surfaces may help. Follow the label directions and keep the product off adjacent wallpaper or fabric. Do not combine cleaners, and avoid abrasive powders, scouring pads, and bleach-based products on painted walls.
Techniques that reduce streaking
Work in small sections and keep the leading edge of each pass slightly overlapping the last. Avoid stopping in the middle of a wall, because a partially cleaned area can dry with a visible line. If a faint haze remains after the wall dries, a second light pass is usually better than a single aggressive scrub.
Handle Flat Paint, Wallpaper, and Specialty Finishes
Flat paint hides imperfections well but shows cleaning marks easily. Use the dry method first and keep moisture to a minimum. If you must use a damp cloth, blot rather than rub, and dry the surface immediately with a clean towel. Some flat paints marketed as washable tolerate more cleaning, but testing is still worthwhile.
Wallpaper requires more caution because water can loosen seams, lift edges, and stain the paper. A dry soot sponge or a soft brush attachment on a vacuum is usually the safer first step. If a damp method is needed, use the least amount of moisture possible and test a hidden seam area before cleaning a full wall.
Specialty finishes such as faux glaze, metallic paints, and textured coatings can be damaged by rubbing. Consult the finish manufacturer’s cleaning guidance if you have it. When in doubt, a light dry pass and a call to a painter is more sensible than experimenting on a large visible area.
What about painted trim and doors?
Trim and doors often have a harder, glossier finish that tolerates a damp cloth better than wall paint. Clean them after the walls so loosened soot does not fall onto surfaces you have already finished. Pay attention to the top edges of door casings, where dust and soot collect out of sight.
Remove Soot From Ceilings, Shelves, and Fabrics
Ceilings above candle displays collect soot because warm air rises and slows near the surface. Use a vacuum with an extension wand and soft brush, then follow with a dry sponge if the deposit is light. Cleaning a ceiling is awkward work, so plan your footing carefully and avoid overreaching on a ladder.
Shelves, mantels, and candle holders should be cleaned before the walls, since soot on these surfaces can fall during cleaning. Wash removable glass and metal holders according to the manufacturer’s guidance. For wood surfaces, use a cleaner appropriate for the finish and avoid soaking the wood.
Curtains, table linens, and upholstery may hold soot odor as well as visible residue. Check care labels before laundering, and consider professional cleaning for drapery with delicate construction. A vacuum with an upholstery attachment can remove loose particles from fabric before a deeper cleaning.
While you inspect the walls, look for cracks and popped seams that may have been there before the soot appeared. Cosmetic wall damage near ceilings can be repaired with the right technique, and a guide on hanging drywall on tall walls explains how to prevent seam problems during larger repairs.
Why Some Candles Soot More Than Others
Wick type, wax blend, fragrance load, and candle design all influence how cleanly a candle burns. A candle with a wick that is too large for its diameter may produce a flame that smokes regardless of trimming. Decorative candles with embedded items, multiple wicks close together, or unusual shapes can also burn unevenly.
Burning time matters as much as candle choice. Very long burn sessions can overheat the wax and the container, which changes combustion. Many candle makers recommend a maximum burn period on the label, and following it is a simple way to reduce smoking. Extinguishing with a snuffer rather than blowing out the flame also reduces the smoke puff and the soot that follows it.
Room conditions contribute too. A dry, tightly sealed room with a running HVAC system can carry particles across the space and deposit them on cooler surfaces. Candles placed directly under a vent or beside a return grille are especially likely to leave marks on the wall behind them.
Try a small burn test with new candles
When you buy a new candle, burn it for a short session and watch the flame and the wall above it. A flame that flickers excessively, smokes, or produces a visible plume is a sign the candle may not suit that location. Move it to a better spot or choose a different product for that room.
Prevent Holiday Candle Soot Through the Season
Trim wicks to the length recommended on the candle label before each burn, and remove any mushroomed tip. Keep candles away from drafts, vents, ceiling fans, and open windows. Space candles apart rather than clustering them tightly, and avoid burning several heavily fragranced candles in a small closed room at the same time.
Place candles on a stable, heat-resistant surface with clearance above the flame. Keep the area above the candle free of shelves, decorations, and greenery that could be damaged or ignited. Never leave a burning candle unattended, and keep matches and lighters away from children and pets.
If you love the look of candlelight but want to reduce soot, consider flameless LED candles for everyday ambiance and reserve real candles for shorter, supervised sessions. Battery-operated candles have improved considerably and can provide a similar glow without combustion particles.
It also helps to look at the whole room, not just the candle. A dusty return grille or a clogged furnace filter can keep particles circulating. During holiday preparation, a holiday hosting home repair checklist can help you catch air filter, ventilation, and safety items before guests arrive.
When Soot Suggests a Bigger Problem
Candle soot is usually localized and tied to the candles themselves. However, persistent dark residue near vents, a smoky odor without candles burning, or soot around a gas appliance is a different situation. Those patterns can point to a combustion or venting problem that deserves professional attention.
If soot appears near a furnace, water heater, fireplace, or gas range, stop using the appliance and arrange an inspection. Carbon monoxide alarms should be tested regularly, and any alarm activation should be treated as an emergency. Do not attempt to diagnose combustion problems by yourself.
There is also a practical hosting angle. A house full of people, cooking, and candles puts more particles into the air, and a busy kitchen can create its own messes. If the sink backs up during meal prep, knowing how to handle unclogging a sink after holiday cooking keeps a minor issue from derailing the day.
Quick Reference: Soot Scenarios and Cleaning Approaches
The table below matches common soot patterns with likely causes and appropriate first steps. Use it to plan your cleaning order, and test any product on a hidden area before applying it broadly. When a surface is delicate or valuable, professional help is worth considering.
| Pattern or Surface | Likely Cause | Cleaning Approach | Prevention |
|---|---|---|---|
| Gray halo above a candle shelf | Untrimmed wick or draft near the flame | Dry sponge first, then damp cloth with mild soap | Trim wick per label and move candle away from drafts |
| Oily film behind dining candles | Long burn sessions with fragranced candles | Dry pass, then mild degreaser on a damp cloth | Shorten burn time and space candles apart |
| Dark streaks near ceiling vents | Airflow carrying particles to cooler surfaces | Vacuum with soft brush, then dry sponge | Replace filters and keep candles away from returns |
| Smudges on flat paint | Wet wiping drove soot into porous paint | Blot gently with minimal moisture and dry quickly | Start dry and test in a hidden spot |
| Staining on wallpaper seams | Moisture lifting adhesive or paper dye | Dry methods only; consult a paperhanger if needed | Avoid damp cleaning and burning candles nearby |
| Residue on glass candle holders | Direct smoke deposition on nearby surfaces | Warm soapy water and a soft cloth | Clean holders weekly during heavy use |
| Soot near a gas appliance | Possible combustion or venting problem | Stop use and arrange professional inspection | Regular appliance service and CO alarm checks |
Use the table to sort your cleaning tasks by surface and cause, then work from the least aggressive method upward. If a wall shows staining that does not respond to gentle cleaning, consider whether the paint itself has been affected and whether repainting is the more practical solution.
FAQ
Does candle soot on walls come back after cleaning?
It can return if the conditions that created it continue. Untrimmed wicks, drafts, long burn sessions, and candles placed under vents all keep producing particles. Cleaning without changing placement or burn habits usually leads to the same deposit over time.
Can I use a magic eraser on candle soot?
Melamine foam sponges are mildly abrasive and can dull or burnish painted surfaces, especially flat paint. Test on a hidden area first, use light pressure, and avoid them on wallpaper, faux finishes, and glossy trim where the sheen matters.
Is candle soot harmful?
Candle soot is a visible particle deposit that can irritate eyes and respiratory passages in sensitive people and can discolor surfaces. It is different from combustion problems in fuel-burning appliances, which can produce carbon monoxide and require professional attention.
How do I clean soot off a textured wall?
Textured surfaces trap particles in the recesses, so vacuuming with a soft brush and using a dry sponge usually works better than wiping. If damp cleaning is necessary, use very little moisture and work in small sections so the texture does not stay wet.
Conclusion
Holiday candle soot on walls is usually a combustion and airflow problem rather than a cleaning failure. Start with a dry pass to lift loose particles, test any cleaner in a hidden spot, and match your method to the finish. Flat paint, wallpaper, and specialty coatings need gentler handling than trim and glass.
Prevention is the more durable fix. Trim wicks to the label’s recommendation, keep candles out of drafts and away from vents, limit long burn sessions, and space candles apart. If soot appears near a gas appliance or without any candles burning, treat it as a safety question and call a professional.
Clean ceilings, shelves, and holders before the walls so fallen soot does not undo your work. Give the room time to dry, then check the result under normal lighting. With a sensible cleaning order and a few changes to your candle habits, the walls can stay clean through the season.