An oven that is not heating evenly before holiday baking can turn a carefully planned menu into a stressful afternoon. One tray of cookies browns on the left while the right side stays pale, the center of a casserole cooks faster than the edges, and the turkey breast reaches temperature while the thighs lag behind. The problem is common, and it is often caused by something simpler than a failed oven.
This guide walks through the practical checks that matter most before a big baking day. You will learn how to measure the oven’s real temperature, inspect the elements and seals, adjust for hot and cold spots, and recognize the symptoms that call for a technician. The goal is predictable results, not a perfect laboratory oven.
Why Uneven Oven Heat Matters More During the Holidays
Everyday cooking can hide a moderate temperature imbalance. A sheet pan of vegetables may brown a little unevenly and still taste fine, but delicate baking exposes the problem quickly. Cakes, pies, yeast breads, and cookies depend on consistent ambient heat, and a swing of a few dozen degrees can change browning, rise, and texture.
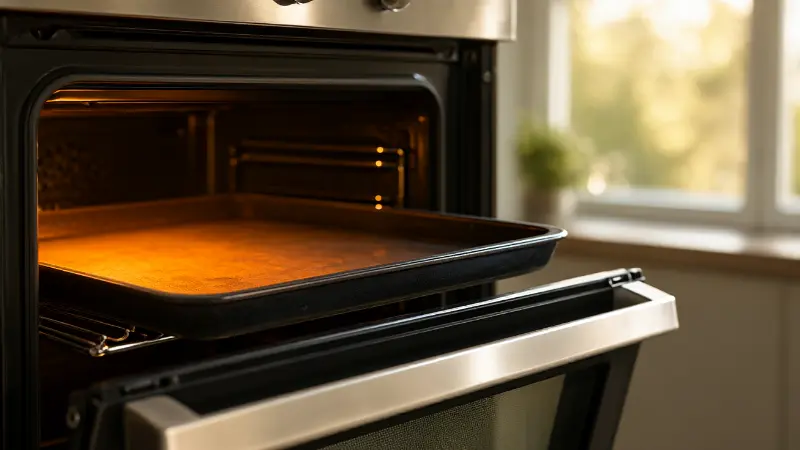
Holiday cooking also loads the oven differently. You may run two or three racks at once, open the door more often, and bake larger quantities than usual. More food in the cavity affects airflow and heat distribution, so a small existing imbalance becomes much more visible when the oven is packed.
Time pressure makes the issue worse. When you are roasting a turkey and baking sides for a crowd, you do not have room for a batch that needs an extra twenty minutes or a pie that scorches on one side. Diagnosing the problem ahead of time gives you options.
Start With an Oven Thermometer Test
The oven display tells you what the control board thinks the temperature is, not necessarily what the cavity is actually doing. A separate oven thermometer placed in the center of the middle rack gives you an independent reading. Use a thermometer designed for oven air temperature rather than a meat thermometer, which is calibrated for internal food temperatures.
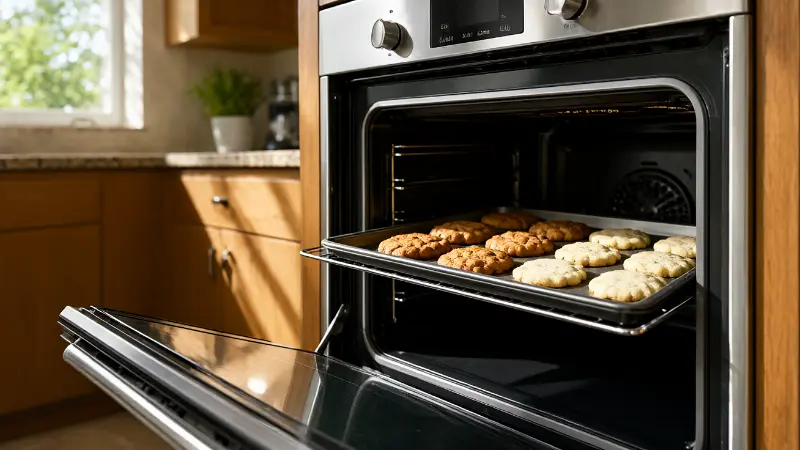
Run the test with an empty oven except for the racks and the thermometer. Set the oven to a common baking temperature such as 350°F on the standard bake setting, not convection or rapid preheat. Let it preheat fully, then wait a while before taking readings, because the first preheat cycle often overshoots the set point.
Record the temperature every few minutes for at least twenty to thirty minutes. Ovens cycle on and off, so the reading will rise and fall around the set point rather than holding a single number. What matters is the average and the size of the swings, not one snapshot. If the average is far from the set temperature, calibration or a sensor issue may be involved.
Repeat the test with the thermometer on the left and right sides of the rack if you suspect a side-to-side difference. This helps you separate a general calibration problem from a localized hot or cold zone.
Understand normal oven cycling
Even a healthy oven does not hold a perfectly flat temperature. The thermostat turns the heat on and off to maintain an average, and the actual cavity temperature bounces around the set point during each cycle. Some variation is normal, so do not panic if the thermometer moves by several degrees.
Inspect the Bake and Broil Elements
On an electric oven, the bake element is usually the lower element and the broil element is at the top. If the bake element has failed, the oven may rely mostly on the broil element, which heats from above and produces uneven results. Look at the element with the oven off and cooled: a burned-out element may show blisters, holes, or a visibly broken coil.
A working element should glow red during operation. If one element stays dark while the other heats, that is a strong clue. You can test an element for continuity with a multimeter after shutting off power, but only if you are comfortable working safely around appliance wiring. A healthy element typically shows low resistance rather than an open circuit.
On a gas oven, the bake burner tube sits at the bottom under a cover. Inspect the tube for corrosion, deformation, or clogged burner holes. A dirty or damaged burner tube can distribute flame unevenly, which translates into uneven baking. Cleaning or replacing the burner tube is often a job for a qualified technician because it involves gas components.
Do not ignore the broil element
Some baking modes cycle the broil element on and off to supplement heat. If the broil element is weak or intermittent, the top of the oven may run cooler than expected, and foods that need top browning can suffer. Check both elements rather than assuming the lower one is the only culprit.
Check the Temperature Sensor and Control Board
The oven temperature sensor is a thin probe, often in the upper corner of the cavity, that reports resistance changes to the control board as the oven heats. If the sensor is out of position, coated with baked-on residue, or failing, the control board receives inaccurate information and regulates heat poorly.
Look at the sensor without bending or scrubbing it. It is fragile, and moving it can change readings. If it appears loose or pushed to one side, returning it to its normal position may help, but do not force it. A sensor that reads incorrectly may need replacement.
On some models, the control board can be recalibrated within a limited range, often around plus or minus 30 to 35°F depending on the manufacturer. Check your owner’s manual for the exact procedure, because the button sequence varies widely. Calibration corrects a consistent offset, but it does not fix a failed element or a blocked airflow path.
Inspect the Door Gasket and Seal
A torn, flattened, or misaligned door gasket lets heat escape around the door. The oven then struggles to hold temperature, and the area near the leak may run cooler. Run your hand along the gasket with the oven off and look for cracks, gaps, or sections that no longer contact the frame.
Check that the door closes squarely and that the hinges are not sagging. A door that does not seal properly can also cause the outer edges of baked goods to brown differently from the center. Gasket replacement is usually straightforward on many models, but confirm the part number for your specific oven.
Residue on the gasket or the door frame can prevent a tight seal. Clean these surfaces gently with a cleaner appropriate for the material, and avoid abrasive pads that can damage the seal. Do not use oven cleaner on the gasket unless the manufacturer says it is safe.
Improve Airflow and Rack Placement
Rack position changes how food cooks. The middle rack is the usual default for even browning, while the lower rack runs hotter from the bottom element and the upper rack runs hotter from the broil element. If your recipes consistently brown too much on the bottom, try moving the rack up one position, and vice versa.
Avoid covering the oven floor or the racks with foil, which can block airflow and trap heat. If you use a baking stone or a large sheet pan, leave space around it so air can circulate. Overloading the oven with too many pans at once restricts airflow and creates uneven results even in a healthy oven.
For multiple racks, rotate pans partway through baking and switch their positions if the recipe allows. This is a practical workaround for a mild hot spot. Also confirm that the oven is fully preheated before loading it, because putting food into a cold or partially heated oven can exaggerate unevenness.
Compare Bake, Convection, and Roast Modes
Different modes use different heat sources and fan behavior. Standard bake relies on radiant heat from the elements, while convection modes use a fan to circulate air and often reduce the recommended temperature. If you normally use one mode and switch to another for the holidays, the results can differ even when the oven is working correctly.
Check the manufacturer’s guidance on temperature adjustments for convection. Many recipes need a reduction of roughly 25°F when using convection, but the exact recommendation varies by oven and brand. Follow your manual rather than guessing, and test a small batch before the main event.
Rapid preheat or power preheat features may use extra elements to reach temperature quickly, and they can create temporary hot spots. For delicate baking, let the oven stabilize after the preheat signal rather than loading it immediately.
Gas Oven Specifics: Igniter and Burner
A weak gas oven igniter can delay ignition or produce inconsistent heating. If the igniter glows for an extended period without lighting the flame, it may not be opening the safety valve properly. This is a common cause of temperature problems in gas ovens, and the igniter is often replaced as a unit.
Look at the flame through the oven bottom or the designated viewing area if the manufacturer allows it. A healthy flame should be steady and mostly blue, with some slight variation. A yellow or lazy flame can indicate incomplete combustion or a dirty burner, which is a reason to call a technician rather than adjust anything yourself.
Gas work carries safety risks, so avoid disconnecting gas lines or adjusting air shutters unless you are trained and equipped. If you smell gas at any point, turn off the oven, ventilate the area, and contact your gas provider or a qualified technician.
Calibrate for a Consistent Offset
If your thermometer test shows that the oven runs consistently hot or cold by a moderate amount, calibration can bring the average closer to the set point. The procedure usually involves entering a service or settings menu and entering an offset value. Some ovens allow adjustments in increments of 5°F.
Calibration is not a fix for a 50°F or larger error, a failed element, or a sensor that is clearly out of range. It is a correction for a modest, consistent bias. After adjusting, repeat the thermometer test to confirm the change and avoid overcorrecting based on a single reading.
Write down the offset you entered so you can reverse it if needed. If the oven still performs poorly after calibration, the sensor, control board, or another component may be at fault.
Quick Fixes vs When to Call a Technician
Before the holiday, decide which issues you can reasonably handle and which need professional help. Cleaning, rack adjustments, gasket inspection, and a thermometer test are safe homeowner tasks. Replacing an element is within reach for many DIYers on electric ovens, but gas components, control boards, and persistent electrical faults are better left to a qualified technician.
Use the table below to match symptoms with sensible first steps. The guidance is general, so always defer to your oven manufacturer’s instructions and your own comfort level with the repair.
| Symptom | Likely Cause | First Step | When to Call a Pro |
|---|---|---|---|
| Oven runs consistently hot or cold by a moderate amount | Calibration offset or sensor drift | Verify with an oven thermometer; recalibrate per manual | Error persists after calibration |
| Bottom of baked goods burns while top is pale | Rack too low or bake element running hot | Move rack up; test element glow | Element or control issue suspected |
| One side browns faster than the other | Airflow restriction or localized hot spot | Rotate pans; check for blocked vents and foil | Difference remains after airflow fixes |
| Oven takes very long to preheat | Weak bake element, igniter, or door seal | Inspect element glow and gasket | Gas igniter or element replacement needed |
| Bake element does not glow | Failed bake element or power supply issue | Test continuity with power off | Element replacement or wiring fault |
| Gas flame is yellow or lazy | Dirty burner or combustion issue | Stop using; ventilate | Call a technician promptly |
| Heat escapes around the door | Worn or misaligned gasket | Clean and inspect seal; check door alignment | Hinge or gasket replacement needed |
If a repair requires disconnecting power or gas, shut off the circuit or supply first and confirm it is off. Do not test components with the oven energized. If you are unsure at any point, stop and schedule service.
Practical Workarounds for Holiday Baking Day
If you cannot fully solve the unevenness before the holiday, adjust your baking strategy. Use the center rack for the most temperature-sensitive items, rotate pans partway through, and avoid crowding the oven. Bake in smaller batches rather than filling every rack if the schedule allows.
Use an oven thermometer as your guide rather than the display, and trust visual cues such as browning and doneness tests. For large items like a turkey, rely on a food thermometer in the thickest part rather than the oven setting alone. A little extra monitoring can compensate for a mild hot spot.
While you are preparing the house, it helps to check other systems that guests will use. A quick look at guest room heating fixes can prevent a cold bedroom, and knowing how to handle a clogged kitchen sink after holiday cooking saves time if the kitchen gets busy. If you are also getting the bathroom ready, prepping a guest bathroom for holiday visitors rounds out the pre-holiday walkthrough.
FAQ
Why does my oven bake unevenly on one side?
Side-to-side differences often come from restricted airflow, a rack that is too close to an element, or a localized hot spot rather than a failed part. Rotate the pan, check for foil or oversized pans blocking circulation, and test with an oven thermometer on both sides before assuming a repair is needed.
Can I calibrate my oven myself?
Many modern ovens allow a temperature offset adjustment through the control panel, usually within a limited range such as plus or minus 30 to 35°F. The exact steps vary by brand, so follow the owner’s manual. Calibration helps with a consistent bias but will not fix a failed element or sensor.
How do I know if the bake element is bad?
A bake element that does not glow during a bake cycle may be burned out. With the oven off and cooled, look for blisters, holes, or a visible break. A multimeter continuity test can confirm an open element, but only attempt it with the power disconnected.
Conclusion
An oven that is not heating evenly before
holiday baking is often a solvable problem rather than a reason to
replace the appliance. Test the real temperature with a separate
thermometer, inspect the elements and door seal, check the sensor, and
improve airflow with better rack placement. If the oven runs
consistently hot or cold by a modest amount, calibration may close the
gap.
Know the limits of DIY repair. Gas components, control
boards, and persistent electrical faults belong with a qualified
technician, especially when holiday timing leaves little room for error.
Use the table and the workarounds in this guide to decide what to
tackle and what to delegate.
A methodical check now gives you
predictable baking later. Confirm the oven’s behavior with a test batch,
adjust your technique where needed, and keep a thermometer handy on the
big day. That preparation protects the meal and reduces stress when the
kitchen gets busy.