Discovering that only one half of your double oven is heating is a stressful event at any time, but it feels especially urgent when Holiday is approaching and you have a menu to plan. The good news is that a double oven is essentially two separate cooking cavities that share a housing and a power supply, so a failure on one side does not automatically mean the whole appliance is beyond repair. In many cases, the fault is confined to a single component that can be tested and, in some situations, replaced without a major disruption.
This guide walks through the most likely reasons why one oven cavity stays cold while the other works normally. It explains how to diagnose each possibility safely, what tools you will need, and when the sensible decision is to call a qualified appliance technician rather than attempt a repair yourself. The aim is to help you understand the problem clearly so you can act quickly and confidently.
How a Double Oven Is Wired and Why One Side Can Fail Alone
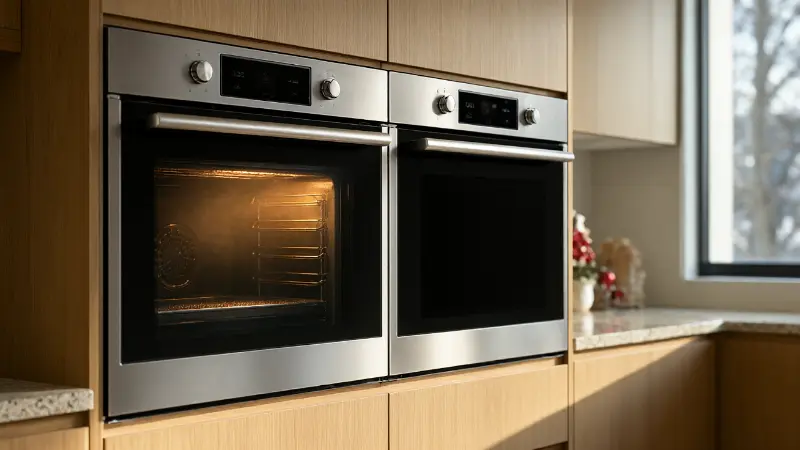
A double oven usually contains two independent cooking cavities, each with its own heating elements, thermostat or temperature sensor, and often its own cooling fan. Both cavities draw power from the same incoming supply, but they are controlled through separate circuits on the main control board or through separate selector switches on the front panel. Because the two sides operate independently during normal use, a failure in one cavity’s element, sensor, or control circuit will not necessarily affect the other.
This independence is useful for diagnosis. If the top oven heats and the bottom oven does not, or the reverse, you can often rule out a complete power failure to the appliance. The incoming supply, the main terminal block, and the shared earth connection are usually still functioning because one side is working. That narrows the investigation to the components and wiring that serve only the cold cavity.
Cause 1: A Failed Bake or Broil Heating Element
The most common reason for a single oven cavity not heating is a burned-out heating element. Each cavity typically has a bake element at the bottom and a broil element at the top. If the bake element fails, the oven may still appear to power on, the display may work, and the thermostat light may come on, but the cavity will not reach temperature. If the broil element fails, the oven may still bake, but grilling and browning will be uneven or absent.
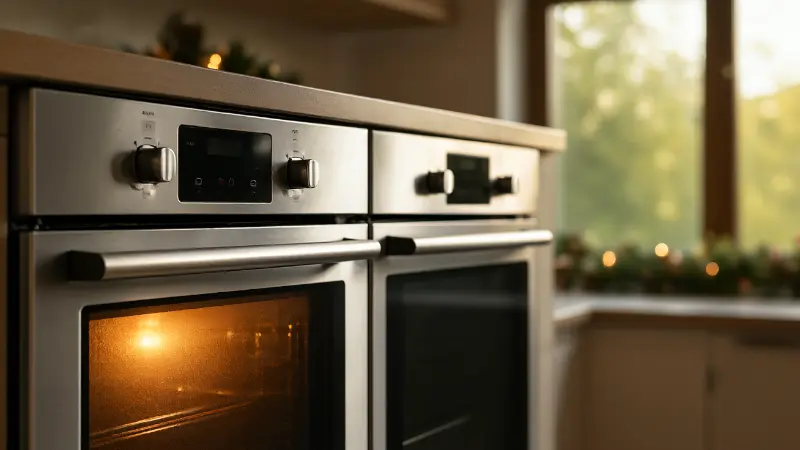
Heating elements are resistive coils that degrade over time. A element can develop a visible blister, a crack, or a complete break in the internal wire. In some cases, the failure is not visible at all, which is why a multimeter continuity test is more reliable than a visual inspection alone. A healthy element typically shows a low resistance reading, while an open circuit indicates that the element has failed and needs replacement.
Before condemning the element, confirm that the oven is actually calling for heat. Set the cavity to a bake or grill function and watch the element for several minutes. A working element should glow red. If it stays dark while the other cavity’s element glows normally, the element or its supply circuit is the prime suspect. This is a straightforward check that costs nothing and helps avoid unnecessary part purchases.
Cause 2: A Faulty Thermostat or Temperature Sensor
Each oven cavity relies on a thermostat or an electronic temperature sensor to tell the control board when to send power to the elements. If the sensor sends an incorrect reading, the control board may believe the cavity is already at temperature and withhold power from the element. The result is an oven that appears to be switched on but produces little or no heat. A faulty sensor can also cause overheating, uneven cooking, or error codes on the display.
Testing a temperature sensor usually involves checking its resistance with a multimeter and comparing the reading to the manufacturer’s specification for the ambient temperature. The sensor is often a small probe mounted inside the cavity, connected by a wire harness to the control board. A reading that is far outside the expected range, or a reading that does not change when the cavity warms, points to a failed sensor.
Thermostats on older or simpler models perform a similar role through a mechanical or capillary system. A thermostat that has drifted or failed can prevent the element from energising even though the dial clicks and the indicator light comes on. Replacing a thermostat or sensor is usually more involved than replacing an element, and the exact procedure varies considerably between models, so the manufacturer’s service information is important.
Cause 3: A Defective Selector Switch or Function Dial
On many double ovens, especially freestanding cookers and some built-in models, a selector switch determines which element or combination of elements receives power for a given cooking mode. If the selector switch for the cold cavity has failed internally, the control board may be functioning correctly and the element may be sound, but power never reaches the element. This is a common failure point on ovens that use mechanical function dials rather than a fully electronic touch control.
Symptoms of a faulty selector switch can include a dial that feels loose, does not click positively, or has a burnt smell around the control panel. In some cases, the oven works on one setting but not another, which strongly suggests a switch contact problem rather than an element problem. Testing a selector switch requires access to the rear of the control panel and a multimeter, and it should only be attempted with the appliance fully disconnected from the power supply.
If the oven uses a shared selector switch arrangement, a failure can sometimes affect only one cavity because the switch has separate contact sets for the top and bottom oven. This is one of the reasons why a double oven can lose heat on one side while the other side continues to operate normally. A technician will usually check switch continuity across each function position to confirm the diagnosis.
Cause 4: Control Board or Relay Failure
Modern double ovens rely on an electronic control board to manage heating cycles, timers, and safety functions. The board contains relays that act as switches, sending power to the bake and broil elements when the cavity calls for heat. If a relay for one cavity fails in the open position, that cavity will not heat even though the element and sensor may be perfectly functional. If a relay fails in the closed position, the cavity may overheat or trip a safety cutout.
Control board faults can be intermittent, which makes diagnosis frustrating. The oven may heat normally on some days and fail on others. Error codes displayed on the control panel can provide clues, but not all faults generate a code. A technician will typically test the relay outputs and the board’s supply voltages before recommending a replacement board, because control boards are among the more expensive parts to replace.
Before assuming the board is faulty, it is worth checking the simpler components first. A burned element, a failed sensor, or a loose wire can mimic a control board problem. Replacing a board without testing the rest of the circuit risks paying for a part that was not the cause of the fault. A methodical approach that starts with the element and works back toward the board is usually the most cost-effective strategy.
Cause 5: Wiring, Terminal Block, or Connection Problems
Loose, burnt, or corroded connections can interrupt power to a single oven cavity. The terminal block, where the incoming power cord connects to the oven’s internal wiring, is a known failure point. Heat cycling can cause screws to loosen over time, and a poor connection can arc and burn, creating an open circuit. If the terminal block serves both cavities, a partial failure can sometimes affect only one side.
Wiring inside the oven is exposed to high temperatures, and the insulation on element wires can become brittle and crack. A wire that has burned through near an element terminal will prevent that element from receiving power. Inspecting the wiring around the failed cavity’s element and sensor is a sensible step, but it should only be done with the power disconnected. Look for discoloured insulation, melted connectors, and loose spade terminals.
A related possibility is a faulty terminal block or a damaged power cord connection at the wall. However, because one cavity is still heating, the incoming supply is at least partially intact. The fault is more likely to be downstream, in the branch of the circuit that feeds the cold oven. This is why focusing on the components unique to the affected cavity is more productive than testing the whole appliance from the wall outward.
Cause 6: A Tripped Thermal Fuse or Safety Cutout
Many ovens include a thermal fuse or a safety cutout that permanently disconnects power if the cavity overheats. This is a protective device, not a routine wear item. If the cooling fan fails, or if a relay sticks closed and the cavity overheats, the thermal fuse may blow to prevent a fire. Once blown, the fuse must be replaced, and the underlying cause of the overheating must also be addressed.
In a double oven, a thermal fuse may protect one cavity or the entire appliance, depending on the design. If the fuse protects only one cavity, the other side can continue to work normally. A blown thermal fuse will usually result in a completely dead cavity with no display and no heat, rather than a cavity that powers on but stays cold. This distinction helps separate a fuse problem from an element or sensor problem.
Thermal fuses are not resettable in most domestic ovens, and bypassing one is dangerous. If a fuse has blown, the correct repair is to replace it with an identical rated part and to investigate why it operated. A qualified technician should carry out this work because the fuse is a critical safety component, and fitting an incorrect replacement can compromise the oven’s protection against overheating.
Cause 7: Fan Motor or Convection System Failure
In fan-assisted ovens, the fan motor circulates hot air around the cavity. If the fan motor seizes or the fan blade becomes obstructed, the oven may still produce heat from the element, but the cavity will not heat evenly and may overheat in one area. On some models, the control system monitors the fan and will prevent the element from operating if the fan is not running, which can make the cavity appear completely dead.
Fan motor failure is often accompanied by unusual noises, such as a grinding or humming sound, before the motor stops altogether. In other cases, the motor fails silently. A visual check through the oven door with the fan function selected can confirm whether the fan is turning. If the fan does not turn and the cavity remains cold, the motor, the fan blade, or the supply to the motor is the likely cause.
Replacing a fan motor is a more involved repair than replacing an element because access is usually through the rear panel of the oven. The motor is also connected to the control board and may be part of a safety circuit. For this reason, fan motor replacement is often best left to a technician unless you are confident with appliance disassembly and have the correct service documentation for your model.
Diagnosing the Problem Safely: A Step-by-Step Approach
Before touching any part of the oven, disconnect it from the power supply. For a plug-in appliance, unplug it from the wall. For a hard-wired oven, switch off the dedicated circuit breaker at the consumer unit or fuse box and verify that the oven is dead. Never rely on the control panel being switched off, because some internal components remain live even when the display is blank.
Start with the simplest checks. Confirm that the cold cavity is set to the correct function and temperature. Check that the timer is not set to automatic or delayed start, and that the child lock is not engaged. On some models, a cavity can be locked out by a control setting that is easy to overlook. If the controls appear correct, move on to the element and sensor checks described in the sections above.
A multimeter is the most useful diagnostic tool for this work. Use it to test element continuity, sensor resistance, and switch continuity. If you are not comfortable using a multimeter or working around mains voltage, do not proceed beyond the basic control checks. Appliance repair carries a genuine risk of electric shock and fire, and the cost of a professional diagnosis is often lower than the cost of a mistake.
Comparison Table: Symptoms and Likely Causes
| Symptom | Most likely cause | Useful check |
|---|---|---|
| One cavity stays cold, display works, thermostat light comes on | Failed bake element or open circuit in element supply | Watch the element for glow; test continuity with a multimeter |
| One cavity powers on but never reaches temperature | Faulty temperature sensor or thermostat | Test sensor resistance against manufacturer specification |
| Oven works on some functions but not others in the same cavity | Defective selector switch or function dial | Test switch continuity across each function position |
| Cavity is completely dead with no display or heat | Blown thermal fuse or loss of supply to that cavity | Check thermal fuse continuity and supply voltage at the cavity |
| Fan does not turn and cavity stays cold on fan settings | Seized fan motor or fan supply fault | Observe fan through the door; check motor supply |
| Intermittent heating or unexplained error codes | Control board relay fault or loose connection | Inspect wiring and test relay outputs; check for burnt connectors |
When to Repair and When to Replace
The decision to repair or replace depends on the age of the oven, the cost of the failed part, and the labour involved. A heating element is usually an affordable part and a straightforward replacement on many models. A control board or a fan motor is more expensive, and on an older oven the cost may approach a significant fraction of the price of a new appliance. Safety-related parts, such as thermal fuses, should always be replaced with the correct component rather than bypassed.
If the oven is still under warranty, contact the manufacturer or the retailer before attempting any repair. DIY work on a warranted appliance can void the warranty, and the manufacturer may offer a repair or replacement at no cost. If the oven is out of warranty and the fault is confined to one cavity, a repair is often worthwhile because the other cavity and the main housing are still serviceable. A technician can give you a clear quote before any work begins.
For readers dealing with other frustrating appliance or home-system faults where one side or one part works while another does not, the same logical approach applies. Whether you are tracing why a two-gang switch only powers one light or investigating why a snowblower pulls to one side, isolating the fault to the component that is unique to the failed side is the key to an efficient diagnosis. The principle is the same: confirm what still works, then test the parts that serve only the affected circuit.
Safety Notes and Practical Precautions
Oven repair involves high voltage, high temperatures, and heavy components. Always disconnect the power before removing panels or touching wiring. Allow the oven to cool completely before beginning any inspection, because elements and interior surfaces can remain hot for a long time after the oven is switched off. Wear insulating gloves and use tools with insulated handles where appropriate.
Do not attempt to repair a heating element by rewiring or bypassing a broken section. Elements are not user-repairable, and a modified element can overheat or cause a short circuit. Similarly, do not replace a thermal fuse with a higher-rated part or a piece of wire. These devices exist to prevent fire, and defeating them creates a serious hazard. If you are unsure about any step, stop and call a qualified technician.
If you smell burning, see sparks, or notice scorch marks around the control panel or terminal block, stop using the oven immediately and isolate the power at the breaker. These signs can indicate a wiring fault that may worsen if the appliance is used. A technician should inspect the oven before it is returned to service. It is better to delay a Holiday cooking session than to risk a house fire.
When to Call a Professional Technician
Call a professional if you are not confident with electrical testing, if the fault involves the control board or internal wiring, or if the oven is hard-wired and you cannot safely isolate it. A technician has the training, the test equipment, and the manufacturer’s service information to diagnose the fault accurately and replace parts safely. This is especially important for double ovens, where access to components can be more complex than on a single oven.
A good technician will explain the likely cause, provide a quote before starting work, and test the oven after the repair to confirm that both cavities operate correctly. If the repair requires a part that is not immediately available, ask about the lead time, especially during the busy pre-Holiday period when appliance repair services can be in high demand. Booking a diagnostic visit early gives you the best chance of having the oven back in service before the holiday cooking begins.
For homeowners dealing with heating distribution problems elsewhere in the house, such as a zone valve that has stuck and left part of the home cold, the troubleshooting logic can feel similar. An article on a stuck Honeywell zone valve explains how a single failed component can prevent heat from reaching one area while the rest of the system appears to work. The same principle of isolating the affected branch applies to a double oven with one cold cavity.
FAQ
Can a double oven heat on one side only and still be safe to use?
It depends on the cause. A failed heating element or sensor in one cavity does not usually make the other cavity unsafe, but the underlying fault should still be investigated. If there is any smell of burning, visible scorching, or tripping of the circuit breaker, stop using the oven until it has been inspected.
Why does the thermostat light come on if the element is not heating?
The thermostat light indicates that the control is calling for heat, not that the element is actually drawing current. A burned-out element, a faulty selector switch, or a wiring fault can prevent power from reaching the element while the light still comes on. This is why testing the element and its supply is necessary.
Is it worth replacing a heating element myself?
On many models, replacing a bake or broil element is a manageable DIY task for someone comfortable with basic tools and electrical safety. The appliance must be disconnected from the power first, and the replacement element must match the model and rating. If access is difficult or the wiring is damaged, a technician is the safer choice.
Could a power surge cause only one oven cavity to stop working?
Yes. A power surge can damage a control board relay or a thermal fuse that serves one cavity. Resetting the circuit breaker sometimes restores operation after a power interruption, but if the surge has caused component damage, the affected part will need to be tested and replaced.
Conclusion
A double oven that heats on only one side is usually suffering from a fault in the components that serve the cold cavity, not a complete failure of the appliance. The most common culprits are a burned-out heating element, a faulty temperature sensor, a defective selector switch, or a control board relay that no longer sends power to that side. Starting with simple control checks and then testing the element and sensor with a multimeter is a practical way to narrow down the cause.
Safety must come first. Disconnect the power before any inspection, avoid bypassing safety devices, and call a qualified technician if you are unsure about any step. A prompt diagnosis gives you the best chance of repairing the oven in time for Holiday cooking, and in many cases the repair is more economical than replacing the entire appliance. If the oven is old and the faulty part is expensive, weigh the repair cost against the price of a new model before committing.