Dusty supply registers and grimy return grilles are the most visible part of an air conditioning system, and they are also the easiest part to clean without calling a technician. A vent that is clogged with dust, pet hair, or lint restricts airflow, sends debris downstream toward the evaporator coil, and can make a room feel stuffy even when the system is running. Cleaning the vents themselves takes an hour or two with basic tools and does not require opening the refrigerant circuit or the air handler.
This guide walks through the whole job: identifying which vents you have, shutting the system down safely, cleaning supply registers and return grilles, dealing with bent fins and stuck dampers, and knowing when the problem is inside the ductwork rather than at the grille. It also covers the mistakes that turn a simple cleaning into a bent diffuser or a damaged duct boot.
First, Identify Which Vents You Are Cleaning
The phrase “air conditioner vent” covers at least three different things in a typical home, and each one needs a different approach. Supply registers are the grilles that blow conditioned air into a room, usually located on the floor, low on a wall, or in the ceiling. Return grilles are larger and draw air back toward the air handler, and they are often the dirtiest because they pull in dust from the whole room.

The third type is the outdoor condenser unit, which has a fan grille on top and coil fins around the sides. That is a separate cleaning job with its own safety rules, and it should not be confused with indoor register cleaning. This guide focuses on indoor supply and return vents, with a short section on the outdoor unit at the end.
Supply and return vents are also made of different materials. Stamped steel and aluminum grilles are common and durable. Plastic diffusers are lighter and can become brittle with age. Wood and decorative grilles need gentler cleaning to avoid lifting the finish. Identify the material before you spray anything on it.
Safety First: Shut the System Down
Turn the thermostat to OFF before you start. Cleaning a vent while the blower is running sends dust back into the return and redistributes it through the house, which defeats the purpose. It also means the blower can pull debris into the evaporator coil while you are working nearby.
If you are cleaning near electrical components, such as a return grille that sits close to the air handler or a vent near a condensate pump, switch off the air handler at the breaker as well. Most vent cleaning does not require this, but it is worth checking what is within arm’s reach before you start poking around with a vacuum wand.
Wear eye protection if you are working overhead, and consider a dust mask if the grille has not been cleaned in a long time. Pet dander, mold spores, and fine dust become airborne easily when you disturb a dirty grille. If you see fuzzy growth or a musty odor when you remove a grille, stop and read the mold section below before continuing.
Tools and Supplies You Actually Need
You do not need specialized equipment for routine vent cleaning. A vacuum with a brush attachment, a microfiber cloth, a bucket of warm water with a few drops of mild dish soap, a soft-bristle brush, and a screwdriver are enough for most jobs. A shop vac with a crevice tool helps for the duct opening once the grille is off.
Avoid abrasive pads, scouring powder, and solvent-heavy cleaners on painted or powder-coated grilles, because they can dull the finish or remove the coating. Avoid spraying liquid directly into the duct opening, because moisture in a dark duct is exactly what mold needs. If you want a disinfectant, use one labeled for HVAC surfaces and apply it to the grille, not into the duct.
For ceiling vents, a step stool or a small ladder is safer than stretching from a chair. For floor registers, kneel on a pad rather than on bare flooring, and put the screws in a cup so they do not disappear into the carpet.
Step 1: Remove and Wash the Grille
Most supply registers are held by two screws, sometimes four, and some simply snap into a frame. Remove the screws and lift the grille straight out. If it has been painted over, score the paint line around the edge with a utility knife before pulling, or you will tear the paint on the wall or ceiling.
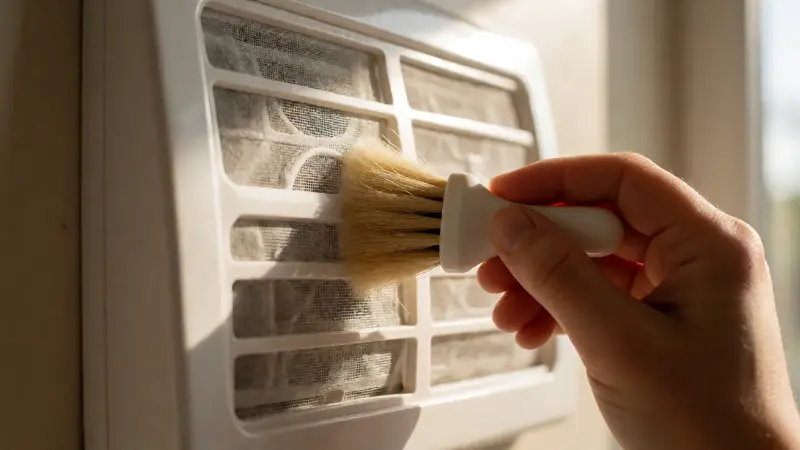
Take the grille to a sink or a utility tub and wash it with warm soapy water and a soft brush. Work along the direction of the louvers rather than across them, because brushing across stamped metal can bend the slats. Rinse thoroughly and dry it completely before reinstalling. A damp grille installed over a duct adds moisture where you do not want it.
For return grilles, the same process applies, but the grille may be larger and may have a filter behind it. Remove the filter first, set it aside, and wash the grille separately. If the grille has a hinge or a latch, check the hinge pin for wear while it is off the wall.
Cleaning Plastic and Wood Diffusers
Plastic diffusers can be washed the same way, but use cooler water and a softer brush. Older plastic becomes brittle, and hot water can warp a thin louver. Wood grilles should be wiped rather than soaked, and the finish should be dried immediately to avoid raising the grain.
Step 2: Clean the Duct Opening and Boot
With the grille off, look into the opening. You will usually see the metal boot, the duct liner, or the inside of the duct itself. Use a vacuum with a crevice tool to remove loose dust from the edges and the visible surfaces. A brush attachment on a flexible wand can reach a little farther in, but do not force anything deep into the duct, because you can dislodge insulation or disconnect a flexible duct joint.
Wipe the visible surfaces with a barely damp microfiber cloth. The goal is to remove the dust that would otherwise be blown back into the room, not to wash the inside of the ductwork. If the duct liner is torn or the insulation is falling apart, that is a repair issue rather than a cleaning issue, and it should be addressed before the system runs again.
Check the damper while you have access. Many supply boots have a small lever or a butterfly damper that adjusts airflow. Make sure it moves freely and is set to a sensible position. A damper that is nearly closed can make a room feel like it has no airflow at all, which is sometimes mistaken for a clogged vent.
Step 3: Straighten Bent Fins and Louvers
Stamped metal grilles and aluminum diffusers bend easily. A bent louver restricts airflow and looks sloppy. You can straighten minor bends with a small flathead screwdriver, a putty knife, or a dedicated fin comb if you have one. Work slowly and support the back of the louver with your thumb so you do not crack the metal.
Plastic louvers are harder to straighten once they bend, because the material tends to whiten and crack at the crease. If a plastic louver is badly bent, replacement is usually cheaper than repair. Many standard sizes are available as stock items at hardware stores, and matching the size and color is easier than matching a bent part.
If the grille has a directional deflector or a set of adjustable vanes, check that they still move and hold their position. A vane that flops loose will not direct air where you want it, and it may rattle when the blower runs.
Step 4: Reinstall and Verify Airflow
Reinstall the grille with the screws snug, not overtightened. Overtightening warps the frame and can crack plastic. If the grille sits proud of the wall, check that the screws are catching the frame rather than the drywall, and that the frame is not bent.
Turn the thermostat back on and let the system run for a few minutes. Hold a tissue or a piece of light paper near the supply register to confirm airflow. If one vent feels weak compared with others, the cause may be a closed damper, a disconnected duct, or a balancing issue rather than dirt. That is a diagnostic question, not a cleaning question, and it is worth noting which vents are weak before you call anyone.
Repeat the process for every supply and return in the house. Returns usually need the most attention because they handle the largest volume of air and collect the most debris. A whole-house pass takes longer than a single vent but produces a noticeably cleaner system.
Step 5: Handle the Filter and the Coil
The vent cleaning is only part of the airflow story. The return grille usually holds a filter, and a clogged filter restricts airflow more than a dirty grille ever will. Check the filter while you have the return open, and replace or clean it according to the manufacturer’s recommendation. A filter that is gray and matted is overdue.
If the vents were heavily soiled, the evaporator coil may also be dirty. A dirty coil reduces cooling capacity and can freeze up. Coil cleaning is a more involved job that may require opening the air handler, and it is often better left to a technician unless you are comfortable with the procedure and know how to protect the drain pan and electrical components.
Duct cleaning is a separate service from vent cleaning. Most homes do not need full duct cleaning on a routine basis, and the EPA has cautioned that duct cleaning has not been shown to consistently prevent health problems. If you see visible mold, pest infestation, or debris blocking the ducts, that is a reason to call a professional, not a reason to rent a truck-mounted machine.
| Vent Type | Typical Location | Cleaning Method | Frequency | Watch-Outs |
|---|---|---|---|---|
| Supply register (floor or wall) | Rooms, near the floor or low on a wall | Remove grille, wash in soapy water, vacuum the boot, reinstall | Every 3 to 6 months, more often with pets | Bent louvers, paint-sealed edges, overtightened screws |
| Ceiling supply diffuser | Ceilings, often in bedrooms and hallways | Remove, wash, straighten vanes, wipe the opening | Every 3 to 6 months | Working overhead, brittle plastic, ladder safety |
| Return air grille | Central hallway, near the air handler, large grille | Remove filter, wash grille, vacuum the opening, replace filter | Monthly filter check, grille every 3 to 6 months | Heaviest dust load, filter fit, mold growth on the grille |
| Outdoor condenser grille | Top of the outdoor unit | Power off, remove debris, rinse coils from inside out | Once per season before cooling season | Never use a pressure washer on fins, never work with power on |
Mold, Musty Odors, and Moisture Problems
A musty smell from a vent is a moisture signal, not a dirt signal. Cleaning the grille will not fix it if the duct or the coil is wet. Common causes include a clogged condensate drain, a frozen coil that has thawed, high indoor humidity, or a duct that runs through an unconditioned space and sweats.
If you see fuzzy growth on the grille or around the boot, wear gloves and a mask, and clean the area with a product labeled for HVAC surfaces. Then find the moisture source. Mold will return if the underlying humidity or leak is not addressed. If the growth is inside the duct or on the coil, a technician should assess it, because improper cleaning can spread spores through the house.
High indoor humidity in summer can also make vents sweat. A vent that drips is usually a sign of an insulation or humidity problem rather than a cleaning problem, and it deserves attention before it damages drywall or flooring.
How Often Should You Clean the Vents?
Most homes do well with a full vent cleaning every three to six months, timed to the start of heating and cooling seasons. Homes with pets, smokers, or occupants with allergies may need more frequent attention, particularly on the return grille. Homes near construction, dirt roads, or dusty environments also accumulate debris faster.
The filter schedule is separate and shorter. Check the filter monthly during heavy use and replace it when it looks matted or gray. A clean filter protects the coil and keeps the vents cleaner, so the two tasks support each other. If you are already doing seasonal maintenance, adding vent cleaning to the same weekend makes it easier to remember.
There is a practical limit to how much cleaning helps. If the ducts are undersized, the system is not balanced, or the equipment is aging, clean vents will not fix weak airflow. Cleaning removes a variable so you can tell whether the problem is dirt or design.
Common Mistakes to Avoid
- Cleaning with the system running. Dust gets pulled back into the return and redistributed. Turn the thermostat off first.
- Spraying liquid into the duct. Moisture in a dark duct encourages mold. Wipe surfaces instead.
- Overtightening grille screws. It warps frames and cracks plastic. Snug is enough.
- Using harsh chemicals on painted or wood grilles. Abrasives dull the finish and can remove the coating.
- Ignoring the filter. A clogged filter restricts airflow more than a dirty grille and puts extra load on the blower.
- Forcing a vacuum wand deep into the duct. You can dislodge insulation or disconnect a flexible joint.
- Treating musty odor as dirt. Odor usually means moisture. Find the source before cleaning again.
- Pressure-washing the outdoor condenser. The fins bend easily, and high pressure can damage the coil.
A Note on Other Vents in the Home
Air conditioner vents are only one category of vent, and the cleaning methods do not transfer between them. A kitchen range hood or an oven vent handles grease and heat, and the cleaning approach is different from anything you would use on an HVAC grille. If you are noticing unusual heat or airflow from a kitchen vent, our guide to too much heat coming out of an oven vent covers the causes and fixes for that specific problem.
Exterior surfaces also need their own methods. Pressure washing a brick wall is not the same as rinsing an aluminum grille, and the wrong approach can damage mortar or the brick face. Our guide to the best way to clean an old brick exterior explains how to match the cleaning method to the material, and the same principle applies indoors.
If you are using a portable vacuum or a small wet-dry unit in an area without an outlet, power supply becomes part of the job. Our article on a power inverter for an air mattress covers the practical limits of running household equipment from a portable power source, and the same caution about wattage and cord length applies to any tool you plug into an inverter.
FAQ
How do I clean the air conditioner vent without removing it?
You can vacuum the face of the grille with a brush attachment and wipe it with a damp microfiber cloth, but the result is limited because dust collects behind the louvers and in the boot. Removing the grille takes a few minutes and allows a much more thorough clean. If the grille is painted over or the screws are seized, vacuum and wipe first, then remove it once the fasteners are free.
Should I turn off the air conditioner before cleaning the vents?
Yes. Turn the thermostat to OFF so the blower stops. Cleaning while the system runs sends dust back into the return and redistributes it through the house, and it can pull debris toward the evaporator coil. If you are working near electrical components, switch off the air handler at the breaker as well.
How often should I clean the air conditioner vents?
Every three to six months is a reasonable routine for most homes, timed to the start of the heating and cooling seasons. Homes with pets, allergies, or dusty conditions may need more frequent cleaning, especially on the return grille. Check the filter monthly and replace it when it looks matted.
Why does my air conditioner vent smell musty?
A musty odor usually indicates moisture rather than dirt. Common causes include a clogged condensate drain, a frozen coil that has thawed, high indoor humidity, or a duct running through an unconditioned space. Cleaning the grille will not fix the smell if the moisture source remains, so find and correct the underlying problem.
Can I spray disinfectant into the duct?
It is better to avoid spraying liquid into the duct. Moisture in a dark duct encourages mold growth, and many disinfectants are not intended for HVAC surfaces. Clean the grille with a product labeled for the material, and have a technician address growth inside the ductwork or on the coil.
Should I clean the outdoor air conditioner unit too?
Yes, once per season before cooling season. Switch off the power at the disconnect, remove debris from the top grille, and rinse the coil fins gently from the inside out with a garden hose. Do not use a pressure washer, because the fins bend easily and high pressure can damage the coil.
When to Call a Technician
Call a professional if you find mold inside the ductwork, if a vent is dripping water, if airflow is weak across the whole house after cleaning and a filter change, or if the system freezes up repeatedly. Those symptoms point to refrigerant, drainage, or duct design problems that cleaning cannot solve. A technician can also clean the evaporator coil safely and check the blower and drain pan while the system is open.
If you are not comfortable on a ladder or working around electrical components near the air handler, hire the job out. Vent cleaning is low-risk when done carefully, but a fall from a step stool or a damaged air handler is not worth the savings. The same judgment applies to any repair you are unsure about: knowing when to stop is part of doing the job well.