Look at the base of a vinyl-sided wall and you will often see a J-channel holding the bottom course. Sometimes that is correct. Sometimes it is a shortcut that quietly routes water into the framing. The difference comes down to why the channel is there, how it is flashed, and whether a starter strip would have done the job better. This guide explains what the J-channel at the bottom of siding is actually doing, when it is the right accessory, and how to install it so it sheds water instead of collecting it.
What J-Channel Does at the Bottom of a Wall
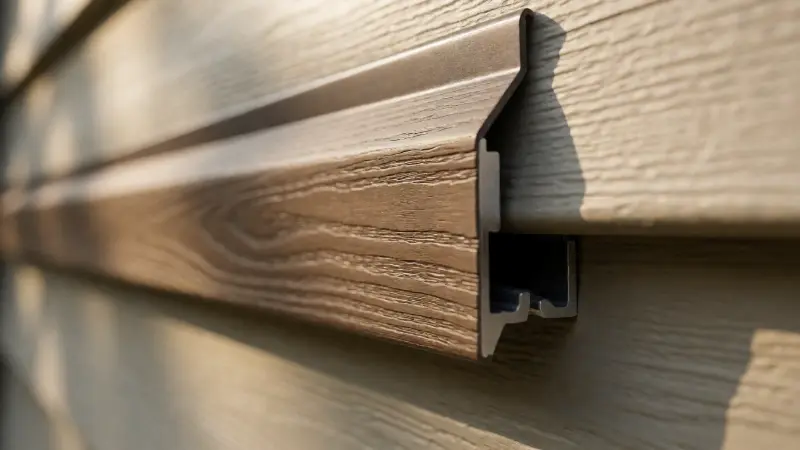
J-channel is a trim accessory with a pocket that receives the cut or trimmed edge of a siding panel. It is most often used around windows, doors, and other openings, where the siding needs a finished termination. At the bottom of a wall, the same pocket performs a similar job: it holds the lower edge of a panel that does not have a factory lock to hook onto.
That last point is the key. A full vinyl panel has a lock along its bottom edge designed to snap into a starter strip. When the panel is trimmed, the lock is cut away, and the remaining edge has nothing to engage. J-channel gives that cut edge a place to sit. It also hides minor framing inconsistencies at the base of the wall, which is part of why installers reach for it.
The channel is not a flashing. It is a receiver. Water that runs down the face of the siding and into the pocket has to find its way out, and the channel itself does not slope away from the wall. That distinction is the source of most of the problems covered below.
When J-Channel Is the Right Choice at the Bottom
J-channel is a legitimate choice when the bottom course starts with a partial panel. A common example is a wall where the siding needs to line up with an adjacent wall, a deck, or a roof line, and the first course is ripped narrower than a full panel. Because the factory lock is gone, a starter strip has nothing to grab.
It is also the standard approach for vertical siding applications, where the panels run up and down and the bottom edge needs a receiver. Installation guidance for vertical siding describes positioning the bottom J-channel so its lower edge sits about a quarter inch below the lowest point on the wall that will be covered. The same guidance calls for overlapping J-channel sections by roughly three-quarters of an inch.
A third case is a transition where the siding stops above a foundation, a porch roof, or another material. If the bottom edge is cut rather than locked, J-channel provides a clean line. In each of these situations, the channel is doing a job that a starter strip cannot do.
Why Starter Strip Is Usually Better for a Full Panel
When the bottom course is a full panel, a metal starter strip is the preferred accessory. The strip has a ledge that the panel lock hooks onto, and it is designed so water that gets behind the siding can drain down and out rather than sitting in a pocket. The Vinyl Siding Institute’s installation manual describes starter strip as the proper way to begin horizontal vinyl siding.
Home inspectors who see J-channel at the bottom of a full-panel wall often flag it, because the channel is unnecessary in that location and it creates a water-collection point that the starter strip would not. One inspection write-up notes that the proper method is a metal starter strip, and that the J-channel in the photographed home was unnecessary because the installer started with a whole piece.
There is a practical exception. If the siding has already been cut and the lock is gone, or if the layout requires a partial first course, J-channel may be the only workable option. The presence of J-channel at the bottom is not automatically a defect. The question is whether it was needed and whether it was detailed correctly.
The Water Problem: How J-Channel Traps and Routes Moisture
Vinyl siding is a rain screen, not a waterproof barrier. Water gets behind it through seams, gaps, and wind-driven rain, and the assembly is designed to let that water drain down and out. The weather-resistive barrier behind the siding handles the actual waterproofing. When J-channel sits at the bottom, it interrupts that drainage path by creating a trough.
Water that enters the channel flows sideways until it reaches a joint, a corner, or a drilled weep hole. If the corner is flashed correctly from underneath the channel, that water exits without contacting the structure. If it is not, the channel delivers water to the one place you least want it: the corner framing, the door threshold, or the rim joist.
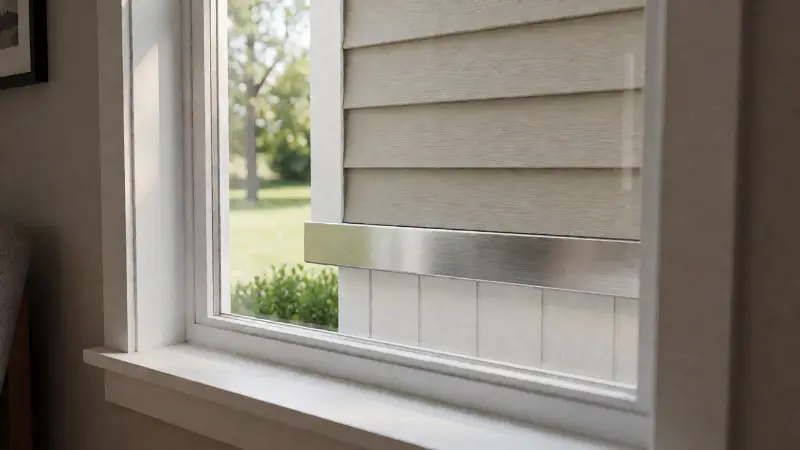
A home inspection case study describes exactly this failure. Water collected in a bottom J-channel was diverted to a door, where it was absorbed by building materials, damaging interior trim, drywall, and door jambs. The inspector noted that the channel was unnecessary because the installer had started with a full panel, and that a starter strip would have let water flow directly off the siding.
The lesson is not that J-channel is unacceptable. It is that a bottom J-channel has to be treated as a water-management detail, not just a trim detail. That means planning the exit path before the first piece goes up.
Installation: Height, Overlap, and Fastening
Height comes first. The bottom of the J-channel is typically set about a quarter inch below the lowest point on the wall that will be sided, so the siding clears the surface below and any water in the channel can reach the weep holes. Snap a chalk line rather than eyeballing it, because a channel that runs uphill will hold water at the low end.
Overlap comes next. Adjacent J-channel pieces should lap by roughly three-quarters of an inch, and the lap should be arranged so water cannot get behind the upstream piece. A common technique is to start the J at the bottom, then overlap the next piece and bend the lap so water sheds over the joint rather than into it. Nails go in the slotted holes and should be driven snug, not tight, so the vinyl can move.
Fastening matters more than most homeowners expect. Vinyl expands and contracts with temperature, and a panel can move a noticeable amount over its length. Nailing the channel tight or through the face instead of the slot restricts that movement and can cause buckling, cracked vinyl, or popped fasteners later. Use roofing nails or siding nails with small heads, and leave the recommended clearance.
Drilling Weep Holes Correctly
Weep holes are the exit path for water that collects in the bottom channel. The inspection guidance recommends drilling quarter-inch weep holes roughly twelve inches apart, and only where they are needed. Some siding manufacturers publish their own spacing and diameter recommendations, so check the installation manual for the product you are using.
The phrase “only where needed” is important. Weep holes should be positioned so water can actually reach them, which usually means at the low points of the run and near corners or joints where water accumulates. Drilling a neat row of holes across a perfectly level run may not accomplish much if the channel drains sideways to a corner anyway.
Drill through the channel face, not through the weather barrier or the sheathing. A hole that penetrates the WRB creates a new leak path. Deburr the edges so the vinyl does not crack, and keep the holes clear of debris and paint.
Flashing Corners and Joints
Corners are where bottom J-channel earns or loses its reputation. Water running sideways in the channel arrives at the corner with nowhere to go unless the flashing underneath directs it out and away. The corner should be flashed from beneath the J-channel, with the flashing lapped so water exits over the exterior finish rather than behind it.
The same logic applies at door openings, garage doors, and any penetration near the base of the wall. Water diverted to a door threshold can be absorbed by the sill, the jamb, and the interior finishes. If the door is nearby, it is worth reviewing how the rough opening was framed and flashed before the siding goes on, because the details are much harder to correct afterward. Our guide to framing a door at the bottom covers the structural side of that opening, while the siding detail covers the water side.
Joints between J-channel sections are another exit point. If the lap is arranged so water can escape at the joint, that is acceptable. If the lap creates a pocket, it becomes a collection point. Think of the channel as a shallow gutter and detail each joint as a place where the gutter can overflow harmlessly.
Vertical Siding and Partial Panels
Vertical siding changes the calculation. When panels run vertically, the bottom edge is a cut edge on every course, and J-channel is the standard receiver. Installation guidance for vertical applications calls for J-channel along both the top and bottom of the wall, with the bottom channel set to the chalk line and weep holes drilled before installation.
Partial bottom panels on horizontal walls are the other common case. If a deck, a stoop, or a stepped foundation forces the first course to be ripped, the cut edge needs support. Undersill trim or utility trim is often a better choice than standard J-channel in that situation, because it is designed to lock the cut edge of a trimmed panel rather than simply receive it.
Undersill is also the preferred accessory under window sills and along horizontal eaves where a trimmed panel needs to be secured. In a forum discussion on starting below the first row, one tradesperson noted that starting in undersill trim is better than starting in J-channel. The reason is that undersill holds the panel more securely and presents a tighter profile.
Common Mistakes to Avoid
- Using J-channel at the bottom of a full-panel wall. A starter strip is the better choice when the factory lock is intact, because it drains water instead of trapping it.
- Installing J-channel open-side-up where it will catch debris. A channel that is open on top collects grit and blocks drainage from behind the siding.
- Skipping weep holes or drilling them in the wrong place. Quarter-inch holes roughly a foot apart, positioned where water actually collects, keep the channel from becoming a reservoir.
- Failing to flash the corners underneath the channel. Water running sideways will find the corner, and the flashing is what decides whether it exits or enters.
- Nailing the channel tight. Vinyl needs room to move; nails in the slots, driven snug, allow expansion and contraction.
- Running the channel uphill. A channel that slopes the wrong way holds water at the low end and defeats the weep holes.
- Using J-channel where undersill trim belongs. Trimmed panels under sills and at partial bottom courses are better served by undersill or utility trim.
Comparing the Three Bottom Options
| Accessory | Best Use at the Bottom of a Wall | Water Behavior | Watch-Outs |
|---|---|---|---|
| Starter strip | First course is a full panel with an intact factory lock | Water drains down and off the face; no trough is created | Cannot be used with a ripped panel or vertical siding |
| J-channel | Vertical siding, ripped bottom panels, transitions where the lock is gone | Collects water and routes it sideways to joints, corners, and weep holes | Requires weep holes and corner flashing; unnecessary on full-panel horizontal starts |
| Undersill or utility trim | Trimmed panels under sills, eaves, and partial bottom courses | Locks the cut edge and presents a tighter profile than J | Less commonly stocked; must match the siding profile |
Inspection and Maintenance
Once the siding is on, the bottom J-channel is easy to ignore. It is worth checking at least once a year, ideally after the spring melt and again before winter. Look for staining or mud streaks below the channel, which suggest water is exiting where it should not. Look for gaps at corner laps and for caulk that has failed.
Check that the weep holes are open. Paint, debris, and insect nests can plug them. A stiff wire or a pipe cleaner can clear a blockage without enlarging the hole. If the channel is full of grit, flush it gently with a hose and let it drain.
Pay attention to the area below the siding line. Soft sill plates, bubbling paint, or damp drywall near a door are clues that water is being routed somewhere it should not be. The fix is often a flashing correction rather than a full re-side, but it needs to be diagnosed before the damage spreads.
For homeowners who are also working on the roofline, the same water-management logic applies at the top of the wall. Our guide to installing J-channel along a roofline covers the details that keep water out where the siding meets the roof, and many of the same principles carry down to the base of the wall.
If you are planning exterior decorating near the siding, keep in mind that anything mounted to the wall can trap water or block drainage. Even a seasonal piece like a wreath with bow on bottom should be hung from a hook that does not penetrate the siding or the weather barrier, and it should be removed before it holds moisture against the wall.
FAQ
Should there be J-channel at the bottom of vinyl siding?
Only when the bottom course is a partial panel or the siding is installed vertically. If the first course is a full panel with an intact factory lock, a metal starter strip is the better choice because it lets water drain off the face instead of collecting in a channel. The presence of J-channel is not automatically wrong, but it has to be justified by the layout and detailed correctly.
Why is J-channel at the bottom of siding a problem?
J-channel forms a shallow trough that collects water and routes it sideways to joints and corners. If those exits are not flashed correctly, the water can reach framing, sheathing, or a nearby door threshold and cause rot or interior damage. The channel itself does not slope away from the wall, so the drainage path has to be planned.
How far apart should weep holes be in bottom J-channel?
Inspection guidance recommends quarter-inch weep holes roughly twelve inches apart, drilled only where water actually collects. Siding manufacturers publish their own recommendations, so check the installation manual for your product. Drill through the channel face, not through the weather barrier or sheathing.
What is the difference between J-channel and starter strip?
A starter strip has a ledge that the lock on a full siding panel hooks onto, and it drains water off the face of the siding. J-channel has a pocket that receives a cut or trimmed edge, and it collects water until the water finds an exit. Starter strip is for full panels; J-channel is for trimmed panels, vertical siding, and openings.
Is undersill trim better than J-channel at the bottom?
For a trimmed panel under a sill, an eave, or a partial bottom course, undersill or utility trim is often the better choice because it locks the cut edge and presents a tighter profile. J-channel is more common and easier to find, but it does not hold the panel as securely. Match the accessory to the condition rather than defaulting to J-channel.
How much should J-channel overlap at the bottom?
Adjacent pieces should lap by roughly three-quarters of an inch, and the lap should be arranged so water sheds over the joint rather than into it. Start the run at the low end and overlap in the direction that lets water escape. Nails go in the slots and should be snug, not tight.