Installing J channel along a roof line looks simple until the siding reaches a sloped roof. The channel has to create a clean edge for the siding while leaving enough room for movement and keeping the roof-to-wall area properly protected.
The biggest mistake is treating J channel as a flashing product. J channel finishes and receives the edge of siding, while flashing and other water-management components protect the wall from water. Getting that distinction right makes the installation cleaner and more durable.
What J Channel Does Along a Roof Line
J channel is a vinyl siding trim component with a recessed channel that receives the cut edge of a siding panel. It is commonly used where siding terminates around openings, under eaves, at gable edges, and where a wall meets a roof.
At a sloped roof line, the J channel follows the roof angle. The siding panels are cut to match that angle and their edges fit inside the channel.
The channel provides a finished appearance, but it also gives the siding a controlled termination point. It should not, however, be expected to replace step flashing, kickout flashing, a weather-resistive barrier, or other components designed to manage water.
Why Roof-Line J Channel Causes So Many Problems
A roof line combines several materials that behave differently. Asphalt shingles, metal flashing, vinyl siding, wood framing, and PVC trim can all expand, contract, or move differently as temperatures change.
The roof also sheds water toward the lower end of the slope. A small mistake near that point can therefore have consequences beyond appearance.
Another complication is that the roof edge is rarely perfectly horizontal or perfectly straight. The installer may need to follow a roof slope while keeping the trim visually consistent with the siding courses.
The Difference Between Appearance and Water Management
A J channel can look perfectly straight while the underlying flashing is incorrectly installed. The opposite can also happen: a trim piece may look slightly unusual while the actual water-management system is functioning correctly.
Water should have a clear path away from the wall. Never move or modify flashing simply to make the J channel look better.
Tools and Materials for the Installation
The exact materials depend on the siding system and roof construction. Always check the siding manufacturer’s installation instructions before beginning the work.
Typical tools include a tape measure, level, chalk line, pencil, snips, utility knife, siding-cutting tools, drill or hammer, and appropriate corrosion-resistant fasteners.
The installation may also require J channel, compatible siding panels, flashing, approved weather-resistive-barrier tape, and other trim components specified for the particular siding system.
| Problem | Likely Cause | Practical Fix |
|---|---|---|
| J channel touches shingles | Channel installed too close to the roof | Reposition it according to the siding manufacturer’s required clearance |
| Vinyl trim looks wavy | Fasteners driven too tightly | Allow the channel to remain properly supported without restricting movement |
| Water collects near the lower end | Poor flashing or blocked drainage path | Inspect the flashing and drainage details before changing the trim |
| J channel sections separate | Improper overlap or insufficient support | Overlap sections according to the manufacturer’s instructions |
| Siding does not line up | Incorrect measurements or inconsistent roof-angle cuts | Recheck the roof slope and use a repeatable cutting pattern |
| Trim becomes distorted | Excessive heat or restricted vinyl movement | Maintain the specified roof clearance and fastening method |
How to Prepare the Roof Line
Preparation should begin before the first piece of J channel is cut. Inspect the roof-to-wall intersection and determine how the existing siding, flashing, underlayment, and weather-resistive barrier are arranged.
Do not assume that visible trim is the complete water-management system. Important flashing can be hidden behind siding and trim.
Inspect the Existing Flashing
The roof-to-wall area should have appropriate flashing before the siding trim is installed. Depending on the roof design, this may include step flashing and other components that direct water away from the wall.
If the existing flashing is missing, damaged, or incorrectly positioned, installing new J channel over the problem only hides it. Correct the water-management issue first.
Check the Roof Surface
Look for damaged shingles, loose roofing materials, exposed fasteners, or an unusual buildup where the roof meets the wall. The J channel should not be used to conceal an active roof defect.
Pay particular attention to the lower end of the roof-to-wall intersection. Water from the roof naturally concentrates there, making proper drainage especially important.
Establish a Straight Reference
A chalk line or another reliable reference can help establish the intended path of the channel. The reference should follow the actual roof geometry rather than relying only on visual judgment.
Measure several points along a long roof line. This helps reveal changes in the roof slope that may otherwise become obvious only after the siding has been cut.
How to Install J Channel Along a Roof Line
1. Measure the Roof Line
Measure the complete run before cutting the first piece. If the roof line is longer than one piece of J channel, determine where the joints will occur.
A long installation is easier to control when the joints are planned instead of being created wherever the first piece happens to end.
2. Determine the Required Clearance
Do not install vinyl J channel directly against roofing shingles unless the specific siding system expressly permits that arrangement. Manufacturer instructions commonly require a small separation from the roof surface.
For example, several vinyl siding installation guides specify a minimum clearance around 1/2 inch from the roof line. Some systems or conditions may require more clearance, particularly where dark roofing receives substantial heat.
The manufacturer’s instructions for the actual siding product should always take priority over a generic measurement.
3. Mark the Installation Line
Use the roof flashing and roof geometry to establish a straight installation path. A temporary spacer can help maintain consistent clearance while marking the line.
Check the line from several viewing angles before fastening the channel. A small alignment error can become much more noticeable as the channel extends across a long gable.
4. Cut the First J Channel
Measure the first section carefully and cut it with appropriate snips or another tool recommended for the product.
Do not make every cut from a single assumption about the roof angle. Roof geometry can change slightly, so measurements should be checked as the installation progresses.
5. Position the Channel
Place the J channel along the marked path while maintaining the required clearance from the roofing material. Keep the channel supported and aligned without forcing it against an uneven surface.
At this stage, check the channel from below and from several points along the wall. Correcting a crooked piece now is much easier than correcting it after multiple siding panels are installed.
6. Fasten the Channel Correctly
Fastening must allow vinyl trim to accommodate normal temperature movement. Do not clamp vinyl trim tightly against the wall.
Fasteners should be positioned according to the manufacturer’s instructions and driven straight. The trim should remain secure while retaining the ability to move as temperatures change.
7. Add Additional Sections
When one piece cannot span the complete roof line, use the overlap specified by the siding manufacturer. The upper piece should normally overlap the lower piece in a way that supports water shedding.
Avoid simply butting two pieces together. A properly planned overlap creates a more finished appearance and reduces the chance of an open joint.
8. Extend the Drainage Path Correctly
At the lower end of the roof line, the trim and flashing need to work together so water can leave the roof area without being trapped against the wall.
Some siding systems use a diverter or other shaped flashing detail to direct water outward. Follow the manufacturer’s roof-to-wall detail rather than improvising a sealant-heavy solution.
9. Cut the Siding Panels
Once the J channel is installed, the siding panels can be measured against the roof angle. Each panel should be cut so the edge enters the channel without being forced tightly into it.
Making a reusable pattern from a short piece of siding can make repeated angled cuts more consistent. Check the pattern periodically because even a small change in roof geometry can affect the cut.
10. Allow for Siding Movement
Vinyl siding expands and contracts with temperature. The cut edge therefore needs appropriate clearance inside the receiving channel.
Forcing the panel tightly into the J channel can restrict movement and contribute to buckling, distortion, or visible waves later.
11. Inspect the Completed Edge
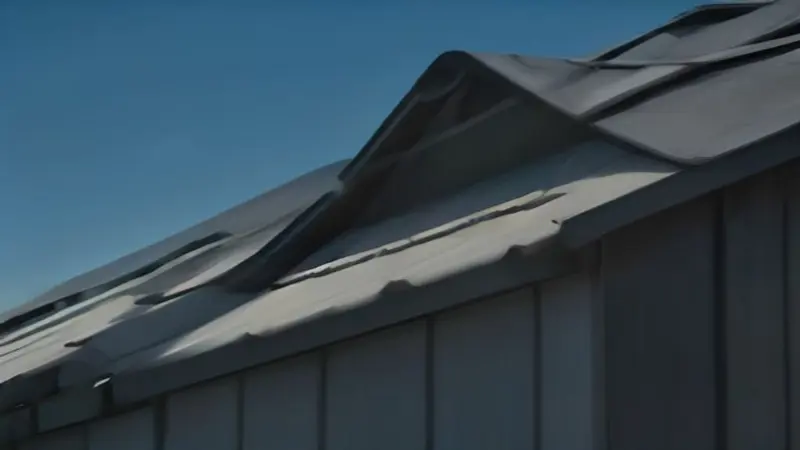
After the siding is installed, inspect the entire roof line from several distances. Look for consistent clearance, straight trim, open joints, trapped debris, and areas where the siding appears compressed.
Also inspect the lower end of the roof line. This is where water-management problems can become most obvious during heavy rain.
How Roof Pitch Changes the Installation
Roof pitch affects both the visual angle of the J channel and the shape of every siding panel that meets it. A steep roof creates a more pronounced angle, while a low-slope roof may make small alignment errors easier to notice.
Do not assume that the siding panel can be cut using the same angle throughout the entire wall. Measure and verify the slope as necessary.
Use a Pattern for Repeated Cuts
A short piece of siding can be used to create a cutting pattern. Place it where the finished panel will sit, mark the roof angle, and transfer that shape to the next panel.
This approach reduces the chance of gradually changing the angle from one course to the next. Consistency is particularly important on long gable ends because small errors accumulate visually.
Common J Channel Installation Mistakes
Installing the Channel Directly on the Shingles
This is one of the most important mistakes to avoid with vinyl J channel. Roofing materials can become hot enough to transfer significant heat into adjacent vinyl trim.
Follow the siding manufacturer’s required clearance. In some high-heat situations, the manufacturer may recommend greater separation or a different trim material.
Using J Channel Instead of Flashing
J channel is not a substitute for roof flashing. It receives the siding edge and provides a finished termination, while flashing is responsible for directing water through the roof-to-wall assembly.
If water is entering behind the siding, simply adding more caulk around the J channel may conceal the symptom without correcting the cause.
Fastening the Vinyl Too Tightly
Vinyl siding and trim need room for thermal movement. Fastening them so tightly that they cannot move can create distortion.
The correct fastening method depends on the product, so use the manufacturer’s instructions for nail position, spacing, and penetration.
Ignoring the Lower Roof End
The upper section of a roof line may look perfect while the lower section creates a drainage problem. Water naturally travels downhill, so the termination deserves careful attention.
Make sure the flashing and trim arrangement does not create a pocket that traps water against the wall.
Creating Too Many Small Pieces
Small pieces can sometimes be necessary, but excessive segmentation often produces visible joints and inconsistent movement. A cleaner layout with fewer properly planned pieces is generally easier to maintain.
Where a complicated roof intersection requires custom metalwork or specialized flashing, a purpose-built flashing solution may be more appropriate than forcing multiple pieces of J channel into the area.
How to Fix J Channel That Does Not Line Up
If the J channel appears uneven, first determine whether the problem is the trim itself or the underlying roof and wall geometry.
Do not immediately bend the channel into position. Forcing flexible trim to compensate for an underlying structural or layout problem can produce a temporary visual improvement while creating other problems.
Check the Reference Line
Measure several points and compare them with the installed channel. If the reference line is wrong, reinstalling the trim according to the corrected measurements may solve the problem.
For broader siding alignment issues, a related guide about vinyl siding that does not line up can provide additional troubleshooting context.
Check the Siding Cuts
If the channel itself is straight but the siding edges look uneven, the problem may be inconsistent panel cuts. Create a new pattern and compare several panels before cutting additional pieces.
Do Not Hide the Problem With Excessive Caulk
Caulk can have an appropriate role in some siding details, but it should not be used as a substitute for proper geometry and drainage.
Heavy caulking can also make future inspection and repair more difficult. The underlying installation should be correct before sealant is considered.
J Channel and Water Management
The roof-to-wall junction deserves more attention than an ordinary siding termination because the roof continuously directs rain toward this area.
Proper flashing should be installed before the J channel where required by the siding and roofing system. The flashing must integrate with the wall’s weather-resistive barrier and roofing layers rather than simply sitting on top of finished siding.
Why Step Flashing Matters
Where a sloped roof meets a vertical wall, step flashing is commonly used as part of the roof’s water-management system. Its job is fundamentally different from the J channel’s job.
If the roof-to-wall flashing is damaged or missing, the correct repair may require temporarily removing siding and trim to reach the flashing. Covering the area with new J channel is not a reliable substitute.
Watch the Lower Corner
At the lower end of a roof-to-wall intersection, water can leave the roof and travel toward the wall if the drainage details are incomplete. A properly designed diverter or kickout detail can help direct water away from the wall.
This area is particularly important on walls that have windows, doors, or other openings below the roof intersection.
Working Around Gutters and Other Exterior Details
Roof-line siding sometimes meets gutters, fascia, soffits, or porch structures. These intersections should be planned before the final trim is installed.
A gutter-related project may have different drainage requirements from a simple roof-to-wall intersection. For additional information about another exterior drainage situation, see portico gutter installation.
The goal is to keep each component performing its intended function rather than using one piece of trim to solve several unrelated problems.
Plan Around Existing Utilities
Some roof-line siding projects occur near exterior electrical fixtures, cables, vents, or other penetrations. These should be identified before cutting siding or trim.
Where electrical work or another utility modification is required, use the appropriate professional and follow applicable electrical and building requirements. A siding installation should not interfere with a properly installed utility penetration.
For example, if an exterior electrical arrangement needs attention, a guide covering a power cord drop from the ceiling addresses a different problem and should not be treated as a roof-line siding procedure.
How to Check the Finished Installation
Stand several feet away and inspect the roof-line trim for a consistent visual path. Then inspect it closely for loose fasteners, distorted vinyl, open joints, or siding edges that are pressed tightly into the channel.
Check the lower end for a clear drainage path. Remove construction debris that could block water movement.
Inspect After Temperature Changes
A new installation can look perfect immediately after completion. Temperature changes may reveal movement problems that were not visible on the first day.
After the siding has experienced both warm and cool conditions, inspect for buckling, unusual gaps, or trim movement. A change in appearance does not automatically mean the material is defective; vinyl is designed to accommodate thermal movement.
When to Call a Professional
Professional help is appropriate when the roof-to-wall flashing is missing, damaged, or inaccessible; when there is an active leak; or when the siding installation requires significant alteration of an existing roofing system.
Roof work also becomes more hazardous as the roof gets steeper or access becomes difficult. Do not take unnecessary risks simply to install a small piece of trim.
A professional siding contractor can also be useful when the siding manufacturer requires a specific installation detail that is difficult to reproduce with generic methods.
Final Takeaway
Installing J channel along a roof line is primarily an exercise in accurate layout, correct clearance, controlled fastening, and proper coordination with the roof’s water-management system.
The most important principle is simple: J channel should finish the siding, while flashing protects the wall. Keeping those functions separate prevents many of the problems that otherwise get blamed on the trim itself.
Measure the roof line carefully, follow the siding manufacturer’s requirements, maintain the required clearance from the roofing, allow vinyl to move, and plan the lower end for proper drainage.
A clean-looking installation is valuable, but the best roof-line detail is one that remains aligned, allows normal material movement, and continues directing water away from the wall long after the installation is finished.