Transforming your home often involves reimagining how spaces function and appear. A common challenge arises when you need to power a device in the middle of a room, far from an existing wall outlet. This often leads to the unsightly and potentially hazardous problem of a power cord dangling precariously from the ceiling. Addressing this issue requires careful planning and execution to ensure both safety and aesthetic appeal.
Many homeowners face this dilemma when installing ceiling-mounted projectors, smart home devices, decorative lighting, or even ceiling-mounted televisions. The desire for a clean, wire-free look clashes with the practical necessity of providing electricity. This guide explores the underlying causes of this common home and garden problem and provides comprehensive, actionable solutions to achieve a professional and safe power cord drop from your ceiling.
The Hidden Dangers of Exposed Ceiling Power Cords
While a dangling power cord might seem like a minor inconvenience, it poses several significant risks. Understanding these dangers is the first step toward implementing a safe and permanent solution. Exposed cords are not just an eyesore; they are a potential hazard in any living space.
Safety Hazards: Tripping, Fire, and Electrical Code Violations
An exposed power cord can become a tripping hazard, especially in high-traffic areas or homes with children and pets. This risk is amplified if the cord runs across the floor to reach a device. More critically, improperly managed electrical cords can overheat, leading to potential fire risks. Frayed insulation, pinched wires, or overloading circuits are all serious concerns. Furthermore, permanent wiring solutions must adhere to local electrical codes. Ignoring these codes can lead to fines, invalidate home insurance, and create dangerous electrical conditions. Always consult local regulations or a qualified electrician for permanent installations.
Temporary fixes, like simply taping a cord to the ceiling, are not only unsightly but also unreliable and potentially dangerous. The adhesive can fail, causing the cord to fall, or the tape itself could damage the cord’s insulation over time. Understanding these risks underscores the importance of a well-planned and executed installation.
Aesthetic Disruption: Clutter and Unfinished Look
Beyond safety, a visible power cord dropping from the ceiling significantly detracts from a room’s aesthetic. It introduces visual clutter and makes the space feel unfinished or poorly designed. In modern homes, where clean lines and minimalist designs are often preferred, a dangling cord can be a major eyesore. This issue is particularly noticeable in open-plan living areas or rooms designed for entertainment, where projectors or sound systems are central features. Achieving a polished look requires thoughtful cable management.
The goal is to integrate necessary power sources seamlessly into your home environment. This means hiding wires, routing them discreetly, and ensuring that the final setup enhances rather than detracts from your interior design. A well-executed power drop contributes significantly to the overall appeal and perceived value of your home.
Common Scenarios Requiring a Ceiling Power Drop
Various home improvement projects and technological advancements necessitate bringing power from the ceiling. Identifying your specific need helps in choosing the most appropriate solution.
Projectors and Home Theater Systems
Mounting a projector on the ceiling is popular for creating an immersive home theater experience. However, these devices require power, often leading to a visible cord descending to an outlet. The same applies to ceiling-mounted speakers or other audio-visual equipment that are part of a sophisticated entertainment setup. Powering these devices discreetly is key to a professional installation.
Smart Home Devices and Security Cameras
Many modern smart home devices, such as Wi-Fi access points, motion sensors, or even some smart lighting fixtures, are designed for ceiling installation. Similarly, ceiling-mounted security cameras provide optimal viewing angles and coverage. These devices need a constant power supply, making a hidden ceiling power drop a necessity for a clean and functional smart home. For issues with outdoor cameras, you might find solutions in our guide on Blink Camera in Direct Sunlight: 7 Fixes for Glare & Heat.
Decorative Lighting and Accent Fixtures
Beyond traditional ceiling lights, homeowners often want to install unique pendant lights, track lighting, or other decorative fixtures in locations without existing electrical boxes. Running a power cord to these new lighting elements from the ceiling creates design flexibility. This allows for customized lighting schemes that enhance ambiance and highlight specific features within a room.
Planning Your Ceiling Power Cord Drop: Essential Considerations
Before beginning any installation, thorough planning is crucial. This involves assessing your specific needs, understanding structural elements, and prioritizing safety.
Assessing Your Power Needs and Device Location
First, determine the exact location where your device will be mounted. Measure the distance from the nearest power source and calculate the required cord length. Consider the device’s power requirements (voltage and amperage) to ensure your chosen solution can safely deliver adequate power. Overloading circuits can be dangerous, so proper planning is essential.
Think about the future. Will you add more devices in the same area? Planning for potential expansion can save you time and effort later. Consider the aesthetics of the device itself and how the power solution will integrate with it.
Understanding Your Ceiling Type and Structure
The type of ceiling you have significantly impacts the installation method. Drywall, plaster, and drop ceilings each present unique challenges and opportunities. Knowing if your ceiling contains joists, studs, or other structural elements is vital for safely mounting devices and routing cables. Avoid drilling into structural beams unless absolutely necessary and with proper reinforcement.
For instance, working with plaster ceilings requires different tools and techniques than drywall. Drop ceilings offer easier access for running wires but may require specific mounting hardware. Always be aware of what lies behind your ceiling surface before cutting or drilling. This can prevent accidental damage to existing wiring, plumbing, or structural components.
Safety First: Electrical Codes and Professional Consultation
Electrical work, even seemingly minor tasks, carries inherent risks. Always prioritize safety by understanding and adhering to local electrical codes. These codes are in place to prevent hazards like fire and electric shock. If you are unsure about any aspect of the installation, consult a qualified electrician. They can ensure your project meets all safety standards and regulations. Do not take shortcuts when it comes to electricity.
While many solutions can be DIY-friendly, complex installations involving new circuits or modifications to existing wiring should always be handled by a professional. This ensures peace of mind and the long-term safety of your home. Remember, a professional installation protects your property and its occupants.
Innovative Solutions for a Seamless Power Cord Drop
Achieving a clean and safe power cord drop from the ceiling involves several distinct approaches, ranging from surface-mounted options to fully concealed installations. Each method has its advantages and is suitable for different scenarios and skill levels.
1. Surface-Mounted Cable Management Systems
For situations where opening walls or ceilings is not feasible or desired, surface-mounted cable management systems offer a practical and aesthetically pleasing solution. These systems consist of channels or conduits that adhere to the ceiling and walls, providing a discrete path for power cords. They are an excellent option for renters or those seeking a less invasive installation. They come in various colors and designs to blend with your decor.
These channels can be painted to match your ceiling color, making them nearly invisible. They protect cords from damage and keep them neatly organized. While not entirely hidden, a well-installed surface conduit can look very professional and significantly improve safety and aesthetics compared to a dangling cord. This method is particularly useful for temporary setups or when you need flexibility.
2. In-Ceiling and In-Wall Cable Routing
For the ultimate clean look, routing the power cord inside the ceiling and down through a wall is the preferred method. This involves creating access points in the drywall or plaster to run the cable discreetly. This method requires more effort and potentially some patching and painting, but the result is a completely invisible power solution. It is ideal for permanent installations where aesthetics are paramount.
This process typically involves drilling small holes, using fish tape to pull the cable through the ceiling joists and wall studs, and then installing low-voltage wall plates or power outlets. Careful planning is essential to avoid existing electrical wires, plumbing, or HVAC ducts. For related issues with power, consult our article on Light Not Working But Has Power. Always ensure proper insulation and fire-blocking are maintained when creating openings in walls or ceilings.
3. Using Power Extension Kits Designed for Ceilings
Specialized power extension kits are available that simplify the process of running power from the ceiling. These kits often include a power inlet plate for the ceiling, an in-wall rated power cable, and an outlet plate for the wall. They are designed to meet electrical safety standards for in-wall use and provide a convenient all-in-one solution. These kits often eliminate the need for complex wiring, making them more accessible for DIY enthusiasts.
These kits are particularly useful for projectors or ceiling-mounted TVs, where a dedicated power source is needed near the device. Always choose kits that are UL listed or meet other relevant safety certifications. Following the manufacturer’s instructions carefully is crucial for a safe and effective installation. This approach offers a balance between DIY feasibility and professional results.
4. Concealing Cords with Decorative Elements
Sometimes, direct concealment within walls or ceilings is not practical. In such cases, incorporating the power cord into decorative elements can be an ingenious solution. For example, running a cord along a ceiling beam, inside decorative molding, or even through a hollow curtain rod can effectively hide it in plain sight. This method requires creativity and an eye for design, transforming a potential eyesore into a feature. This approach adds a unique touch to your interior design.
Consider the overall aesthetic of the room when choosing this method. The decorative element should complement the existing decor rather than stand out. This approach allows for a customized solution that blends seamlessly with your home’s style. It’s a clever way to address functionality without sacrificing visual appeal.
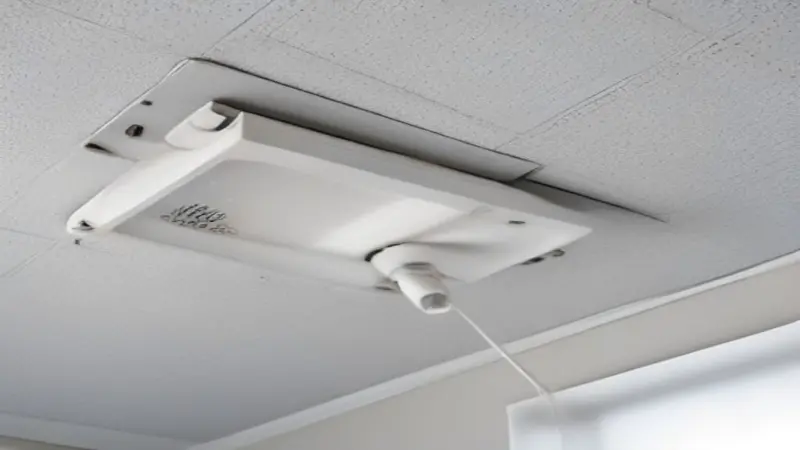
Step-by-Step Guide: Installing a Concealed Ceiling Power Drop (DIY-Friendly)
For homeowners comfortable with basic DIY tasks, a concealed power drop can be achieved with careful planning and the right tools. This guide outlines a common method involving in-wall cable routing for a professional finish.
Tools and Materials You’ll Need
Before starting, gather all necessary tools and materials. This includes a stud finder, drill, drywall saw, fish tape, in-wall rated power extension kit (or individual components like an electrical box, outlet, and appropriate gauge wire), measuring tape, pencil, safety glasses, and dust mask. Having everything on hand will streamline the process and prevent interruptions. Always use high-quality, safety-certified materials for electrical work.
You might also need spackle or joint compound, sandpaper, and paint for finishing touches. Ensure your in-wall rated power cable meets local electrical codes for safety. This attention to detail will ensure a lasting and secure installation. Proper tools make the job easier and safer.
Step 1: Planning and Locating Power Source
Begin by precisely marking the desired location for your device on the ceiling. Then, using a stud finder, locate the nearest wall stud and ceiling joist that will facilitate the cable run. Identify an existing power outlet in a suitable wall below your ceiling drop point. This outlet will serve as your power source. Ensure the circuit can handle the additional load of your device.
Measure the distance for your cable run, adding extra length for maneuvering. This initial planning phase is crucial for avoiding obstacles and ensuring a smooth installation. Take your time to double-check all measurements and locations before making any cuts. Accurate planning prevents costly mistakes.
Step 2: Creating Access Points
Carefully cut a small hole in the ceiling at your marked device location. This hole should be just large enough to accommodate the power inlet plate or electrical box. Next, cut a corresponding hole in the wall, directly below, near your chosen power outlet. This hole will be for the power outlet plate. Use a drywall saw for clean cuts.
Ensure these holes are positioned strategically to allow for easy cable routing and proper installation of the plates. Always wear safety glasses and a dust mask when cutting drywall. Be mindful of existing wiring and plumbing behind the wall and ceiling surfaces. A careful approach here minimizes damage and rework.
Step 3: Running the Power Cable
Now, it’s time to run the power cable. Attach the in-wall rated power cable to a fish tape. Insert the fish tape into the ceiling hole and guide it through the ceiling cavity towards the wall. Once it reaches the top of the wall cavity, guide it down to the wall outlet hole. This process may require some patience and maneuvering, especially if there are obstructions. For more complex routing, you might need a longer fish tape or additional access points.
Once the fish tape emerges from the wall hole, pull the power cable through until you have enough slack at both ends to make your connections. Ensure the cable is not kinked or damaged during the pulling process. This step is critical for a smooth and uninterrupted power supply.
Step 4: Connecting and Securing the Power
At the ceiling hole, connect the power cable to the inlet plate according to the manufacturer’s instructions. Secure the inlet plate to the ceiling. At the wall hole, connect the other end of the power cable to the new outlet or power extension kit’s outlet plate. Install the outlet plate in the wall. Ensure all electrical connections are secure and properly insulated. If you are replacing an existing outlet, turn off the power at the circuit breaker before beginning any wiring work. Safety is paramount when dealing with electrical connections.
Once both plates are installed and connections are made, carefully push any excess cable back into the wall and ceiling cavities. Turn the power back on at the circuit breaker and test your new power drop with your device. This final check ensures everything is functioning correctly and safely.
Step 5: Finishing Touches
After confirming the power drop is working, patch any remaining small gaps around the plates with spackle or joint compound. Sand smooth once dry, and then paint to match the surrounding ceiling and wall color. This step ensures a seamless and professional finish, making your power cord drop virtually invisible. A well-finished job enhances the overall aesthetic of your room.
Take pride in the clean, wire-free look you’ve achieved. This meticulous attention to detail elevates the entire installation, transforming a functional necessity into an integrated design element. Your efforts will result in a safer and more visually appealing space.
Advanced Techniques and Considerations
For more complex installations or specific aesthetic goals, advanced techniques might be necessary. These often involve a deeper understanding of electrical systems and construction.
Integrating with Existing Electrical Systems
If your project requires adding a new dedicated circuit or significantly modifying existing wiring, it is highly recommended to hire a licensed electrician. They possess the expertise to safely integrate new power sources into your home’s electrical panel, ensuring compliance with all codes. Attempting complex electrical work without proper knowledge can be extremely dangerous. A professional ensures the work is done correctly and safely, protecting your home and family.
Electricians can also advise on the best placement for new outlets or junction boxes to optimize your electrical layout. This expertise is invaluable for long-term safety and functionality. They can identify potential issues that a DIY approach might overlook.
Concealing Multiple Cords and Data Cables
When dealing with multiple power cords and data cables (e.g., for a complex home theater setup), consider using larger cable management channels or conduit systems. These allow for the organized routing of several cables, preventing tangles and ensuring easy access for future maintenance or upgrades. Planning for expansion upfront can save significant hassle later. Investing in quality cable management solutions pays off in the long run.
For a truly integrated system, consider installing dedicated conduits within the walls and ceilings. This allows for easy pulling of new cables in the future without reopening walls. This foresight is a hallmark of professional home design and enhances the versatility of your space. Think about future technological needs when planning your current setup.
Utilizing Low-Voltage Wiring for Certain Devices
Some devices, like certain LED lighting strips or small smart home sensors, operate on low voltage. For these, specialized low-voltage wiring can often be used, which may have fewer restrictions regarding in-wall routing compared to standard AC power cables. However, even low-voltage wiring requires careful planning to avoid interference and ensure a clean installation. Always verify the voltage requirements of your devices.
Low-voltage wiring can sometimes be run more easily through existing cavities or along less conspicuous paths. This provides additional flexibility for discreet power solutions. Understanding the power needs of each device is crucial for selecting the appropriate wiring method. This distinction is often overlooked but offers unique advantages.
Maintenance and Future-Proofing Your Installation
Once your power cord drop is complete, consider long-term maintenance and future needs to ensure its continued safety and functionality. A well-planned installation should last for many years without issue.
| Aspect | Key Considerations for Longevity | Originality/Added Value |
|---|---|---|
| Cable Longevity | Use high-quality, in-wall rated cables to prevent premature wear and ensure compliance with safety standards. Avoid sharp bends during installation. | Emphasizing the long-term cost-effectiveness and safety of investing in superior cable materials, often overlooked in DIY guides. |
| Accessibility | Plan for future access. If using conduit, ensure it’s large enough for additional cables. Consider removable access panels in discreet locations for future upgrades or troubleshooting. | Highlighting the importance of ‘future-proofing’ by designing for easy modifications, which many guides neglect by focusing solely on initial installation. |
| Heat Management | Ensure adequate ventilation around areas where power cables converge, especially if multiple devices are drawing power. Avoid bundling cables too tightly. | Addressing subtle heat buildup from bundled cables, a less commonly discussed but significant factor for electrical longevity and safety. |
| Device Upgrades | Consider the potential for future device upgrades. Will new devices have different power requirements or connection types? Design a system that can adapt. | Encouraging proactive design for technological evolution, moving beyond immediate needs to anticipate future smart home integrations and device changes. |
| Pest Protection | Seal any openings around cable entry points to prevent pests from entering wall or ceiling cavities, which could chew through wires. | Introducing the often-ignored aspect of pest deterrence in cable management, crucial for preventing costly damage and potential hazards. |
Regular Inspections for Wear and Tear
Periodically inspect your power cord drop, especially if any part of it remains exposed. Look for signs of wear, fraying, or damage to the cable insulation. If you notice any issues, address them immediately. For concealed installations, listen for any unusual buzzing or flickering, which could indicate a problem. Early detection of issues can prevent more serious electrical problems down the line.
Regular visual checks are a simple yet effective way to maintain the safety of your installation. Pay particular attention to areas where the cable might be subjected to stress or movement. Proactive maintenance extends the life of your installation and ensures continued safety.
Adapting to New Technologies
Technology evolves rapidly. When planning your power drop, consider how future devices might impact your current setup. For instance, if you anticipate upgrading your projector or smart home system, ensure your cable routing provides enough flexibility for potential changes in power requirements or cable types. Installing a conduit, even if empty, can provide an easy path for future cable runs. This forward-thinking approach minimizes future disruption.
Designing with adaptability in mind saves time and effort in the long run. A system that can accommodate new technologies without significant rework is a truly valuable asset. This foresight makes your home smarter and more resilient to technological changes. Thinking beyond the immediate project ensures lasting functionality.
Conclusion: Empowering Your Home with Smart Power Solutions
A power cord drop from the ceiling, when executed correctly, transforms a functional necessity into an integrated and aesthetically pleasing part of your home. By understanding the potential hazards, carefully planning your approach, and utilizing the right techniques and materials, you can achieve a professional and safe installation. Whether opting for surface-mounted solutions or fully concealed routing, the goal is always to enhance both the safety and beauty of your living space.
Empower yourself with the knowledge to tackle this common home and garden challenge, or know when to call in a professional. The result will be a cleaner, safer, and more technologically advanced home that you can truly enjoy. Thoughtful cable management is a hallmark of a well-maintained and modern living environment. Your effort in this area significantly contributes to your home’s overall appeal and functionality.