Skid shoes are the least glamorous part of a snowblower and the most consequential setting on the machine. They control how high the auger housing rides above the surface, which determines whether you scrape pavement clean, plow through gravel without launching rocks, or grind the scraper bar into oblivion. The factory setup uses two or four bolts per side, which means every seasonal change or surface switch becomes a wrench session in the cold. That is why quick-adjust skid systems, pin-lock conversions, and longer aftermarket shoes have become one of the most popular upgrades for two-stage machines.
This guide covers the quick-adjust options that actually work, the adjustment procedure that keeps both sides even, and the mistakes that turn a five-minute job into uneven wear, a bent auger housing, or a face full of gravel. It applies to Ariens, Craftsman, Toro, Husqvarna, and most other two-stage snowblowers, with model-specific clearances noted where they differ.
What Quick-Adjust Skids Actually Change
Stock skid shoes are steel or plastic blocks bolted to the sides of the auger housing through slotted holes. To change height, you loosen the bolts, slide the shoe up or down, and retighten. The process is simple in theory and miserable in practice when the bolts are rusted, the slots are packed with ice, and you are kneeling on a cold driveway.
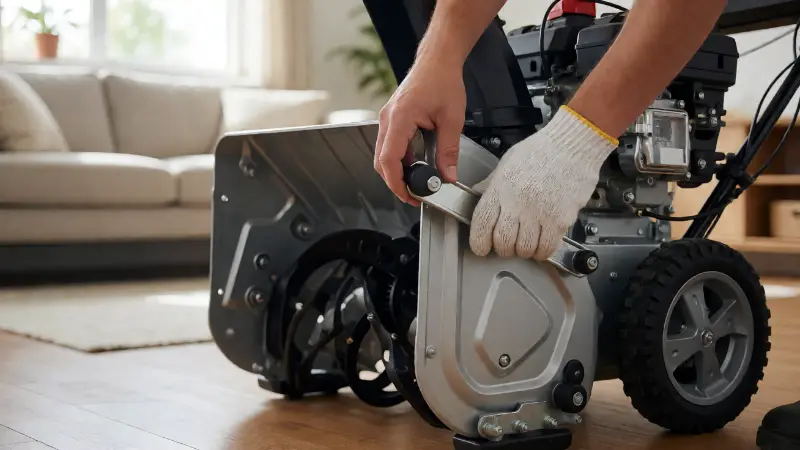
Quick-adjust systems replace the bolt-and-slot arrangement with one of three approaches. The first is a pin-lock design, where the shoe has multiple pre-drilled holes and a quick-release cotter pin or lynch pin selects the height. The second is a roller skid, which replaces the sliding contact with a wheel that rolls over the surface. The third is a longer, wider aftermarket shoe that bolts into the stock location but provides more float and a more gradual ramp over bumps.
The benefit is not cosmetic. Being able to change height without tools means you can drop the skids for a clean scrape on pavement, raise them for the gravel section at the end of the driveway, and reset them for the next storm without cursing the hardware. Owners who switch surfaces regularly describe quick-adjust as the single biggest quality-of-life improvement on the machine.
The Clearance Numbers That Matter
Every snowblower manual publishes a recommended clearance between the scraper bar and the ground, and the numbers differ by surface type and by manufacturer. The general target for paved surfaces is roughly one-eighth to one-half inch. For gravel or uneven surfaces, the range climbs to roughly three-quarters of an inch to an inch or more, depending on how loose the stone is.
Model-specific guidance narrows those ranges. Ariens manuals commonly specify about one-eighth of an inch for hard, smooth surfaces and about seven-eighths of an inch for uneven or gravel surfaces. Craftsman manuals list roughly three-sixteenths to one-quarter inch for level pavement and one-half to five-eighths inch for gravel. John Deere guidance for its snow removal attachments describes a similar split, with lower settings for flat surfaces and maximum clearance for rough or gravel conditions.
Those numbers assume the machine is sitting on a level surface with both tires at equal pressure. A low tire on one side tilts the housing and throws the clearance off by a visible amount, even if the skid bolts are set identically. Checking tire pressure before adjusting the skids is the step most owners skip and the one that causes the most confusing uneven-wear complaints.
Step-by-Step Adjustment Without the Guesswork
Start on a flat, hard surface such as a garage floor or a level driveway. Turn the machine off and disconnect the spark plug wire before reaching under the housing. Set both tires to the same pressure, because an unbalanced machine will never adjust evenly no matter how careful you are with the bolts.
Place a spacer under the scraper bar at each end. The spacer thickness equals the clearance you want. A paint stir stick is a classic choice because it is thin and widely available, and doubling it gets you close to a quarter inch. Cardboard, thin plywood, and even a penny have all been used successfully. The point is to lift the scraper bar to a known height so the skid shoes can be set to rest on the ground.
Loosen the skid shoe bolts just enough that the shoe slides freely. Lower each shoe until its entire bottom surface contacts the ground, then snug the bolts. Do not fully tighten yet. Check that the scraper bar is parallel to the ground and that both shoes are at the same height. Once the geometry looks right, tighten the hardware firmly and recheck the clearance on both sides.
For a quick-adjust pin system, the procedure is the same up to the point of setting height. Instead of tightening bolts, you align the shoe hole with the desired position and insert the pin. Pull the pin, move the shoe, push the pin back in. That is the entire adjustment, and it can be done with gloves on.
Quick-Adjust Options Worth Considering
Pin-lock retrofit kits are the most direct way to get tool-free adjustment on a stock machine. These kits typically include replacement skid shoes with multiple pre-drilled holes and heavy-duty quick-release pins. Some are sold as complete shoe-and-pin sets, while others are conversion hardware that works with existing shoes. The limitation is that the holes give you discrete height steps rather than infinite adjustment, so the positions may not match your ideal clearance exactly.
Roller skids replace the sliding shoe with a wheel or a set of wheels. The advantage is reduced friction and a smoother glide over cracks and uneven pavement. Owners who run them on concrete and asphalt often describe a noticeable reduction in the machine jerking or stalling when it hits a raised edge. The disadvantage is that roller skids are not designed for gravel or loose stone. A wheel that rolls over pavement can sink into gravel, and the housing can dig in as a result. Manufacturer guidance is explicit on this point: roller skids are for flat, hard surfaces, not for gravel or uneven terrain.
Longer aftermarket shoes, such as the Armor Skids line, take a different approach. Instead of rolling, they provide a longer, wider contact patch that floats over bumps and distributes the machine’s weight over more surface area. Owners report that the longer ramp angle lifts the housing gently over obstacles up to a couple of inches rather than jolting it. These shoes are bolted into the stock location and adjusted with the standard bolt-and-slot method, though some models offer multiple mounting holes. They are popular for gravel driveways and uneven sidewalks because the extra float keeps the auger housing above the stones.
Common Mistakes That Cause Uneven Wear and Damage
The first mistake is adjusting only one side. A snowblower with one skid high and one skid low will sit crooked, and the scraper bar will wear unevenly from one end to the other. It will also pull to one side and clean inconsistently. Always adjust both sides as a pair, and verify the clearance at both ends of the scraper bar.
The second mistake is ignoring tire pressure. A tire that is a few pounds low on one side tilts the machine enough to change the effective clearance. This is the hidden cause behind many “my skids keep going out of adjustment” complaints. Check pressure before every adjustment and top up as needed.
The third mistake is over-tightening the bolts on a sliding-slot design. The slot exists to allow adjustment, and cranking the bolt down can deform the slot or strip the hardware. Snug the bolt, verify the position, then tighten to the manufacturer’s specification without crushing the slot.
The fourth mistake is using the wrong skid for the surface. Roller skids on gravel, or short stock skids on deep loose stone, will either sink, dig, or throw rocks. Match the shoe type to the surface, and change the height when the surface changes.
The fifth mistake is adjusting the skids without checking the scraper bar. If the scraper bar is bent, worn unevenly, or mounted crooked, no amount of skid adjustment will produce a level cut. Inspect the scraper bar first, replace it if it is worn through or bent, and then set the skids against a known-good edge.
| Skid Type | Best Surface | Adjustment Method | Strengths | Watch-Outs |
|---|---|---|---|---|
| Stock steel or plastic skids | Paved driveways and sidewalks | Bolts and slotted holes; requires tools | Inexpensive, widely available, simple design | Bolts rust and seize; height changes are slow |
| Pin-lock quick-adjust skids | Mixed surfaces where height changes often | Pull pin, move shoe, reinsert pin | Tool-free changes, fast seasonal resets, glove-friendly | Discrete hole positions; pin can be lost if not tethered |
| Roller skids | Flat concrete and asphalt only | Bolts, similar to stock; some models have pins | Smooth glide, less friction, reduced jerking on cracks | Not for gravel or loose stone; wheels can sink or clog |
| Long aftermarket shoes (Armor-style) | Gravel, uneven ground, rough pavement | Bolts and slots; some offer multiple holes | More float, gentle ramp over bumps, protects housing | Longer profile can reduce close scraping on pavement |
| Poly or composite skids | Paved surfaces where marking is a concern | Bolts and slots | Won’t rust, quieter on pavement, replaces steel wear part | Wears faster than steel on abrasive gravel |
Gravel Driveways: The Hardest Adjustment Case
Gravel is where skid setup earns its reputation. A two-stage snowblower can handle small, tight gravel with the skids raised, but loose stone and larger aggregate are a different problem. If the skids sink into the stone, the auger housing drops and the machine starts scooping rocks. Those rocks become projectiles, and they can jam the auger, break a shear pin, or damage the impeller.
The practical approach is to raise the skids until the scraper bar clears the gravel by roughly an inch, and to accept that a thin layer of snow will remain on the driveway. Trying to scrape gravel clean is a losing battle that damages the machine and the landscaping. For deep or loose gravel, a longer aftermarket shoe that spreads the load over a wider area helps the machine float rather than sink, and some owners run a weighted roller or a set of wide skis for the same reason.
It also helps to pack the first snowfall rather than blow it. Driving over the gravel before clearing creates a frozen crust that supports the machine and keeps the stones in place for the rest of the season. That is not an adjustment, but it changes what the adjustment needs to accomplish.
Maintenance and Seasonal Checks
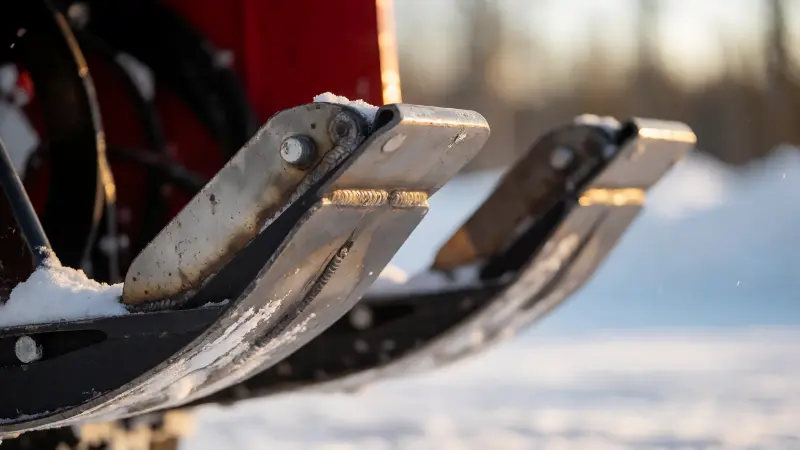
Skid shoes wear, and they wear faster on abrasive surfaces. Inspect the bottom of each shoe at the start of the season and again mid-season if you clear a lot of pavement. A shoe that has worn down to the bolt heads is no longer protecting the housing, and it needs replacement. Reversible shoes can be flipped to extend their life, which is worth doing if your model supports it.
Check the hardware for looseness and corrosion. Quick-release pins can vibrate out if they are not tethered, so a lanyard or a spare pin in the toolbox is cheap insurance. Bolts that have seized should be removed, cleaned, and coated with anti-seize before the season starts, not after the first storm.
Keep the scraper bar in the inspection loop. A worn scraper bar changes the geometry that the skids are set against, so replacing the bar means resetting the skids. Do the scraper bar first, then the skids, and verify the clearance at both ends before putting the machine away.
If you are also chasing starting or fuel problems, the skid adjustment is a separate job from the engine diagnostics. Our guide to Craftsman snowblower leaking gas covers the fuel-side failures that keep a machine from running at all, and the choke settings in our Craftsman snowblower choke position article explain why a healthy engine can still refuse to fire on a cold morning.
When to Replace Rather Than Adjust
Adjustment restores height, but it cannot restore material that has worn away. If the skid shoe is thin, cracked, bent, or worn through at the contact point, replace it. A bent shoe will never sit flat, and a cracked one can fail under load. The same applies to the mounting slots: a slot that has elongated or rounded out will not hold its position, and the shoe will drift no matter how carefully you tighten it.
If the auger housing itself is bent or cracked at the skid mounting points, replacement shoes will not fix the geometry. That kind of damage usually comes from hitting a curb, a rock, or a buried obstacle, and it needs to be assessed before the machine is used again. A housing that is out of square will wear scraper bars and skid shoes prematurely no matter how well they are adjusted.
For owners running older machines, it is worth confirming the model and year before ordering replacement parts. Ariens, Craftsman, and Toro have changed skid mounting patterns across generations, and a part that fits one model year may not fit the next. Our guide to what year is my Ariens snowblower explains how to decode the serial and model numbers so you order the right hardware the first time.
FAQ
How often should I adjust my snowblower skid shoes?
Adjust them whenever you switch between paved and gravel surfaces, at the start of each season, and after replacing the scraper bar. Check them mid-season if you clear a lot of pavement, because wear changes the effective height. Quick-adjust pin systems make seasonal changes fast enough that there is little reason to put them off.
What is the correct skid shoe height for a gravel driveway?
Most manufacturers recommend roughly three-quarters of an inch to an inch of clearance between the scraper bar and the ground for gravel, with some models specifying up to about seven-eighths of an inch. Loose or deep gravel may need more. The goal is to ride above the stone rather than scrape it, even if that leaves a thin layer of snow behind.
Are roller skids better than standard skids?
Roller skids are better on flat concrete and asphalt because they reduce friction and glide over cracks. They are not designed for gravel or loose stone, where the wheels can sink and the housing can dig in. Standard or long aftermarket shoes are the better choice for mixed and unpaved surfaces.
Why do my skid shoes wear unevenly?
Uneven wear usually comes from one side being set higher than the other, from unequal tire pressure, or from a bent scraper bar or housing. Check tire pressure first, then verify that both shoes are at the same height and that the scraper bar is level. If the hardware or housing is damaged, adjustment alone will not fix it.
Can I convert my stock skids to quick-adjust?
Yes. Pin-lock retrofit kits and quick-release pin conversions are available for many two-stage machines. Some kits replace the shoes entirely, while others add pins and collars to the existing mounting hardware. Check the bolt spacing and slot pattern for your specific model before ordering, because mounting dimensions vary between brands and generations.
Do I need to disconnect the spark plug before adjusting skids?
Yes. You are reaching under the auger housing, and the machine should be off with the spark plug wire disconnected as a safety precaution. The auger can rotate unexpectedly if the engine is bumped or if a control is engaged, and the clearance under the housing is tight.