Kitchen cabinet renovation cost is one of the hardest numbers to pin down in home improvement, because the phrase itself covers several very different projects. Refinishing existing doors, replacing door fronts, and ripping out the cabinetry entirely to install new boxes all fall under the same umbrella, yet the price gap between them is enormous. Two homeowners asking the same question can receive quotes that differ by a factor of five or more.
This guide breaks the cost down by scope rather than by a single figure. It explains which line items drive the total, where labour quietly overtakes materials, and which upgrades are worth paying for. It also covers the preparation, plumbing, and electrical work that frequently appears on the invoice even though it has nothing to do with cabinets.
Why Cabinet Renovation Quotes Vary So Widely
The first reason is that “renovation” is not a defined scope. Painting existing cabinets, refacing them with new doors and veneer, and full replacement are three different trades with three different price structures. A quote that seems high may simply cover far more work than a cheaper one.
The second reason is measurement. Cabinet pricing is often quoted per linear foot of cabinetry rather than per square foot of floor area, and the two are easy to confuse. A kitchen with a large floor plan but few cabinet runs will price lower than a small galley packed with uppers and tall units.
The third reason is hidden conditions. Old cabinets may conceal damaged drywall, outdated wiring, water-damaged substrate, or plumbing that does not meet current code. Once the old boxes come out, those repairs become part of the job. A reputable contractor builds contingency into the estimate; a low bid often simply excludes them.
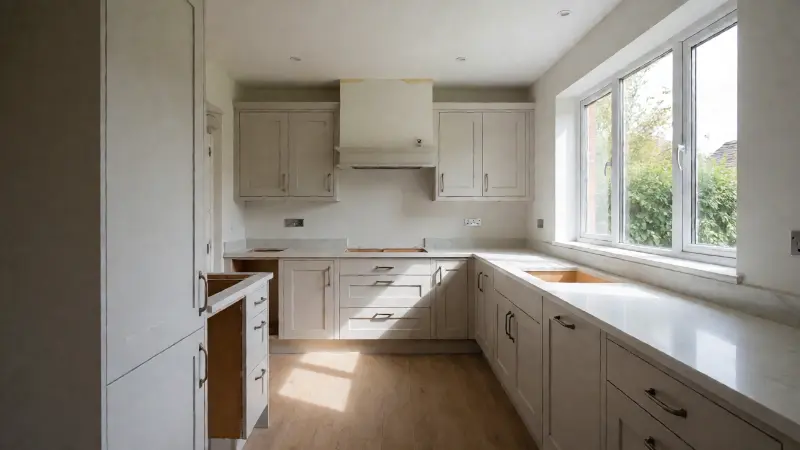
The Three Main Scopes and What They Cost
It helps to sort cabinet renovation into three tiers before comparing any numbers. Each tier has a different labour profile and a different level of disruption.
Refinishing and Repainting
Refinishing keeps the existing boxes and doors and changes the finish. It is the least expensive tier because no new cabinetry is manufactured and no boxes are removed. The cost is dominated by preparation, which is also the step that determines whether the finish lasts.
Degreasing, sanding, filling, priming, and spraying all take time. A professional spray finish usually involves removing doors and drawer fronts, transporting them, and reinstalling them after curing. That sequence explains why a professional repaint costs considerably more than a can of paint, even though materials are a small share of the total.
Refacing
Refacing keeps the cabinet boxes but replaces the door and drawer fronts, and applies a matching veneer or laminate to the visible box faces. It sits between refinishing and replacement in cost, and it delivers a more dramatic visual change than paint alone.
Refacing requires precise measurement, because new doors must fit the existing openings. Drawer boxes may need new glides if the originals are worn. Hinges are almost always replaced. The labour is skilled but less extensive than full installation.
Full Replacement
Replacing cabinets means removing the old units, preparing the walls, installing new boxes, levelling them, and fitting doors, drawers, and trim. This is the most expensive tier and the most disruptive, because plumbing and electrical work often follows.
Full replacement also triggers countertop removal and replacement in most cases, since countertops are cut for sink and faucet positions that may shift. Flooring edges, backsplash tile, and wall finishes may also need repair.
Line Items That Make Up a Cabinet Renovation
Understanding the components makes it easier to see where a quote is padded and where it is genuinely fair. The categories below apply to most projects, though the balance shifts with scope.
Cabinetry and Materials
For replacement projects, cabinetry is usually the largest single line item. The price depends on construction quality, box material, finish, and whether the line is stock, semi-custom, or custom. Comparing the trade-offs between these categories is worth doing before you commit. A breakdown of custom cabinets versus stock cabinets explains how construction, lead time, and fit affect what you pay.
Labour and Installation
Installation labour covers removal, disposal, wall preparation, levelling, fastening, and trim work. It also includes the time spent adjusting doors and drawers so they align and close correctly, which is more fiddly than it looks.
Access matters here. A ground-floor kitchen with a wide doorway is straightforward. An upper-floor kitchen with a narrow stairwell may require more people and more time, and that shows up in the quote.
Countertops
If countertops are replaced alongside cabinets, they add their own material, fabrication, and templating costs. Templating often happens after cabinets are installed, which means the project cannot be completed in a single visit. Surface choice drives the number significantly, and it pays to understand the differences before selecting.
Plumbing and Electrical
Moving a sink, dishwasher, or range requires new supply, drain, or venting work. Adding outlets, under-cabinet lighting, or a dedicated circuit for a new appliance requires an electrician. These trades are often quoted separately and are a common source of budget overrun.
Backsplash, Flooring, and Paint
Removing cabinets damages the wall behind them, and new cabinet dimensions rarely match the old ones exactly. Backsplash tile, flooring edges, and wall paint frequently need repair or replacement as a consequence. These finish items are easy to overlook when planning.
Permits, Disposal, and Contingency
Some jurisdictions require permits for electrical or plumbing changes associated with a cabinet project. Disposal of old cabinetry carries a tipping fee. Contingency covers the surprises that appear once walls are opened.
Cost Comparison by Scope
The table below compares the main renovation scopes across the factors that affect price. The figures are relative rather than absolute, because regional labour rates and material choices shift them considerably.
| Scope | What Is Replaced | Typical Labour Intensity | Disruption Level | Countertop Impact | Relative Cost | Where Budgets Slip |
|---|---|---|---|---|---|---|
| Repaint only | Finish on existing doors and boxes | Moderate, preparation-heavy | Low, kitchen usable between steps | Usually none | Lowest | Poor prep causing premature peeling |
| Refinish with new hardware | Finish plus hinges, handles, pulls | Moderate | Low to moderate | Usually none | Low | Worn boxes that cannot be saved |
| Reface doors and veneer | Doors, drawer fronts, exposed box faces | Moderate to high, precision work | Moderate | Sometimes none | Moderate | Drawer glides and hinge replacement |
| Replace doors only | Doors and drawer fronts | Moderate | Low to moderate | None | Moderate | Mismatched box colour showing through |
| Full replacement, same layout | Boxes, doors, drawers, trim | High | High | Usually required | High | Wall and floor damage behind old units |
| Full replacement, new layout | Cabinets plus utility relocation | Highest | Highest | Required | Highest | Plumbing, electrical, and permit work |
Where Labour Quietly Overtakes Materials
Homeowners often assume materials dominate the budget, and for replacement projects they frequently do. But in refinishing and refacing work, labour is the larger share by a wide margin. That is why doing the preparation yourself can reduce the bill substantially, and why rushing it produces a finish that fails within a season.
Installation labour also scales with complexity. A run of standard base cabinets against a straight wall is quick. A corner with a blind cabinet, an angled wall, or a bank of tall pantry units takes considerably longer. Every extra cut, scribe, and filler adds time.
Countertop templating is another labour-sensitive step. Fabricators need the cabinets installed and level before they measure, and any subsequent movement can affect the fit. Sequencing the trades correctly avoids paying for a return visit.
What Actually Changes the Total
Several factors move the number more than others. Knowing which ones matter helps you direct your budget deliberately.
- Number of cabinet runs: More linear feet means more material and more labour, regardless of floor area.
- Cabinet height and depth: Tall pantry units and deeper base cabinets cost more than standard sizes.
- Door style and finish: Complex profiles, glazing, and specialty finishes add cost.
- Drawer quantity: Drawers use more hardware and more assembly time than doors.
- Hardware quality: Soft-close hinges and full-extension glides add cost but reduce wear.
- Interior accessories: Pull-out trays, dividers, and waste bins increase both material and installation time.
- Utility relocation: Moving a sink or range is one of the largest single cost drivers.
- Wall and floor condition: Out-of-square walls and damaged subfloor require extra preparation.
- Access and staging: Difficult delivery routes increase labour.
- Permits and inspections: Required for many electrical and plumbing changes.
If the budget is genuinely tight, the sensible approach is to change the finish rather than the layout. A guide to updating kitchen cabinets on a budget covers low-cost approaches, including which preparation steps you can safely handle yourself.
Repairing the Room Around the Cabinets
Cabinet work is rarely confined to the cabinets. Removing old units exposes the wall behind them, and that wall is usually unpainted, patched, or damaged. New cabinets may not cover the same footprint, leaving gaps that need filling, skimming, and painting.
Flooring is another boundary issue. If the old cabinets sat on top of the flooring, removing them exposes bare subfloor or a discontinued material. Matching that area is often impossible, so the choice becomes a deliberate transition or a partial floor replacement.
Backsplash tile usually suffers during removal. Even careful work tends to crack or loosen tiles, and replacing a section rarely matches the original. Planning for a full backsplash replacement is often more realistic than attempting a patch.
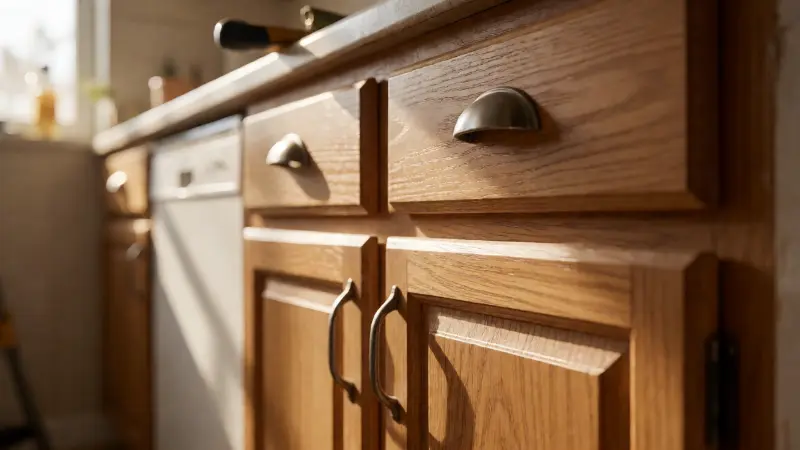
Doing Part of the Work Yourself
There is genuine savings available for homeowners willing to take on portions of the project. Demolition, disposal, masking, and some preparation work are within reach for many people. So is painting walls and trim after the cabinets are installed.
Tasks that are better left to professionals include electrical work, plumbing and gas connections, countertop fabrication, and the actual cabinet installation. Cabinet installation looks simple but depends on precise levelling. An out-of-level run causes doors to swing open, drawers to slide, and countertops to sit unevenly.
If you plan to handle the painting yourself, do it before the new cabinets go in where possible, and use a durable product suited to a kitchen environment. Grease and moisture are hard on finishes, and cheap paint in a high-use area rarely holds up.
How to Compare Quotes Fairly
The fastest way to misjudge a quote is to compare totals when the scopes differ. Insist on an itemised estimate that separates materials, labour, hardware, countertops, electrical, plumbing, and disposal.
Confirm what is excluded. Common exclusions include permit fees, wall repair, flooring transitions, backsplash, and painting. Ask who handles countertop templating and whether the price includes removal of the old surfaces.
Ask about lead times for cabinetry, because a delay in one component stalls the whole sequence. Ask what happens if the walls are out of square or the subfloor is damaged, and how change orders are priced.
Get at least three estimates and check references for projects of similar scope. A very low bid usually signals an omission rather than a bargain, and the omission tends to surface once work has begun.
Sequencing the Project to Control Cost
Order of operations affects both the total price and the amount of rework. A logical sequence reduces the number of trade visits and avoids paying twice for the same step.
- Finalise the layout and confirm whether utilities will move.
- Order cabinetry and confirm the delivery window before demolition begins.
- Remove old cabinets, countertops, and backsplash.
- Complete any rough plumbing and electrical work, then obtain inspections if required.
- Repair and prepare walls and flooring boundaries.
- Install and level new cabinetry.
- Template and install countertops.
- Install backsplash, trim, and hardware.
- Finish electrical connections, plumbing trim, and paint.
Some of these steps overlap, and the exact sequence depends on whether the layout is changing. The principle is to complete rough work before finishes, and to have materials on site before demolishing anything.
Open-Concept Projects Add Their Own Costs
Cabinet renovation sometimes happens alongside a larger kitchen reconfiguration. If walls are coming down to create an open plan, the cabinet budget sits inside a larger number that includes structural work, ceiling repair, and flooring transitions. Those projects carry costs that have nothing to do with cabinetry, and a guide to an open-concept kitchen remodel on a budget explains how to control the broader scope.
If the layout is changing, the cabinet order must wait until the structural work is complete and the room dimensions are final. Ordering early to save time risks ordering the wrong sizes.
Long-Term Value and Resale Considerations
Cabinet renovation generally improves how a kitchen functions and how it shows, but the return at resale depends on the local market and the rest of the home. A well-executed refacing or repaint can refresh a kitchen at modest cost and appeal to buyers who want a move-in-ready space.
Full replacement with premium materials may not recover its cost in a market where comparable homes have simpler kitchens. If you plan to sell soon, spending on layout, lighting, and function often delivers more perceived value than spending on elaborate finishes.
Keep records of the work, including receipts, warranties, and any permits. Documentation supports the value of the renovation and reassures buyers that the work was done properly.
Maintenance Costs After the Renovation
The cost of cabinets does not end at installation. Hinges loosen, glides wear, and finishes dull over time. Soft-close hardware generally lasts longer than basic hardware, but it is not immune to failure.
Painted cabinet finishes in kitchens need careful cleaning. Abrasive cleaners and scrubbing pads wear through the finish, and water left standing at the base of doors can cause swelling. Simple habits, such as wiping spills promptly and avoiding soaking the cabinet fronts, extend the life of the finish.
Sealant joints around sinks and countertops should be checked periodically, since failure there leads to water damage inside the cabinetry. The same principle applies to any appliance connection behind or beneath the cabinets.
FAQ
How much does a kitchen cabinet renovation cost?
There is no single figure because the scope varies so widely. Refinishing existing cabinets costs the least, refacing sits in the middle, and full replacement with new boxes and countertops costs the most. Local labour rates and material choices shift the number considerably, so itemised quotes are the only reliable guide.
Is it cheaper to reface or replace kitchen cabinets?
Refacing is generally less expensive than full replacement, provided the existing boxes are solid and square. Replacement becomes more sensible when the boxes are damaged, the layout is changing, or the cabinets are low quality. The cost difference can be substantial.
What is the biggest hidden cost in a cabinet renovation?
Wall and floor repairs behind the old cabinets, plus plumbing and electrical work if the layout changes, are the most common surprises. Countertop replacement and backsplash work are also frequently underestimated.
Can I save money by installing cabinets myself?
You can save on labour, but cabinet installation requires precise levelling and shimming. An out-of-level run causes doors to swing open, drawers to slide, and countertops to sit unevenly. If you are not confident, hiring an experienced installer is often cheaper than correcting a poor fit.
Do I need a permit for a kitchen cabinet renovation?
Permits are commonly required when electrical circuits, plumbing, or gas lines are altered. A simple refinish or like-for-like replacement may not require one. Requirements vary by location, so check with your local building department.
How long does a cabinet renovation take?
Refinishing may take several days to a couple of weeks depending on curing and reinstallation. Refacing typically takes longer, and full replacement depends on cabinet lead times plus countertop templating and installation. Access, inspections, and material delays all affect the schedule.
Are countertops always replaced with new cabinets?
Often yes, because countertops are cut for specific sink and faucet positions and may not fit a new layout. If the layout and cabinet dimensions match closely, a countertop may occasionally be reused, but removal without damage is not guaranteed.
What adds the most cost to a cabinet project?
Relocating plumbing and electrical services tends to add the most, followed by full replacement with premium cabinetry and countertops. Structural changes such as removing a wall add costs that sit outside the cabinet budget entirely.
Kitchen cabinet renovation cost is really a question about scope, not price. Decide whether you are refinishing, refacing, or replacing, and the budget range narrows considerably. Get itemised quotes, plan for wall and floor repairs, and sequence the trades so rough work finishes before finishes begin. That preparation is what keeps the final invoice close to the estimate.