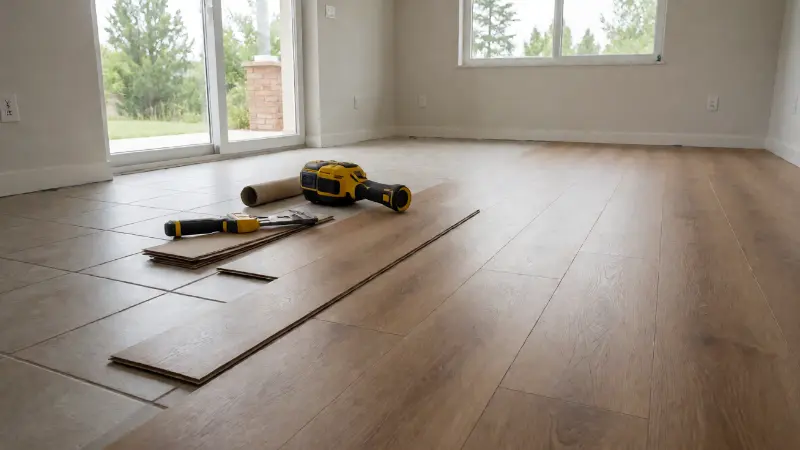
Installing vinyl plank flooring over existing tile is one of the few flooring projects that genuinely can skip the demolition stage. The tile becomes a stable substrate, the old floor stays out of the landfill, and the project moves faster than a full tear-out. That convenience comes with conditions, though, and ignoring them is how floating floors develop hollow spots, clicking noises, and failed joints.
This guide covers how to assess whether your tile is a suitable substrate, how to prepare it properly, and how to install vinyl plank over it so the finished floor performs. It also covers the specific problems that come with grout lines, uneven tiles, and moisture in wet areas.
Why Vinyl Plank Can Go Over Tile
Vinyl plank is a floating floor in most of its click-lock forms. It does not need to be glued or nailed to the substrate, so it does not require the mechanical fastening that hardwood or some engineered products demand. Instead, it relies on a flat, stable surface beneath it and its own interlocking joints to hold the field together.
Ceramic and porcelain tile are dimensionally stable and hard. Once the tile is well bonded to the subfloor, it provides a solid base that does not compress underfoot. That makes it a viable substrate for a floating vinyl floor, provided the surface is flat enough and the grout joints are addressed.
The trade-offs are real, though. Tile is unforgiving of unevenness, so any lippage between adjacent tiles transfers directly into the vinyl above. Grout lines can telegraph through thin vinyl over time. And in a bathroom or laundry, moisture behaviour matters more than in a living room.
Assessing the Existing Tile Floor
Before buying a single box of plank, evaluate the tile honestly. A floating floor amplifies whatever is underneath it, so problems that seem minor now become visible later.
Is the Tile Well Bonded?
Walk across the floor and listen for hollow sounds. Tap tiles with a screwdriver handle or a coin and note any that sound loose. A tile that has debonded from the subfloor will move slightly under load, and that movement transfers to the vinyl above.
Loose or hollow tiles need to be removed and the void filled, or the entire floor becomes a poor candidate. If several tiles are loose across the field, a full removal may be the more reliable path.
How Flat Is the Floor?
Flatness matters more than levelness. A floor that slopes gently is usually acceptable. A floor with high and low spots over a short distance is not, because floating planks bridge those variations and flex when walked on.
Check flatness with a long straightedge in several directions. Note any gaps between the straightedge and the tile surface. Manufacturers publish flatness tolerances in their installation instructions, and those tolerances are the standard to follow rather than guesswork.
How Wide Are the Grout Lines?
Narrow grout joints are easier to bridge than wide ones. Wide joints, deep grout recesses, and heavily textured tile all create conditions where the vinyl can settle into the depressions over time.
A rigid underlayment layer over the tile solves most of this. It bridges the joints and creates a smooth plane for the vinyl to float on.
Is There Moisture Present?
Tile over a concrete slab can transmit moisture vapour from below. Vinyl plank is generally moisture-resistant, but the adhesive-free floating system still needs a barrier in some situations, and trapped moisture can affect the subfloor and the finish.
In basements, on-grade slabs, and bathrooms, testing for moisture is a sensible step. A simple test involves taping a square of plastic sheeting to the floor, sealing the edges, and checking after a day or two for condensation underneath. If moisture appears, a vapour barrier or a different approach is needed.
Is There Asbestos in the Flooring?
Older sheet vinyl, vinyl tile, and the adhesive beneath them may contain asbestos. This is a genuine safety concern, and the answer is not to sand or grind the material. If you are unsure about the age and composition of the existing floor, testing is the safe route. If the tile is sound and you are installing over it without disturbing it, exposure risk is much lower, but cutting or scraping during preparation changes that.
Should You Remove the Tile Instead?
Going over tile is faster and cheaper, but it is not right for every situation. Removal makes sense when tiles are loose across the field, when the added height would create an awkward transition, or when the existing tile is uneven enough that levelling over it would be impractical.
Removal also allows you to inspect the subfloor and address any moisture or structural problems directly. That said, tile removal is dusty, heavy work, and the debris disposal cost adds up quickly. Weighing the convenience of going over against the certainty of a clean start is the central decision in this project.
Materials and Tools You Will Need
Gathering supplies before starting prevents the shortcuts that cause failures. The list below covers a typical floating vinyl installation over tile.
- Vinyl plank flooring: Calculate area plus a waste allowance for cuts and layout.
- Underlayment: A rigid underlayment panel or a manufacturer-approved underlayment mat, depending on the system.
- Vapour barrier: If recommended for your slab or moisture conditions.
- Self-levelling compound: For filling low spots and feathering transitions.
- Patching compound: For minor surface imperfections.
- Spacers: To maintain an expansion gap at the perimeter.
- Tapping block and pull bar: For closing joints without damaging the plank edges.
- Utility knife and straightedge: For cutting planks.
- Jigsaw or oscillating multi-tool: For cuts around door jambs and pipes.
- Measuring tape and pencil: For layout and marking.
- Knee pads and gloves: For comfort and safety.
- Dust mask and eye protection: For cutting and prep work.
- Transition strips: For doorways and where the floor meets other surfaces.
- Mallet: For use with the tapping block.
Confirm that your chosen underlayment is approved by the plank manufacturer. Some vinyl planks include a pre-attached pad and require no additional underlayment, while others need a specific mat. Using the wrong one can void the warranty.
Preparing the Tile Surface
Preparation is where this project succeeds or fails. A floating floor cannot correct for a bad substrate, so time spent here pays off later.
Clean Thoroughly
Tile in kitchens and bathrooms holds grease, soap residue, and dust. Vacuum thoroughly and wipe with a suitable cleaner. Allow the floor to dry completely before installing any underlayment or plank.
Address Loose or Cracked Tiles
Remove any tile that sounds hollow or moves underfoot. Fill the resulting void with a patching compound or a suitable levelling product, and let it cure fully. Cracks in the tile surface may be acceptable if the tile is solidly bonded, but a crack that allows movement is not.
Fill Grout Lines and Low Spots
If you are installing a rigid underlayment panel, the panels bridge the grout lines and create a smooth plane, so filling every joint may not be necessary. If you are installing directly over tile with a mat underlayment, wide or deep grout lines should be filled and skimmed so they do not telegraph through the vinyl.
Use a patching compound to fill the joints and feather them flush. This step is tedious but it is the difference between a floor that looks flat and one that shows every grout line under raking light.
Level Pronounced Unevenness
For lippage between adjacent tiles or broader low spots, a self-levelling compound is the appropriate product. Follow the manufacturer’s instructions for mixing, pouring, and curing. Self-levelling compound needs adequate dry time, and the floor must be completely dry before any vinyl goes down.
Installation Steps
The sequence below suits a standard click-lock floating vinyl plank system. Follow your product’s specific instructions where they differ.
- Acclimatise the plank. Let the boxes sit in the room at normal living temperature for the period the manufacturer specifies. Planks that are too cold or too warm can be stiff or brittle.
- Install the underlayment. Roll out or lay the approved underlayment, overlapping seams as directed and taping them where required. Trim around the perimeter.
- Plan the layout. Determine your starting wall and check that the last row will not be a thin sliver. Adjust the starting offset to balance the cuts on both sides.
- Set the first row. Place spacers along the starting wall to maintain the expansion gap. Engage the end joints of the first row and keep the planks aligned.
- Continue the field. Stagger the end joints between rows so they are offset rather than aligned. This is both aesthetic and structural, because aligned joints concentrate stress.
- Cut around obstacles. Use a jigsaw or multi-tool for door jambs, pipes, and vents. Undercut door casings where possible so the plank slides beneath for a cleaner finish.
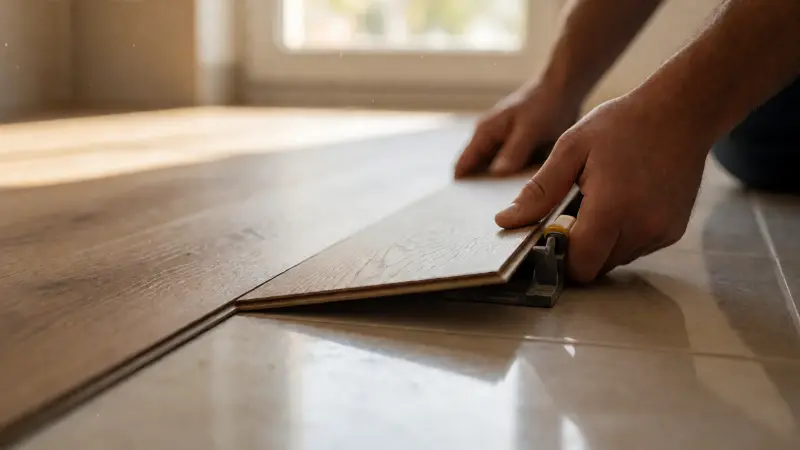
- Use the tapping block correctly. Tap along the joint with a block rather than hitting the plank edge directly. A pull bar helps close the final joints near walls.
- Finish the perimeter. Remove spacers and install baseboards or quarter round to cover the expansion gap. Do not caulk the floor tight to the wall, because the floor needs room to move.
- Install transitions. Fit transition strips at doorways and where the vinyl meets other flooring materials.
Take your time on the first two rows. If they are straight and square to the room, the rest of the installation follows more easily.
Comparing Approaches to Installing Over Tile
The table below compares the main methods for installing vinyl plank over existing tile, along with the conditions that suit each one.
| Approach | Best Suited To | Preparation Required | Added Height | Effect on Grout Lines | Relative Effort |
|---|---|---|---|---|---|
| Direct install over tile with approved mat | Flat tile, narrow grout lines, plank with attached pad | Cleaning, minor patching, flatness check | Minimal | Can telegraph over time if joints are wide | Lowest |
| Rigid underlayment panel over tile | Wider grout lines, textured tile, uneven surface | Cleaning, panel fitting, fastener planning | Moderate | Bridged by the panel | Moderate |
| Self-levelling compound over tile | Noticeable low spots and lippage | Primer, mixing, pouring, long cure time | Low to moderate | Filled flush with the tile surface | Moderate to high |
| Tile removal then install | Loose tiles, height concerns, unknown subfloor condition | Full demolition and disposal, subfloor inspection | Lowest finished height | Not applicable | Highest |
| Glue-down vinyl over tile | Areas needing extra stability, some commercial use | Extensive cleaning, adhesive selection, flatness | Minimal | Depends on adhesive and plank thickness | Moderate |
Dealing With Grout Lines and Texture
Grout lines are the most common complaint after a vinyl-over-tile installation. The plank is flexible, and when weight presses down on a joint, the vinyl can settle slightly into the depression. Over time this creates a visible pattern of lines following the tile layout beneath.
Thicker plank helps, because a more rigid product bridges gaps better than a thin one. A rigid underlayment panel helps more, because it creates a continuous plane. Filling the joints flush is the third option, and it works well when combined with a quality underlayment.
Heavily textured tile, such as slate-look or tumbled stone, is a harder substrate. The surface irregularities are larger, and a mat underlayment may not bridge them adequately. In those cases a rigid panel or a skim coat is usually the better preparation.
Moisture and Wet Areas
Vinyl plank itself tolerates moisture well, but that does not make any room waterproof. In bathrooms and laundry rooms, water can still reach the subfloor through gaps at fixtures, around the toilet, and at the perimeter.
If you are installing over tile in a bathroom, confirm the plank is rated for wet areas by the manufacturer. Some products are approved for bathrooms, while others are intended for dry rooms only. Check the warranty terms as well, because bathroom installations sometimes carry conditions.
In basements and on-grade slabs, moisture vapour from below is the concern. A vapour barrier beneath the underlayment, if the manufacturer permits it, helps control vapour movement. Never install a vapour barrier on both sides of a floor assembly, because that can trap moisture in the middle.
Height and Transition Considerations
Adding a floor over tile raises the finished floor level. That affects door clearances, appliance fit, and transitions to adjacent rooms.
Check that doors still swing freely after the added thickness. You may need to trim the bottom of doors, which is straightforward on solid wood but harder on hollow-core doors. Undercutting door casings allows the plank to slide beneath, which produces a cleaner appearance than cutting around the jamb.
Where the new floor meets an adjacent hard surface, a transition strip covers the height difference. Measure the gap and choose a strip designed for the height difference you have. Transitions that are too small will not sit properly, and ones that are too large look clumsy.
Common Mistakes to Avoid
Floating floors fail for predictable reasons. These are the errors that appear most often in vinyl-over-tile projects.
- Skipping the flatness check: A floor that flexes over high spots will eventually crack at the joints.
- Installing over loose tile: Movement beneath the plank transfers upward and breaks the locking system.
- Omitting the expansion gap: A floating floor needs room to move at the perimeter. Pinching it against walls causes buckling.
- Using the wrong underlayment: Some mats are too soft for click-lock systems and allow joints to flex.
- Aligning end joints: Stacked joints concentrate stress and look wrong. Stagger them consistently.
- Cutting too tight around obstacles: Pipes and posts need a small clearance to allow movement.
- Ignoring moisture tests: Installing over a damp slab traps moisture and can damage the floor above it.
- Rushing acclimatisation: Cold or poorly acclimatised planks can be brittle and prone to cracking at the joints.
Alignment Problems and What They Signal
When a click-lock floor will not line up, the cause is usually one of a few things. A bowed wall, an out-of-square room, or a first row that drifted out of alignment will compound with every subsequent row.
The same principle applies in other interlocking panel systems, where a single misaligned starting piece causes cascading problems across the field. Homeowners troubleshooting vinyl siding not lining up encounter a comparable issue, where an early alignment error propagates because each panel references the one before it.
If joints will not close at all, the locking profile may not be engaging properly. Forcing the plank usually damages the tongue or groove. A tapping block and a pull bar, used correctly, solve most stubborn joints. When panels of any kind refuse to engage, it often points to debris in the profile, a misaligned angle, or a damaged edge. The troubleshooting logic behind vinyl siding that will not snap together is a useful parallel for diagnosing why interlocking profiles fail to seat.
Ventilation and Indoor Conditions
Vinyl flooring off-gasses to some degree after installation, and new plank can carry a noticeable odour. Ventilating the room during and after installation helps dissipate it.
Room conditions also matter in adjacent spaces. If you are installing flooring in a room where moisture and ventilation have been problems, addressing those issues first prevents the new floor from being affected. Guidance on installing a gable vent from inside is useful context if attic or roof ventilation is contributing to humidity problems in the rooms below.
FAQ
Can I install vinyl plank flooring directly over tile?
In many cases yes, provided the tile is well bonded, reasonably flat, and clean. You may need an underlayment to bridge grout lines, and the plank must be rated for the application. Check the manufacturer’s instructions before starting.
Do I need underlayment over tile?
Not always, but it depends on the tile and the plank. If the grout lines are wide or the tile is textured, an underlayment helps create a smoother plane. Some planks have an attached pad and require no additional underlayment, while others need a specific mat.
Will grout lines show through vinyl plank?
They can, particularly with thin plank over wide or deep joints. Thicker plank, a rigid underlayment panel, or filling the joints flush reduces the risk. Filling and skimming the grout lines is the most effective preparation.
How much height does vinyl plank add over tile?
The added height depends on the plank thickness and any underlayment used. A thin plank with a mat adds very little, while a plank plus a rigid panel adds more. Measure before installing and check door clearances and transitions.
Can I install vinyl plank over tile in a bathroom?
Some vinyl planks are rated for bathrooms and some are not. Check the manufacturer’s guidance and warranty terms. Even in a bathroom, water can reach the subfloor at fixtures and the perimeter, so proper sealing and detailing still matter.
Do I need to remove loose tiles before installing?
Yes. A tile that moves underfoot will transfer that movement to the floating floor above and eventually damage the locking joints. Remove loose tiles, fill the voids, and allow the repair to cure before proceeding.
How long should vinyl plank acclimatise before installation?
Acclimatisation time varies by product and is specified in the manufacturer’s instructions. Planks should sit in the room at normal living temperature for the stated period before installation. Installing cold or poorly acclimatised plank can cause joint failures.
Should I glue vinyl plank over tile instead of floating it?
Floating is the more common approach for click-lock vinyl and is easier to install and replace. Glue-down can provide extra stability in some situations but requires careful adhesive selection and thorough surface preparation. Follow the manufacturer’s recommendation for your product.
Installing vinyl plank over tile is a genuinely practical project when the substrate cooperates. Check that the tile is sound and flat, bridge the grout lines with the right underlayment, and respect the expansion gap at the perimeter. Do that, and the new floor will sit flat, lock together properly, and hold up to daily life without the mess of a full tear-out.