A garage door is one of the largest openings in a house, and it is usually the least insulated. Even a door with a factory-applied backing panel can leak air at the perimeter, along the panel joints, and through hollow sections that have no insulation at all. The result is a cold garage, higher heating costs in an attached home, and uncomfortable temperatures in any workshop or storage space above.
Insulating the panels is a manageable DIY project, but it is only part of the job. Air sealing matters just as much as the insulation itself, and the door’s weight and balance must be considered before adding any material. This guide covers each of those elements so the finished door performs as intended.
Why Garage Doors Leak Air and Heat
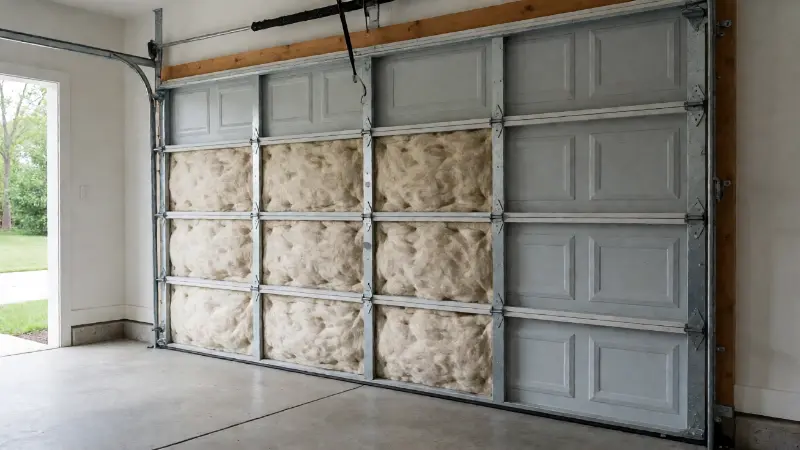
A typical sectional garage door is made from thin steel or aluminium skins bonded to a frame. In the least expensive designs, the panel is a single layer of metal with no core, so heat passes through it readily. Better doors use two skins with an insulating core between them, though even those rely on seals to control air movement.
Air leakage is the bigger problem in most garages. A metal door expands and contracts with temperature changes, which opens small gaps at the perimeter and along the joints between panels. Wind pressure pushes air through those gaps, and the effect is noticeable on a cold day when you stand near a closed door.
Hollow panels also allow air to circulate inside the door itself, which undermines any insulation you add. Filling the cavities and sealing the gaps work together. Insulating without sealing leaves the drafts, and sealing without insulating leaves a cold, conductive surface.
Find the Leaks Before You Insulate
Locating the leaks first prevents wasted effort and tells you whether the perimeter seals need replacement. The check is straightforward and takes little time.
On a cold or windy day, close the door and feel along the bottom seal, the vertical edges, and the header at the top. A hand held close to the surface detects moving air. A thin piece of paper or a strip of tissue can be used as an indicator at the corners, where gaps tend to be largest.
Look at the bottom seal from inside the garage. If it is flattened, cracked, or hardened, it is no longer making contact with the floor. Dirt and debris in the track can also hold the door slightly off the ground, leaving a gap along the bottom edge. Clean the tracks before assuming the seal has failed.
Check the panel joints by shining a light from the outside on a dark day or at night. Any visible light along a joint indicates a gap. Pay attention to the hinges, since the space between panels is where air moves most freely.
The garage door is not the only opening that matters. Other penetrations around the garage, such as a wall or floor opening for a fixture, can contribute to drafts in the same space. Guidance on sealing an ash dump door covers a similar problem in older homes, where an unused opening becomes a channel for cold air and odours.
Types of Garage Door Construction
The construction of your door determines how much benefit insulation will deliver and which materials suit the cavities.
- Single-layer steel or aluminium: One metal skin with no backing. These doors are light and inexpensive but conduct heat readily. They benefit most from insulation and usually have open cavities that accept rigid board or batt material.
- Double-layer with a steel backer: Two metal skins with an air space or a thin insulating core between them. Adding insulation to the core improves performance, but the cavities may be shallow, which limits material thickness.
- Sandwich panels with a factory core: Polyurethane or polystyrene foam bonded between two skins. These doors are already insulated, so the priority shifts to sealing the perimeter and joints rather than filling panels.
- Wood or composite doors: Wood doors can be heavy and may expand and contract with humidity. Insulation options depend on whether the door is a sectional design with cavities or a solid panel.
- Roll-up and one-piece doors: These designs often have limited or no cavity space, which makes panel insulation impractical. Sealing and weatherstripping become the main improvements available.
Measure the depth of the cavity in a representative panel before buying insulation. A shallow cavity cannot accept a thick board, and forcing material into it can bow the panel or interfere with the hinges.
Insulation Materials Compared
Several materials are used for garage door panels, and each has trade-offs in cost, ease of installation, and moisture behaviour. The table below compares the main options.
| Material | Installation Difficulty | Moisture Behaviour | Best Suited To | Main Drawback |
|---|---|---|---|---|
| Rigid foam board (polystyrene) | Low; cut to size and friction fit or adhere | Resists moisture; closed-cell types absorb little water | Single-layer doors with open cavities | Thickness limited by cavity depth; seams need sealing |
| Foil-faced foam board | Low to moderate | Foil face resists moisture and radiant heat | Doors where a reflective surface is acceptable | Foil can interfere with adhesives and may trap moisture if edges are unsealed |
| Reflective foil or bubble wrap | Low | Vapour-resistant but thin; can trap condensation on metal | Quick, low-cost improvement on a tight budget | Modest insulating value and prone to tearing |
| Fiberglass batt with facing | Moderate | Absorbs water if exposed; facing helps but does not seal | Cavities deep enough to hold a batt without compression | Sags over time and loses performance when damp |
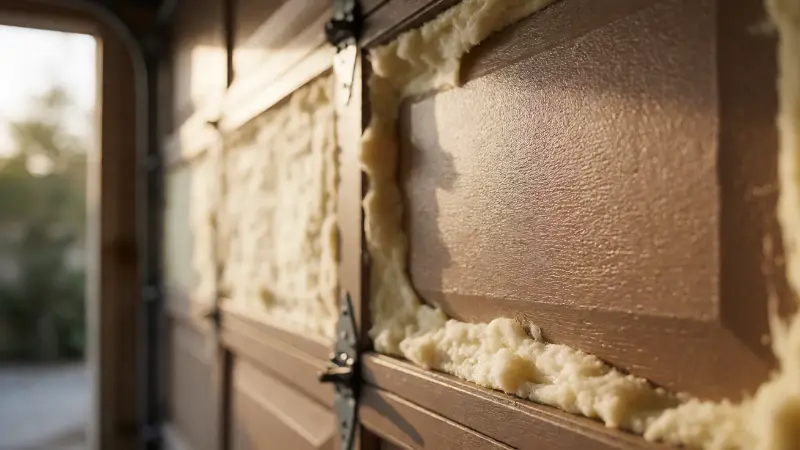
| Spray foam kit | Moderate to high | Closed-cell foam resists moisture and seals gaps as it expands | Irregular cavities and doors with complex framing | Higher cost, requires careful application and curing conditions |
| Pre-cut garage door insulation kit | Low | Usually foam-based, moisture-resistant | Standard sectional doors with uniform panel sizes | Limited to specific panel sizes and thicknesses |
| Mineral wool board | Moderate | Resists moisture and fire better than some foams | Cavities where fire performance matters | Heavier than foam and more expensive |
Tools and Materials You Will Need
Gathering supplies before starting keeps the project efficient and avoids trips to the store mid-installation.
- Insulation material: Matched to the cavity depth and door construction.
- Measuring tape and straightedge: For accurate panel measurements.
- Utility knife or foam cutter: For clean cuts in rigid board.
- Construction adhesive or panel adhesive: Rated for the material and substrate.
- Foil tape or seam tape: To seal joints between insulation pieces.
- Weatherstripping: For the perimeter, including the bottom seal and side seals.
- Bottom seal replacement: If the existing seal is hardened or torn.
- Caulk and sealant: For small gaps at the header and around hardware.
- Gloves and eye protection: For cutting and handling materials.
- Dust mask: When cutting foam or mineral wool.
- Sturdy stepladder or platform: For reaching upper panels.
- Utility knife with fresh blades: Dull blades tear foam rather than cutting it.
If you plan to seal the perimeter thoroughly, inspect the existing weatherstripping first. Replacement seals are inexpensive and often deliver more benefit than adding insulation to a leaky door.
Step-by-Step: Insulating the Panels
The process below suits rigid foam board and pre-cut kits, which are the most common choices for DIY installations.
- Work safely with the door. Raise the door to a comfortable working height, or lower it fully and work from inside. Never work on a door that is partially open and unsupported.
- Measure each panel cavity. Panels are not always identical, particularly on older doors. Measure height and width at the cavity, and note the depth available.
- Cut the insulation to size. Cut slightly oversize so the piece friction-fits, or cut to the exact size if you plan to adhere it. Score foam with a utility knife and snap it for a clean edge.
- Test fit before adhering. Slide the piece into the cavity and confirm it sits flat without bowing the panel or interfering with the hinge hardware.
- Apply adhesive where needed. A few beads of panel adhesive hold the insulation in place without creating a full vapour barrier. Avoid adhesive near hinge mounting points.
- Press the insulation into place. Ensure it makes contact across the panel and does not protrude beyond the framing.
- Seal the seams. Use foil tape or seam tape along the edges where insulation pieces meet, and around the perimeter of each panel cavity.
- Repeat for each panel. Work methodically from the bottom up or the top down, keeping track of the pattern.
- Check the hinges and rollers. Confirm that the added material does not contact moving parts or obstruct the hinge plates.
- Test the door. Operate the door slowly by hand first, watching for binding, scraping, or unusual strain before using the opener.
Take your time on the first panel. Once you establish the technique and confirm the fit, the remaining panels go faster.
Sealing the Perimeter and Panel Joints
Insulation reduces heat transfer, but seals control air movement. Addressing both is what makes the garage noticeably warmer and less drafty.
Start with the bottom seal. A hardened or flattened seal no longer contacts the floor, and replacing it is one of the most effective single improvements available. Measure the door width and purchase a replacement seal designed for your door type. Some designs slide into a retainer, while others are fastened with screws or adhesive.
Side seals and a header seal close the vertical gaps and the gap along the top of the door. Brush-style or bulb-style seals are common, and they accommodate the slight movement of the door as it opens and closes. Adjust the seals so they make contact without pressing so hard that the door struggles to close.
The panel joints are the next priority. A strip of weatherstripping or a foam seal placed between panels can reduce air movement at the hinges, but it must not interfere with the door’s folding action. Check the operation after installing any material in this area.
Small gaps at the header, around the track mounts, and at the corners can be sealed with caulk or a suitable sealant. Some openings require a different approach, depending on what they were originally for. An unused opening that was designed for a specific purpose may need a purpose-made seal rather than general caulk, similar to how removing a draft from an ash dump door requires understanding what the opening was built for.
The Weight and Balance Question
Adding insulation increases the weight of the door, and that changes the load on the springs and the opener. A door that was balanced for its original weight may become difficult to lift or may drop unexpectedly.
Before adding any material, weigh the trade-off. Rigid foam board is light, and a full set of panels may add only a modest amount of weight. Fiberglass batts and mineral wool boards are heavier, and spray foam adds weight as it cures. The heavier the material, the more likely the springs need adjustment.
Test the door by hand after installation. Disconnect the opener and lift the door to about waist height, then release it gently. A properly balanced door stays in place or drifts slowly. A door that drops quickly is unbalanced and needs attention.
Spring adjustment is dangerous work. Torsion springs store considerable energy, and an incorrect adjustment can cause serious injury. If the door is unbalanced, have a qualified technician adjust the springs rather than attempting it yourself.
Moisture, Condensation, and Ventilation
Garages often experience higher humidity than the rest of the house, particularly when a wet vehicle is parked inside or when the slab releases moisture. Adding insulation changes the temperature of the door surface, which can affect where condensation forms.
On a cold day, a warm, humid garage interior can cause moisture to condense on the cold inner face of the door or on the insulation itself. Foil-faced and closed-cell materials resist moisture better than unfaced fiberglass, which can become damp and lose performance.
Ventilation helps manage humidity. If the garage is tightly sealed after insulation work, consider whether air movement is adequate. A small vent or a dehumidifier may be appropriate in humid climates, though in cold climates adding ventilation increases heat loss.
If you store items in the garage that are sensitive to moisture, check them periodically after insulating. A change in the moisture balance can affect stored materials even if the door itself performs better.
Safety Considerations
Garage doors are heavy and spring-loaded, and the space around them contains hazards that are easy to overlook.
- Never remove or adjust springs yourself: Torsion and extension springs are under high tension and can cause severe injury.
- Do not block the door’s travel: Insulation and seals must not interfere with the door’s movement or the safety reverse system.
- Keep insulation away from heat sources: Water heaters, furnaces, and exhaust pipes in the garage should not be covered or placed in contact with combustible materials.
- Check fire performance: If the garage is attached to the house, the door and any added material should not compromise the separation between the garage and living space.
- Use a stable platform: Falls from ladders are a common injury during overhead work.
- Wear eye protection: Cutting foam and mineral wool produces particles that irritate the eyes.
- Disconnect the opener when testing: Manual operation reveals binding that the opener may mask.
If your garage has been modified for a specific purpose, such as a workshop with heavy equipment suspended overhead, the structure may need reinforcement before adding any load. Guidance on reinforcing a garage ceiling for a hoist explains how ceiling framing carries loads and why reinforcement should be planned rather than improvised.
Cost and Payback Expectations
The cost of insulating garage door panels depends on the material, the door size, and whether you also replace the perimeter seals. Pre-cut kits cost more per panel than buying rigid board and cutting it yourself, but they save time and reduce waste.
The payback comes from several directions. In an attached garage, reducing air leakage into the house lowers heating demand. In a detached workshop, a warmer space extends the usable season and reduces the need for supplementary heating. Insulation also reduces noise transmission through the door to some degree. For related door-hardware context, see this door ball bearing spring fix.
Expectations should be realistic. Panel insulation and new seals make a noticeable difference, but a garage door remains a large, relatively thin barrier compared with a stud wall. The biggest gains come from combining insulation, air sealing, and, where appropriate, insulating the garage ceiling and walls. For broader home-improvement planning, compare custom versus stock cabinets.
Electrical and Equipment Considerations
Garages often contain outlets, lighting, and equipment that were installed before any insulation was considered. When adding material to the door or walls, keep clearance around electrical components.
The door opener and its wiring should not be obstructed by insulation. If the garage has a subpanel or additional circuits, the space around that equipment needs to remain accessible. Understanding the requirements for a detached garage sub panel is useful if the project expands to include electrical work alongside the insulation.
Extension cords and temporary heaters used during cold-weather work should never be covered by insulation or run beneath it. Heat buildup in an enclosed space is a fire risk.
FAQ
What is the best insulation for garage door panels?
Rigid foam board and pre-cut foam kits are the most practical choices for most DIY installations. They are lightweight, moisture-resistant, and easy to cut. The best option depends on the cavity depth and whether the door is single-layer or has an existing core.
Will insulating my garage door make the garage warm?
It will reduce heat loss and drafts, but a garage door is only one part of the building envelope. Insulating the door without sealing the perimeter leaves the drafts. Insulating the ceiling and walls also affects the result. Expect improvement rather than a fully conditioned space.
Do I need to adjust the garage door springs after insulating?
It depends on how much weight you add. Light foam board may not require adjustment, while heavier materials such as mineral wool or spray foam might. Test the door by hand and have a qualified technician adjust the springs if it is unbalanced.
Can I insulate a garage door with reflective foil only?
Reflective foil products are thin and offer modest insulating value on their own. They can reduce radiant heat transfer but do not address conduction or air leakage. Sealing the perimeter and adding a thicker material generally delivers better results.
Should I insulate the inside or the outside of the door?
Insulation is normally added to the inside face of the door, within the panel cavities. Adding material to the outside is impractical and would interfere with the door’s operation and appearance.
How do I stop drafts along the bottom of the garage door?
Inspect the bottom seal for flattening, cracking, or debris. Clean the tracks and replace the seal if it no longer contacts the floor. Adjusting the door’s travel can also help if it stops slightly above the ground.
Is it safe to leave the insulation exposed?
Foil-faced and closed-cell foam boards are often left exposed, since they resist moisture and do not shed fibres. Unfaced fiberglass should be covered because it can release fibres and absorb moisture. Check the manufacturer’s guidance for the material you choose.
Will insulating the door cause condensation problems?
It can change where condensation forms, particularly in a humid garage. Closed-cell and foil-faced materials resist moisture better than unfaced batts. Managing garage humidity with ventilation or a dehumidifier reduces the risk.
Insulating drafty garage door panels is a project where small details produce most of the benefit. Fill the cavities with a material suited to the door, seal the perimeter and panel joints, and check the door’s balance before relying on the opener. Do that, and the garage becomes noticeably more comfortable, the house loses less heat, and the door still operates as smoothly as it did before.