A water stain on a ceiling is rarely the problem itself. It is a message from somewhere else in the house, and the repair will not last unless you read that message correctly. Drywall that has been wet behaves differently from drywall that has simply aged, and the difference determines whether you can patch a small area or need to replace a larger section.
This guide walks through the full repair process, from tracing the moisture source to blending the finished patch into the surrounding ceiling. It covers the tools involved, the trade-offs between patching and replacing, and the safety concerns that come with working overhead on a material that may be contaminated.
Understand What Water Does to Drywall
Drywall is a paper-faced gypsum panel. The paper face and the gypsum core both react to moisture, but they do so in different ways. The paper can delaminate and peel, while the gypsum core can soften, crumble, or lose its structural integrity.
Mould is a separate concern. Drywall paper is a food source for mould when it stays damp, and mould can begin to colonise within a relatively short period. Staining alone does not confirm mould growth, but a musty odour, fuzzy discolouration, or dark speckling are warning signs that warrant closer inspection.
Sagging is the clearest structural warning. If the ceiling feels soft, spongy, or visibly bowed when you press it gently, the panel has lost strength and should be replaced rather than patched. Painting over a sagging or soft area only hides a problem that will return.
Step One: Find and Stop the Source
Repairing the drywall before fixing the leak is wasted effort. The patch will fail, the stain will return, and you will be doing the same job twice. Tracing the source is the first real task.
Common culprits above a ceiling include failed roof flashing, damaged shingles, clogged gutters that back water under the roof edge, leaking supply or drain pipes, an overflowing fixture on the floor above, and condensation on cold ductwork or pipes. In cold climates, ice dams are a frequent cause of ceiling stains that appear during freeze-thaw cycles.
A bathroom directly above the stained ceiling points toward a plumbing or fixture seal issue. A stain near an exterior wall suggests roof or flashing problems. A stain that grows during rain points to the roof, while one that appears after a shower points to plumbing or ventilation.
Water heaters are another frequent source of slow leaks that travel along joists before appearing on a ceiling below. Units can weep from the tank, the temperature and pressure relief valve, or the fittings, and the moisture often shows up far from the appliance itself. Routine checks of an AO Smith water heater maintenance routine are worth doing if the stain appears anywhere below or adjacent to the unit.
Hard water is a related but different issue. Mineral-rich water does not cause ceiling leaks, but it can accelerate corrosion in pipes and fittings, which eventually leads to pinhole leaks. If your home has hard water, understanding treatment options can reduce long-term plumbing risk, and a EcoWater vs Culligan softener comparison is a reasonable starting point for evaluating whether a softener makes sense.
Once the source is identified, repair it before touching the drywall. Allow the affected area to dry thoroughly, because installing a patch over damp framing traps moisture and invites mould.
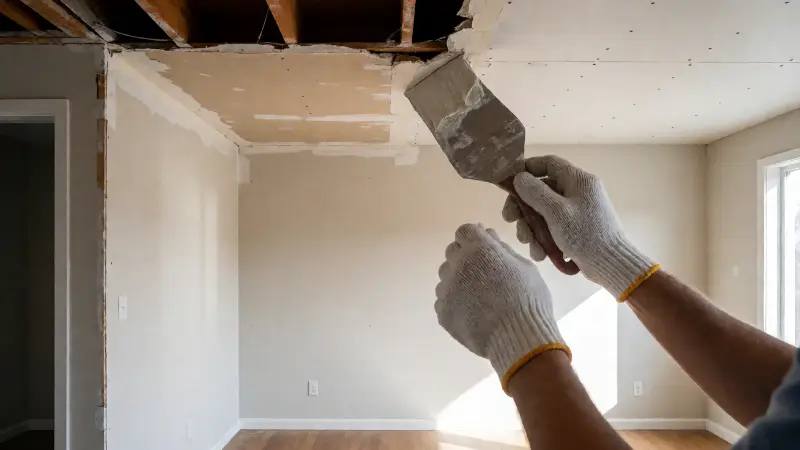
Step Two: Assess the Extent of the Damage
Not every stain requires a full panel replacement. Sorting the damage into categories helps you choose the right repair approach and avoid unnecessary work.
Surface Staining Only
If the drywall is firm, dry, and intact, and the stain is purely cosmetic, a stain-blocking primer and paint may be sufficient. The key is using a primer formulated to block water-soluble stains. Ordinary paint will allow the stain to bleed through, often within days.
Soft, Crumbling, or Sagging Areas
If the core has softened or the panel sags, replacement is the reliable option. Cutting out the affected area and installing new drywall restores both appearance and structure. Attempting to skim over a soft section rarely holds.
Mould Contamination
Visible mould growth changes the scope. Small areas of surface mould on a firm panel can sometimes be cleaned and treated, but extensive growth, especially on the back of the drywall or in the framing cavity, usually means removal. Mould on the back face cannot be cleaned effectively while the panel stays in place.
Large or Multiple Wet Areas
When a significant portion of a ceiling has been saturated, replacing the whole ceiling plane is often more efficient than piecing together multiple patches. A single new panel produces a cleaner finish and fewer seams to hide.
Step Three: Gather the Right Tools and Materials
Working overhead changes the tool list compared with a wall repair. Reaching, holding, and fastening panels above your head is physically demanding, and the wrong tools make it harder.
- Drywall saw or oscillating multi-tool: For cutting out damaged sections cleanly.
- Utility knife: For scoring and trimming.
- Drywall panels: Match the thickness of the existing ceiling, commonly available in several standard thicknesses.
- Drywall screws: Sized to suit the panel thickness and joist depth.
- Joint compound: All-purpose or lightweight compound for taping and finishing.
- Paper joint tape: Or mesh tape, each with different working characteristics.
- Drywall lifter or T-brace: To hold the panel in place while you fasten it.
- Corner trowel and taping knives: Several widths for building up thin coats.
- Sanding block and pole sander: For levelling the finished joint.
- Stain-blocking primer: Shellac or oil-based, for residual staining.
- Ceiling paint: Matched to the existing sheen and colour.
- Personal protective equipment: Dust mask, eye protection, and gloves.
Matching the panel thickness matters because a thicker or thinner patch creates a visible step at the joint. If you cannot identify the thickness, measure at an edge or at an existing cutout.
Step Four: Remove the Damaged Material
Mark out the area to be removed, extending the cutout beyond the visibly damaged material to sound drywall. Water travels, and the boundary between wet and dry is not always visible from the surface.
Use a straightedge to mark clean, square lines. Square cuts are easier to patch and produce cleaner joints than irregular shapes. Cut along the lines with a drywall saw, controlling the depth so you do not damage wiring or plumbing above.
Remove the panel carefully, then inspect the cavity. Look for signs of ongoing moisture, mould growth on the framing or the back of adjacent panels, and any damaged wiring or pipe insulation. This inspection is a key benefit of opening the ceiling, because it reveals problems that a surface patch would conceal.
If the framing is damp, allow it to dry before closing the ceiling. Fans and dehumidifiers speed this process. Do not proceed while the wood feels damp to the touch.
Cut the new patch from the same thickness of drywall. Test fit it before fastening, trimming as needed for a snug but not forced fit. A patch that is too tight can crumble at the edges, while one that is too loose leaves a wide gap to fill.
Step Five: Install the Patch
Fastening a ceiling patch is easier with two people or with a support. A drywall lifter or a simple T-brace made from lumber holds the panel against the joists while you drive screws.
Drive drywall screws at regular intervals along the joists, spacing them according to standard practice for the panel thickness. Set the screw heads slightly below the surface without breaking the paper face. Overdriving crushes the gypsum core and weakens the hold, while underdriving leaves bumps that show through the finish.
If the patch spans a joist that runs parallel to the cut edge, you may need to add blocking or a backer board to support the edge. A floating edge with no support will crack along the joint.
Recessed light fixtures, vents, and other penetrations need to be accounted for. Cutting around a recessed fixture requires care and, in some cases, a fire-rated enclosure. Never cover a fixture that requires clearance, and never bury a junction box behind drywall.
Step Six: Tape, Mud, and Finish the Joints
Finishing is where the repair succeeds or fails visually. The goal is a joint that disappears under paint, with no ridges or hollows that catch light.
Apply a thin bed of joint compound over the joint, then embed the tape while the compound is still wet. Press the tape firmly so it bonds, and smooth it with a knife to remove excess compound. Paper tape is stronger but less forgiving for beginners, while mesh tape is easier to embed but slightly weaker.
After the first coat dries, apply a second, wider coat that feathers beyond the tape edges. Then apply a third coat, wider still. Building up thin coats and feathering the edges is what makes the joint invisible. Thick coats shrink, crack, and create ridges.
Allow each coat to dry fully before the next. Drying time depends on humidity, temperature, and coat thickness. Rushing the process traps moisture and causes problems later.
Sand lightly between coats to remove ridges and nibs. Use a pole sander to reach the ceiling comfortably, and wear a dust mask. Over-sanding can scuff the paper face and create a fuzzy texture that shows through paint.

Step Seven: Prime and Paint the Ceiling
Priming is not optional after a water repair. Joint compound is porous and absorbs paint unevenly, which causes flashing, a patchy appearance where the repaired area reads differently from the surrounding ceiling.
Use a primer that seals the compound and blocks any residual staining. Shellac-based and oil-based stain blockers are effective for water stains, while water-based primers are easier to clean up but may not block severe discolouration.
When painting, extend the finish beyond the repaired area to a natural break, such as a wall line or a change in ceiling plane. Blending a patch into the middle of a large ceiling often leaves a visible boundary because paint sheen and colour can vary slightly across the surface.
Match the existing sheen. Ceilings are often painted in a flat or matte finish to hide imperfections, and using a different sheen will make the repair obvious even if the colour matches.
Comparing Repair Approaches by Damage Level
The table below summarizes which repair strategy suits which level of damage. The categories are guidance rather than rules, and the final decision depends on what you find when the ceiling is opened.
| Damage Level | Typical Signs | Recommended Approach | Relative Effort | Notes |
|---|---|---|---|---|
| Cosmetic staining only | Discolouration, dry and firm surface | Stain-blocking primer and paint | Low | Confirm the source is fixed and the panel is fully dry |
| Minor soft spot | Small area of softened core, no sag | Cut out the spot and install a small patch | Low to moderate | Extend the cutout to sound material |
| Moderate damage | Delaminated paper, crumbling core, isolated mould | Replace the affected panel section | Moderate | Inspect framing and treat mould if present |
| Sagging ceiling | Visible bowing, spongy feel, cracked joints | Replace the panel and check joists for damage | Moderate to high | Address any structural cause before closing |
| Extensive or repeated leaks | Multiple stains, widespread mould, long-term moisture | Replace the full ceiling plane | High | Fewer seams, cleaner finish, easier to verify repair |
| Textured ceiling repair | Any damage on a textured surface | Patch, then match texture | Moderate to high | Texture matching is difficult and sometimes impractical |
Safety Concerns You Should Not Ignore
Ceiling work involves overhead dust, potential contamination, and sometimes hazardous materials. Taking a few precautions protects both you and the repair.
Older homes may have asbestos in ceiling textures, joint compound, or insulation. Disturbing these materials releases fibres that can be hazardous when inhaled. If your home was built or renovated during a period when asbestos was commonly used, and you are unsure about the ceiling material, have a sample tested before cutting.
Popcorn and other textured ceilings are a particular concern because the texture may contain asbestos. If you have already disturbed a textured ceiling and are worried about exposure, guidance on asbestos popcorn ceiling removal risks explains what steps to take next.
Electrical hazards are the second major concern. Ceiling cavities contain wiring, junction boxes, and recessed fixtures. Shut off power to the area at the breaker before cutting, and verify with a tester. Never cut blindly into a cavity where wiring may run.
Mould is the third concern. Disturbing mouldy drywall releases spores into the air. Contain the work area with plastic sheeting, wear respiratory protection, and avoid spreading contamination to other rooms. If the mould coverage is extensive, professional remediation is the safer route.
Finally, working overhead is physically taxing. Use a sturdy stepladder or scaffold rather than stretching from a chair, and take breaks. Falls from height are a leading cause of home improvement injuries.
Matching Ceiling Texture
Many ceilings have a texture applied to them, and matching that texture is often harder than repairing the drywall itself. Common textures include popcorn, orange peel, knockdown, and a light stipple.
Orange peel and light stipple can sometimes be approximated with an aerosol texture product and careful technique. Knockdown requires a specific sequence of spraying and dragging a knife across the surface. Popcorn texture is very difficult to match invisibly, and many homeowners choose to scrape and refinish the entire ceiling instead of attempting a spot match.
If you decide to remove texture rather than match it, test for asbestos first. Scraping a textured ceiling without testing is risky in older homes.
Practice the texture technique on a scrap piece of drywall before applying it to the ceiling. Texture is difficult to undo, and a failed attempt means sanding the area back down and starting again.
Preventing the Problem From Returning
Prevention is the most valuable part of a ceiling repair. The patch itself is straightforward once you know how, but the conditions that caused the damage will do it again if left unaddressed.
- Maintain the roof: Inspect flashing, valleys, and penetrations periodically, and repair damaged shingles promptly.
- Clear gutters: Blocked gutters and downspouts push water into places it should not go.
- Check plumbing: Address slow drips under sinks, around toilets, and at appliance connections before they become ceiling stains.
- Service water heaters: Inspect fittings and the relief valve, and watch for corrosion at the tank base.
- Insulate and ventilate: Reduce condensation on cold pipes and ductwork in attics and crawl spaces.
- Prevent ice dams: Improve attic insulation and ventilation so snowmelt does not back up under the roof edge.
- Ventilate bathrooms: Run exhaust fans long enough to clear moisture, and confirm they vent to the exterior.
- Monitor in cold snaps: Check for new stains after heavy rain, snow melt, or hard freezes.
Catching a leak early usually means a cosmetic repair rather than a panel replacement. A small investment in routine inspection saves considerably more than the cost of repeated ceiling repairs.
FAQ
Can I just paint over a water stained ceiling?
You can paint over a stain if the drywall is dry, firm, and structurally sound. You need a stain-blocking primer first, because ordinary paint allows the stain to bleed through. If the panel is soft or sagging, painting will not fix the underlying problem.
How do I know if ceiling drywall needs to be replaced?
Press gently on the area. If it feels soft, spongy, or crumbles, replacement is the reliable option. Visible sagging, cracked joints, or widespread mould also point toward replacement rather than a surface repair.
Do I need to remove all the damaged drywall or just the stained part?
Cut back to sound material rather than stopping at the visible stain. Water travels beyond the discolouration, and the boundary between wet and dry is not always obvious. Extending the cutout slightly gives you a solid edge for the patch.
How long should I wait for the ceiling to dry before patching?
The framing and surrounding drywall should feel dry to the touch before you close the cavity. Drying time depends on humidity, airflow, and how wet the assembly became. Fans and dehumidifiers speed the process considerably.
What kind of primer blocks water stains?
Shellac-based and oil-based stain-blocking primers are the most effective for water discolouration. Water-based primers are easier to clean up but may not block severe stains. Applying two coats of a quality stain blocker is often worthwhile.
Can I repair a water damaged ceiling myself?
Many homeowners can handle a small patch, particularly if the damage is limited and the ceiling is not textured. Larger replacements, textured ceilings, mould contamination, and any work involving asbestos require more care and sometimes professional help.
How do I match ceiling texture after a repair?
Matching texture is one of the hardest parts of a ceiling repair. Aerosol products can approximate orange peel and light stipple, but popcorn and knockdown are difficult to reproduce invisibly. Practising on scrap drywall before applying texture to the ceiling improves the result.
Should I be worried about asbestos in my ceiling?
Older textured ceilings and some joint compounds may contain asbestos. Testing a sample before cutting or scraping is the safe approach. If you have already disturbed a suspect ceiling, avoid further disturbance and seek professional guidance.
Will my insurance cover a water damaged ceiling repair?
Coverage depends on the cause and your policy terms. Sudden accidental discharges are often covered, while damage from neglected maintenance may not be. Document the damage, keep receipts, and contact your insurer before starting work if you intend to claim.
Repairing a water damaged drywall ceiling is a sequence of small, careful steps rather than one difficult task. Stop the leak, confirm the damage is dry and sound, cut back to good material, and finish the joint in thin coats. Get the moisture source fixed and the patch will last. Skip that step and the stain will be back before the paint has fully cured.