If your toilet flange sits 1/2 inch above the finished floor, you must either raise the base with shims, or cut the pipe to lower it. Ignoring a raised flange causes the toilet to rock constantly. This movement quickly destroys the fragile wax ring seal. Eventually, this leads to severe water leaks and costly floor damage. Choosing the right repair method depends on your skill level.
Homeowners often discover this height mismatch after completing a new bathroom tile installation. The standard rule dictates that a flange should sit completely flush with or directly on top of the finished floor. When the pipe extends a full half-inch higher, the porcelain base cannot make contact with the floor. The fixture teeters on the plastic pipe instead of resting safely on the tiles.
Fixing a high plumbing connection does not always require you to rip open your freshly laid floors. Several strategic methods exist to securely bridge this gap without compromising the watertight seal. Understanding the mechanics of your specific toilet model can reveal surprisingly simple workarounds. You can choose structural shimming, custom plinths, or internal pipe adjustments to solve this.
Why a Toilet Flange 1/2 Above Floor Causes Major Problems
A toilet flange extending 1/2 inch above the floor is a massive plumbing liability. The flange is designed to anchor the fixture and provide a reliable transition into the waste line. When it sits too high, it physically prevents the ceramic bowl from touching the ground. This unbalanced state puts intense stress on the structural components of the fixture.
The Mechanics of the Rocking Toilet
Every time you sit on an improperly seated toilet, your body weight shifts the fixture. The ceramic base acts like a seesaw pivoting precisely on top of the elevated plastic flange. Even a tiny fraction of an inch of clearance causes a noticeable, unnerving wobble. This rocking motion is the primary catalyst for all subsequent plumbing failures in the bathroom.
Tightening the floor bolts will never stop a toilet from rocking on a high flange. Many homeowners mistakenly overtighten these brass bolts in a desperate attempt to stabilize the bowl. This incorrect approach applies massive torque directly to the fragile ceramic mounting ears. Instead of securing the fixture, you risk instantly cracking the expensive porcelain base.
The Inevitable Wax Ring Failure
Wax rings rely entirely on steady, uniform compression to maintain a watertight barrier. The constant shifting of a rocking toilet rapidly distorts and flattens this pliable wax seal. Once the wax is deformed, it never springs back to its original shape. This creates microscopic gaps where wastewater can quietly escape during every single flush.
The resulting leaks from a compromised wax ring are rarely visible right away. The water usually seeps directly downward into the wooden subfloor rather than pooling on the tiles. Over months, this hidden moisture silently rots away your structural floor joists. You might only notice the problem when the ceiling below starts showing mysterious water stains.
The Hidden Dangers of Sewer Gases
Water damage is only one consequence of a broken wax seal caused by a high flange. The gap also allows toxic sewer gases to travel freely from the waste pipe into your home. These noxious fumes contain methane, hydrogen sulfide, and harmful airborne bacteria. Breathing in these lingering bathroom odors poses a legitimate health risk to your family.
If your bathroom constantly smells like a sewer despite frequent cleaning, the seal is broken. Many people try to mask this odor with air fresheners without fixing the core issue. Diagnosing this requires removing the fixture and inspecting the compressed wax layer. Addressing a flange that sits exactly a 1/2 inch above the floor is the only permanent cure.
The Risk of Cracked Porcelain Bowls
Toilets are constructed from dense, rigid vitreous china that possesses zero flexibility. When a heavy person sits on a bowl suspended slightly above the floor, the ceramic flexes. This unnatural bending force concentrates directly at the anchor bolt locations. Eventually, the brittle porcelain will fracture violently under the continuous pressure.
A cracked toilet bowl is completely unrepairable and requires immediate replacement. This sudden failure can cause a catastrophic flood if the tank water spills out simultaneously. Replacing a high-end fixture costs hundreds of dollars, far exceeding the price of a proper flange repair. Addressing the elevation issue early prevents this expensive plumbing disaster.
How to Accurately Diagnose Your Flange Height Issue
Understanding the exact nature of your plumbing setup is crucial before attempting any repairs. You need to verify if the flange itself is the issue or if the flooring is simply uneven. A proper assessment prevents unnecessary damage to your expensive bathroom pipes. Taking precise measurements ensures you choose the most effective and safest repair method.
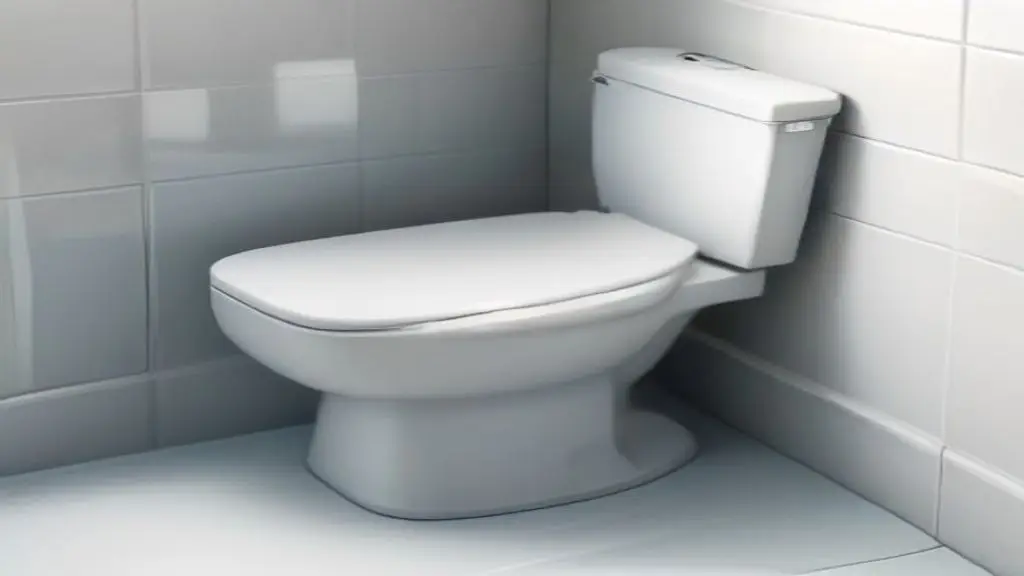
Measuring the True Flange Gap
Do not rely on a simple visual estimation when checking your specific flange height. Place a perfectly straight level across the top edge of the plastic or metal flange ring. Use a tape measure to calculate the exact distance from the floor tile to the bottom of the level. If this measurement reads exactly 1/2 inch, you have a significantly elevated drain pipe.
You must also measure multiple points around the perimeter of the circular fitting. Sometimes a waste pipe is installed at a slight angle, making one side much higher than the other. An angled flange complicates the repair process because the fixture will never sit plumb. Documenting these specific measurements guides your next critical structural decisions.
The Toilet Horn Recess Clearance Check
This is a critical expert step that most casual DIY tutorials completely ignore. Turn your disconnected toilet upside down and inspect the protruding ceramic waste horn. Lay a straight edge across the flat resting base of the porcelain fixture. Measure the depth from that straight edge down to the absolute lowest tip of the discharge horn.
Comparing these measurements reveals the true severity of your installation problem. If the porcelain recess is 5/8 inch deep, it will perfectly clear your 1/2 inch raised flange. The toilet will rest solidly on the floor without bottoming out on the plastic fitting. In this rare scenario, no massive plumbing modifications are actually necessary to stop wobbles.
Evaluating the Existing Pipe Material
The composition of your waste lines dictates which repair solutions are physically possible. Modern homes typically feature white PVC or black ABS plastic drain pipes. These synthetic materials are relatively easy to cut, sand, and glue from the inside. Conversely, older properties might have heavy cast iron pipes joined with poured lead and oakum.
Modifying a thick cast iron flange requires specialized grinding tools and extreme caution. Attempting to force modern plastic compression fittings into rusted iron can cause massive cracks. You must accurately identify your pipe material before purchasing any specialized internal cutters. This single step prevents hours of frustrating bathroom plumbing failures.
Assessing the Surrounding Subfloor
A raised flange might actually be a symptom of a severely sagging wooden subfloor. Inspect the surrounding tile or linoleum for noticeable dips, cracks, or sponge-like soft spots. If the wood beneath the flooring has rotted, the floor itself may have sunk away from the pipe. This creates the illusion that the plumbing has somehow magically moved upward.
Fixing a rotten floor requires completely removing the damaged joists and plywood sections. If you blindly cut the plumbing to match a sinking floor, you are hiding a structural failure. Much like calculating a basement parging cost to stop moisture, fixing rot prevents larger issues. Always ensure the bathroom floor is perfectly solid first.
Non-Destructive Fixes for a High Flange
Not every elevated pipe requires you to grab a saw and start slicing into your home’s plumbing. Several highly effective, non-destructive methods can safely absorb the height discrepancy. These surface-level solutions focus on raising the toilet fixture to meet the existing pipe. This approach is generally much safer for amateur DIY enthusiasts to attempt.
Method 1: The Grout and Shim Technique
Building a supportive platform using hard plastic shims is the most common industry fix. Dry-fit the toilet over the flange without any wax ring installed to test the wobble. Insert hard plastic composite shims evenly around the base until the fixture is completely rigid. Never use wooden shims in a bathroom because they will quickly absorb moisture and rot.
Once the toilet is perfectly level and stable, carefully trace the base with a pencil. Lift the fixture away and mix a batch of high-quality sanded floor grout. Apply a thick, continuous bed of grout just inside your traced pencil line on the floor. Carefully set the toilet back down onto the shims and the wet grout, bolting it tightly into place.
The sanded grout cures into a rock-solid, custom-molded foundation beneath the porcelain. This completely supports the fixture and entirely absorbs the problematic 1/2 inch gap. Smooth the excess grout around the exterior edges with a damp sponge for a clean finish. This creates a highly durable fix that looks far better than a massive bead of messy caulk.
Method 2: Crafting a Custom PVC Plinth
Installing a custom PVC plinth offers an elegant alternative to thick, unsightly grout lines. Trace your toilet base onto a sheet of waterproof PVC exterior trim board. Use a jigsaw to carefully cut out this exact shape to serve as a custom pedestal base. Cut a large access hole in the exact center to allow the waste pipe and flange to pass through.
This bespoke architectural plinth completely eliminates the 1/2 inch height difference instantly. Secure the PVC board directly to the tile floor using a premium waterproof construction adhesive. Set your wax ring and install the toilet directly on top of this newly raised platform. The result looks like a deliberate design choice rather than a frantic plumbing repair.
Method 3: Using a Thinner Rubber Gasket Alternative
Traditional thick wax rings can exacerbate the height issue by adding too much unnecessary bulk. If your toilet horn slightly clears the flange, a standard wax ring might still cause a wobble. Consider switching to a modern, wax-free foam or rubber compression gasket instead. These innovative seals compress much thinner than traditional wax, saving valuable space.
Products like the Sani-Seal or blue universal rubber gaskets are highly resilient. They can maintain a perfect airtight seal even if the spatial tolerances are exceptionally tight. Unlike wax, rubber seals will bounce back if the toilet shifts slightly during seating. This offers a margin of error that is incredibly helpful when dealing with elevated drain pipes.
Upgrading to a Deep-Recess Skirted Toilet
Sometimes the simplest solution is to change the specific toilet fixture completely. Many modern skirted toilets feature a totally different internal trapway and aesthetic design. These premium models often possess a much deeper recess cavity underneath the bowl base. This expanded hollow space can effortlessly swallow a flange sitting a full 1/2 inch above the floor.
While buying a new toilet is an investment, it saves hours of frustrating manual labor. You avoid the messy process of cutting pipes, mixing grout, or building custom pedestals. Always measure the clearance underneath the display models at the hardware store before buying. This smart swap provides a brand-new bathroom aesthetic alongside a reliable permanent fix.
Plumbing Fixes to Lower the Toilet Flange
If non-destructive methods are not viable, you must surgically lower the waste pipe itself. This requires a moderate level of plumbing expertise and a very steady hand. Lowering the connection ensures the fixture rests directly on the original finished flooring. This guarantees the most stable, flush, and traditional bathroom installation possible.
Cutting the Pipe from the Ceiling Below
The easiest way to lower a waste pipe is to access it from the unfinished room underneath. If you have an exposed basement ceiling below the bathroom, your job is drastically simplified. You can easily cut a small section out of the vertical PVC waste line. Using a standard rubber coupling, you can then rejoin the pipes lower down flawlessly.
This method allows you to pull the entire flange assembly downward until it hits the floor. Once the flange sits perfectly flush, you tighten the heavy-duty metal bands on the coupling. This process completely bypasses the need to work in cramped quarters above the floor. It is the preferred method for any licensed plumber dealing with accessible drain lines.
Using an Internal PVC Pipe Cutter
If you do not have basement access, you must cut the pipe from inside the bathroom. This requires a specialized tool known as an internal PVC pipe cutter attached to a drill. This small, abrasive disc lowers directly into the drain and cuts outward from the inside. You must carefully slice the pipe below the level of the existing concrete or wooden subfloor.
Operating an inside pipe cutter requires extreme caution to avoid dropping parts down the drain. Always stuff a large rag deep into the pipe below your cutting area to catch any debris. Cut slowly and keep the drill perfectly level to ensure a clean, straight edge. A jagged cut will make it incredibly difficult to securely glue the replacement plumbing fitting.
Installing a Push-in Replacement Flange
Once the old elevated pipe is removed, you must install a brand-new, lower connection. A Twist-N-Set or gasketed push-in replacement flange is the perfect DIY-friendly solution. These specialized fittings feature thick rubber ribs that slide tightly into the freshly cut pipe. They do not require any messy PVC primer or heavy-duty solvent cement to create a seal.
Simply push the ribbed cylinder downward until the outer lip rests flush on your tile floor. You can then secure the outer ring directly to the subfloor using masonry screws or heavy wood screws. This mechanical connection expands the rubber ribs outward, creating an impenetrable watertight barrier. This modern fitting makes intricate pipe repairs incredibly simple and fast.
Dealing with Cast Iron Flange Complications
Handling a cast iron pipe sticking 1/2 inch above the floor is a massive headache. You cannot easily cut heavy cast iron from the inside using a standard drill attachment. Often, the lead and oakum seal must be meticulously drilled, heated, and picked out by hand. This grueling process takes immense patience and specialized heavy-duty extraction tools.
If the cast iron is stubborn, you might need to use an angle grinder with a diamond blade. You carefully grind the metal edge down until it is flush with the surrounding floor. Always wear a respirator, as cutting old plumbing creates dangerous metallic dust. Dealing with cast iron is frequently the exact moment when homeowners should call a professional.
The Financial and Structural Impacts of Flange Leaks
Ignoring a poorly fitted flange is a guaranteed recipe for disastrous home damage. Water constantly seeks the path of least resistance, which is typically straight into your joists. Understanding the potential financial fallout highlights the urgency of repairing a wobbly fixture. Acting quickly will save you thousands of dollars in emergency home restoration.
Comparing Costs of High Flange Repairs
The materials needed for surface-level shimming and grouting rarely exceed thirty dollars. Purchasing a specialized internal pipe cutter and push-in flange might cost around fifty dollars. These inexpensive DIY solutions are incredibly budget-friendly if executed correctly. A little bit of manual labor yields massive savings compared to professional plumbing hourly rates.
Conversely, hiring a licensed plumber to lower the pipe internally costs significantly more. Professional rates for this specific task usually range from three to five hundred dollars. While pricey, you are paying for guaranteed workmanship and essential liability insurance. This peace of mind is often worth the expense when dealing with critical sanitation infrastructure.
Subfloor Rot and Water Damage Risks
A leaking wax ring will quietly saturate your wooden subfloor with raw sewage water. Plywood quickly acts like a sponge, absorbing this moisture until it severely swells and rots. Eventually, the floor will completely lose its structural integrity and begin to cave in. The toilet could literally crash through the floor into the room located directly below.
Repairing a rotten subfloor requires a complete demolition of the entire bathroom layout. You must rip up the pristine tiles, remove the vanity, and replace the foundational joists. Just as you worry if drywall can get wet during delivery, you must fiercely protect floors from water. Prevention is the key to avoiding these massive remodeling bills.
When to Hire a Licensed Plumber
Certain warning signs indicate that a DIY flange repair is no longer a viable option. If you notice massive water stains on your downstairs ceiling, the damage is already extensive. If your pipe is heavily corroded cast iron, modifying it yourself is incredibly risky. These severe situations require the specialized training of a certified plumbing contractor.
A plumber can accurately assess if the main waste stack has shifted inside the walls. Sometimes a raised flange indicates a much larger foundational settling issue in the property. They have the advanced diagnostic cameras needed to inspect the hidden underground lines. Investing in their expertise prevents minor symptoms from becoming catastrophic property failures.
| Repair Method | Difficulty Level | Estimated Cost | Best Use Case |
|---|---|---|---|
| Grout and Shims | Beginner | $15 – $30 | Minor wobbles where the toilet horn completely clears the raised pipe. |
| Custom PVC Plinth | Intermediate | $40 – $60 | Homeowners wanting a clean, architectural look without using thick grout. |
| Internal Pipe Cut | Advanced | $50 – $80 | PVC pipes that absolutely must be lowered flush with the tile surface. |
| Deep-Recess Toilet | Beginner | $250 – $500 | Bathroom remodels needing a new fixture without complex plumbing cuts. |
| Professional Plumber | N/A | $300 – $600 | Corroded cast iron pipes or severe structural subfloor moisture damage. |
Preventing Flange Height Errors During Remodels
The best way to handle a problematic flange is to prevent the issue from occurring initially. Most elevation problems stem from simple miscalculations during the flooring installation phase. Carefully planning your material layers ensures your plumbing aligns perfectly with the final floor. A strategic approach during rough-in saves endless headaches down the structural line.
Accounting for Tile and Mortar Thickness
Many DIYers install the closet flange directly onto the bare plywood subfloor before tiling. When they add thick cement board, heavy thinset mortar, and large format tiles, the floor rises. Suddenly, the once-perfect flange is buried far too deeply beneath the finished surface. However, if they overcompensate and raise the pipe too high, you get the 1/2 inch gap.
You must calculate the exact cumulative thickness of your planned flooring materials beforehand. If your cement board and tile equal 3/4 of an inch, set your pipe elevation accordingly. The absolute ideal scenario is placing the flange completely on top of the final tile surface. Securing it directly over the finished floor guarantees a perfect, watertight wax compression.
Proper Rough-in Measurements
Accurate rough-in plumbing requires strict adherence to universal standard building codes. The center of the waste pipe must be exactly 12 inches away from the finished drywall. The vertical height must be left intentionally long until the very final stages of the remodel. Never permanently glue the flange until the bathroom floor is completely finished and grouted.
Leaving the pipe unglued allows you to make minute adjustments at the very last second. You can dry-fit the flange repeatedly to ensure the vertical elevation is flawlessly flat. Proper preparation is essential, much like installing a wrt318fzdw09 ice maker kit where tiny details matter. Taking your time prevents permanent glued structural mistakes.
Choosing Adjustable Flange Systems
Modern plumbing technology offers incredible adjustable solutions for unpredictable bathroom remodels. Stainless steel adjustable rings allow you to rotate the bolt slots after the glue dries. Some advanced PVC models feature telescoping necks that slide up and down before locking. Utilizing these forgiving materials provides an excellent safety net for amateur pipe installers.
Selecting the right parts drastically reduces your overall margin for dangerous error. Avoid cheap, all-plastic flanges because the thin mounting slots frequently snap under pressure. Always opt for a premium model featuring a heavy-duty, corrosion-resistant stainless steel ring. This durable hardware ensures your toilet remains firmly anchored for decades to come.
Finalizing Your Bathroom Upgrades Safely
Completing a bathroom renovation requires immense attention to very fine, hidden plumbing details. The toilet connection is arguably the most critical junction in the entire plumbing system. A flange sitting 1/2 inch above the floor is not a minor cosmetic annoyance to be ignored. It is a severe structural hazard that demands your immediate and careful attention.
Take the time to properly measure your clearances, evaluate your pipes, and choose a solid fix. Whether you meticulously build a supportive grout bed or completely cut the internal pipe, do it right. Securing your fixture permanently eliminates the anxiety of hidden water damage and odors. A perfectly seated toilet ensures a safe, pristine, and highly functional home.