Roofing projects demand strict adherence to manufacturer guidelines. Many homeowners wonder if leftover materials can save time and money. No, you cannot use architectural shingles for starter strips because their uneven thickness causes bulges and prevents a wind seal. Attempting this shortcut compromises the roofing system. A secure perimeter is essential for weather protection.
Why Architectural Shingles Fail as Starter Strips
Dimensional roofing features a dual-layer design for aesthetic appeal and enhanced durability. This specific construction makes them unsuitable for perimeter foundation duties. Using them at the eaves creates immediate structural and functional conflicts. Understanding roof perimeter mechanics explains why this fails. Professionals actively avoid this dangerous scenario on job sites.
The Problem with Laminated Thickness
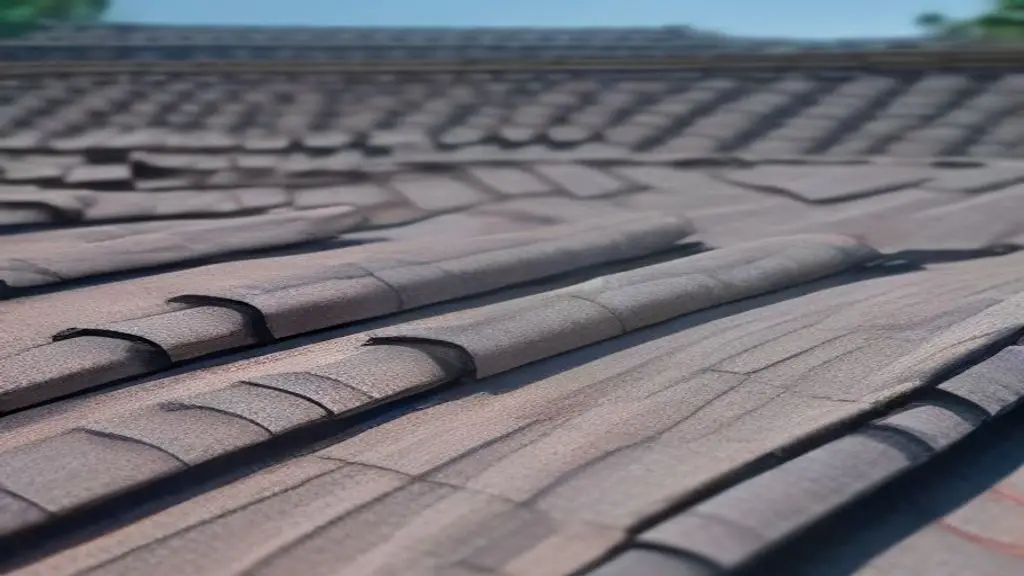
Architectural products have a double-thick lower half to mimic cedar shakes. If placed at the edge as a base layer, this thickness creates a massive hump. The actual first course installed over it will not lay flat against the deck. This telegraphing effect ruins the visual lines of your home. It also leaves gaps where driving rain can penetrate the underlayment.
Misalignment of the Critical Sealant Strip
The tar sealant bead is the most important feature of a starter course. Dedicated rolls have this adhesive positioned exactly at the bottom edge. When modifying dimensional pieces, the factory tar line rarely aligns correctly. Without this crucial bond, the leading edge of your roof remains vulnerable. High winds will easily catch unsealed edges and tear them off.
Manufacturer Warranties and Code Violations
Roofing warranties contain strict clauses regarding approved installation methods. Using improper base materials instantly voids protections against wind damage. Building codes also require materials to follow factory specifications. An inspector will flag this improper installation during a standard review. You will be forced to tear off the edges and redo the labor.
What Happens If You Already Used Them?
Discovering incorrect materials on your roof perimeter is a stressful realization. Many DIYers make this mistake to save a few dollars during installation. The consequences manifest quickly, especially during the first storm season. Identifying signs of failure early can save you from catastrophic water damage. Ignoring these warning signs will eventually rot your roof decking completely.
Identifying Cosmetic Bulges and Telegraphing
The most obvious sign of this error is a distinct wave at the roofline. Stand back and look closely at the bottom row of your eaves. If the first row tips upward unnaturally, you likely have bulky materials underneath. Just as a flat base is needed for self-leveling concrete over asbestos tile, flat roofs are vital. Uneven bases ruin structural integrity entirely.
Assessing Wind Uplift Risks at the Eaves
The eaves endure the highest wind uplift pressures on your entire house. Without a proper tar seal at the very edge, wind gets trapped beneath. You might notice the bottom row flapping slightly during heavy gusts. Over time, this constant movement bends the fiberglass mat and cracks the asphalt. Complete blow-off of the lower sections is inevitable under these conditions.
Water Infiltration and Capillary Action
Gaps created by bulky under-layers invite a physics phenomenon called capillary action. Water travels upward against gravity through tight, uneven spaces. This moisture bypasses the drip edge and rots the wooden fascia boards. A failing roof perimeter leads to severe attic moisture. This can even trigger HVAC faults like a Goodman E3 code due to sensor damage.
The Best Alternatives for Starter Courses
Professional roofers never risk their reputation by cutting corners on foundations. There are several correct methods to establish a secure, weather-tight perimeter. Selecting the right product ensures your roof withstands high winds effectively. Let us explore the most reliable options available at any improvement store. These proven alternatives guarantee structural safety long-term.
Dedicated Manufacturer Starter Strips
Pre-cut starter rolls are the industry standard for modern roofing installations. They are manufactured specifically to match dimensional roofing thickness. The tar line is perfectly positioned to grab the bottom edge of overlying courses. These rolls are relatively inexpensive and drastically speed up the process. They also guarantee full compliance with your warranty terms.
Repurposing 3-Tab Shingles Correctly
If you are in a bind, traditional 3-tab products serve as an excellent substitute. You must cut off the lower tabs, leaving only the top rectangular portion. Ensure the sealant strip faces upward and sits directly at the eave. Because 3-tabs have uniform thickness, they will not cause bulging issues. This is a classic roofer technique that remains code-compliant.
Roll Roofing as an Emergency Substitute
In some regional markets, contractors use heavy-duty roll roofing for bases. You cut the roll into appropriate widths and apply roofing cement. While effective, it requires more labor and careful adhesive application. It lacks the precision factory tar line found on modern pre-cut rolls. It should only be used if factory products are completely unavailable locally.
How to Install Proper Starter Strips Step-by-Step
Correct installation is just as important as choosing the right material. A flawless perimeter provides the template for the rest of your roof. Even minor misalignments at the bottom magnify as you work upward. Follow these crucial steps to ensure maximum wind resistance and perfect visual lines. Skipping any of these preparation steps compromises the entire edge.
Preparing the Drip Edge and Underlayment
Always install a quality metal drip edge before placing any asphalt products. Ice and water shield should overlap the metal edge to prevent ice dam leaks. Ensure your attic ventilation or de-icing wiring is fully prepped now. If installing heat cables, knowing how to splice 6 gauge wire ensures safety. A clean, smooth substrate is totally non-negotiable.
Positioning the Sealant Strip Correctly
Unroll or place your starter sections entirely flush with the drip edge. The factory-applied tar line must be positioned closest to the eave edge. This orientation ensures the first full course bonds tightly against wind. Ensure an overhang of about a quarter-inch past the existing drip edge. This exact overhang guides rainwater directly into the gutters safely.
Nailing Patterns for Maximum Wind Resistance
Pro-Tip for Fastening: Fasten the base layer using four to five galvanized roofing nails per section. Keep nails positioned three to four inches up from the leading eave edge. Never place a nail directly through the tar sealant strip under any circumstance. Keep all nail heads perfectly flush with the protective mat surface. Over-driven nails will tear the fiberglass backing entirely.
Comparison of Common Roofing Starter Materials
Choosing the right base layer involves balancing cost, labor, and warranty protection. While dedicated rolls are superior, comparing them provides valuable perspective. This table breaks down key differences between common materials found on job sites. Use this specific data to make an informed decision for your next exterior home project. Visualizing these factors prevents poor purchasing choices.
| Material Type | Thickness Profile | Factory Sealant Position | Warranty Compliance |
|---|---|---|---|
| Dedicated Starter Roll | Perfectly Uniform | Precise Eave Edge | Fully Compliant |
| Cut 3-Tab Shingle | Uniform | Correct Alignment | Compliant if cut correctly |
| Architectural (Dimensional) | Highly Uneven | Misaligned completely | Instantly Voids Warranty |
| Heavy-Duty Roll Roofing | Uniform | Requires manual cement | Varies by Manufacturer |
The Hidden Costs of Roofing Shortcuts
Homeowners often seek cheaper methods when replacing aging exterior materials. However, taking shortcuts on structural base layers creates massive financial risks. The initial savings of reusing leftover materials vanish during the first major storm. Exploring these hidden expenses reveals why professional adherence is absolutely critical. Fixing edge mistakes is incredibly expensive later.
Increased Labor for Future Repairs
Fixing an improperly installed perimeter requires delicate and intensive labor. Contractors cannot simply rip off the edge without damaging the courses above it. Workers must carefully pry up sealed layers to remove the bulky base material. This slow process drastically increases the hourly labor rates for basic repairs. You end up paying double for the same square footage.
Reduced Lifespan of the Entire Roof
A roofing system functions as a cohesive shield against environmental elements. When the eave edges fail, moisture infiltrates the lower decking boards rapidly. This trapped dampness causes the plywood underneath to warp and delaminate prematurely. As the decking rots, it pulls the overlying nails out of their structural positions. The entire lifespan of your roof drops drastically.
Potential Liability and Insurance Denials
Homeowner insurance policies mandate that structures meet basic local building codes. If an adjuster discovers faulty base materials during a damage inspection, problems arise. Insurance companies routinely deny payout claims for wind damage on improper installations. You become fully liable for all structural water damage inside the living spaces. This financial burden is enormous.
Understanding Roof Wind Ratings and Aerodynamics
The physics of severe weather play a massive role in exterior home design. Wind does not simply push down on your house during a heavy storm. It creates complex aerodynamic forces that attempt to pull materials away violently. Understanding these pressure systems highlights the true purpose of strict edge sealing. Improper materials simply cannot resist these incredible natural forces.
How Wind Interacts with Roof Edges
High-speed gusts hitting exterior walls are forced upward toward the roofline. This rushing air creates an intense localized updraft directly beneath the eaves. If the bottom course is not sealed flat, this updraft gets underneath the material. The trapped air acts like a parachute, violently lifting the asphalt upward. This constant flexing quickly destroys the fiberglass core.
The Role of the Starter Strip Sealant
The thermal sealant strip is a specialized adhesive activated by solar heat. It bonds the overlapping layers together into one solid, wind-resistant membrane. Dedicated base rolls position this adhesive at the exact point of maximum wind pressure. Without this bond acting as an anchor, the sheer force of a storm prevails. Even heavy-duty architectural products will eventually snap.
Preventing Negative Pressure Failures
Wind sweeping over the top of a roof creates extreme negative pressure zones. This phenomenon functions exactly like airplane wings generating aerodynamic lift. The suction pulls aggressively on every single overlapping seam across the deck. A properly sealed perimeter acts as the primary lockdown mechanism against this suction. Without it, the domino effect of shingle loss begins quickly.
Common Myths About Asphalt Shingle Installation
The construction industry is filled with outdated advice and dangerous misconceptions. DIY forums often propagate techniques that violate modern building regulations entirely. Sorting through these stubborn myths requires reviewing actual engineering data and manufacturer notes. Let us debunk the most pervasive falsehoods regarding asphalt installations. Relying on facts prevents failures.
Myth: Thicker Materials Always Mean Better Protection
Many believe using thicker architectural pieces at the edge adds strength. They assume extra asphalt layers translate to better structural wind resistance. In reality, uneven thickness compromises the interlocking geometry of the entire system. Roofing materials are engineered to lay perfectly flat. Bulkiness creates dangerous air gaps instead.
Myth: Sealant Strips Activate Immediately in Cold Weather
Another common myth is that tar lines bond immediately after being nailed down. Actually, these thermal adhesives require continuous direct sunlight and heat to activate. During late autumn installations, the strips may not fully cure for several weeks. Using mismatched base materials prevents cold strips from ever making contact. A failed bond guarantees winter storm damage.
Myth: Manufacturer Guidelines are Just Suggestions
Stubborn contractors treat manufacturer installation manuals as optional suggestions. They rely on old school methods that worked fine for completely outdated materials. Modern architectural products utilize different chemical composites and structural geometries today. Ignoring the manual legally absolves the factory from replacing defective products. Always demand strict factory compliance.
Environmental Impact of Improper Roofing Techniques
Many property owners overlook the environmental consequences of failed exterior renovations. Poor installation practices lead to premature failure and excessive waste generation. When edges fail early, massive amounts of asphalt end up in local municipal landfills. Exploring these ecological impacts adds another reason to use the correct materials. Sustainable building relies heavily on long-lasting workmanship.
Landfill Burden from Premature Replacements
Asphalt shingles are a massive portion of construction waste nationwide. When roofs fail prematurely due to incorrect base layers, tons of material get discarded. Petroleum-based products take centuries to decompose in landfills. Doing the job correctly maximizes the lifespan of exterior materials. This choice reduces your overall carbon footprint dramatically.
Energy Loss and HVAC Inefficiency
A compromised roof edge damages protective insulation inside your attic. Once moisture penetrates the fascia, it crushes the R-value of fiberglass insulation. Wet insulation loses its ability to trap heat, forcing HVAC systems to work overtime. This inefficiency leads to higher monthly utility bills and increased electricity usage. Proper weather sealing keeps your home energy efficient.
Resource Waste in Material Manufacturing
Manufacturing new roofing requires massive amounts of raw petroleum and energy. When you replace a roof prematurely, you drive demand for more heavy industrial manufacturing. These production processes release significant greenhouse gases directly into the atmosphere. Preserving your existing roof through proper installation conserves natural resources. Excellent craftsmanship is genuinely eco-friendly.
Long-Term Maintenance of Properly Installed Edges
A correctly installed perimeter still requires basic annual maintenance to function flawlessly. Neglecting seasonal cleaning can eventually compromise even the best quality professional workmanship. Routine inspections catch minor issues before they become catastrophic structural failures. Following a consistent upkeep schedule guarantees your roof achieves its maximum factory lifespan. Preventive care always pays huge dividends.
Clearing Gutters to Prevent Water Backup
Clogged gutters ruin a healthy roof perimeter and wooden fascia boards. When leaves block downspouts, rainwater backs up against the leading shingle edge. Prolonged submersion breaks down strong thermal sealant bonds. Clean gutters twice yearly so water flows freely away from the roofline. Free-flowing drainage protects your entire structural investment.
Inspecting the Drip Edge for Rust and Deflection
The metal drip edge supports the starter strip and guides water into the gutter. Extreme temperature fluctuations can cause the metal flashing to warp or pull away. Inspect this edge annually for signs of heavy rust or outward physical deflection. If the drip edge pulls away, the starter row loses its rigid structural support entirely. Re-secure loose metal immediately using galvanized roofing nails.
Monitoring for Animal and Pest Intrusion
Birds and rodents seek shelter in the gaps beneath uneven roof edges. A flat, tightly sealed base layer prevents wildlife from gaining entry to your attic. Determined pests might attempt to chew through edge materials during cold winters. Inspect eaves with binoculars every spring to check for bite marks or nesting debris. Prompt pest removal prevents massive internal insulation damage.