A timer for holiday lights that stops working can leave your display dark at the wrong time or running all night. Most holiday light timers are simple devices, but they sit outdoors or in garages, they handle repeated cycling, and they are often asked to control loads that are lower than they expect. When the lights do not come on, the timer may be faulty, but the cause is often a power, programming, sensor, or connection issue that you can check yourself.
This guide explains how mechanical, digital, photocell, and smart timers work and why each type can fail. It gives a safe diagnostic sequence, covers load compatibility with LED strings, and explains moisture and corrosion problems. It also explains when replacing the timer is more sensible than repairing it.
How Holiday Light Timers Work and Why They Fail
A plug-in timer switches power to the lights according to a schedule. Mechanical timers use a motor-driven dial and movable pins or segments to set on and off times. Digital timers use a clock, a relay, and a display or app interface. Photocell timers use a light sensor to switch on at dusk and off at dawn. Smart plugs combine a timer with Wi-Fi control and app scheduling.
Each type has common failure points. Mechanical timers can suffer from a stalled motor, bent pins, or worn contacts. Digital timers can lose their clock setting after a power interruption or suffer a failed relay. Photocell timers can be confused by nearby lights, dirt, or shade. Smart plugs can lose Wi-Fi connection or fail after a firmware or app change. Understanding the type you have helps narrow the diagnosis.
Timers also have electrical limits. A timer rated for a certain current may not handle a large incandescent display, and some timers have a minimum load requirement that LED strings may not meet. If the timer clicks but the lights stay off, the relay may be switching but the contacts may be worn. If the timer does not click at all, the clock or control circuit may not be running.
Check the Outlet, GFCI, and Power Supply First
Before blaming the timer, confirm that the outlet is live. Plug a small lamp or a known-working device into the same outlet and switch it on. If the lamp does not work, the problem is upstream of the timer. Outdoor outlets are often protected by a GFCI receptacle or a GFCI breaker, and a tripped device will cut power to everything downstream.
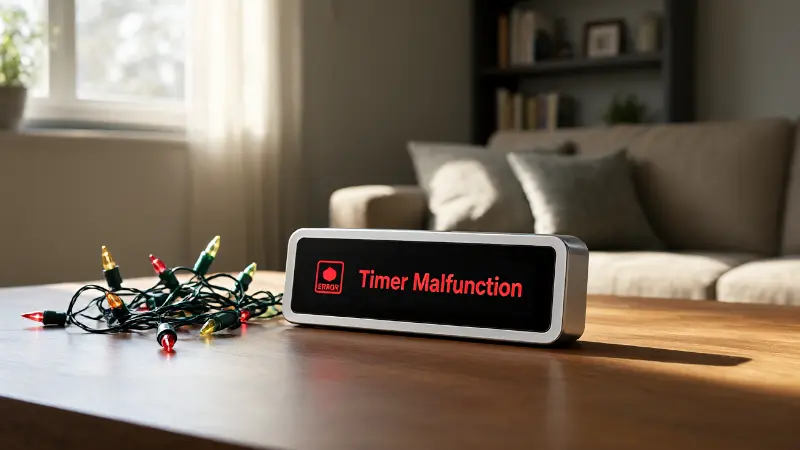
Reset a tripped GFCI once and observe whether it holds. If it trips again immediately, stop and investigate the connected equipment or call an electrician. Repeated tripping is a sign of a ground fault, not a timer programming problem. Also check whether the outlet is controlled by a wall switch or a circuit breaker that has been turned off. A switched outlet is a common reason a timer appears dead.
Inspect the timer’s plug and the outlet for corrosion, discoloration, or a loose fit. A plug that does not seat firmly can arc and overheat, and a corroded outlet can prevent the timer from receiving power. If the plug or outlet feels warm, smells burnt, or shows scorch marks, take the equipment out of service and have the outlet inspected. Do not use an adapter to force a poor connection.
Confirm the Timer Is Programmed Correctly
Digital timers can appear to be working while the schedule is wrong. Check the current time, the day of the week, and the on and off times. Confirm that the timer is in automatic mode rather than manual or random mode. Some timers have a manual override button that switches the output on or off until the next scheduled event, and it is easy to press it accidentally while plugging in the lights.
If the timer has a daylight saving time setting, confirm that it is correct for your area. A timer that is one hour off may switch the lights on after you have gone to bed or off before guests arrive. Check whether the timer uses a 12-hour or 24-hour clock and whether AM and PM are set correctly. A schedule that looks right at a glance can be wrong by twelve hours.
For mechanical timers, confirm that the pins or segments are set for the times you want and that the dial is rotating. A mechanical timer that has stopped rotating may have a stalled motor or a broken gear. If the dial can be turned by hand but does not advance on its own, the timer is likely faulty. Unplug it before turning the dial by hand, and do not force it past its stops.
Photocell and Dawn-to-Dusk Timer Problems
Photocell timers switch on when the ambient light drops. If the sensor is covered by dirt, snow, leaves, or a decoration, the timer may stay off because it believes it is still daytime. Clean the sensor window and clear any obstruction. If the sensor is in deep shade during the day, it may switch on early and run the lights longer than expected, which can shorten the life of the timer and the lights.
Nearby lights can also confuse a photocell. If another outdoor light shines directly into the sensor, the timer may switch off even though it is dark. If the sensor faces a reflective surface or a bright wall, the reflected light can have the same effect. Adjust the sensor orientation or move the timer to a location that sees natural daylight and darkness without interference from artificial light.
Some photocell timers have a sensitivity adjustment or a delay setting. A delay prevents brief shadows or passing car headlights from switching the lights. If the timer switches on and off repeatedly around dusk, check whether the delay is set too short or whether the sensor is being affected by a nearby light. If the sensor is cracked or water has entered the housing, replace the timer rather than attempting a repair.
Load Compatibility and LED Light Strings
Timers are rated for a maximum load, and exceeding that rating can cause the relay contacts to weld or fail. Add up the current drawn by all connected light strings and compare it with the timer rating. Incandescent strings draw more current than LED strings, and a large display can exceed the rating of a small timer even if the lights work when plugged directly into the outlet.
Some timers also have a minimum load requirement. The relay or switching circuit may need a certain current to operate reliably, and a small LED string may not draw enough. Symptoms can include flickering, failure to switch on, or the lights staying on after the timer should have switched off. If the timer is rated for a minimum load, adding a small compatible load or using a timer designed for LED loads can solve the problem.
Check that the timer is suitable for outdoor use if it is installed outside. A timer rated only for indoor use may fail when exposed to moisture or temperature extremes. Use a weatherproof enclosure or an outdoor-rated timer, and keep connections off the ground. If the lights fail after rain, review outdoor lights failing after rain before assuming the timer is at fault.
Moisture, Corrosion, and Outdoor Installation
Moisture is a common cause of timer failure outdoors. Water can enter through a poorly sealed cover, a damaged gasket, or a plug that is not fully engaged. Corrosion on the plug pins or the internal contacts can prevent power from reaching the lights. If you see green or white corrosion, water has been present, and the timer should be taken out of service.
Mount outdoor timers where water cannot pool around the outlet. Use a drip loop on the cord so that water runs away from the connection. Keep the timer above the ground and away from sprinklers, gutter downspouts, and areas where snow can bury it. A weatherproof box with a gasketed cover provides better protection than an exposed plug, but the cover must be closed properly after installation.
Cold weather can make plastic housings brittle and stiffen cords. Handle the timer carefully in freezing conditions, and do not force a plug into a stiff outlet. If the timer has been exposed to water, unplug it before touching the pins, and allow it to dry completely before testing. Do not open a sealed timer housing to dry it unless the manufacturer’s instructions specifically allow it.
Smart Plugs, Apps, and Wi-Fi Timers
Smart plugs and Wi-Fi timers add convenience but also more ways to fail. Check that the plug is connected to the correct Wi-Fi network and that the app shows the device as online. If the router has been replaced or the password changed, the plug may need to be reconnected. A plug that is offline may still have a local schedule, but some models rely on the cloud and will not switch without a connection.
Review the schedule in the app and confirm that it is enabled. Check for conflicting schedules, manual overrides, or an automation that turns the lights off after a set time. If the app has recently updated, review the device settings and permissions. A smart plug that clicks but does not power the lights may have a failed relay, while a plug that does not click may have lost power or failed internally.
Test the smart plug with a simple lamp before connecting the holiday lights. If the lamp works through the app, the plug and network are functioning, and the problem is likely with the lights, the load, or the connection. If the lamp does not work, focus on the plug, the outlet, and the app settings. Keep the plug’s firmware updated if the manufacturer provides updates, and follow the reset procedure if the device becomes unresponsive.
Wiring, Connections, and Damaged Light Strings
A timer can only switch power that reaches it. If the light string has a damaged plug, a broken connector, or a failed bulb section, the timer may click but the lights will stay dark. Test the lights by plugging them directly into a known-good outlet. If they work directly but not through the timer, the timer or its connection is suspect. If they do not work directly, the fault is in the lights or their wiring.
Inspect the connectors between strings for bent pins, corrosion, or a loose fit. A connector that is not fully engaged can cause intermittent operation that looks like a timer fault. If a string has been repaired, confirm that the repair is sound. Safe methods for splicing 3 wire holiday lights exist, but a taped twist is not a reliable connection and can overheat. Replace damaged strings rather than relying on temporary repairs.
Check the extension cord and any adapters between the timer and the lights. A cord that is too thin, too long, or damaged can cause voltage drop or an open circuit. If the timer is mounted high or in a difficult location, plan the cord route so that it is not pulled tight or pinched. When adjusting lights on the roofline, follow safe practices for hanging lights without roof damage and keep the ladder away from the timer and cords.
Safe Diagnostic Sequence for a Faulty Timer
Work through the checks in a logical order and keep the timer unplugged while you inspect it. Reconnect power only for brief tests, and do not stand on wet ground or touch metal surfaces while testing. If you are not comfortable working with outdoor electrical equipment, stop and call a qualified electrician.
- Confirm that the outlet is live using a lamp or another device.
- Reset a tripped GFCI once and check whether it holds.
- Verify the timer’s clock, day, schedule, and automatic mode.
- Check for a manual override or a random mode setting.
- Clean a photocell sensor and clear obstructions or nearby lights.
- Test the lights directly in the outlet without the timer.
- Inspect the timer plug, outlet, and connectors for corrosion or heat damage.
- Compare the connected load with the timer’s rating and minimum load.
- Test the timer with a simple lamp to confirm switching operation.
- Replace the timer if it fails the lamp test or shows moisture damage.
Comparison Table: Timer Symptoms and Likely Causes
| Symptom | Likely cause | Practical check |
|---|---|---|
| Timer display is blank | No power, dead battery, or failed timer | Test outlet; replace battery if applicable; test with lamp |
| Timer clicks but lights stay off | Worn relay contacts, loose connection, or faulty lights | Test lights directly; test timer with a lamp; inspect connectors |
| Lights stay on all the time | Manual override, welded relay, or incorrect schedule | Check mode and schedule; test timer with a lamp |
| Lights switch on and off at dusk | Photocell affected by nearby light or shadow | Clean sensor; reposition away from artificial light |
| Timer works intermittently after rain | Moisture in housing or corroded connections | Dry and inspect; replace damaged timer; improve weather protection |
| LED lights flicker or fail to switch | Load below timer minimum or incompatible timer | Check ratings; test with a small additional load or LED-rated timer |
Repair or Replace the Timer
Most consumer light timers are sealed units, and internal repair is not practical for a typical homeowner. If the timer fails a simple lamp test, shows moisture damage, or has a burnt smell, replacement is the sensible choice. Choose a timer rated for the load, suitable for outdoor use if needed, and compatible with LED strings if that is what you are switching.
If the timer is still under warranty, contact the retailer or manufacturer before opening or discarding it. Keep the receipt and note the model number. A replacement timer is often inexpensive compared with the time spent troubleshooting an intermittent internal fault. For a smart plug, a factory reset and reconnection may solve software-related problems before you replace the device.
After installing a replacement, test it with a lamp before connecting the full display. Confirm that the schedule works and that the timer switches the load on and off as expected. Then connect the lights and monitor the first few cycles. If the new timer also fails, the load or the wiring may be the underlying cause, and further investigation is warranted.
FAQ
Why does my timer click but the holiday lights do not come on?
A clicking timer usually means the clock and control circuit are working, but the relay contacts may be worn or the connection to the lights may be faulty. Test the lights directly in the outlet and test the timer with a lamp. If the lamp works and the lights do not, inspect the light string and connectors.
Can a timer be used with LED holiday lights?
Many timers work with LED lights, but some have a minimum load requirement that a small LED string may not meet. Check the timer’s rating and instructions. If the lights flicker or fail to switch, a timer designed for LED loads may solve the problem.
Why does my outdoor timer fail after rain?
Moisture can enter the housing through a damaged gasket, an open cover, or a poorly seated plug. Corrosion on the contacts can then prevent switching. Use an outdoor-rated timer, keep connections off the ground, and replace any timer that shows water damage or corrosion.
Conclusion
A timer for holiday lights that is not working is often caused by a power problem, an incorrect schedule, a confused photocell, a load that is outside the timer’s rating, or moisture damage. Checking the outlet, GFCI, programming, and sensor before replacing the timer can save time and money. Testing the lights directly and testing the timer with a lamp are the two most useful diagnostic steps.
If the timer fails a simple lamp test, shows corrosion or heat damage, or is not rated for the load, replacement is the practical choice. Choose an outdoor-rated and LED-compatible timer where appropriate, and protect the connections from water. Safety should guide every step: unplug before inspection, avoid damaged cords, and call an electrician if a GFCI trips repeatedly.
With a methodical check and the right replacement, you can get the display switching reliably again and avoid dark evenings during the holiday season.