The snow is already falling, you have the extension cord draped across the driveway, and the starter button does nothing. Or it clicks. Or it whines but the engine never turns over. An electric start that fails on the first storm of the season is one of the most frustrating small-engine problems because the fix is often cheap and simple—but only if you know where to look.
This guide walks through the diagnostic sequence in the order that saves the most time and money. It starts with the power source, moves through the starter circuit, and ends at the mechanical parts inside the engine. It also explains what the different failure sounds mean, because a click and a whine point to very different causes.
How a Snowblower Electric Start System Works
A residential snowblower electric start is essentially a small electric motor bolted to the engine block. On 120-volt models, you plug an extension cord into a receptacle on the machine, press a button or turn a key, and the starter motor spins a small gear. That gear engages a toothed ring on the engine’s flywheel and cranks the engine until it fires.
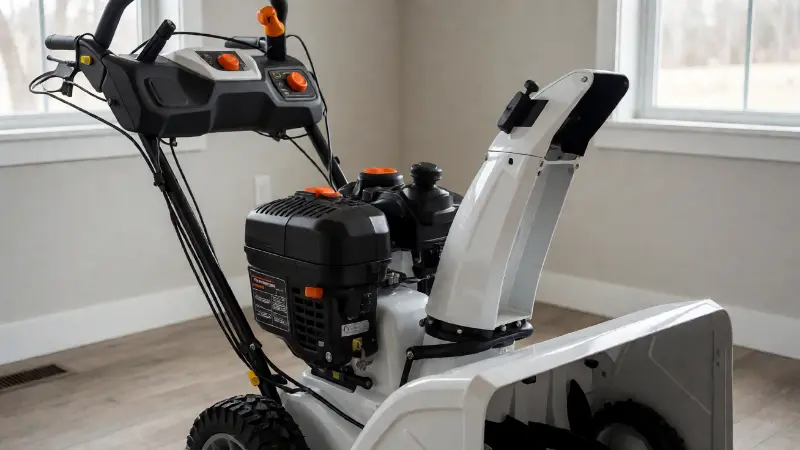
The circuit has several components in series: the extension cord, the machine’s starter receptacle, the starter switch or button, a safety switch or fuse on some models, a solenoid, and the starter motor itself. Some machines use a 12-volt battery instead of a 120-volt cord, which adds a battery and charging system to the circuit. In either case, a failure anywhere in that chain will stop the starter from working, so the diagnostic goal is to find the first point where power stops.
The mechanical side matters too. The starter motor drives a bendix—a small gear that is supposed to extend forward and mesh with the flywheel ring gear when the motor spins. If the bendix is sticky, misaligned, or damaged, the motor may spin freely without turning the engine. If the flywheel key has sheared, the engine may crank but not start. Those are different problems with different fixes.
Step 1: Check the Power Source First
Before touching the machine, confirm that the outlet actually has power. Plug a lamp or a drill into the same outlet and verify it works. Check whether the outlet is on a GFCI circuit, because a damp garage or an outdoor outlet can trip the GFCI and cut power without any obvious sign at the snowblower.
Extension cord problems are extremely common. The cord must be heavy enough for the starter’s current draw. A light-duty cord or an excessively long cord causes voltage drop, and the starter may turn slowly, click, or do nothing at all. Use a cord with adequate wire gauge for the length of the run, keep it as short as practical, and inspect it for cuts, crushed spots, or a damaged plug.
Check the connection at the machine. The cord must seat fully into the starter receptacle. A partially inserted plug can arc, melt the terminal, or fail to make contact. If the receptacle or plug looks burnt or melted, replace the damaged part before trying again. A ground prong that has pulled away from the starter assembly is a sign of a damaged receptacle and should be repaired rather than ignored.
Step 2: Listen to the Sound
The sound the machine makes when you press the button is the most useful diagnostic clue you have.
- Nothing at all: The problem is upstream—no power, a bad cord, a bad switch, a blown fuse, or a disconnected wire.
- A single click: The solenoid is engaging but the starter is not turning. Could be a bad solenoid, a bad starter, a weak battery on 12-volt models, or a poor ground.
- A rapid clicking or buzzing: Often a sign of low voltage on battery models, or a solenoid that is chattering because it cannot hold. On 120-volt models, check the cord and connections.
- A whirling or spinning sound with no engine crank: The starter motor is spinning but the bendix is not engaging the flywheel. The starter gear may be stuck, misaligned, or worn.
- A high-pitched screech or squeal: The starter gear is partially engaging or misaligned with the ring gear. Stop cranking and inspect the gear mesh before continuing.
Each sound narrows the diagnosis. Write down what you hear before you start disassembling anything.
Step 3: Test the Starter Switch and Safety Circuit
Most snowblowers have safety interlocks that prevent the starter from engaging unless the controls are in the correct position. The auger control, the drive control, or a key switch may need to be engaged. Check the operator’s manual for the correct starting procedure, because some machines require the choke to be set and the key to be on before the starter button will work.
If the procedure is correct and the button still does nothing, the switch itself may have failed. Switches on outdoor power equipment are exposed to moisture, cold, and vibration, and the contacts can corrode. A multimeter can confirm whether the switch is passing voltage when pressed. If it is not, replace the switch or test the circuit by bypassing it temporarily with a jumper wire.
Some machines also have a fuse in the starter circuit. A blown fuse will stop the starter from working while leaving everything else functional. Check the fuse holder and replace any fuse that is visibly blown or that shows no continuity. If a new fuse blows immediately, there is a short in the wiring that needs to be found before the fuse is replaced again.
Step 4: Inspect the Wiring and Grounds
Rodents are a real problem for stored snowblowers. Mice chew insulation and nest in engine compartments, and a chewed wire can short to the frame or simply break the circuit. Trace the starter wiring from the switch to the solenoid and from the solenoid to the starter. Look for bare spots, crushed insulation, disconnected terminals, and corrosion at the connectors.
Grounds are equally important. The starter motor grounds through its mounting surface or through a dedicated ground wire. A rusty or loose ground connection adds resistance and can cause a click with no crank. Clean the ground point with a wire brush, tighten the fastener, and apply a dielectric grease to slow future corrosion.
If you find a blown fuse alongside damaged wiring, the short is the root cause. Repair the wiring first, then replace the fuse. Our guide to Snow Joe snow blower stopped working covers the wiring and switch failures that show up across several brands, and many of the same checks apply here.
Step 5: Test the Solenoid
The solenoid is a heavy-duty relay that sends battery or line current to the starter motor when you press the button. It has a small control terminal and two large power terminals. When the control terminal receives voltage, the solenoid closes the circuit between the large terminals and the starter spins.
A simple bypass test can confirm whether the solenoid is the problem. On a 12-volt system, use a jumper wire or a screwdriver with an insulated handle to briefly bridge the two large terminals. If the starter spins when the terminals are bridged but not when the button is pressed, the solenoid or its control circuit is faulty. If the starter does not spin even when bridged, the problem is downstream—at the starter motor or its ground.
On 120-volt models, the solenoid test follows the same logic but with line voltage. Do not attempt a bypass unless you are comfortable working with live 120-volt circuits. If you are not, replace the solenoid as a unit or have a technician test it. Solenoids are relatively inexpensive and are a common failure point on older machines.
Step 6: Remove and Bench-Test the Starter Motor
If the solenoid checks out and the starter still does not turn, the starter motor itself is the next suspect. Remove the starter from the machine, keeping the hot wire connected and grounding the starter case to the machine. Briefly activate the starter and observe whether the gear spins. If it does not spin on the bench, the motor is faulty and should be replaced or rebuilt.
Inspect the starter gear and the bendix while the starter is off. The gear teeth should be clean and square, and the bendix should extend smoothly when the motor spins. A bendix that is sticky or slow to extend can often be cleaned and lubricated. A gear with worn or chipped teeth should be replaced. Check the starter shaft for burrs or a bent condition, because a misaligned starter can screech and fail to engage the flywheel.
Starter mounting bolts should be tight and the starter should sit square to the engine block. A starter that hangs at an angle can mesh poorly with the ring gear and produce a high-pitched screech. If the mounting surface is corroded, clean it before reinstalling the starter.
Step 7: Check the Flywheel Key and Ring Gear
If the starter spins the engine but the engine will not fire, the problem may not be the starter at all. A sheared flywheel key allows the flywheel to rotate out of time with the crankshaft, and the engine will crank without starting. This is more common after the machine has hit a hard object like a curb or a chunk of ice. The flywheel key is a small, inexpensive part, but accessing it requires removing the blower housing and the flywheel.
Inspect the ring gear on the flywheel for damaged or missing teeth. A few worn teeth can cause intermittent engagement, especially if the engine tends to stop in the same position. If the ring gear is damaged, the flywheel may need to be replaced. On some engines, the ring gear is a separate serviceable part.
A flywheel key failure is uncommon, but it is worth checking if the starter is clearly turning the engine and the engine still will not start. Our guide to the snowblower choke symbol covers the starting procedure and choke settings that can mimic a starter problem, because an engine that is flooded or choked incorrectly will crank without firing.
Step 8: Battery and Charging System on 12-Volt Models
Not every snowblower uses a 120-volt cord. Some models have a 12-volt battery and an onboard charging system. On those machines, a weak or dead battery is the most common reason the electric start stops working. Check the battery voltage with a multimeter. A fully charged 12-volt battery should read around 12.6 volts at rest. A reading below 12 volts suggests the battery is discharged or failing.
Charge the battery with a maintainer and retest. If it will not hold a charge, replace it. Check the battery terminals for corrosion and tighten the connections. Inspect the charging system if the battery keeps going dead, because a failed rectifier or charging coil will leave the battery flat after each use.
Cold weather reduces battery capacity, so a battery that works in autumn may fail on the first subfreezing morning. Bringing the battery indoors between storms is a practical way to extend its useful life and ensure reliable starting.
| Symptom | Most Likely Cause | Quick Check | Likely Fix |
|---|---|---|---|
| Nothing happens when the button is pressed | No power, bad cord, bad switch, blown fuse | Test the outlet, inspect the cord, check the fuse | Replace cord, switch, or fuse |
| Single click, no crank | Bad solenoid, weak battery, poor ground | Bypass the solenoid; check battery voltage; clean grounds | Replace solenoid or battery; clean connections |
| Rapid clicking or buzzing | Low voltage, chattering solenoid | Check battery charge and cord gauge | Charge or replace battery; use a heavier cord |
| Starter spins but engine does not turn | Sticky or worn bendix, misaligned starter | Inspect the starter gear and bendix travel | Clean and lubricate bendix; replace starter gear |
| High-pitched screech | Starter gear misaligned or partially engaged | Check starter mounting and gear mesh | Reseat or replace the starter |
| Engine cranks but will not start | Sheared flywheel key, fuel or choke problem | Check the flywheel key; verify choke and fuel | Replace flywheel key; service fuel system |
| Starter works intermittently | Loose connection, corroded terminal, failing switch | Wiggle-test wiring and connectors | Tighten, clean, or replace connectors |
When to Stop and Call a Technician
Some diagnostics are best left to a professional. If you are not comfortable working with 120-volt circuits, do not attempt to bypass the solenoid or probe live wiring. If the starter motor is faulty and you do not have the tools to bench-test it, a small-engine shop can test and replace it quickly. If the flywheel key is sheared or the ring gear is damaged, the repair involves removing the flywheel, which requires a puller and some experience.
It is also worth calling a technician if the machine is under warranty. Opening the starter circuit or replacing components can affect coverage, so check the warranty terms before you start. For engine-related problems that appear alongside the starter issue, our guide to Craftsman snowblower choke position explains the choke settings that can make a healthy engine crank without firing.
Preventive Maintenance for Next Season
Most electric start failures are preventable with a few minutes of attention before the season begins. Inspect the extension cord for damage and store it indoors. Clean and tighten the battery terminals on 12-volt models. Check the starter receptacle for corrosion and apply dielectric grease. Run the machine briefly every few weeks during the off-season to keep the starter gear and bendix free.
Store the machine in a dry place, and take steps to keep rodents out of the engine compartment. A chewed wire is one of the most common causes of a no-crank condition, and it is entirely avoidable. If the machine is stored in a shed or garage, check the wiring before the first storm rather than after the first failure.
Keep the battery on a maintainer if the machine has one, and bring it indoors during extreme cold. A battery that is kept charged and warm will crank reliably when you need it. Finally, read the operator’s manual for the correct starting procedure and safety interlock sequence, because a starter that seems dead may simply be waiting for a control to be engaged.
FAQ
Why does my snowblower electric start click but not turn over?
A single click usually points to the solenoid engaging while the starter motor fails to spin. Common causes include a weak battery on 12-volt models, a faulty solenoid, a bad starter motor, or a poor ground connection. Bypass-testing the solenoid and checking battery voltage will narrow it down quickly.
Why does the starter spin but the engine does not crank?
If you hear the starter motor whirling but the engine does not turn, the bendix gear is probably not engaging the flywheel. The bendix may be sticky, misaligned, or worn, or the starter may be mounted at an angle. Removing and inspecting the starter gear is the next step.
Can I use any extension cord for a snowblower electric start?
No. The cord must be heavy enough for the starter’s current draw and short enough to avoid excessive voltage drop. A light-duty or very long cord can cause slow cranking, clicking, or no operation at all. Use a cord with adequate wire gauge for the length of the run.
Where is the fuse on a snowblower electric start?
The fuse is usually located near the starter switch, along the wiring harness, or in a small holder near the battery on 12-volt models. Check the operator’s manual for the exact location. A blown fuse will stop the starter from working while leaving the rest of the machine functional.
How do I test the starter solenoid?
On a 12-volt system, briefly bridge the two large solenoid terminals with an insulated tool. If the starter spins when bridged but not when the button is pressed, the solenoid or its control circuit is faulty. On 120-volt models, have a technician perform the test unless you are comfortable working with line voltage.
Why did the electric start stop working after one season?
Off-season storage is hard on starter systems. Corroded terminals, chewed wiring, a discharged battery, or a sticky bendix can all develop while the machine sits. A pre-season inspection of the cord, wiring, battery, and starter gear catches most of these problems before the first storm.