A loose towel rack is a small problem with an outsized annoyance. The bar sags, the screws spin, and every damp towel seems to pull the bracket farther from the wall.
Searching for a quick fix often leads to one unlikely suggestion: expanding foam. The question is whether spray foam can actually secure a towel rack or simply delay the inevitable.
The short answer is nuanced. Expanding foam can help in specific hollow-wall repairs, but it should never be the primary anchor for a load-bearing towel rack.
Why Towel Racks Pull Out
Hollow Drywall and Weak Anchors
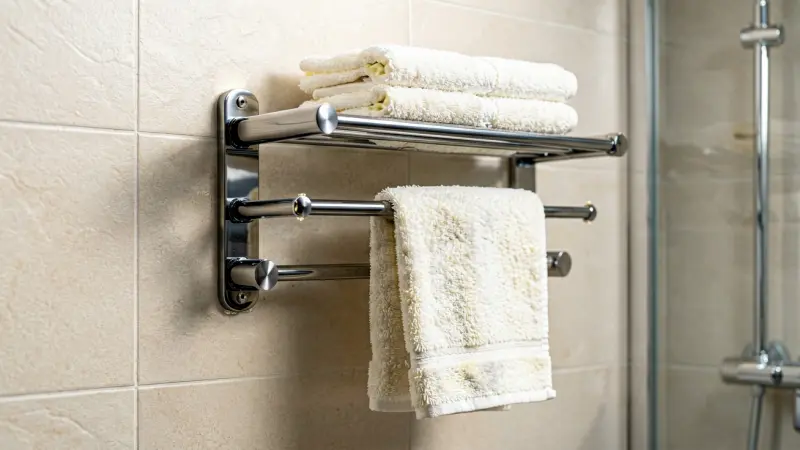
Towel racks endure repeated sideways and downward force. Plastic anchors included with many racks are often too small for that load.
In hollow drywall, those anchors can crumble the paper face and enlarge the hole. Once the hole is oversized, screws lose their grip and the rack feels unstable.
Moisture, Humidity, and Rust
Bathrooms combine steam, splashes, and damp towels. Moisture weakens drywall, softens plaster, and corrodes cheap screws.
If paint around the bracket is bubbling or peeling, moisture may already be inside the wall. Addressing paint peeling off walls like rubber can reveal whether a deeper leak is contributing.
Tile, Plaster, and Old Construction
Tile and plaster look solid, but they can crack when anchors expand. Older lath-and-plaster walls may have crumbly keys behind the surface.
A towel rack may also have been installed without blocking. That missing wood backing is the root cause in many failed installations.
The Science of Load and Leverage
A towel rack is not just holding towels. It is resisting leverage every time someone pulls a towel down or grabs it while wet.
The farther the bar extends from the wall, the more force the upper screws feel. That is why a small plastic anchor often fails first at the top bracket.
Expanding foam does not change this leverage. It may fill a void, but the load still travels through the screws and anchors.
What Expanding Foam Can and Cannot Do
Where Expanding Foam Helps
Expanding foam is excellent at filling voids. In a hollow wall, it can create a firmer pocket around a repair zone when used sparingly.
It can also seal air leaks and reduce moisture movement. That makes it useful as a supporting material, not as a replacement for mechanical fasteners.
Where Expanding Foam Fails
Cured foam is lightweight and compressible. It does not provide reliable pull-out strength for screws under continuous load.
A towel rack can hold several pounds when wet towels are hung. Foam alone may hold for days, then fail suddenly and damage the wall.
Risks of Overexpansion
Spray foam expands with surprising force. Too much foam can bow drywall, crack tile, or push trim away from the wall.
It can also encase wires, pipes, or electrical boxes if sprayed into the wrong cavity. Always know what is behind the wall before using foam.
Diagnosing the Wall Before Repair
Sound and Tap Tests
Tap around the bracket with a screwdriver handle. A hollow sound suggests drywall with no blocking.
A dull, solid sound may indicate a stud or a plaster wall. Confirm with a stud finder before drilling new holes.
Moisture Checks
Look for brown stains, soft paint, or a musty smell. These signs mean water is entering the wall.
Repair leaks and dry the cavity before using foam. Trapping moisture behind foam can encourage mold and rot.
Anchor Damage
Remove old anchors carefully with pliers. If the hole is larger than the anchor head, a standard replacement may spin.
Oversized holes may need a repair patch, a larger toggle bolt, or a new location for the rack.
A Safer Expanding Foam Repair Method
Step 1: Remove the Rack and Assess Damage
Take the towel rack off the wall. Inspect the holes, anchors, and surrounding drywall or tile.
If the wall is soft, moldy, or crumbly, stop and repair the wall first. Foam will not stabilize rotten or water-damaged material.
Step 2: Choose the Right Foam
Use a low-pressure, minimal-expansion foam designed for windows and doors. These formulas expand less and reduce the risk of wall damage.
Avoid high-expansion gap filler for small bathroom anchor holes. It is harder to control and can create more problems than it solves.
Step 3: Prepare the Hole
Remove loose debris with a vacuum or compressed air. A clean hole helps foam bond and prevents trapped dust from weakening the repair.
If the hole is larger than a pencil, consider inserting a plastic straw or tube as a form. This controls where the foam lands and keeps the cavity neat.
Step 4: Apply Foam Sparingly
Spray only a small amount into the void behind the hole. Foam expands, so a little goes a long way.
Stop when the cavity begins to fill. Overfilling can push the wall outward and create a bulge around the bracket.
Step 5: Let It Cure Fully
Follow the manufacturer’s cure time. Most foams need several hours, and some need overnight, before trimming or drilling.
Cool, humid bathroom air can slow curing. Rushing this step can leave a gummy core that will not support anything.
Step 6: Trim and Drill Pilot Holes
Once cured, trim excess foam flush with the wall using a utility knife. Do not pull the foam; cut it cleanly.
Drill pilot holes slightly smaller than the anchor or screw. The foam may guide the bit, but it should not be the only material holding the fastener.
Step 7: Install a Real Anchor
Use toggle bolts, snap toggles, or heavy-duty wall anchors with the rack. These fasteners spread the load across the back of the drywall.
For the strongest repair, locate a stud and screw at least one side of the rack into solid wood. Foam can fill the gap, but the stud carries the weight.
Tools and Materials for a Foam-Assisted Repair
Gather a utility knife, vacuum, low-expansion foam, drill, pilot bits, toggle bolts, and a stud finder. A caulk gun may be needed for some foam cans.
Wear gloves and eye protection. Expanding foam sticks to skin and can be difficult to remove.
Keep a damp rag and solvent recommended by the foam manufacturer nearby. Clean up drips before they cure.
Foam Plus Toggle Bolt Repair Details
Create a Foam Backing Pocket
Insert a short piece of tubing into the hole to direct foam behind the wall. This keeps foam from oozing onto the visible surface.
Spray a two-second burst, then wait. The foam will expand and create a pocket around the future anchor location.
Reinforce with a Dowel or Plug
For a stronger repair, insert a wooden dowel or plastic wall plug into the hole before foam cures. The foam locks the plug in place.
After curing, trim the plug flush, drill a pilot hole, and drive the screw into the plug. This still works best with a toggle or stud on the other side.
Install the Bracket Evenly
Mount both brackets at the same height and check level. Uneven brackets increase stress on one side.
Do not overtighten screws. Over-tightening can crush foam, strip anchors, or crack tile.
Comparison Table: Repair Methods for a Loose Towel Rack
| Repair Method | Best Use | Load Strength | Bathroom Durability | Notes |
|---|---|---|---|---|
| Expanding foam alone | Filling small voids behind a wall patch | Very low | Moderate if sealed and dry | Never use as the only fastener for a towel rack |
| Toggle bolts | Hollow drywall with clean holes | High | Good when rust-resistant | Creates a wide bearing surface behind the wall |
| Snap toggles | Drywall repairs that may need removal later | High | Good | Easier to install than traditional toggle bolts |
| Stud screws | When a stud is behind the bracket | Very high | Excellent | Best simple fix if alignment allows |
| Wood blocking | New construction or accessible wall cavities | Very high | Excellent | Requires cutting the wall or access panel |
| Construction adhesive | Supplementing mechanical fasteners only | Low to moderate | Variable | Not a replacement for anchors or screws |
Better Long-Term Fixes for a Loose Towel Rack
Toggle Bolts and Snap Toggles
Toggle bolts are the gold standard for hollow drywall. They open behind the wall and create a broad bearing surface.
Snap toggles are easier to install and can be removed later. They work well when the hole is already enlarged but still clean.
Wood Blocking and Plywood Backing
The most reliable repair adds solid blocking behind the wall. A piece of one-by-four or plywood can be screwed between studs or glued to the back of the drywall.
Blocking spreads the load over a larger area. It also gives future owners a solid target for any wall-mounted fixture.
Stud Mounting and French Cleats
When a stud is available, mount the towel rack directly into it with long screws. This is the simplest and strongest solution.
For heavy racks or multiple towels, a French cleat can distribute weight across several fasteners. The cleat must still be anchored into studs or blocking.
Adhesives and Repair Plates
Construction adhesive alone is not enough for a towel rack. It can supplement mechanical fasteners but should not replace them.
Metal repair plates or wall patches can restore a damaged hole. After the patch cures, install new anchors according to the manufacturer’s load rating.
What to Do If the Hole Is Too Damaged
Patch and Redrill
If the drywall is crumbly, cut out a clean square and install a patch. Use a California patch or a mesh repair patch.
After the patch dries, install a toggle bolt or locate a stud. Foam alone will not restore a failed wall surface.
Relocate the Rack
Sometimes the best repair is a new location. Move the rack a few inches to reach fresh drywall or a stud.
Patch the old holes and paint to match. This avoids fighting with damaged anchors.
Special Situations
Towel Rack on Tile
Tile is brittle and cannot be repaired like drywall. Do not spray expanding foam directly behind tile if it can expand and crack the surface.
Use tile-specific anchors or drill into grout lines carefully. If the tile is already loose, remove and reset it before mounting the rack.
If the bathroom remodel expands to flooring, review self-leveling concrete over asbestos tile before disturbing old materials.
Plaster and Lath Walls
Plaster walls often have a thick gypsum core over wood lath. Standard drywall anchors may not grip well.
Use long toggle bolts that reach behind the lath, or add a wooden backer board. Foam may fill voids, but it will not restore crumbling plaster.
Rental-Friendly Repairs
Renters need repairs that avoid major wall damage. Toggle bolts leave larger holes, so consider adhesive-mounted racks for light towels.
If the existing rack must be fixed, document the damage and use removable anchors when possible. Check the lease before making permanent changes.
Common Mistakes to Avoid
Using too much foam is the most common error. It expands, bows the wall, and creates a mess that is difficult to trim cleanly.
Another mistake is trusting foam to hold screws by itself. Foam is a filler, not a structural fastener, and it will creep under load.
Skipping moisture repair leads to repeat failure. If the wall is damp, fix the leak and let the area dry before any repair.
Ignoring load ratings can also cause trouble. A towel rack with wet bath towels may weigh more than expected, especially when pulled.
When to Call a Professional
Call a pro if the wall is wet, moldy, or structurally damaged. A handyman can add blocking or repair plaster and tile correctly.
If the towel rack is heavy or part of a glass shower enclosure, professional installation is safer. It reduces the risk of cracked tile or glass.
Cost and Time Expectations
A foam-assisted DIY repair may cost under twenty dollars for foam and anchors. The job can take an hour plus cure time.
A professional blocking repair may cost more, but it provides a permanent solution. The exact price depends on wall access and finish repair.
Environmental and Safety Notes
Expanding foam can contain chemicals that irritate skin and lungs. Use it in a ventilated bathroom and follow the label.
Some foams are flammable before curing. Keep flames and heat sources away until the foam is fully cured.
Dispose of empty cans according to local rules. Do not puncture or incinerate pressurized containers.
Maintenance and Prevention
Check the rack monthly for loose screws. Tighten them gently before the holes enlarge.
Reduce strain by hanging towels evenly and avoiding heavy robes on a towel bar. Use a separate hook for bulky items.
Keep the bathroom ventilated to limit moisture damage. A fan or open window helps drywall and paint last longer.
Regular maintenance applies to every home system. The same attention used for an Ariens friction disc adjustment can prevent small issues from becoming expensive repairs.
Preventing Future Towel Rack Failures
Use the right anchor from the start. Match the anchor rating to the weight of the rack and the expected pull force.
Check screws seasonally. A quick tighten can prevent the hole from elongating.
Control bathroom humidity with a fan or dehumidifier. Dry walls hold anchors better and resist mold.
FAQ
Does expanding foam hold screws in drywall?
No, not reliably. Foam can firm up a hollow area, but screws need a mechanical anchor or solid wood to resist pull-out.
How long should foam cure before drilling?
Most minimal-expansion foams cure in eight to twenty-four hours. Always follow the label because temperature and humidity affect cure time.
Can expanding foam fix a towel rack without anchors?
It should not be used alone. A rack installed only with foam may fail when a wet towel is pulled, causing wall damage.
Is spray foam safe behind bathroom walls?
It is safe when used correctly and when no wires, pipes, or moisture problems are present. Avoid overfilling and choose low-expansion foam.
What is the best fix for a loose towel rack?
The best fix is a toggle bolt, snap toggle, or screw into a stud. Adding blocking behind the wall is even stronger.
Final Checklist
Remove the rack, inspect for moisture, and choose a low-expansion foam. Fill voids sparingly and let the foam cure fully.
Install toggle bolts, snap toggles, or stud screws for the real holding power. Add blocking if the wall feels hollow or weak.
Test the rack gently before hanging towels. If it moves, reinforce it before daily use.
Final Verdict: Use Foam as a Helper, Not a Hero
Expanding foam can be part of a towel rack repair, but it cannot be the whole repair. It works best as a void filler behind a proper anchor or added blocking.
For a lasting fix, remove the rack, inspect for moisture, fill gaps sparingly, and install toggle bolts or stud screws. That combination addresses the cause and restores strength.
A towel rack should feel solid when pulled. If it still moves after repair, stop and add blocking or call a professional before the wall fails.