A row of small bumps along a ceiling or wall is one of the most common complaints in homes, and it is rarely caused by the paint. Drywall nail pops appear when the fastener head pushes back through the surface, cracking the joint compound and lifting the finish. The fix is straightforward once you understand why it happens.
Repairing the visible bump is only half the job. If the underlying cause is seasonal movement, moisture, or inadequate fastening, the pop will return in the same place next year. This guide explains the causes, how to identify which one applies to your wall, and how to repair pops so they stay fixed.
What a Drywall Nail Pop Actually Is
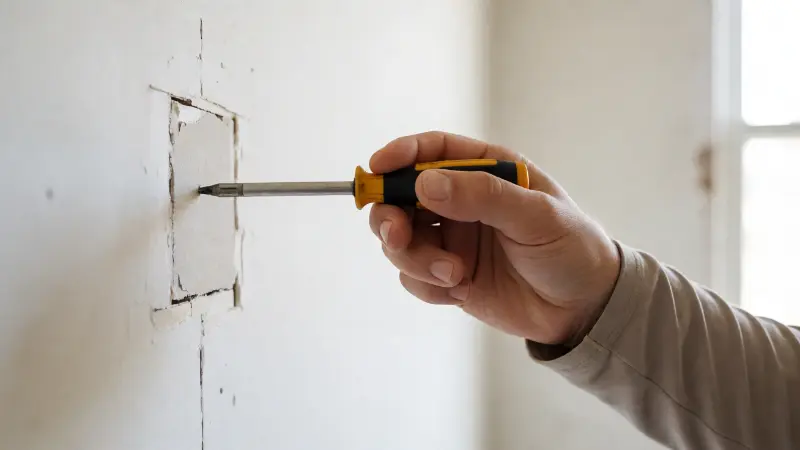
Drywall is fastened to framing with nails or screws, and the fastener heads are set slightly below the paper surface. Joint compound is then applied over the heads to conceal them. A pop occurs when the fastener moves outward, pushing the compound and paint away from the wall.
What you see is usually a small circular bump, sometimes with a hairline crack around it. In more severe cases, the compound flakes off entirely and exposes the fastener head. The pop may appear as a single spot or as a line of pops along a stud or joist.
Understanding the mechanism matters because the repair differs depending on whether the fastener is loose, the framing has moved, or the panel itself has shifted.
The Main Causes of Nail Pops
Nail pops are rarely random. They cluster around specific conditions, and recognising the pattern often points to the cause.
Lumber Shrinkage
Framing lumber is not perfectly dry when it is installed, and it continues to shrink as it acclimatises to the indoor environment. As a joist or stud shrinks in depth, the drywall panel can move slightly, and the fastener head may protrude through the finished surface.
This is especially common in new construction during the first heating season, when indoor humidity drops and the framing dries quickly. Pops that appear in the first year or two are often attributed to this shrinkage process.
Inadequate Fastening
Nails that are driven too shallowly, overdriven, or spaced too far apart can allow the panel to move. An overdriven nail breaks the paper face and loses holding power, while a nail that barely penetrates the framing cannot resist movement.
Spacing matters too. Fasteners placed too far apart allow the panel to flex, and that flexing works the fastener loose over time.
Framing Movement and Truss Uplift
Roof trusses and floor joists move with changes in temperature and humidity. Truss uplift is a specific phenomenon where the bottom chord of a roof truss bows upward in cold weather, lifting the ceiling and pulling fasteners away from the wall framing below.
Pops caused by truss uplift often appear in winter and close up in summer. They tend to run in lines along the ceiling near interior walls, and they recur seasonally unless the underlying condition is addressed.
Moisture and Water Damage
Moisture changes the dimensions of both the framing and the drywall. A leak above a ceiling or inside a wall can cause the panel to swell, and when it dries, the fastener may no longer sit flush. Pops accompanied by staining, softness, or a musty odour point to moisture rather than simple shrinkage.
Water damage should be treated as a separate repair. Coverage over a damp panel traps the problem, and the finish will likely fail again. Guidance on repairing a water damaged drywall ceiling covers how to assess and address the substrate before refinishing.
Vibration and Structural Movement
Homes near busy roads, above garages, or with mechanical equipment can experience ongoing vibration that works fasteners loose. Similarly, floors that deflect under load can cause ceiling fasteners to move over time.
Adhesive Failure
Some drywall installations use adhesive in addition to fasteners. If the adhesive fails or was omitted, the panel relies entirely on the fasteners, which increases the likelihood of movement and popping.
Diagnosing Which Cause Applies to You
The pattern and timing of pops provide clues. Working through the questions below narrows the likely cause before you pick up a tool.
- When did they appear? Pops in a new build or after a recent renovation often relate to lumber shrinkage.
- Do they change with the seasons? Pops that close up in summer and reappear in winter suggest truss uplift.
- Are they clustered in a line? A row of pops along a joist or stud points to fastener spacing or framing movement.
- Is there staining or softness? Moisture is the likely cause, and the leak must be found first.
- Are the pops in one room or throughout the house? Widespread pops point to humidity conditions rather than a single defect.
- Is the wall or ceiling near a garage or mechanical room? Vibration may be loosening the fasteners.
In many homes, more than one cause is at work. A ceiling near an exterior wall may have both moisture-related movement and truss uplift contributing to the same line of pops.
Tools and Materials for the Repair
Nail pop repair is a small-scale drywall job, and the tool list is modest. Gathering everything first keeps the work moving.
- Drywall screws: Sized to penetrate the framing adequately without puncturing the panel behind.
- Drill or impact driver: With a dimpler bit or a screw setter to control depth.
- Hammer: For driving protruding nails back before setting new screws.
- Nail set: For driving a nail head slightly below the surface.
- Utility knife or scraper: For removing loose compound around the pop.
- Joint compound: All-purpose or lightweight for filling and finishing.
- Paper or mesh joint tape: To bridge the repair and prevent cracking.
- Putty knife and taping knives: Several widths for building up thin coats.
- Sanding sponge or pole sander: For levelling the finished patch.
- Primer and matching paint: To blend the repair into the surrounding surface.
- Dust mask and eye protection: For sanding and working overhead.
A dimpler bit is a particularly useful purchase. It creates a consistent recess for the screw head without crushing the gypsum core, which is the most common cause of a repair that fails.
Step-by-Step Repair That Lasts
The sequence below addresses the pop at its source rather than just covering the bump. Each step builds on the one before it.
Step One: Remove Loose Material
Scrape away the cracked compound and any loose paint around the pop using a putty knife or scraper. Expose the fastener head so you can see what you are working with. Removing the loose material prevents the new patch from flaking off later.
Step Two: Address the Original Fastener
For a popped nail, drive it back in with a hammer and a nail set, setting the head slightly below the surface. For a screw, tighten it until the head is just below the paper, but do not overdrive it. If the fastener spins freely or refuses to hold, it has lost its grip and needs to be removed entirely.
Removing a stubborn nail is usually better than trying to re-drive it. A nail that has worked loose once tends to work loose again.
Step Three: Add New Screws Nearby
Install drywall screws adjacent to the old fastener, offset by an inch or two along the framing member. Drive them to sit slightly below the surface without breaking the paper face. The new screws carry the load, and the old fastener becomes irrelevant.
Placement matters. The screws should pass through the panel and into the framing, not into empty cavity. If the pop is at a joist, position screws along the joist on either side of the original fastener.
Step Four: Dimple and Prepare the Surface
Check that all screw heads sit in a shallow recess. If any stand proud, adjust them before filling. Wipe away dust and any loose material from the recessed heads and surrounding area.
Step Five: Fill and Tape the Repair
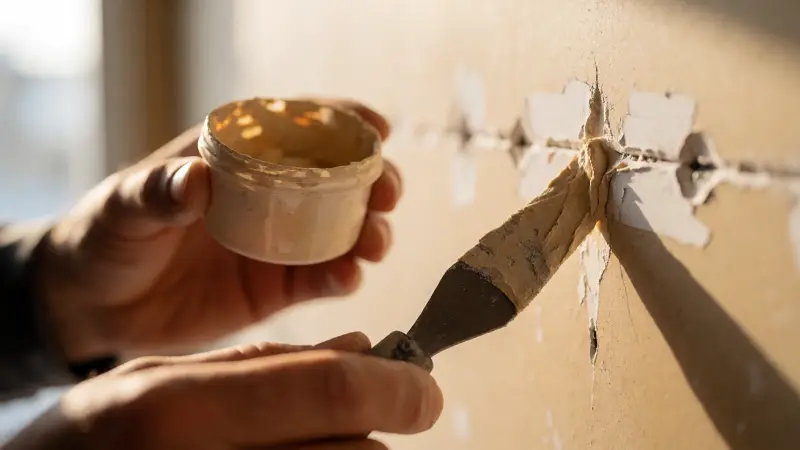
Apply a thin bed of joint compound over the screw heads and the surrounding repair area. Embed a small piece of paper or mesh tape over the screws to bridge them, then smooth the tape with a knife. Tape over fastener heads is optional in some repairs but adds crack resistance where movement is likely.
Apply a second coat of compound wider than the first, feathering the edges to blend into the wall. A third coat, wider still, completes the build. Thin coats that dry fully perform better than one thick application.
Step Six: Sand, Prime, and Paint
Once the compound is fully dry, sand lightly to remove ridges and nibs. Wipe away dust, then apply a primer over the repaired area. Joint compound absorbs paint differently from the surrounding drywall, and skipping primer causes a visible patch, known as flashing.
Paint the repaired area and feather the finish outward to a natural break, such as a corner or a change in plane. Matching the existing sheen matters, because a different sheen will catch light differently and make the repair obvious.
Comparing Repair Approaches
Not every pop requires the same level of intervention. The table below compares common approaches and the situations where each is appropriate.
| Repair Approach | Best Suited To | Tools Needed | Relative Effort | Likelihood of Recurrence |
|---|---|---|---|---|
| Fill and paint only | Cosmetic pops on a stable, dry wall | Compound, knife, primer, paint | Lowest | High if the fastener is still loose |
| Re-drive nail and fill | Single pop where the nail still holds | Hammer, nail set, compound, knife | Low | Moderate; the same nail may loosen again |
| Replace with screws and fill | Most isolated pops; loose or spinning fasteners | Drill, screws, dimpler, compound, tape | Low to moderate | Low when screws are set correctly |
| Screw and tape over a wider area | Lines of pops along a joist or stud | Drill, screws, tape, compound, sanding | Moderate | Lower; tape resists cracking if movement is minor |
| Address moisture before repair | Pops with staining, softness, or musty odour | Leak repair tools, drying equipment, drywall materials | Moderate to high | Low once the moisture source is corrected |
| Truss uplift mitigation | Seasonal ceiling pops near interior walls | Slotted clips or specialist connectors, drywall tools | Moderate to high | Low if the uplift detail is installed correctly |
| Full panel replacement | Widespread damage, saturated panels, many failed fasteners | Full drywall toolkit, panels, finishing materials | High | Low, but disruptive and costly |
Why Screws Beat Nails for Repair
Nails hold by friction and a small amount of bending resistance. They withdraw more easily when the wood moves, and a nail that has already popped has demonstrated that it does not hold well in that location. Screws have threads that grip the wood, and they resist withdrawal far better.
Using the right screw type matters. Drywall screws are designed with a bugle head that seats into the paper without cutting through it, and coarse threads grip wood framing. Fine-thread screws are intended for metal studs, so match the screw to your framing.
Screw length and spacing also affect performance. A screw that is too short will not reach the framing adequately, while one that is too long can puncture wiring or plumbing. Spacing that is too wide allows the panel to flex, which defeats the purpose of the repair.
Dealing With Recurring Pops
If the same spot pops again after a proper repair, the cause is not the fastener. It is the movement of the structure, and repeating the same repair will produce the same result.
Seasonal pops from truss uplift require a detail that allows the ceiling to move independently of the interior wall. Slotted connectors and specific framing techniques address this, but they are best specified by someone familiar with the condition. A repair that ignores the mechanism will continue to fail annually.
Widespread pops that keep appearing in different locations usually point to a humidity problem. Indoor air that swings between very dry in winter and humid in summer causes framing and panels to move repeatedly. Managing indoor humidity with ventilation and, where appropriate, a humidifier or dehumidifier reduces the cycling.
Pops that appear in a pattern across a ceiling may also indicate that the panel was fastened with too few fasteners or with adhesive that has failed. In those cases, adding screws systematically across the affected area is more effective than treating individual pops.
Moisture, Ventilation, and Prevention
Many drywall problems, including recurring pops, come back to moisture. Bathrooms, kitchens, and laundry rooms generate humidity that moves through the house, and ceilings near these rooms are often the first to show movement.
Running exhaust fans during and after use, keeping them ducted to the exterior, and maintaining airflow through the home all help. In attics, ventilation and insulation affect the temperature of the framing above the ceiling, which in turn affects how much the trusses move.
Where walls have been covered with heavy materials, moisture behaviour changes and can affect adhesion and movement. If a wall covering is part of the equation, understanding how a coating behaves on a special substrate helps avoid compounding the problem. Whether you can paint over textured drywall wallpaper involves similar questions about adhesion, moisture, and surface stability.
Finishing the Repair Invisibly
A structurally sound repair still looks wrong if the finishing is rushed. Blending the patch into the surrounding wall is a skill worth developing, and the principles are consistent across different types of damage.
Feathering the compound over a wide area, using thin coats, and sanding between them produces a joint that disappears under paint. Skim coating the entire area, rather than just the pop, is sometimes the better approach when several repairs are close together. Techniques for hiding drywall seams on a budget cover how to build up thin coats and avoid the ridges that show under raking light.
Texture matching is the other variable. A smooth wall is straightforward, but a textured ceiling or wall requires reproducing the existing pattern. Practice on a scrap piece before applying texture to the repair.
Safety Notes
Drywall work produces fine dust that irritates the lungs and eyes. Wear a dust mask and eye protection when sanding, and ventilate the room. A vacuum attachment on a sander reduces airborne dust considerably.
Working overhead on a ceiling puts strain on the neck and shoulders, and falls from ladders are a common injury. Use a stable platform rather than a chair, and take breaks when your arms fatigue.
Before driving screws into a ceiling or wall, be aware of wiring and plumbing concealed in the framing. A screw that contacts a live conductor can cause a shock or a fire risk. Shut off power to the area if you are working near outlets or switches, and use a cable detector where wiring routes are uncertain.
Older homes may have asbestos in joint compound or textured finishes. If your home is older and you are unsure, have a sample tested before sanding or scraping, especially on ceilings with a textured finish.
FAQ
Why do my drywall nails keep popping?
Recurring pops usually indicate ongoing movement rather than a single failed fastener. Lumber shrinkage, seasonal truss uplift, moisture changes, and vibration are common causes. Repeating the same repair without addressing the mechanism produces the same result each time.
Should I replace popped nails with screws?
Replacing a popped nail with a drywall screw and leaving the old fastener in place is a common and effective approach. Screws grip the wood better than nails and resist withdrawal. Adding two screws near the original fastener distributes the load.
Can I just spackle over a nail pop?
You can, but the repair may not last if the fastener is still loose. Filling without addressing the fastener covers the symptom rather than the cause. For a stable wall with a cosmetic bump, filling and painting can be sufficient.
How do I fix a nail pop on a ceiling?
The process is the same as on a wall: scrape away loose compound, drive the fastener, add screws nearby, fill, tape, sand, prime, and paint. Ceiling work is more physically demanding, so use a stable platform and plan for the finishing to be visible under raking light.
Will nail pops stop after the first year?
Many pops related to new-construction lumber shrinkage appear during the first heating season and settle down afterward. Pops caused by truss uplift or ongoing moisture problems can recur every year until the underlying condition is addressed.
Why do nail pops appear in winter?
Cold weather causes truss uplift and lowers indoor humidity, which dries framing and can change its dimensions. Pops that close up in summer and reappear in winter often point to truss uplift rather than a fastener defect.
How many screws should I add to fix a pop?
Two screws placed adjacent to the original fastener along the framing member are usually sufficient for an isolated pop. Where a line of pops runs along a joist, adding screws systematically across the affected length is more effective than treating each spot individually.
Do nail pops mean my house has a structural problem?
Most nail pops are cosmetic and relate to normal lumber movement. However, pops accompanied by sagging, cracking across a large area, or visible deflection may indicate a structural issue. A professional assessment is advisable if you are unsure.
Can I prevent nail pops during a renovation?
Using screws instead of nails, spacing fasteners correctly, avoiding overdriving, and allowing framing to acclimatise before hanging drywall all reduce the likelihood of pops. Gluing panels to framing in addition to fastening also helps.
Stopping drywall nails from popping comes down to replacing the failed fastener with something that holds, then addressing whatever caused the movement in the first place. Screws near the original nail, a properly dimpled head, and a well-feathered patch solve the visible problem. Managing humidity and recognising seasonal movement solve the reason it happened. Do both, and the repair will still look good next year.
Also Read –
PVC Trim Around Bathtub: The Waterproof Gap Solution You Need
Recessed Stove Outlet: Get a Flush Fit for Your Range
Plumbers Box Framing: The Pro Secret to Flawless Pipe Runs