Choosing between an interior bonding primer and a standard primer can feel like splitting hairs, especially when both come in similar-looking cans. In practice, the two products are formulated for different jobs, and using the wrong one can lead to peeling, flashing, or a topcoat that fails within months. The difference matters most on surfaces that are glossy, slick, or difficult to adhere to.
This guide explains what each type of primer actually does, which surfaces call for a bonding primer, and where a standard primer remains the sensible and economical choice. It also covers surface preparation, dry times, and the application mistakes that cause even good primers to underperform.
What Primer Actually Does
Primer is not simply a cheap first coat of paint. It is a preparatory coating engineered to do specific jobs that a topcoat cannot perform reliably on its own.
A primer seals porous surfaces so the topcoat does not soak in unevenly and require extra coats. It blocks stains such as water marks, knots, and marker bleed so they do not migrate through the finish. It also provides a uniform base so colour reads consistently across patched and unpatched areas.
Most primers also promote adhesion, but the degree of adhesion varies enormously by formulation. A standard primer may grip bare drywall or cured wood well while struggling on glazed tile, laminate, or a slick factory finish. That is where bonding primers enter the picture.
What Makes a Bonding Primer Different
Bonding primers, sometimes marketed as adhesion primers or grip primers, are formulated with resins that create a stronger mechanical and chemical bond to difficult substrates. Many are water-based, though solvent-based versions exist for specific applications.
These products often contain ingredients that etch or slightly soften a glossy surface, giving the primer something to bite into. Some are designed to bond to non-porous materials such as ceramic tile, glass, melamine, and factory-primed metal. Others are tuned for high-density substrates like hardboard or certain plastics.
The trade-off is cost and, in some cases, working time. Bonding primers generally cost more per gallon than standard primers, and some have shorter recoat windows or stronger odours. They also tend to have a tackier feel during application.
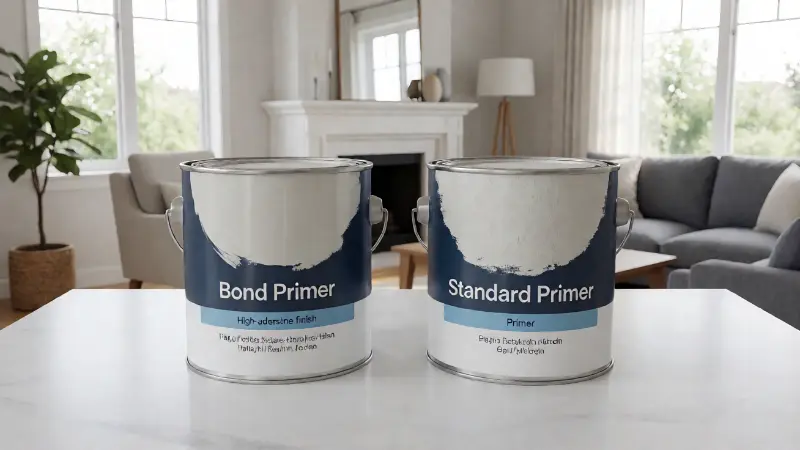
Standard Primer: What It Is Good At
Standard primers are the workhorses of interior painting. They are formulated for common, porous, and reasonably clean surfaces where adhesion is not in question.
Bare drywall and joint compound are the classic case. Drywall paper and mud are highly absorbent, and a standard primer seals that surface so the topcoat does not flash or require excessive coverage. A primer made specifically for drywall, sometimes called a PVA primer, is inexpensive and effective for this purpose.
Bare or previously painted wood is another common use. Standard primers seal grain, block tannin bleed on species like cedar and redwood, and give the finish coat a consistent base. Shellac-based and oil-based stain-blocking primers handle knots and heavy stains more effectively than water-based options.
Standard primers also work well over previously painted walls that are clean, sound, and already painted with a compatible finish. In that situation, the main goals are sealing and colour uniformity, not aggressive adhesion.
Bonding Primer vs Standard Primer: The Core Differences
The distinction comes down to intended substrate, adhesion chemistry, cost, and how forgiving the product is during application.
Adhesion Strength
Bonding primers are engineered for substrates where conventional primers may not grip. Glossy surfaces, non-porous materials, and slick factory finishes fall into this category. Standard primers rely on some porosity or texture to anchor properly.
Surface Compatibility
Standard primers suit drywall, plaster, wood, and previously painted walls in good condition. Bonding primers extend that range to tile, glass, metal, laminate, melamine, and some plastics. Some bonding products are also formulated to accept topcoats that standard primers cannot.
Cost
Bonding primers typically cost more per gallon. The premium is justified when the substrate demands it. Using a bonding primer on bare drywall is usually unnecessary spending, since a standard drywall primer performs the required job for less.
Working Properties
Bonding primers can be thicker, tackier, and slower to level than standard primers. Some have shorter recoat windows or require more careful timing. Standard primers are generally more forgiving and easier for a novice to apply evenly.
Odour and Ventilation
Water-based bonding primers have modest odour. Solvent-based and shellac-based products have stronger fumes and require good ventilation, plus appropriate respiratory protection. Standard water-based primers are usually the least offensive in an occupied home.
When a Bonding Primer Is Worth It
Certain surfaces make bonding primer the practical choice rather than an upsell. Recognising them saves both time and rework.
- Glossy or semi-gloss painted surfaces: Paint that has a sheen resists new coatings. Bonding primer improves the grip that sanding alone may not deliver.
- Ceramic tile and glass: If you are painting a tile backsplash or a glass panel rather than replacing it, a bonding primer is typically the appropriate base.
- Laminate and melamine: Cabinet doors and furniture made from these materials are slick and non-porous. Bonding primers are formulated to adhere to them.
- Factory-finished metal: Some metal surfaces arrive with a slick factory coating that resists standard primers.
- Previously coated surfaces with unknown history: When you cannot identify the existing coating, a bonding primer reduces the risk of adhesion failure.
- High-traffic or high-moisture areas: Kitchens, bathrooms, and trim that gets touched frequently benefit from a stronger bond.
Preparation still matters even with a bonding primer. Cleaning grease, dust, and soap residue is essential, because no primer can bond through contamination. Light scuff sanding also helps on glossy surfaces, and it improves the mechanical key that the primer relies on.
When a Standard Primer Is the Right Call
Using a standard primer is not a compromise on the right surfaces. It is the correct and often better choice.
- New drywall and joint compound: A drywall or PVA primer seals the surface economically and prevents flashing.
- Bare interior wood: A wood primer seals grain and blocks tannin bleed on species prone to it.
- Previously painted walls in good condition: If the existing paint is sound, clean, and matte or eggshell, a standard primer provides adequate sealing and colour uniformity.
- Large areas where adhesion is not in question: Primer cost adds up over whole rooms. Matching the product to the surface avoids unnecessary spending.
- Stain and odour blocking: Shellac and oil-based stain-blocking primers handle water stains, smoke, and pet odours better than most bonding primers.
The temptation to use a bonding primer everywhere is understandable, but it increases cost without a corresponding benefit on porous surfaces. A primer that is designed to grip slick materials may not seal absorbent drywall as efficiently as a dedicated drywall primer.
Comparing the Two Types Side by Side
The table below outlines the practical differences across the factors that matter most during an interior painting project. Use it as a decision aid rather than a product recommendation, since formulations vary between manufacturers.
| Factor | Standard Primer | Bonding Primer |
|---|---|---|
| Primary purpose | Seal porous surfaces, block stains, unify colour | Maximize adhesion to difficult or non-porous substrates |
| Best substrates | Drywall, joint compound, bare wood, sound previously painted walls | Glossy paint, tile, glass, laminate, melamine, some metals and plastics |
| Relative cost | Lower per gallon | Higher per gallon |
| Adhesion strength | Adequate on porous and clean surfaces | Formulated for slick and non-porous surfaces |
| Sealing ability | Strong on absorbent materials | Variable; not always the best sealer on porous surfaces |
| Stain blocking | Good with shellac or oil-based stain blockers | Not the primary function of most bonding products |
| Working time | Generally forgiving | Can be tacky with shorter recoat windows |
| Odour | Low with water-based options | Low to strong depending on chemistry |
| Sandability | Usually easy to sand smooth | Some products sand poorly or gum up |
| Typical interior use | Whole rooms, new construction, repaints | Trim, cabinets, tile, problem surfaces |
Surface Preparation Beats Product Choice
No primer compensates for a dirty or unstable surface. Preparation is where most adhesion failures begin, and it is the step most often rushed.
Degrease kitchen walls and cabinet doors before anything else. Cooking residue leaves a film that primers cannot bond through. A mild degreaser followed by a clean water rinse and full dry time is a sensible sequence.
Scuff sand glossy surfaces with a fine abrasive to create a mechanical key. Wipe away dust with a damp cloth or a tack cloth. Fill cracks and dents, then spot-prime the repairs so the texture and porosity match the surrounding wall.
Address moisture and mould before painting. Painting over active mould or damp plaster traps the problem and the finish will likely fail. Fix the source of moisture first, then treat and prime the area appropriately.
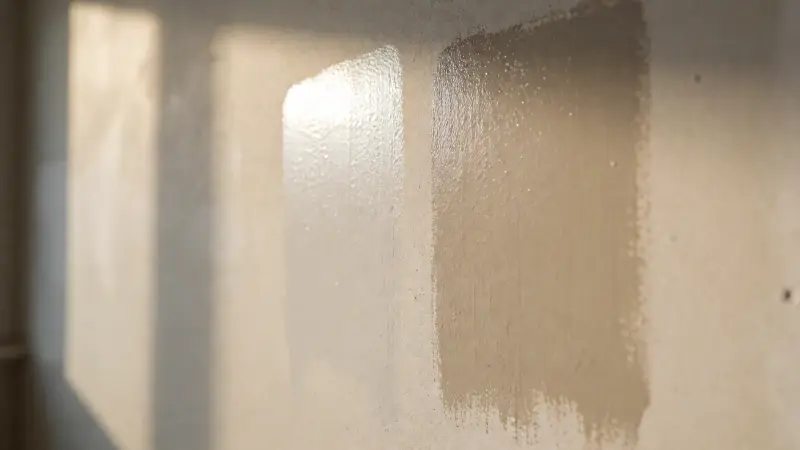
Application Tips for Better Results
Application quality affects how well any primer performs. A few practical habits improve outcomes on both product types.
- Stir thoroughly: Primer separates in the can. Mix it fully rather than relying on a shake at the store.
- Use the right nap: A short-nap roller suits smooth surfaces, while a medium nap covers texture better.
- Maintain a wet edge: Work in manageable sections so lap marks do not dry into visible lines.
- Respect recoat times: Applying a topcoat too early can lift or wrinkle the primer. Too late can reduce intercoat adhesion on some products.
- Do not over-thin: Thinning reduces the film build that provides sealing and adhesion.
- Prime patches separately: Joint compound absorbs differently from painted wall, so spot-prime repairs before the full coat.
- Ventilate the room: Even low-odour products benefit from airflow during and after application.
Common Mistakes and Their Consequences
Misjudging the primer is rarely obvious immediately. Problems tend to surface weeks or months later, when the topcoat begins to peel, blister, or scratch away.
The most frequent error is skipping primer altogether on a slick surface because the old paint looked clean. The second is using a standard primer on glossy tile or laminate and assuming it will hold. The third is applying a bonding primer too thickly, which can leave a gummy film that never cures properly.
Another mistake is using a bonding primer as a stain blocker. Bonding primers are not formulated for tannin or water-stain blocking, and using them for that purpose can let discolouration bleed through the finish. Choose a shellac or oil-based stain-blocking primer when stains are the concern.
Finally, avoid mixing primer types within the same wall without reason. Different primers can leave different texture and porosity, which shows through the topcoat as uneven sheen or flashing.
Choosing Between the Two in Practice
A simple decision sequence keeps the choice straightforward. Identify the substrate first, then decide whether adhesion is the primary risk.
If the surface is porous, clean, and sound, a standard primer usually does the job. If the surface is glossy, non-porous, or of unknown history, a bonding primer reduces risk. If the surface has stains or odours, choose a stain-blocking primer regardless of the other categories.
Some projects need more than one product. A kitchen cabinet repaint may call for a bonding primer on the frames and doors, plus a stain-blocking primer on any knotty areas. A whole-room repaint over sound paint may only need a standard primer on patched spots.
If your walls need more than priming to look smooth, it is worth understanding the difference between resurfacing and priming. A comparison of skim coat versus primer wall prep explains when a plaster skim is the better route and when primer alone is sufficient.
Product-Specific Considerations
Formulations vary enough that the label matters. Some bonding primers are designed for interior use only, while others are rated for interior and exterior surfaces. Some require a specific topcoat chemistry, and some are tintable while others are not.
If a particular bonding primer is being recommended to you, it helps to read independent feedback before committing to a whole project. A review of the Sherwin Williams Extreme Bond primer review gives a sense of how one popular product behaves on real substrates and where users report issues.
Always check the manufacturer’s data sheet for dry times, recoat windows, coverage, and substrate limitations. Those documents contain the specific guidance that generic advice cannot provide.
Cost and Practicality Across a Whole Project
Primer cost is modest relative to the total cost of a paint job, but the difference between standard and bonding products is noticeable over large areas. It helps to estimate coverage before buying.
On a typical interior repaint, primer may account for a small share of material cost. Labour, however, is the larger expense, so rework caused by poor adhesion is far more costly than the primer itself. That asymmetry justifies spending more on a bonding primer when the substrate is genuinely difficult.
Buying one extra gallon for touch-ups is often worthwhile, since primer colour and sheen should match if you need to spot-prime later. Store leftover primer properly sealed and protected from freezing.
The word primer also appears in unrelated equipment contexts, which can be confusing when searching for information. If you are troubleshooting small engine equipment rather than wall coatings, guidance on fixing a snowblower primer bulb leak covers a completely different kind of primer and its failure modes.
Safety and Ventilation Notes
Primers vary in their solvent content, and the safer choice depends on the product and the space. Water-based products generally have lower volatile organic compound levels and milder odour, which suits occupied homes.
Solvent-based and shellac-based primers require ventilation and appropriate respiratory protection. Avoid using them in enclosed spaces without airflow, and keep them away from ignition sources. Follow the manufacturer’s instructions for cleanup and disposal.
If you are sensitive to fumes, pregnant, or painting a child’s room, choose a low-odour water-based product and allow extra dry time before occupancy. Never mix products from different manufacturers unless the labels permit it.
FAQ
Do I really need a bonding primer, or will standard primer work?
It depends on the surface. On drywall, bare wood, or sound previously painted walls, a standard primer is usually sufficient. On glossy, non-porous, or unknown surfaces, a bonding primer reduces the risk of adhesion failure and is often worth the extra cost.
Can I use a bonding primer on drywall?
You can, but it is usually unnecessary spending. Bonding primers are designed for slick substrates, and a dedicated drywall primer seals absorbent surfaces more efficiently. Save the bonding primer for tile, laminate, or glossy paint.
Does a bonding primer need sanding afterward?
Not always, but light sanding can improve the surface for the topcoat if the primer feels rough or has dust nibs. Some bonding primers sand poorly, so check the product data sheet before sanding. Always remove dust before painting.
How long should I wait before applying topcoat over primer?
Follow the manufacturer’s recoat window, which varies by product and conditions. Applying too early can lift or wrinkle the primer, while waiting too long can reduce intercoat adhesion with some formulations. Humidity and temperature affect dry time significantly.
Will primer hide stains and odours?
Standard and bonding primers are not the best stain blockers. Shellac-based and oil-based stain-blocking primers handle water stains, smoke residue, and pet odours more effectively. Choose the product based on the problem you are solving.
Can I paint over a bonding primer with any topcoat?
Most bonding primers accept common interior topcoats, but some are formulated for specific chemistries. Check the data sheet for compatible topcoats. Using an incompatible product can cause adhesion or curing problems.
Is bonding primer worth it for kitchen cabinets?
Often yes, because cabinet surfaces are frequently glossy or factory-finished and are handled daily. Degreasing and light scuff sanding remain essential regardless of which primer you choose. A bonding primer improves the odds of a durable finish.
How much primer do I need for one room?
Coverage varies by product, surface porosity, and application method. Estimate the wall area, check the label coverage figure, and round up rather than down. Keeping a small amount for touch-ups is a practical habit.
Matching the primer to the surface is the whole decision in miniature. Use a standard primer where the material is porous and sound, use a bonding primer where adhesion is genuinely at risk, and choose a stain blocker when discolouration is the concern. Prepare carefully, respect recoat windows, and the topcoat will have the foundation it needs to last.