Charging a home appliance or vehicle air conditioner with R134a can seem simple. A can, a hose, and a gauge might be all that stands between a warm room and cold air. Then the question appears: should R134a charge as liquid or vapor?
The answer is not a single rule for every situation. R134a is a pure refrigerant, so it behaves differently from blended refrigerants. The right method depends on the system size, the tools on hand, and whether the system is empty or just low.
This guide explains the science, the risks, and the practical steps. It also covers common mistakes that can turn a cheap top-off into an expensive compressor failure.
Why the Liquid vs. Vapor Question Matters
Refrigerant changes state inside a cooling system. The compressor expects vapor at its suction inlet. The metering device expects liquid at its inlet. Charging the wrong state at the wrong port can upset that balance.
Liquid refrigerant is dense and incompressible. If it reaches a running compressor in large amounts, it can damage valves, bearings, and connecting rods. Vapor is compressible, but it carries less mass per volume, so charging takes longer.
R134a adds another layer: it is not a blend. That means the liquid and vapor inside the cylinder have the same basic composition. This is why the “always charge liquid” rule for R410A does not automatically apply.
The Short Answer for R134a
R134a can be charged as either liquid or vapor when the procedure matches the system. For small top-offs, vapor charging through the low-side service port is usually the safest DIY choice. For a fully evacuated system with a known charge, liquid charging by weight is faster and more accurate.
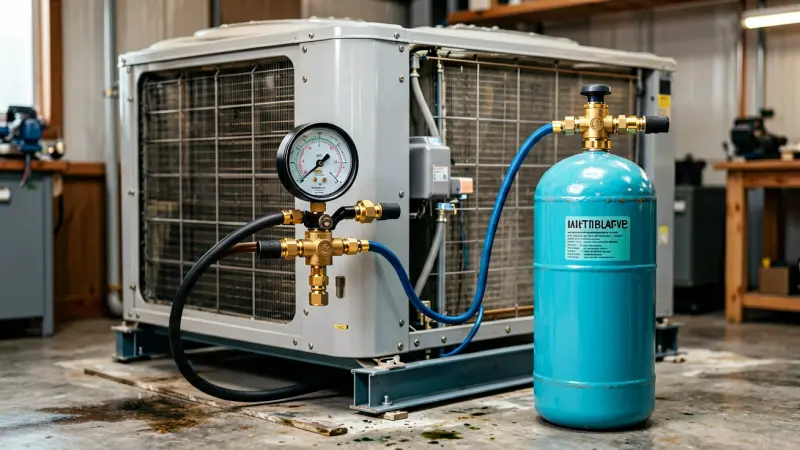
The key word is controlled. Liquid must not be dumped into a running compressor’s suction line. Vapor must not be used to guess a charge on a system that needs exact ounces.
If the system uses a blend, the rules change completely. Most blends must be charged as liquid to prevent fractionation. R134a does not have that problem.
R134a Is Not a Blend: What That Means for Charging
R134a is 1,1,1,2-tetrafluoroethane. It is a single-component refrigerant with zero temperature glide. When it evaporates or condenses, it does so at a steady temperature for a given pressure.
Blends like R410A and R407C contain multiple refrigerants with different boiling points. If vapor is pulled from a blend cylinder, the mixture can shift. That is why blended refrigerants are charged as liquid.
Because R134a is pure, vapor charging does not change the refrigerant’s composition. The vapor drawn from the cylinder is still R134a. The main difference is speed and risk, not chemistry.
When Vapor Charging Is the Better Choice
Vapor charging is common for small systems that are slightly low. Examples include vehicle AC systems, dehumidifiers, garage refrigerators, and water coolers. These systems often have small charges measured in ounces, not pounds.
With vapor charging, the can stays upright. The low-side service port is the only connection. The compressor runs while refrigerant enters slowly as a gas.
This method reduces the chance of liquid slugging. It also lets the technician or homeowner watch gauges and vent temperatures in real time. The trade-off is that adding refrigerant takes longer.
Vapor charging is not a license to guess. Overcharging is still possible. More refrigerant does not mean colder air; it often means higher pressures and less cooling.
When Liquid Charging Is the Better Choice
Liquid charging is preferred when the exact charge is known. A fully evacuated system after a repair should be charged by weight. The nameplate or service manual lists the required amount.
For large systems, liquid can be charged into the high side while the compressor is off. Once the correct weight enters, the valves are closed and the system is started. This method is fast and accurate.
If liquid must be added through the low side, a throttling valve or charging manifold is used. The liquid is allowed to flash into vapor before it reaches the compressor. Never open a liquid valve fully into a running suction line.
Some small cans are designed to be inverted for liquid charging. That does not mean every system accepts liquid at the service port. Follow the equipment manufacturer’s instructions first.
The Hidden Danger: Liquid Slugging
Liquid slugging happens when liquid refrigerant reaches the compressor. The compressor is designed to pump vapor. Liquid can wash oil from the cylinder walls and dilute the crankcase oil.
Symptoms include a loud knocking or rattling compressor, high amp draw, and poor cooling. In severe cases, reed valves bend or break. Metal debris then travels through the system.
A single slug can destroy a compressor in seconds. That is why “invert the can for speed” is dangerous advice for a running system. Speed is not worth a failed compressor.
Tools and Preparation for Safe Charging
Safe charging starts before the first valve is opened. A manifold gauge set, refrigerant scale, vacuum pump, micron gauge, and leak detector are basic tools. Safety glasses, gloves, and ventilation are not optional.
Verify the refrigerant type. R134a systems use specific service fittings and oils. PAG oil is common in vehicle AC, while POE oil appears in some appliances. Mixing refrigerants or oils can create sludge.
Clear the work area and keep children and pets away. That same caution applies when setting a live trap for nuisance wildlife in a garden or yard.
If the project also involves garage wiring, follow safe electrical practices. Use code-compliant methods for a Romex to conduit transition before bringing refrigerant tools into the space.
Protect nearby surfaces from oil and moisture. Water leaks and refrigerant oil can damage building materials, much like the problems caused by drywall getting wet during delivery.
Finally, confirm local laws. Many regions require certification for refrigerant handling. Venting R134a to the atmosphere is illegal in many places.
Step-by-Step: Vapor Charging R134a
Step 1 is inspection. Check for leaks, oily residue, and damaged lines. If a leak is found, repair it before adding refrigerant. Adding refrigerant to a leaking system wastes money and harms the environment.
Step 2 is recovery and evacuation if the system was opened. Pull a deep vacuum and hold it. Moisture and air left in the system can form acids and cause blockages.
Step 3 is connecting the manifold. The low-side hose goes to the suction service port. The center hose goes to the refrigerant cylinder. Purge air from the hoses according to safe practice.
Step 4 is starting the system. Let pressures stabilize. Record ambient temperature, low-side pressure, high-side pressure, and vent temperature.
Step 5 is adding vapor. Keep the R134a can upright. Open the low-side valve in short bursts. Watch the gauges and the scale if using one.
Step 6 is verifying the charge. Use superheat, subcooling, or weight, depending on the system. Do not rely on pressure alone.
Step 7 is closing and leak checking. Close all valves, remove hoses, and check service ports for leaks. Record the amount added for future service.
Step-by-Step: Liquid Charging R134a
Step 1 is evacuation. A system that will receive a weighed charge must be leak-free and deeply evacuated. A micron gauge confirms that moisture has been removed.
Step 2 is setup. Place the refrigerant cylinder on a scale. Calculate the target charge from the nameplate. Zero the scale with the hose attached if the manual requires it.
Step 3 is connection. Use the liquid port or the high-side service port as the manufacturer directs. The compressor should be off for high-side liquid charging.
Step 4 is transfer. Open the valve slowly and watch the scale. Close the valve when the target weight is reached. Do not chase pressures while the system is off.
Step 5 is startup. Start the system and let it stabilize. Check superheat or subcooling. Adjust only if the manufacturer’s procedure allows fine-tuning.
Step 6 is documentation. Write down the exact charge, pressures, and temperatures. This record helps future diagnostics.
How to Know the Charge Is Correct
Weight is the most reliable method. If the manual says 24 ounces, the system should receive 24 ounces. Gauges and vent temperatures confirm performance, but they do not replace a scale.
For fixed-orifice systems, superheat is a common target. Superheat is the difference between the suction line temperature and the saturation temperature for the low-side pressure. A typical target range may be 8°F to 12°F, but manufacturer specs rule.
For TXV systems, subcooling is often used. Subcooling is the difference between the liquid line temperature and the saturation temperature for the high-side pressure. Typical targets are often 8°F to 12°F, again subject to the manual.
Vent temperature can help. A properly charged vehicle AC may blow 35°F to 45°F at the center vent on a moderate day. However, humidity, ambient temperature, and blower speed change the reading.
R134a Pressure and Temperature Basics
R134a pressures change with ambient temperature. On a 70°F day, a low-side reading might be around 35 to 45 psi. The high side might be around 110 to 160 psi.
On a 90°F day, high-side pressures commonly rise to 150 to 220 psi. Low-side pressures may also rise. These are general ranges, not a universal charging chart.
Low pressure can mean undercharge, a restriction, or a bad compressor. High pressure can mean overcharge, air in the system, or a condenser airflow problem. Diagnosis comes before adding refrigerant.
Table: Vapor vs. Liquid Charging R134a
| Factor | Vapor Charging | Liquid Charging |
|---|---|---|
| Best use | Small top-offs and minor low charge | Fully evacuated systems with a known weight |
| Can or cylinder position | Upright for vapor | Upright for liquid port, or inverted only if approved |
| Service port | Low side, compressor running | High side with compressor off, or throttled low side |
| Speed | Slow | Fast |
| Accuracy | Good with scale and gauges | Excellent when weighed |
| Main risk | Overcharge and long charge time | Liquid slugging if not throttled |
| Blend compatibility | Not for most blends | Required for most blends |
| R134a compatibility | Acceptable with correct procedure | Acceptable with correct procedure |
Common Mistakes and Myths
Myth: R134a must always be charged as liquid because it is a refrigerant. R134a is pure, so vapor charging is acceptable in many small systems.
Myth: Inverting the can always makes the job better. Inverting a can sends liquid. That can be useful on some systems, but it is dangerous on a running low-side port without throttling.
Myth: More refrigerant equals colder air. Overcharging raises high-side pressure and can reduce cooling. It also increases compressor load.
Mistake: Skipping evacuation after a repair. Air and moisture cause acid formation, copper plating, and freeze-ups. A vacuum pump is not optional for an open system.
Mistake: Using stop-leak products. They can clog tiny passages, expansion valves, and recovery equipment. They may also void warranties.
Mistake: Mixing refrigerants. R134a should not be mixed with R12, R1234yf, or hydrocarbons. Mixed refrigerant is difficult to recover and recycle.
Legal and Environmental Reality for Homeowners
Refrigerant handling is regulated in many countries. In the United States, EPA Section 608 applies to stationary refrigeration and air conditioning. Section 609 applies to motor vehicle air conditioning.
Venting R134a is not a harmless act. It is a potent greenhouse gas and is regulated. Recovering, recycling, or reclaiming refrigerant is the responsible path.
R134a is also part of a broader HFC phasedown. Existing equipment can still be serviced, but prices and availability may change. Reclaimed refrigerant is often the best choice for older systems.
Homeowners should weigh repair costs carefully. A sealed dehumidifier or refrigerator may not have service ports. Adding taps to a sealed system is a job for a trained technician.
Home and Garden Applications: Where R134a Shows Up
R134a appears in vehicle air conditioning, garage refrigerators, dehumidifiers, water coolers, chest freezers, and some wine coolers. It may also appear in small chillers used for hobby or greenhouse projects.
These systems vary widely. A car AC has a compressor driven by the engine. A dehumidifier has a sealed compressor with a small factory charge. The charging method must match the design.
For garden and greenhouse cooling, small refrigerant systems may help with climate control. However, any system that uses R134a should be serviced according to its manual.
If the appliance is under warranty, DIY charging can void coverage. Check the warranty before adding refrigerant or installing service taps.
Safety Checklist Before Opening a System
Wear safety glasses and refrigerant gloves. Liquid R134a can cause frostbite. Vapor can displace oxygen in a closed space.
Work in a ventilated area. Do not use open flames near refrigerant. When exposed to flame, refrigerant can break down into toxic compounds.
Use a leak detector before charging. A leak that is ignored will cause the system to lose the new charge. Fix the leak first.
Use a scale for every charge when possible. Even vapor charging benefits from knowing how much refrigerant left the cylinder.
Do not exceed cylinder pressure or temperature limits. Store cylinders upright and secure. Keep them away from heat sources.
If any step feels uncertain, stop. A professional service call is cheaper than a new compressor or a legal penalty.
Final Recommendations
For a small R134a system that is only slightly low, vapor charging is usually the safer DIY method. Keep the can upright, use the low-side port, and add refrigerant slowly with a gauge.
For a system that has been opened or fully evacuated, liquid charging by weight is the professional standard. Use a scale, follow the nameplate, and throttle liquid if it must enter the low side.
Remember that R134a is not a blend. That fact allows both liquid and vapor charging when the procedure is correct. It does not make the job risk-free.
When in doubt, call a certified technician. That advice protects the compressor, the environment, and the homeowner’s wallet.