Constructing a heavy-duty timber structure requires absolute vertical stability. A 6×6 wood post is incredibly strong when left as a single, continuous piece. Unfortunately, cutting a post too short is a frustrating but incredibly common construction mistake. Instead of tearing down your entire frame, extending the timber is a highly viable and cost-effective solution.
To safely extend a 6×6 post, you must use a structural half-lap joint secured with through-bolts, or attach heavy-duty steel tie plates and structural screws to create a rigid connection that resists lateral loads and shear forces.
Doing this incorrectly can lead to catastrophic structural failure. Simply stacking two posts on top of each other will never pass building codes. You must approach this task with precision, understanding the physics of load transfer. This guide will teach you the exact methods professionals use to splice large timbers seamlessly.
Understanding the Structural Challenges
Before making any cuts, it is vital to understand the forces acting on a vertical post. A 6×6 timber supports immense axial loads, which is the downward weight of the roof or deck. However, it must also resist lateral loads from wind, movement, and shifting soil. Splicing a post introduces a weak point that must be carefully managed.
The Danger of a Simple Butt Joint
A butt joint involves simply resting one piece of wood on top of another. This is the most dangerous way to extend a load-bearing post. A simple butt joint creates a severe hinge effect. When lateral pressure is applied, the joint will immediately fold and collapse.
Even if you attempt to secure a butt joint with toenailing or basic wood screws, it will fail. Standard screws lack the shear strength required to stop the massive leverage generated by a tall post. Moisture will also easily penetrate the horizontal seam, accelerating wood rot from the inside out.
Fixing a compromised structure is incredibly stressful. The frustration of dealing with shifting, misaligned wood joints can feel similar to the headache you experience when vinyl siding won’t snap together. It halts your project and requires immediate troubleshooting to prevent total failure.
The Hidden Threat: Slenderness Ratio
One of the most overlooked concepts in structural extension is the slenderness ratio. This is a mathematical formula engineers use to predict when a column will buckle. The taller a post becomes relative to its width, the more likely it is to bow and snap under heavy weight.
A standard 6×6 is actually 5.5 by 5.5 inches. If you extend a 10-foot post to 16 feet, you drastically change its slenderness ratio. The spliced area becomes the primary buckling point. Therefore, the connection must be reinforced to act as a single, unyielding unit to prevent mid-shaft deflection.
Professional carpenters combat this by over-engineering the splice. The joint must be long enough to distribute the stress. A short splice will focus all the bending force onto a tiny area, virtually guaranteeing a fracture when extreme weather hits.
Wind Shear and Lateral Movement
Structures built outdoors are constantly battered by the elements. Wind shear introduces horizontal forces that try to push the structure over. If your 6×6 post is part of a freestanding pergola or a deck, these lateral forces are magnified at the structural joints.
When extending a post, the fasteners must possess extreme shear strength. This means the bolts or screws must resist being sliced in half by the sliding motion of the two wood pieces. Using improper hardware will result in sheared bolts and sudden structural collapse.
Planning for load distribution is a critical part of structural framing. You must carefully calculate weight transfer, much like engineering the grid support system for a complex multi-level drop ceiling. Every connection point must be intentionally reinforced to maintain absolute rigidity.
Top Methods for Splicing a 6×6 Post
When extending a heavy timber, you generally have three reliable options. The right choice depends on your woodworking skill, the tools available, and whether the joint will be visible. Structural integrity must always dictate your chosen method.
The Structural Half-Lap Joint
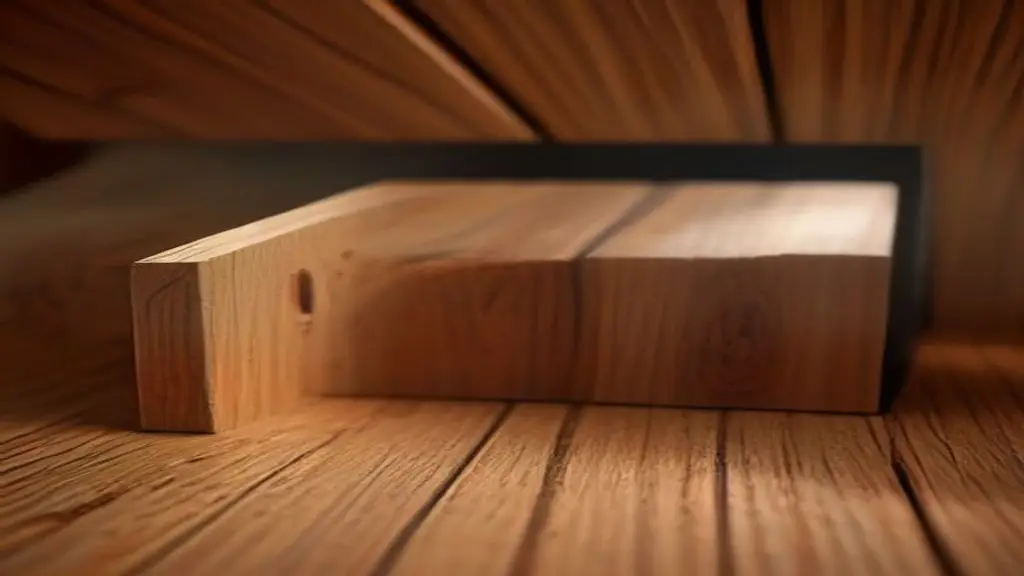
The half-lap joint is widely considered the best overall method for DIYers and professionals alike. It involves removing half the thickness from the ends of both posts. When mated together, the timbers overlap, restoring the original 5.5-inch thickness of the 6×6.
This method provides a massive surface area for wood glue and structural bolts. Because the wood pieces physically overlap, they naturally resist the dreaded hinge effect. A properly bolted half-lap joint can restore up to 80% of the continuous timber’s original bending strength.
Aesthetic appeal is another major benefit of the half-lap. When cut precisely, the seam is minimal. Once sanded and painted, the joint can become nearly invisible, making it ideal for exposed architectural elements like front porch columns.
Heavy-Duty Metal Strap Connectors
If complex wood joinery is outside your comfort zone, heavy-duty steel is your best alternative. This method relies on thick, galvanized steel tie plates installed on all four sides of the butt joint. You must use commercial-grade strapping, not flimsy mending plates.
The steel straps essentially act as an external skeleton. They bridge the weak point and transfer the tension and compression forces safely across the seam. You must use high-shear structural screws to attach the plates, as standard lag bolts require large pilot holes that remove too much wood mass.
The main drawback of metal connectors is their appearance. Industrial steel plates are highly visible and difficult to conceal. However, if the post is hidden inside a wall cavity or will be wrapped in decorative trim boards, this method is exceptionally fast and strong.
The Advanced Timber Scarf Joint
For purists and timber framers, the stop-splayed scarf joint is the ultimate extension method. This is an ancient technique involving angled, interlocking cuts secured with hardwood pegs or wedges. It is a masterpiece of woodworking engineering.
A scarf joint physically locks the two timbers together. As downward pressure is applied, the angled faces slide into each other, tightening the connection. This joint actively utilizes the building’s weight to increase the strength of the splice.
While incredibly strong and beautiful, a scarf joint requires masterful carpentry skills. Cutting precise, interlocking angles on a 6×6 post requires specialized tools and deep experience. For most modern residential projects, a bolted half-lap is far more practical and achieves similar structural goals.
Step-by-Step Guide to the Half-Lap Splice
Executing a flawless half-lap joint requires patience and precision. Rushing this process will result in a sloppy joint that compromises the post’s load-bearing capacity. Working efficiently and smartly is just as satisfying as discovering how to make water boil faster on a gas stove; proper technique saves immense time.
Step 1: Precise Measuring and Marking
The length of your half-lap determines its strength. For a 6×6 post, the overlap should be an absolute minimum of 12 inches, though 16 to 18 inches is highly recommended. Measure from the end of each post and mark your line across all four faces using a speed square.
Next, find the exact center of the post’s end grain. A standard 6×6 is 5.5 inches wide, so mark a line at exactly 2.75 inches. Carry this center line down the sides of the post to meet your length mark. Accuracy here is non-negotiable for a flush fit.
Use a high-visibility marker or a carpenter’s pencil to shade the waste area. When working with large timbers, it is incredibly easy to get turned around and cut the wrong side of the line. Shading the waste prevents disastrous cutting errors.
Step 2: Making the Deep Cuts
A standard 7-1/4 inch circular saw cannot cut entirely through a 6×6. To remove the waste, you will use the kerf-cutting technique. Set your circular saw blade depth to exactly 2.75 inches. Carefully cut the shoulder line first, maintaining a perfectly straight edge.
Next, make horizontal relief cuts along the waste area, spacing the cuts about 1/4 inch apart. The wood will begin to look like a comb. Take your time and ensure the saw base stays perfectly flat on the timber. Do this for both post sections.
Once the kerf cuts are made, use a hammer to easily snap off the wood wafers. Follow up with a sharp, heavy-duty wood chisel to smooth the surface. For a truly professional finish, use a router with a flattening bit to ensure the mating surfaces are perfectly level.
Step 3: Applying Construction Adhesive
Wood glue provides immense shear strength, often bonding stronger than the wood fibers themselves. Before assembling the joint, generously apply a premium exterior-grade polyurethane construction adhesive to both mating surfaces. Do not skip this step.
Polyurethane glues expand as they cure, filling microscopic gaps between the imperfect wood cuts. This creates a waterproof barrier inside the joint, preventing hidden internal rot. Spread the glue evenly with a putty knife for maximum coverage.
Press the two post sections together. Use heavy-duty bar clamps to squeeze the joint tight, forcing out excess adhesive. Wipe away the squeeze-out immediately with a damp rag, as polyurethane glue is notoriously difficult to sand off once fully cured.
Step 4: Drilling and Bolting
While the glue is wet, you must install the structural hardware. For a 12-to-18-inch lap joint, use at least four 1/2-inch hot-dipped galvanized through-bolts. Stagger the bolt pattern in a zig-zag layout to prevent splitting the wood grain.
Drill perfectly straight holes completely through the joint using a long auger bit. To keep the bolt heads flush with the wood surface, use a Forstner bit to countersink the holes by about 3/4 of an inch before drilling the main shaft.
Insert the through-bolts, add a heavy washer and nut on the opposite side, and tighten them down with a socket wrench. The compression from the bolts will permanently lock the half-lap together, creating an immensely rigid, load-bearing extension.
Reinforcing with Metal Bracket Systems
If you prefer the speed and simplicity of metal hardware, you must execute the process flawlessly. Relying on steel plates removes the need for complex cuts, but demands absolute perfection in alignment and fastener selection.
Step 1: Squaring the End Grain
For metal plates to work, the two posts must meet flush end-to-end. Any gap between the wood faces creates a hinge point that will bend the steel plates over time. Use a miter saw or a circular saw with a straight-edge guide to cut the post ends perfectly square.
Seal the raw end grain of both posts with a copper naphthenate wood preservative before pushing them together. Moisture wicking up through the end grain is the leading cause of post failure. Sealing the hidden faces ensures decades of durability.
Clamp the two posts securely against a long, straight 2×4 to ensure they are perfectly aligned. You cannot force a bowed post straight once the steel plates are attached. Perfect alignment must be achieved before driving a single screw.
Step 2: Choosing the Right Steel Plates
You cannot use thin mending plates from the roofing aisle for this job. You must purchase heavy-gauge, structural-grade steel strap ties designed specifically for post-to-beam or post-to-post connections. Look for 12-gauge or thicker galvanized steel.
The metal plates should be at least 16 to 24 inches long. The longer the plate, the more leverage it can resist. You must install a structural steel plate on all four sides of the 6×6 post. Plating only two sides allows the post to wobble in the unbraced direction.
If you live in a coastal environment or are using ACQ pressure-treated lumber, you must use stainless steel or ZMAX galvanized plates. Standard zinc coatings will rapidly corrode when exposed to the high copper content of modern pressure-treated wood.
Step 3: Proper Fastener Selection
Never use standard drywall screws, deck screws, or lag bolts for heavy strap ties. Drywall screws are brittle and will snap under lateral loads. Lag bolts require large pre-drilled holes, which drastically weaken the small surface area of the post ends.
Instead, use structural connector screws, such as Simpson Strong-Tie SD screws. These are specifically engineered to provide extreme shear capacity without requiring pre-drilling. They penetrate cleanly and won’t split the timber.
Fill every single pre-punched hole in the metal strap with a structural screw. Skipping holes severely compromises the plate’s load-rating. Use an impact driver to sink the screws firmly, ensuring the strap is pulled tight against the wood surface.
Comparing the Post Extension Methods
To help you choose the best approach for your specific structural needs, review this comparison of the most common splicing techniques. Always prioritize structural safety over aesthetics when making your final decision.
| Splicing Method | Structural Strength | Installation Difficulty | Best Use Case |
|---|---|---|---|
| Half-Lap Joint | Very High | Moderate | Freestanding posts, pergolas, structural decks |
| Metal Strap Plates | High (with heavy gauge) | Low | Concealed framing, quick structural fixes |
| Timber Scarf Joint | Maximum | Very High | Exposed timber framing, architectural beams |
| Simple Butt Joint | None (Fails easily) | Low | Never recommended for structural posts |
Code Compliance and Advanced Tips
Extending a load-bearing post is a serious structural modification. Depending on your municipality, you may be required to pull a permit and have the splice inspected. Building inspectors prioritize uninterrupted load paths, so your work must be impeccable.
Knowing When to Start Over
While splicing is a great solution, it isn’t always the right choice. If your post needs to be extended by more than one-third of its total intended height, you should strongly consider replacing the entire timber. A joint placed too close to the middle of a tall column maximizes buckling risk.
Additionally, if the existing post shows any signs of rot, severe checking (splitting), or termite damage, do not attempt to extend it. Splicing fresh wood onto rotten wood is dangerous. Rip the damaged post out and install a brand new continuous 6×6.
Structural integrity relies on a solid foundation. If your post base or concrete footing is undersized for a taller, heavier structure, extending the post will only accelerate foundation failure. Always evaluate the entire structural system before proceeding.
Concealing the Extension Joint
If you used metal strap ties or a less-than-perfect half-lap, you probably want to hide the ugly joint. The easiest method is to “wrap” the entire 6×6 post in 1-inch thick decorative boards, such as cedar or PVC trim.
Wrapping the post not only hides the splice but actually adds a minor layer of structural rigidity. Miter the corners of your trim boards for a seamless, high-end architectural column look. Secure the wrap with finish nails and exterior construction adhesive.
If you want to keep the raw 6×6 exposed, you can use a high-quality, stainable wood filler to pack any minor gaps in your half-lap joint. Once cured, sand the filler flush with an orbital sander. With careful staining, the joint will visually disappear into the natural wood grain.
Weatherproofing the Splice
Water is the ultimate enemy of any wood joint. Capillary action will suck rainwater into microscopic cracks, trapping moisture deep inside the splice where the sun cannot dry it. This environment breeds aggressive fungal rot.
If your joint is exposed to the elements, run a thin bead of exterior-grade silicone caulk along the top edge of the seam. This acts as a microscopic flashing, shedding water away from the joint. Never caulk the bottom of the joint, as you want to allow any trapped moisture to easily drain out.
Finally, apply a high-quality UV-blocking wood stain and water repellent sealer to the entire post. Reapply the sealer every two to three years. By keeping the wood fibers nourished and protected from water intrusion, your spliced 6×6 post will stand strong for decades.