Water intrusion in basements and foundations is a homeowner’s nightmare, and one of the most common entry points is the tiny gap where pipes penetrate the wall or floor. Whether it is a sewer line, a water main, or a conduit, the interface between smooth plastic and rough masonry is a weak point. The most effective way to seal around a PVC pipe through concrete is to create a flexible, watertight joint using a high-quality polyurethane sealant backed by a foam backer rod, or for high-pressure situations, creating a mechanical compression seal with a modular rubber sealing link system. Unlike rigid mortar which often cracks over time, these methods accommodate the natural movement of the pipe while maintaining a permanent barrier against moisture, radon gas, and pests.
Failing to address this gap properly can lead to significant structural damage, mold growth, and decreased energy efficiency. Many homeowners make the mistake of simply slapping silicone caulk or standard concrete patch over the hole, only to find it leaking again within a year. This guide explores the physics behind the problem and provides professional-grade solutions that stand the test of time.
Why Concrete and PVC Do Not mix Well
To solve the problem, you first need to understand why it exists. Concrete and Polyvinyl Chloride (PVC) are chemically and physically distinct materials that react differently to their environment. When you simply cast concrete around a pipe without a proper transition, a failure is almost guaranteed eventually. The bond between the two materials is not naturally strong, and environmental factors constantly work to break it.
Thermal Expansion Differences
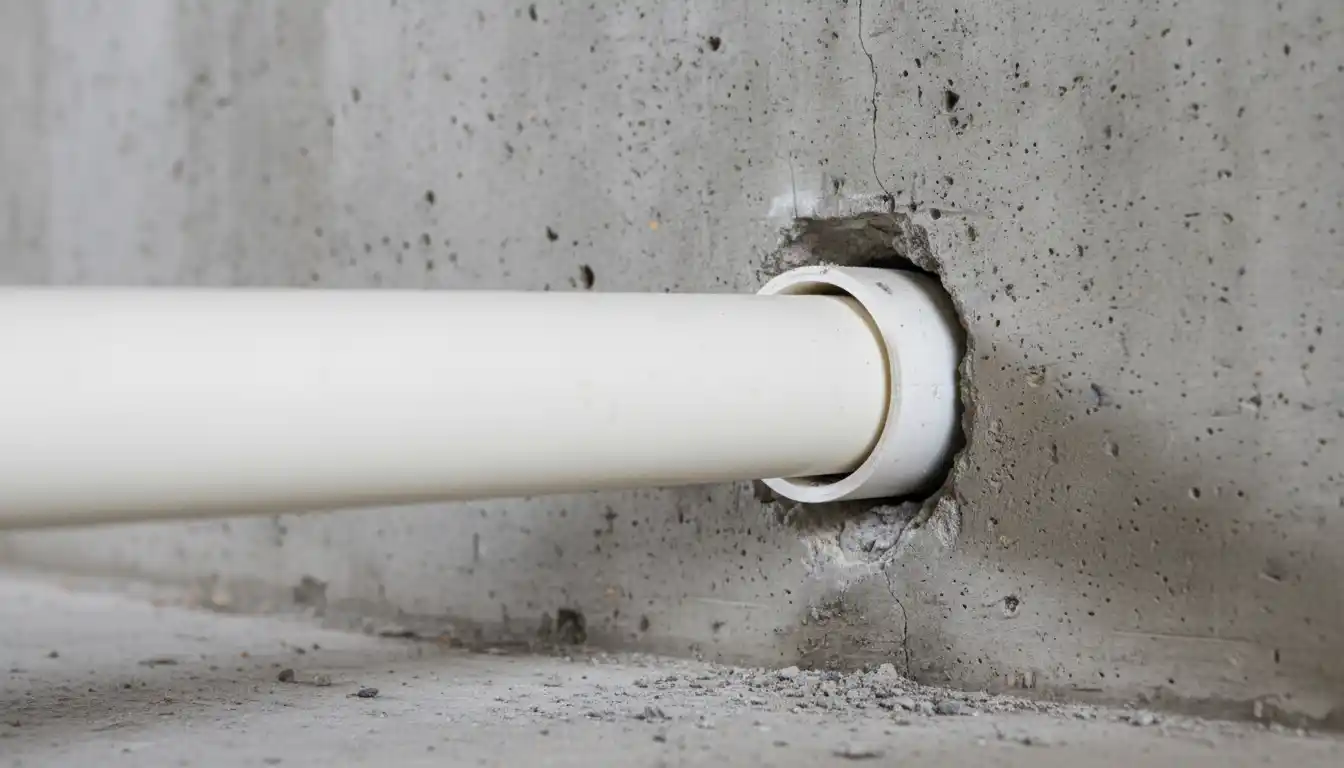
The primary culprit for seal failure is thermal expansion. PVC plastic expands and contracts with temperature changes at a significantly higher rate than concrete. As the seasons change or as hot water flows through a drain pipe, the plastic swells. When it cools, it shrinks back.
Concrete, being rigid and having a much lower coefficient of expansion, stays relatively static. This constant cycle of expansion and contraction creates a microscopic gap between the pipe and the concrete. Over time, this gap widens, breaking the bond of rigid sealants like mortar or grout. This creates a direct pathway for water to seep in.
The Risk of Water Intrusion
Water is persistent and will follow the path of least resistance. The annular space—the ring-shaped gap between the outside of the pipe and the concrete core—acts as a capillary. Hydrostatic pressure from groundwater can force moisture through even the smallest hairline cracks. This is similar to the issues seen with standing water on a newly stained deck, where moisture finds its way into any unsealed crevice, causing long-term rot and degradation.
Radon Gas and Pest Entry
It is not just water that you need to worry about. In many regions, soil gases like radon can migrate into the home through slab penetrations. Sealing these gaps is a critical part of a radon mitigation strategy. Furthermore, insects and termites are masters at squeezing through tiny openings. A proper seal acts as a physical barrier, denying entry to unwanted guests that might otherwise thrive in the damp environment around the pipe.
Choosing the Right Sealant Material
Selecting the correct material is 90% of the battle. The hardware store aisle is filled with tubes of caulk, buckets of cement, and various foams, but only a few are suitable for this specific application. Avoid general-purpose silicone or latex caulks; they lack the durability and adhesion necessary for below-grade masonry applications.
Polyurethane Sealant
For most residential applications, polyurethane sealant is the gold standard. Unlike silicone, polyurethane adheres aggressively to both concrete and PVC. It is highly durable and, most importantly, remains flexible permanently. This flexibility allows it to stretch and compress as the pipe moves without losing its grip on the concrete.
Hydraulic Cement
Hydraulic cement is a specialized material that expands as it sets. It creates a rock-hard, mechanical lock within the concrete void. This is excellent for stopping active, flowing leaks instantly. However, because it sets rigid, it does not allow for pipe movement. It is often best used in conjunction with a flexible surface seal or for iron pipes rather than PVC, though it can be used for PVC if the pipe is exceptionally stable.
Modular Mechanical Seals
For high-pressure situations or larger commercial-style applications, a modular mechanical seal (often referred to by the brand name Link-Seal) is the superior choice. These consist of rubber links connected by bolts. As you tighten the bolts, the rubber expands outward against the concrete and inward against the pipe, creating a watertight compression seal capable of holding back substantial water pressure.
Preparation: The Most Critical Step
Before you open a tube of sealant or mix any cement, the workspace must be prepped perfectly. A dirty or dusty surface will prevent even the best adhesives from bonding. If you have recently drilled the penetration, you might wonder what size hole saw for round electrical box or pipe penetrations was used; knowing the gap size helps in cleaning. Generally, you need a gap of about 1/4 to 1/2 inch for an effective sealant bead.
Cleaning the Annulus
Start by removing any loose debris, old crumbling mortar, or dirt from the gap between the pipe and the concrete. Use a wire brush to scrub the concrete surface vigorously. The goal is to reach raw, solid concrete. For the PVC pipe, wipe it down with a solvent cleaner or alcohol to remove grease, oil, and manufacturing residue. Vacuum the joint out to remove all dust.
Using a Backer Rod
You cannot simply fill a deep hole with sealant; it will sag and fail to cure properly. You must use a backer rod—a closed-cell foam rope that you insert into the gap. The backer rod serves two purposes: it controls the depth of the sealant (usually ensuring the depth is equal to half the width of the joint) and it prevents “three-sided adhesion.” You want the sealant to bond only to the pipe and the concrete, not the bottom of the hole. This allows the sealant to stretch like a rubber band.
Step-by-Step Guide: Sealing with Polyurethane Caulk
This method is suitable for 95% of homeowner situations, such as sealing a dryer vent, a sink drain, or a conduit exiting the foundation. It effectively balances ease of application with professional longevity.
Preparation and Taping
Once the area is clean and the backer rod is firmly pressed into the gap (leaving about 1/2 inch of depth for the sealant), apply painter’s tape to the concrete and the pipe. This ensures that your finish lines will be crisp and clean. Polyurethane is extremely sticky and messy; taping saves you substantial cleanup time.
Applying the Sealant
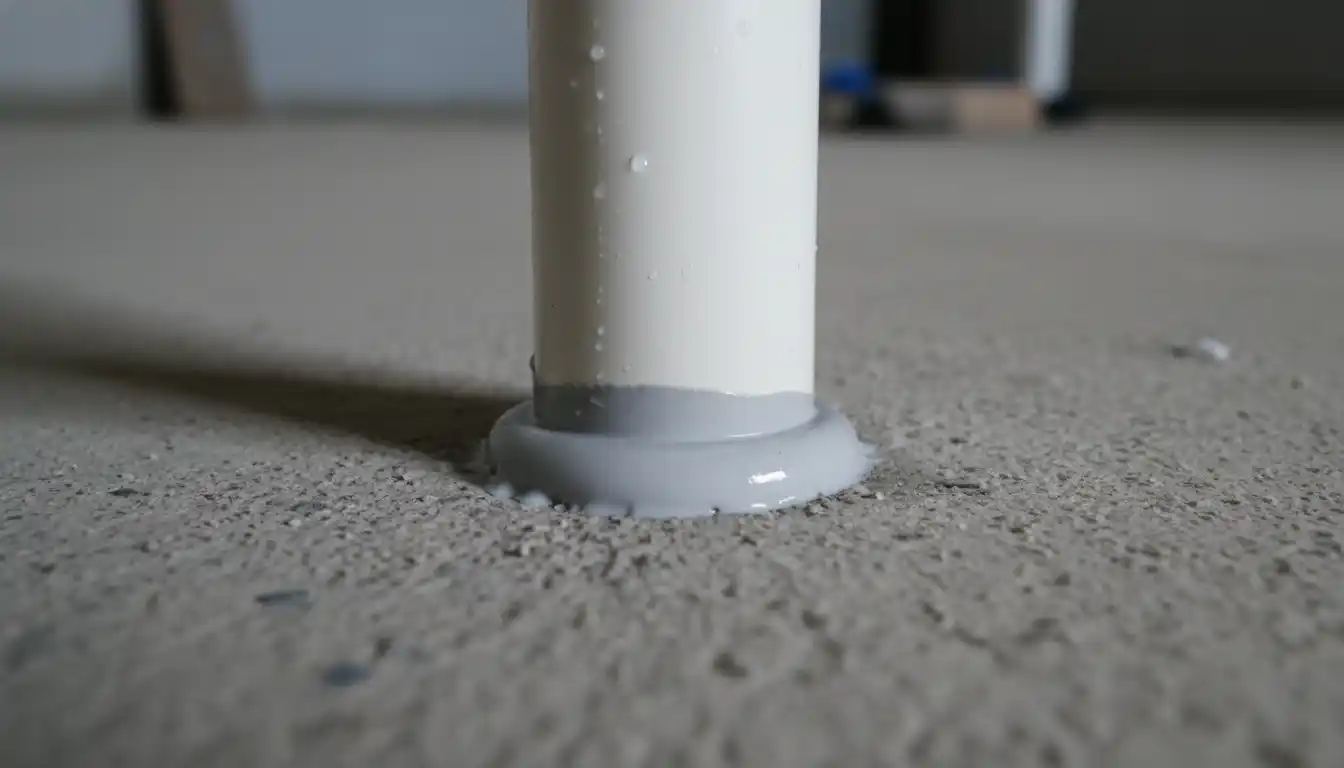
Load your polyurethane cartridge into a high-quality caulk gun. Cut the nozzle at a 45-degree angle to match the width of the gap. Pierce the inner foil seal. Squeeze the trigger with steady pressure, pushing the bead of sealant ahead of the nozzle to force it deep into the joint against the backer rod. Ensure there are no air pockets.
Tooling for Perfection
Immediately after dispensing, use a caulk finishing tool or a gloved finger dipped in soapy water to tool the joint. Press the sealant firmly against the sides of the pipe and the concrete. The soapy water prevents the sealant from sticking to your tool while ensuring a smooth, concave finish. Remove the tape immediately while the sealant is still wet.
Step-by-Step Guide: Using Hydraulic Cement for Large Gaps
If you have a very large, irregular hole or water is currently trickling through, hydraulic cement is the immediate fix. This material sets in 3-5 minutes, so speed is essential.
Undercutting the Hole
To ensure the cement locks into place, use a chisel to “undercut” the hole in the concrete. This means making the hole slightly wider inside the wall than it is at the surface, creating a dovetail shape. When the cement expands, it will physically lock itself into this shape, preventing it from ever popping out.
Mixing and Packing
Mix a small batch of hydraulic cement with water to the consistency of peanut butter. Do not mix more than you can use in 3 minutes. Wearing rubber gloves, roll the cement into a snake shape. Push it firmly into the gap around the pipe. If water is leaking, hold the cement in place with pressure for several minutes until it heats up and hardens. Note that this creates a rigid joint, so consider topping it with a bead of polyurethane later for flexibility.
Advanced Solutions for High-Pressure Situations
Sometimes, simple chemical sealants are not enough. If your pipe penetration is deep underwater or faces significant groundwater pressure, you need a mechanical solution. This is often where homeowners managing complex systems, similar to deciding between a kickstart vs 5-2-1 hard start kit for their HVAC, realize that investing in the heavy-duty hardware upfront prevents system failure later.
Installing Modular Seals
Modular seals come as a belt of rubber links. Wrap the belt around the pipe and slide it into the annular space. Using a ratchet wrench, tighten the bolts on each link in a star pattern. As the bolts tighten, the rubber plates expand. This forms a hydrostatic seal capable of holding back up to 20 PSI of pressure. While more expensive, this is a permanent solution that can be re-tightened if leaks ever develop.
Hydrophilic Waterstops
For new construction or when pouring new concrete around a pipe, use a hydrophilic waterstop. This is a strip of rubber-like material wrapped around the pipe before the concrete is poured. If water ever reaches this strip, the material swells aggressively, shutting off the path for water. It acts as a fuse that activates only when needed.
Comparison of Sealant Methods
Choosing the right method depends on your specific conditions. Use the table below to compare the three most common approaches.
| Method | Flexibility | Difficulty | Best For | Estimated Life |
|---|---|---|---|---|
| Polyurethane Sealant | High | Low (DIY Friendly) | Standard basement penetrations, small gaps | 10-20 Years |
| Hydraulic Cement | None (Rigid) | Medium | Active leaks, large irregular voids | Permanent (can crack) |
| Modular Mechanical Seal | Medium | Medium | High water pressure, critical infrastructure | 20+ Years |
| Silicone Caulk | Medium | Low | Temporary fixes (Not Recommended) | 2-5 Years |
Common Mistakes to Avoid
Even with the best materials, user error can lead to failure. Avoid these common pitfalls to ensure your seal lasts.
Ignoring Surface Prep
The number one reason for sealant failure is applying it over dust, moss, or dampness. The concrete must be bone dry (unless using hydraulic cement) and clean. Wire brushing is not optional; it is a requirement.
Using the Wrong Caulk
Do not use masonry mortar or standard bathroom silicone. Masonry mortar does not stick well to PVC, and bathroom silicone does not stick well to dusty concrete. Look specifically for “Polyurethane Construction Sealant” or “Concrete Repair Sealant” on the label.
Neglecting the Backer Rod
Applying a deep plug of caulk without a backer rod results in uncured sealant deep in the joint. This uncured goo offers no structural integrity and will eventually leak. The backer rod is cheap insurance that ensures the sealant cures into a durable, hourglass-shaped gasket.
Overfilling the Joint
Do not bring the sealant flush with the wall surface if the pipe is likely to move significantly. Leaving a slight recess prevents the sealant from bulging out or being scraped off. However, for sanitary sewer lines, a flush finish is often preferred to prevent dirt accumulation. Judge the situation based on the pipe’s location and exposure.
Final Thoughts on Waterproofing Pipe Penetrations
Sealing around a PVC pipe through concrete is a manageable project that pays massive dividends in protecting your home structure. Whether you choose the flexibility of polyurethane or the brute force of mechanical seals, the key is understanding the movement of materials. By accommodating the thermal expansion of the PVC and preparing the concrete surface meticulously, you create a barrier that stops water, gas, and pests dead in their tracks.
Inspect your pipe penetrations annually, especially before the rainy season. A small crack in a sealant bead is easy to repair now, but a flooded basement caused by a neglected pipe gap is a disaster you want to avoid.