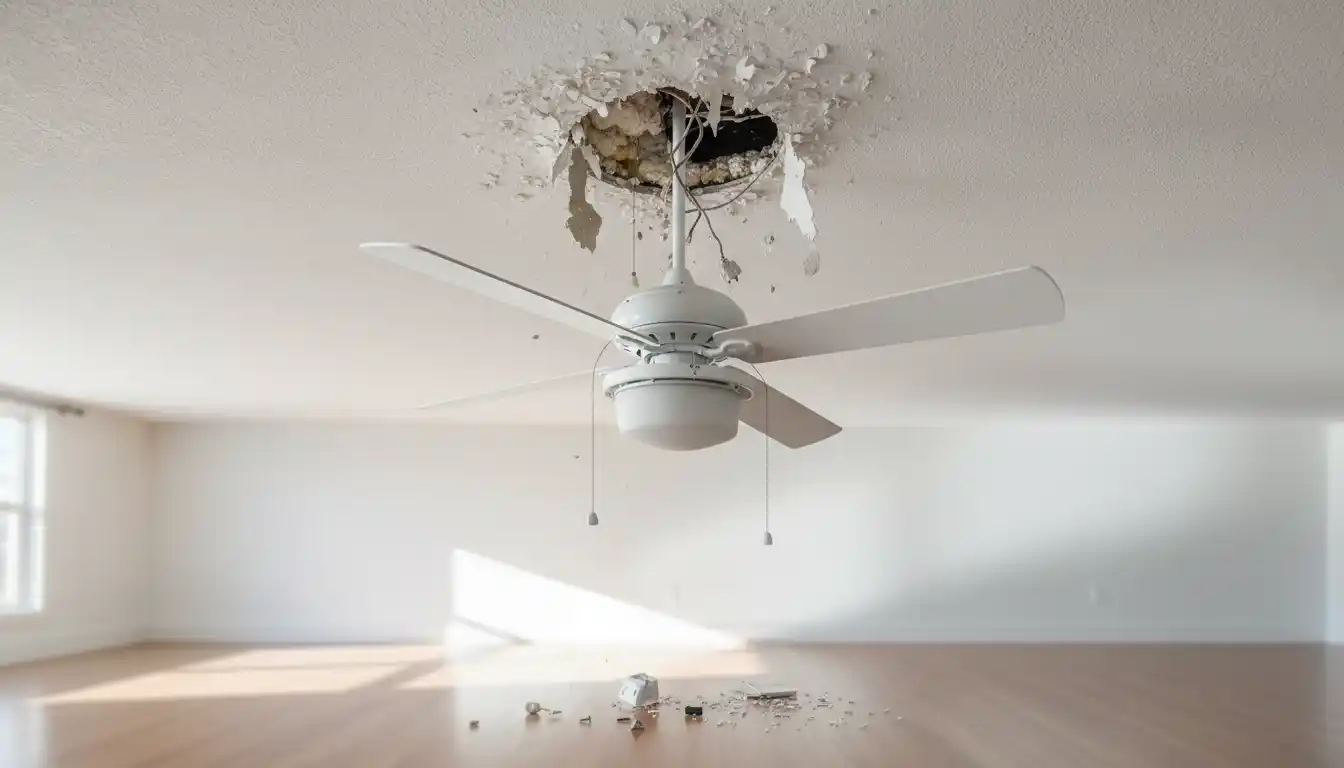
There are few household failures as sudden and terrifying as a ceiling fan falling out of the ceiling. One moment, the room is cool and quiet; the next, there is a crash, shattered glass, and a heavy motor hanging precariously by a few electrical wires. If this has happened to you, you are likely shaken and looking for answers. The most common reason a ceiling fan falls out of the ceiling is the use of a standard light fixture junction box instead of a UL-listed fan-rated box, which cannot withstand the dynamic weight and vibration torque of the motor.
While this situation looks catastrophic, it is often repairable without tearing down your entire ceiling. This guide will walk you through the immediate safety steps, explain the physics behind why the failure occurred, and provide a comprehensive path to a permanent, code-compliant fix.
Immediate Safety: What to Do Right Now
Before you attempt to inspect the damage or push the fan back into place, you must secure the area. A hanging fan poses both an electrical shock hazard and a physical impact risk.
Cut the Power Immediately
The fan motor is likely still connected to live electricity, even if the switch is off. The impact may have damaged the wire insulation, creating a short circuit risk. Go directly to your breaker panel and flip the breaker labeled for that room. Do not rely on the wall switch, as the fall could have bypassed the switch mechanism or exposed hot wires.
Secure the Hazard Area
If the fan is hanging by its wires, do not stand directly underneath it to inspect it. The wire nuts (connectors) inside the ceiling are not designed to hold 20 to 50 pounds of dead weight. They could slip at any moment, causing the fan to drop the rest of the way. Move furniture, pets, and children out of the room. If there is broken glass from a light kit, sweep it up carefully while wearing shoes.
Assess the Hanging Mechanism
From a safe distance (or using a ladder positioned to the side), look at how the fan is hanging. Is it held by the black and white electrical wires? Or is there a safety cable? If it is hanging solely by copper electrical wires, you need to support the weight immediately to prevent damage to the wiring deeper in the wall. You can use a tall ladder or a stack of boxes to prop up the fan temporarily until you can fully disconnect it.
The Root Causes: Why Do Ceiling Fans Fall?
Understanding why your ceiling fan fell out of the ceiling is crucial to preventing it from happening again. It is rarely a defect in the fan itself; the issue almost always lies in the mounting hardware hidden behind the drywall.
The “Light Fixture” Box Mistake
The single most frequent culprit is the installation of a heavy fan onto a standard electrical box designed only for static light fixtures. Standard “blue” plastic boxes or thin metal octagon boxes are rated for roughly 50 pounds of static weight (a non-moving chandelier). However, they are not designed for dynamic loads—the twisting, vibrating, and centrifugal force a fan generates.
The Physics of Torque and Vibration
Even a perfectly balanced fan generates micro-vibrations and torque (rotational force) every time it starts up. This torque acts like an impact driver in slow motion. Over months or years, this rhythmic twisting force can back out screws that aren’t secured with lock washers. If the screws were driven into a plastic box, the vibration can fatigue the plastic until the screw bosses crack and fail completely. This is a nuance often overlooked in general repairs; it’s not just weight, it’s the motion that kills the mount.
Drywall Anchors and Improper Fasteners
In some alarming “renter-friendly” or amateur DIY installs, fans are mounted directly to the drywall using toggle bolts or plastic anchors, with no connection to the ceiling joists. Drywall is chalk and paper; it has zero structural integrity for a moving appliance. Moisture in the air or a minor roof leak can soften the gypsum, causing the anchors to rip straight out, leaving a gaping hole.
Step-by-Step Repair Guide
Once the shock has subsided, it is time to fix the problem correctly. This repair involves replacing the inadequate mounting box with a “fan-rated” brace.
Step 1: Safe Removal of the Damaged Unit
With the power verified off (use a non-contact voltage tester), climb your ladder. Support the fan body and disconnect the wiring. Usually, this involves untwisting the wire nuts connecting the fan’s black, white, and blue wires to the house wiring. Once disconnected, lower the fan and set it aside. Now you have a clear view of the ceiling cavity.
Step 2: Analyzing the Failure Point
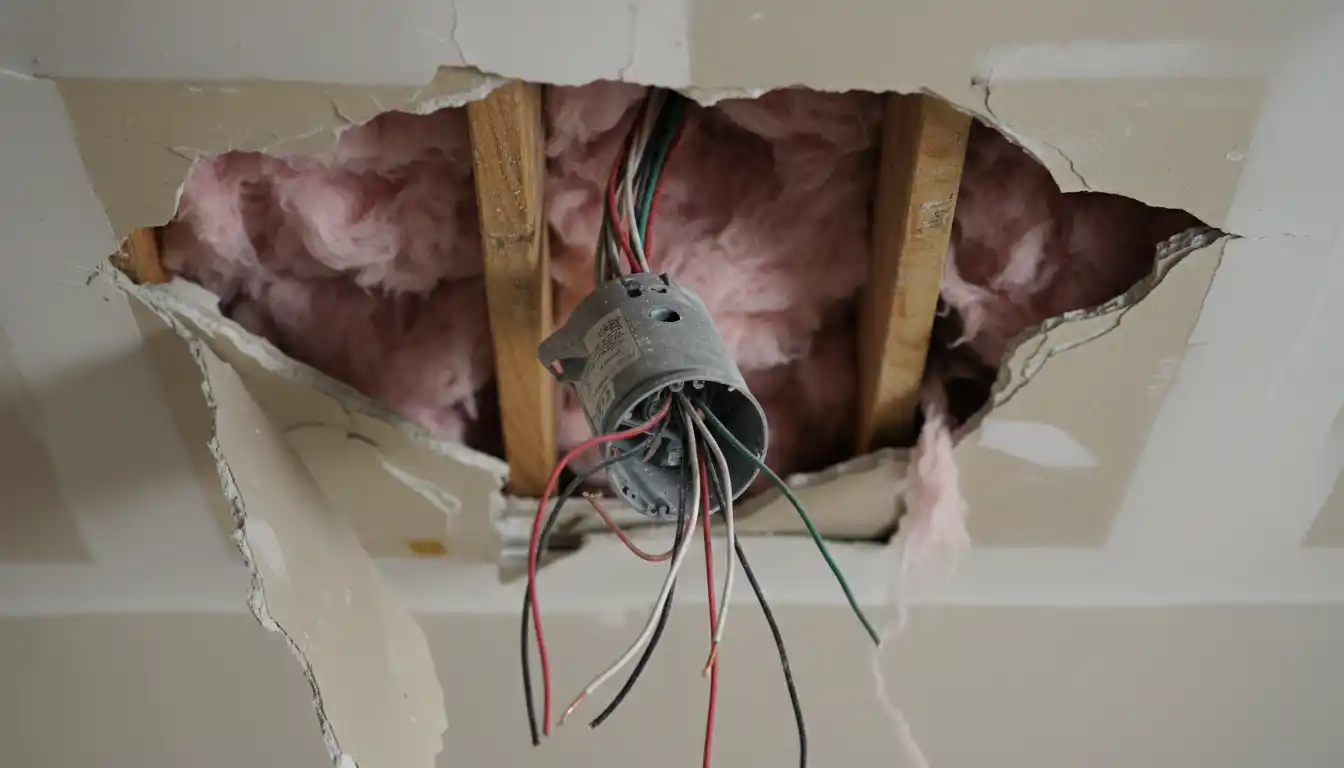
Look at the hole in the ceiling. You will likely see one of three things: a loose plastic box dangling, a metal box with stripped screw holes, or just a hole with wires coming out. You must remove the old box entirely. If it is nailed to a joist, you may need a pry bar or an oscillating tool to cut the nails. Be careful not to nick the electrical cables.
Step 3: Choosing the Right Fan-Rated Box
You cannot simply put a new plastic box in. You need a mounting system that bridges the gap between two ceiling joists or bites deeply into a wood stud. Review the table below to understand what hardware you need.
| Box Type | Weight Rating (Fan) | Installation Method | Verdict |
|---|---|---|---|
| Standard Plastic (Blue) | 0 lbs (Not Rated) | Nailed to side of joist | DANGEROUS – Never use. |
| Standard Metal Octagon | 0-35 lbs (Conditional) | Screwed to joist | RISKY – Only if specifically marked. |
| Fan-Rated Saddle Box | 70 lbs+ | Straddles the joist directly | GOOD – Requires joist access. |
| Retrofit Saf-T-Brace | 70-150 lbs | Expands between two joists | BEST – For finished ceilings. |
Step 4: Installing a Retrofit Saf-T-Brace
For most homeowners, the “Retrofit Saf-T-Brace” is the gold standard solution because it does not require attic access. You insert the bar through the existing hole in the ceiling, rotate it until it is perpendicular to the joists, and then hand-twist the bar until it expands and digs its teeth into the wood joists. Once the bar is locked tight (you can verify it by hanging your body weight on it cautiously), you attach the provided metal electrical box to the bar. This isolates the fan’s vibration from the drywall entirely.
Step 5: Wiring and Re-hanging
Connect the house wires to the new metal box using approved cable clamps. Then, re-hang your fan mounting bracket. Crucially, use the high-tensile steel screws (usually 10-32 thread) provided with the new box. Do not reuse the old screws that fell out. Connect your wiring—black to black, white to white, ground to ground—and secure the canopy.
When to Call a Professional
While replacing a box is a manageable DIY task, structural damage is not. If your ceiling fan fell out of ceiling because the wood joist itself was rotted or cracked, simply installing a new brace won’t help. Water damage from a bathroom above or a roof leak can compromise the wood framing. If you suspect the structure is compromised, you may need an affordable structural engineer to inspect the integrity of the joists before you hang any heavy load.
Additionally, if the wires were ripped or stripped during the fall, do not tape them up. Damaged copper can cause arcing and fires. If the wiring looks frayed, call a licensed electrician. This is also a good time to check other electrical elements in the home; for instance, ensuring your recessed stove outlet is up to code is just as important as your ceiling fan safety.
Preventing Future Catastrophes
Once your fan is back up, you want it to stay there. Prevention is about listening and looking.
Listen for the “Rhythmic Click”
Before a fan falls, it often gives a warning. A rhythmic clicking or ticking sound that aligns with the rotation of the blades is often the sound of the mounting bracket shifting against a loose box. Do not ignore this noise. It is not “settling”; it is loosening.
The “Shake Test”
Every six months, when you clean the blades, give the fan body a gentle shake. It should feel solid, like part of the house structure. If it wobbles independently of the ceiling, tighten the bracket screws immediately. If you have attic access, you might even consider adding solid blocking between joists. While you won’t need 16 foot lumber on a roof rack for a simple blocking job, having the right scrap wood to reinforce the bay can provide peace of mind.
A ceiling fan falling is a wake-up call, but by upgrading to a fan-rated brace and using the proper fasteners, you can ensure your family sleeps safely under a fixture that is solid as a rock.