Icicles on a roof can look like part of the winter scenery, but they are often the visible tip of a problem that is already happening behind the shingles. A large icicle needs a steady supply of water to grow, and on a cold day that water is usually meltwater from snow that has been warmed from below. When the meltwater refreezes at the eave, it can build an ice dam, and the water behind it has nowhere to go but sideways and upward into the roof assembly.
This guide explains how icicles form, why they can lead to leaks even when the roof looks intact, the warning signs that water is already entering the house, what to do right now, and the permanent fixes that stop the cycle. It also covers what not to do, because the most common reactions to icicles, such as chipping them off or climbing onto the roof, cause more damage than the ice itself.
Why Icicles Form on a Roof
An icicle grows when water flows to the roof edge and freezes faster than it can drip away. That requires two conditions at once: snow on the roof and a temperature difference between the upper roof and the eave. The upper roof is warmed enough to melt snow, while the eave stays below freezing and refreezes the runoff.
The warmth usually comes from the house. Heat escaping through the ceiling warms the attic and the underside of the roof sheathing. The eave overhangs the exterior wall, so it stays closer to outdoor temperature. That temperature split is what turns a snowy roof into a water factory at the edge.
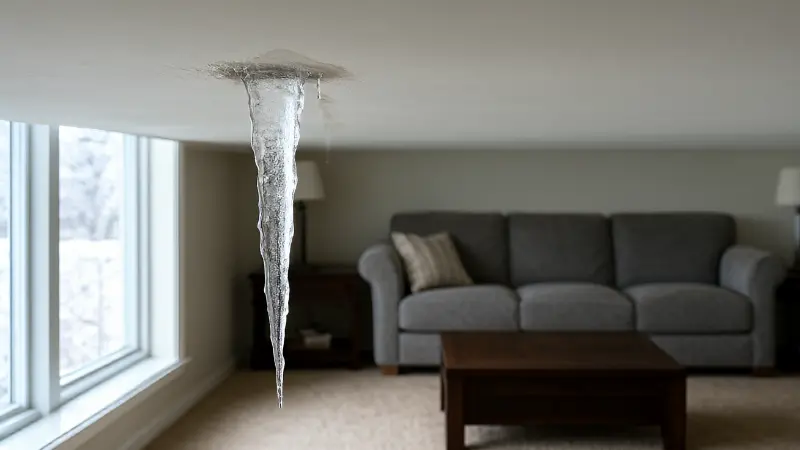
Icicles can also form in a different pattern, called a cold roof with a warm edge, which is less common. In that case, sun exposure or a poorly placed vent warms a small section of roof while the rest stays cold. The result is a localized icicle rather than a continuous fringe, and it often appears near a chimney, a skylight, or a dormer where heat or air leakage is concentrated.
Small icicles on a cold, shaded roof are not automatically a problem. The concern rises with size, with the number of icicles, and with how long they persist. A thick curtain of ice along the eave is a sign that meltwater has been arriving steadily for days.
How Icicles Turn Into Leaks
When ice builds at the eave, it creates a dam that blocks the drainage path. Meltwater continues to run down the roof and pools behind the dam. As the pool deepens, water works its way under the shingle courses, through the seams, and onto the roof deck. From there it can travel along the sheathing, soak the insulation, and stain the ceiling below.
Shingles are designed to shed water that runs down the slope, not to resist water that is pushed sideways and upward by an ice dam. The laps that keep rain out are exactly the places where standing water can find a path. That is why leaks from ice dams often appear far from the icicles, sometimes several feet up the slope or at an interior wall.
Gutters make the problem worse when they are clogged. A gutter full of leaves and frozen water holds the meltwater at the roof edge instead of letting it drain away. The ice then grows back up under the drip edge and into the fascia, where it can rot wood and push flashing out of place.
Valleys, dormers, and chimneys are common leak points because they concentrate water and snow. A valley carries runoff from two roof planes, so the flow is heavier there. A chimney or a dormer interrupts the roof surface and creates seams where ice can pry at the flashing. If the icicles are concentrated at one of those features, the leak risk is higher.
Warning Signs That Icicles Are Already Causing Leaks
The first sign is often a stain on the ceiling or the wall, usually near an exterior wall or under a roof valley. The stain may be brown, yellow, or a ring that grows over a few days. Fresh water marks on paint or drywall are a strong indication that water is entering the roof assembly and finding a path downward.
Look for icicles that are unusually thick at the top, or for ice that has formed on the siding, the fascia, or the soffit. Ice on those surfaces suggests water is running where it should not. Water dripping from the soffit on a sunny day, or a steady drip that continues after the sun goes down, is another warning sign.
Inside the attic, look for wet or compressed insulation, dark staining on the roof sheathing, or frost on the nails and the underside of the deck. Frost on the nails is a sign of high attic humidity, which often accompanies ice dam conditions. Mold on the sheathing or a musty smell in the attic points to a moisture problem that has been building for a while.
Outside, check the gutters and the downspouts. Ice in the gutter is normal in winter, but a gutter that is bowed, pulling away from the fascia, or visibly full of ice and debris is a sign of stress. A downspout that is clogged with ice can back water up into the gutter and then under the roof edge.
Check for hidden leaks
Not every leak shows up as a stain on the ceiling. Water can travel along framing and emerge far from the entry point. A moisture meter pressed against the ceiling and the walls near the roof can reveal damp spots that are not yet visible. If you have access to the attic, a visual inspection after a cold, snowy stretch is one of the most useful checks you can make.
What to Do Right Now If Water Is Coming In
Focus on containment first. Move furniture, electronics, and stored items away from the drip. Place buckets or pans under the leak, and put towels down to protect the floor. If water is pooling in a ceiling bulge, a small drain hole made with a screwdriver can control where the water comes out rather than letting the drywall collapse.
Turn off electricity to any circuit that serves a wet area if you can do so safely. Do not touch wet electrical equipment, and do not stand in standing water while working near outlets, switches, or fixtures. If water is near a panel or a light fixture, leave the power off and call an electrician.
Document the damage with photos and notes. That record helps with an insurance claim and with the conversation with a roofing contractor. Keep the receipts for any temporary repairs, containment supplies, or emergency service.
Do not climb onto the roof in winter conditions. A snowy or icy roof is a fall hazard, and the tools you would use to chip ice can damage shingles and flashing. The safest immediate action is containment and a call to a professional ice dam removal service that uses steam rather than mechanical force.
How to Remove Icicles Safely
Small icicles that hang over a walkway can be a hazard, and removing them reduces the risk of injury. Use a long-handled tool designed for the purpose, such as a roof rake with a light blade, and stand on the ground away from the falling ice. Never stand directly under the icicles, and never let children or pets play in the area.
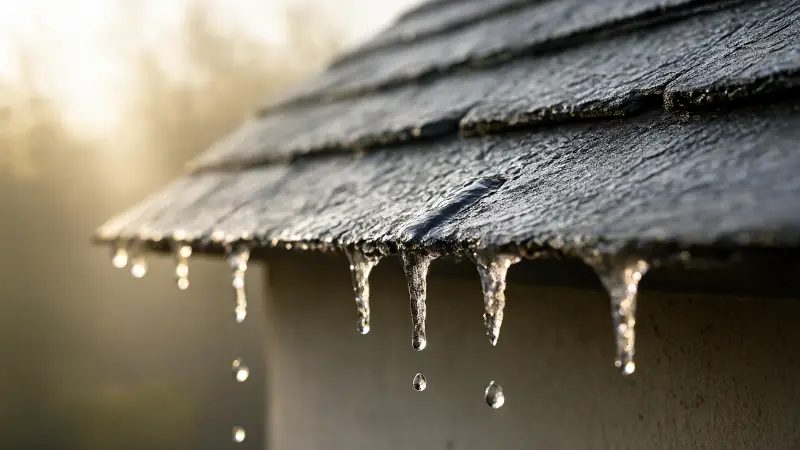
Do not use a hammer, an axe, a chisel, or a power tool to break ice off the roof or the gutter. Those methods damage shingles, tear the gutter, and bend the flashing. They also put you on a ladder or a roof in dangerous conditions. A damaged shingle or a pulled gutter creates a new leak path that lasts long after the ice has melted.
Chemical de-icers are not a good substitute for removal. Many products can stain siding, damage roofing materials, and harm plants below. Some are corrosive to metal gutters and flashing. If you use a de-icer, choose one labeled for roof use and follow the directions, but understand that it is a temporary measure rather than a solution.
If the icicles are large, if the roof is steep or high, or if there is already water entering the house, call a professional. An ice dam removal service can clear the ice without damaging the roof and can advise on the underlying cause.
Fixing the Cause So the Icicles Stop Coming Back
The permanent fix is to keep the roof deck cold. That means reducing the heat that escapes from the house into the attic and improving the airflow that carries that heat away. Air sealing and insulation are the core of the work, and ventilation supports them.
Air sealing targets the paths that carry warm air from the living space into the attic. The top plates of walls, plumbing and wiring penetrations, recessed light housings, the attic hatch, and chimney chases are common leak points. Seal them with caulk, foam, or rigid material plus sealant, and use covers rated for contact with insulation on recessed lights.
Insulation slows conductive heat loss and should be installed to a depth appropriate for the climate. A common benchmark is a minimum of R-30, with higher values preferred in colder zones. Keep the insulation continuous and do not block the soffit vents, because the attic needs air to enter low and exit high.
Ventilation keeps the roof deck closer to outdoor temperature. A balanced soffit-to-ridge system is the usual goal, with open intake at the eaves and a clear exhaust at the ridge. Do not substitute a powered attic fan for air sealing and insulation, because it can pull conditioned air out of the house and make the heat loss worse.
Gutters and downspouts need to be clear before winter so meltwater can drain away. Clean the gutters in fall, check the downspouts for blockages, and confirm that the discharge carries water away from the foundation. A clogged gutter holds water at the roof edge and feeds the ice.
Roof-level defenses during a re-roof
If the roof is being replaced, an ice-and-water shield membrane along the eaves is a valuable addition. It does not stop ice from forming, but it prevents backed-up water from passing through the roof deck. Metal drip edge and proper flashing details at valleys, chimneys, and dormers also reduce the chance that ice will find a seam to exploit.
The principles behind these fixes are covered in more detail in a guide to ice dam prevention without heat cable. That article walks through air sealing, insulation depth, and ventilation as a system rather than as separate tasks.
What Not to Do When You See Icicles
Do not ignore a large icicle that hangs over a doorway or a driveway. It can fall and cause injury, and it is a sign of an ice dam that is already affecting the roof. Remove it safely from the ground or call a professional.
Do not try to solve the problem by keeping the attic warmer. Some homeowners assume that a warmer attic will melt the ice, but that approach increases the meltwater and can make the dam larger. The goal is a cold roof, not a warm one.
Do not block the soffit vents in an attempt to keep the attic warm. That traps moisture and makes the ice dam and mold problems worse. The attic needs ventilation to stay dry and cold.
Do not assume the roof is fine because the shingles look good from the ground. Ice dam damage often happens under the shingles and inside the roof assembly, where it is not visible until water reaches the ceiling. A professional inspection after a bad winter can find damage before it spreads.
When to Call a Professional
Call a roofing contractor if water is entering the house, if the ceiling or walls show stains or bulges, if the attic insulation is wet, or if the icicles are large and persistent. A contractor can inspect the roof assembly, identify the leak path, and recommend repairs to the shingles, flashing, and underlayment.
Call an insulation or weatherization contractor for the attic work. Air sealing and insulation are straightforward in principle but require attention to detail in practice, especially in a complicated roof with valleys, dormers, and knee walls. A blower door test before and after the work can confirm the improvement.
Call an ice dam removal service that uses steam if the dam is large or if water is already backing up. Steam removes the ice without damaging the shingles, and the technician can advise on the cause. Do not hire anyone who offers to chip the ice off with an axe or a torch.
Structural damage from ice and water is a separate concern. Ice can be heavy, and a roof that has been loaded with ice and snow for weeks may show sagging or movement. If the roof structure looks distorted, keep people out from under it and call a structural professional. A guide to flat roof joist hanger installation covers the hardware and load considerations for flat roof framing if repairs are needed.
Other Winter Systems to Check While You Are at It
Ice dams and icicles often appear during the same cold snaps that stress the heating system. If the furnace is locking out, a dirty flame sensor is a common cause, and a guide to a flame sensor causing furnace lockout explains the symptoms and the checks. Addressing heat loss in the attic and reliability in the furnace are both part of getting through winter without a surprise.
Quick Reference: Icicle Symptoms and What They Suggest
The table below matches common icicle and ice conditions with what they usually indicate and the safest first action. Use it to decide what to check and when to call for help.
| What You See | What It Usually Means | Safe First Step | When to Call a Pro |
|---|---|---|---|
| Thick curtain of icicles along the eave | Warm roof deck melting snow, cold eave refreezing it | Contain any interior drips; document the pattern | Water is entering the house or the ice is large |
| Icicles concentrated at a valley or dormer | Runoff concentration and seam weakness | Check for ceiling stains near that area | Any sign of water inside |
| Ice on siding, fascia, or soffit | Water running where it should not | Do not chip; note the extent | Ice is thick or the fascia is damaged |
| Brown or yellow ceiling stain | Water has entered the roof assembly | Move valuables; place buckets; photograph damage | Always, for an active leak |
| Frost on attic nails or sheathing | High attic humidity and heat loss | Improve ventilation and air sealing | Mold or wet insulation present |
| Gutter full of ice and debris | Blocked drainage holding water at the edge | Clear what is reachable from the ground | Gutter is damaged or pulling away |
| Bulging ceiling with trapped water | Water pooling above the drywall | Controlled drain hole and bucket | Always, and check for structural damage |
| Water near outlets or light fixtures | Leak plus electrical hazard | Turn off the circuit; stay out of standing water | Electrician if equipment is wet |
FAQ
Can icicles on my roof really cause a leak?
Yes. Large icicles usually indicate an ice dam at the eave, and the water behind that dam can back up under the shingles and into the roof deck. The leak often appears inside the house, sometimes far from where the icicles are hanging. A brown ceiling stain or a drip after a snowy stretch is a strong warning sign.
Should I knock the icicles off my roof?
Remove small icicles that hang over walkways using a long-handled tool from the ground. Do not climb onto the roof or use a hammer, axe, or chisel. Mechanical removal damages shingles, gutters, and flashing. For large icicles or an existing leak, call a professional ice dam removal service.
Will a warmer attic stop icicles from forming?
No. A warmer attic makes the problem worse because more snow melts and more water refreezes at the eave. The goal is a cold roof: seal the air leaks, insulate properly, and ventilate the attic so the roof deck stays close to outdoor temperature.
How do I know if the icicles have already caused damage?
Look for ceiling and wall stains, bulging paint, wet or compressed attic insulation, frost on the roof sheathing, and ice on the siding or fascia. A moisture meter can find damp spots that are not yet visible. If you find any of these signs, arrange a roofing inspection before the damage spreads.
Conclusion
Icicles on a roof are a symptom, not the problem. They form when snow melts on a warm roof deck and refreezes at a cold eave, and the resulting ice dam can push water under the shingles and into the house. Stains on the ceiling, ice on the siding, and frost in the attic are signs that the leak has already started.
Handle the immediate problem with containment and safe removal from the ground. Do not chip at the ice, climb onto the roof, or rely on chemical de-icers. Call a professional if water is entering the house or the icicles are large and persistent.
The lasting fix is a cold roof: air seal the ceiling plane, insulate to the recommended depth, and keep the soffit-to-ridge ventilation clear. Clean the gutters before winter, and add an ice-and-water shield during a re-roof. Those steps stop the meltwater at its source and keep the icicles from coming back next season.