Replacing a bay window with a flat window is one of the most consequential exterior changes a homeowner can make. It is not a window swap in the usual sense. A bay window is a small, projecting structure with its own floor, ceiling, and often a small roof, and it is frequently doing structural work that is not obvious from inside the room. Flattening that projection means removing a three-dimensional box and rebuilding a section of exterior wall.
The project is entirely achievable, and many homeowners undertake it to eliminate persistent drafts, simplify maintenance, reclaim interior floor space, or modernize the home’s appearance. But the difference between a successful conversion and an expensive lesson lies in understanding what holds the bay up, how the wall will carry load once the bay is gone, and which code requirements apply to the new opening. This guide walks through the structural, permitting, and practical realities so you can plan the work with clear eyes.
Why Homeowners Flatten a Bay Window
The motivations are usually a mix of performance and preference. Bay windows have more seams, more angles, and more exterior surface area than a flat window, which means more places for water and air to find a way in. Failed flashing where the bay roof meets the main wall, deteriorating sealant around the frame, and wood rot in the seat board or skirt are common over time. In cold climates, the uninsulated floor of the bay box becomes a significant heat leak, and the multiple glass panels and angled joints make the assembly harder to seal than a single flat unit.
There is also a spatial argument. A bay window consumes interior floor area and creates an angled alcove that can be awkward to furnish. Removing it reclaims that wall space for furniture placement and simplifies the room’s geometry. On the exterior, a flat window offers a cleaner, more contemporary profile that suits many architectural styles better than a projecting bay. And for homeowners tired of cleaning three or more panes and inspecting a small roof, a flat window reduces the maintenance burden considerably.
First, Understand How Your Bay Window Is Supported
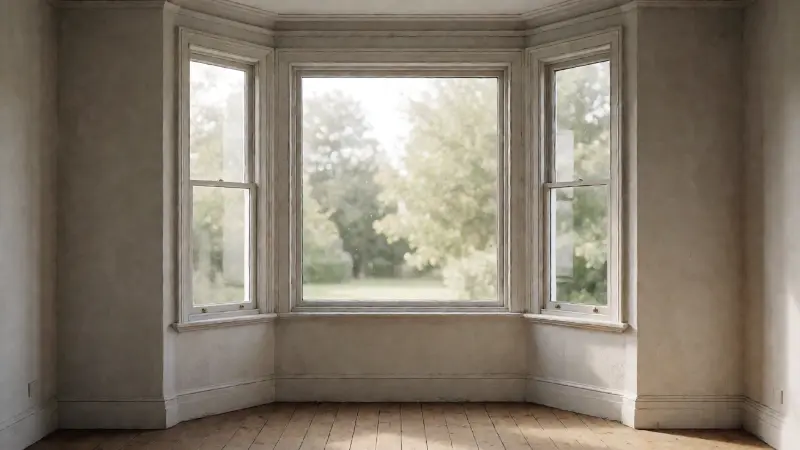
The single most important factor in planning the conversion is how the existing bay is held up. The method of support determines how much structural work the removal will trigger and, by extension, the cost and complexity of the project. There are three common support systems, and you can often identify yours before a contractor arrives.
Cable-supported bays hang from above. Steel cables run from the head board of the bay up through the wall and anchor into the framing above the opening. If you look at the head board and see two small capped holes near the front corners, that is a strong indication of cable support. Removing a cable-hung bay often requires opening the wall above to reach the anchors, which adds scope to the job.
Knee-braced bays are held up from below by angled brackets or corbels that run from the underside of the seat back to the wall. Go outside and look up under the skirt; if you see two diagonal arms, that is what you have. Cantilevered bays sit on floor joists that extend out past the wall. You will not see cables or braces, and the skirt is typically just cladding. A cantilevered bay is often the closest to a flat-window job in terms of structural implications, while a cable-hung bay may require more invasive work.
Regardless of the type, the bay is carrying weight and transferring it back to the house. Removing it without temporary bracing or a clear plan for the new load path can lead to sagging or worse. This is why a structural assessment is not optional.
The Structural Assessment: Header, Framing, and Hidden Damage
A qualified contractor or structural engineer will begin by evaluating the header above the window opening. The header is the horizontal beam that carries the load of the wall above the opening, and its size and condition determine whether it can support the new configuration. If the new flat window is wider than the original bay opening, or if the framing must be reconfigured, a new load-bearing header may be required. Even if the width stays similar, the removal of the bay changes how load is distributed, and the header must be assessed for that condition.
The assessment also examines the surrounding wall studs, the foundation below, and the condition of the framing that was hidden behind the bay. Water infiltration around the bay roof and seat is common, and it can rot the framing in the main wall as well as the bay itself. Discovering rot during the assessment is far better than discovering it after the new window is installed and the siding is closed up. The contractor will also check for electrical wiring, plumbing, or HVAC components within the wall cavity that may need to be relocated.
If the bay is load-bearing, which is common in older construction, the plan must account for how weight is currently distributed and how it will be carried after the bay is removed. In more complex cases, a structural engineer should review the plan before any demolition begins. This is not a step to skip in the interest of saving time or money.
Permits and Code Requirements
Replacing a bay window with a flat window typically qualifies as a structural change, and most municipalities require a building permit for structural window modifications. The permit process ensures that the work meets current codes for structural safety, egress, safety glazing, and energy performance. Even in jurisdictions that exempt same-size window replacements, changing the opening’s configuration or the wall framing almost always triggers a permit requirement.
Two code areas deserve particular attention. The first is emergency escape and rescue openings. If the bay window is in a bedroom or a basement sleeping area, the replacement window must generally provide a net clear opening of at least 5.7 square feet, with a minimum clear height of 24 inches, a minimum clear width of 20 inches, and a sill no more than 44 inches above the floor. There is a replacement-window allowance in the model code, but it is conditional: the new window generally must be the manufacturer’s largest standard size that fits the existing rough opening and must be the same operating style or one with an equal or larger opening. A flat window that is smaller or of a different operating style could fail this requirement.
The second area is safety glazing. Glass in hazardous locations, such as near doors or in tub and shower enclosures, must be tempered or otherwise safety-glazed. The replacement window must meet the current requirement for its location, even if the old bay did not. Energy code requirements for the new window’s U-factor and solar heat gain coefficient also apply, and the permit inspector will check that the installed unit meets the local energy code.
Cost Expectations: What Drives the Price
Costs vary widely by region, window specification, and the amount of structural work required. A common range for a mid-range conversion in a standard U.S. home is roughly $1,000 to $2,700, with higher-end projects surpassing $3,000 when custom trim or high-performance glass is used. Some estimates place the total project range from about $2,000 to $4,500 for a flat-window conversion, compared with $3,500 to $7,000 for a like-for-like bay replacement. The flat conversion is often cheaper than replacing the bay with another bay, largely because the new window unit is less expensive and the assembly is simpler.
Several factors drive the price upward. A larger window unit, a wood frame instead of vinyl, triple glazing, and custom trim all add cost. Structural complexity is the biggest variable: a new header, reframing the rough opening, repairing rot in the surrounding wall, and relocating utilities all increase labor and materials. Permits and inspections add a modest amount, and disposal of the old bay adds a smaller amount. Regional labor rates can swing the total by a meaningful margin, with higher costs in the Northeast and mid-range pricing in the Midwest.
Comparison Table: Bay Window vs Flat Window Conversion
| Factor | Existing Bay Window | Flat Window Conversion |
|---|---|---|
| Structure | Projecting box with its own floor, ceiling, and often a small roof | Window set flush in the main wall plane |
| Support | Cables from above, knee braces from below, or cantilevered joists | Load carried by the wall header and framing |
| Typical installed cost | Roughly $3,500–$7,000 or more for a like-for-like bay | Roughly $1,000–$4,500 depending on scope |
| Energy performance | More seams, an exposed underside, and multiple panels increase heat loss | Single plane, easier to insulate and air-seal; modern glass improves performance |
| Maintenance | Multiple panes, angled joints, a small roof, and flashing to inspect | Simpler cleaning and fewer exterior seams |
| Interior space | Creates an angled alcove and consumes floor area | Reclaims wall space for furniture and simplifies the room |
| Permit likelihood | Permit often required for replacement or structural work | Permit typically required because framing and opening change |
| Egress considerations | Existing opening may or may not comply | New window must meet egress and safety glazing rules if applicable |
The Removal and Reframing Sequence
The work begins with the removal of the bay assembly. This is not a matter of prying out a window. The crew strips the bay roof, the side panels, the center unit, the seat board, and the skirt, and then addresses the support system. If the bay is cable-hung, the cables are detached from the framing above; if it is knee-braced, the brackets are removed; if it is cantilevered, the joists are cut back in line with the main wall. Temporary bracing may be needed to support the wall above the opening during this phase.
Once the bay is gone, the rough opening is reconfigured. The old opening was sized for a three-dimensional bay, so it is typically larger than a flat window requires. The crew frames the opening to the new dimensions, which may involve adding studs, a new header, jack studs, and a sill. If the bay was cantilevered, the joists that extended outward are cut back and a new rim or header is installed to close the wall plane. The goal is a flat, vertical, and properly supported opening that aligns with the rest of the exterior wall.
The wall cavity that was formerly the bay’s interior must be insulated and closed. The floor and ceiling of the old bay projection leave a void in the wall that needs sheathing, insulation, and drywall on the inside and siding on the outside. Closed-cell spray foam is often a better choice than fiberglass batts in this irregular cavity because it air-seals as well as insulates and does not lose R-value when compressed. The exterior is then sheathed, weatherproofed, and sided to match the existing wall.
Exterior Weatherproofing and Interior Finishing
The exterior work is the most visible part of the project and the most important for long-term performance. The new wall section must be integrated with the existing water-resistive barrier, and the flashing around the new window must be installed in the correct sequence so water sheds away from the opening. The siding must be matched to the existing material as closely as possible, and the transition at the old bay location must be sealed and trimmed so it does not read as a patch. This is detail work, and it is where a low bid can show its weaknesses.
Inside, the new window opening is trimmed, the wall is insulated, and the drywall is patched and finished. The old bay created a deeper interior projection, so the wall now sits flush, which changes the room’s proportions and trim alignment. The baseboard, casing, and any adjacent trim must be adjusted to suit the new wall plane. If the room has hardwood or tile flooring that stopped at the bay, the flooring may need to be extended or patched to cover the former projection area.
Energy Efficiency Gains and Insulation Details
A flat window set in a well-insulated wall cavity can outperform an aging bay window on thermal performance, particularly when the new unit has double or triple glazing with argon fill and low-E coatings. The elimination of the bay’s exposed underside, multiple angled joints, and small roof removes several paths for air infiltration and heat loss. The overall assembly is simpler, and simpler is generally easier to seal.
The insulation detail in the former bay cavity matters as much as the window specification. If the cavity is left with compressed batts or gaps around the framing, the wall will underperform and may be prone to condensation. Closed-cell spray foam provides a higher R-value per inch than fiberglass and seals the irregular geometry effectively. Rigid foam board is another option for the flat sections, but the edges and transitions still need to be sealed. The goal is a continuous thermal and air barrier from the existing wall into the new section.
Mistakes to Avoid
- Skipping the structural assessment: Assuming the bay is decorative or that the old header will serve the new opening without evaluation is the most common and costly error.
- Ignoring egress requirements: A smaller or differently operating replacement window in a bedroom can fail the emergency escape rules.
- Under-insulating the old bay cavity: Compressed batts and unsealed gaps undermine the energy gains that justified the project.
- Flashing and siding shortcuts: Poorly integrated weatherproofing at the new wall section can lead to water intrusion and rot within a few seasons.
- Choosing a low bid without checking scope: A quote that omits structural work, permits, or finish carpentry is not comparable to one that includes them.
- Overlooking interior finish transitions: Flooring, baseboard, and casing gaps are common when the wall plane changes and are expensive to correct after the fact.
When to Bring In a Professional
This is not a project for a homeowner whose experience is limited to patching drywall and painting. The combination of load-bearing framing, exterior weatherproofing, and code compliance makes professional involvement the sensible default. A licensed general contractor who has completed bay-to-flat conversions can coordinate the structural, exterior, and interior trades, pull the permit, and manage inspections. A structural engineer may be needed if the load path is complex or if the existing framing is compromised.
If you are evaluating other home improvements at the same time, the same logic of matching the product and the installation to the actual conditions applies. A guide on cost of replacing windows in a house can help you budget the broader window work, while an article on filling in a basement window shows how closing an opening safely involves similar structural and waterproofing considerations. For a smaller-scale example of matching hardware to an existing opening, the guide on replacing old door knobs with the wrong size hole illustrates how a mismatch between the new component and the existing rough opening creates avoidable work.
FAQ
Can I replace a bay window with a flat window myself?
The structural and weatherproofing work involved makes this a poor candidate for most DIYers. Load-bearing framing, header sizing, flashing integration, and permit inspections all require experience. A licensed contractor is the safer choice, and some jurisdictions require licensed trades for structural alterations.
Do I need a permit to replace a bay window with a flat window?
In most jurisdictions, yes. The project changes the wall framing and the window opening, which typically triggers a building permit requirement. Even where same-size replacements are exempt, a conversion from a projecting bay to a flush window is usually treated as a structural change.
How much does it cost to replace a bay window with a flat window?
Common ranges run from roughly $1,000 to $4,500 depending on window size, frame material, glazing, structural complexity, and region. A mid-range project often falls between $1,000 and $2,700, while high-end specifications and significant structural work can push the total above $3,000.
Will a flat window be more energy-efficient than my bay window?
A modern flat window with double or triple glazing, argon fill, and low-E coatings, installed in a well-insulated and air-sealed wall, can significantly outperform an older bay window. The bay’s multiple seams, exposed underside, and angled joints are difficult to seal, so eliminating them often improves comfort and reduces heat loss.
What happens to the space where the bay window was?
The projection is removed, and the wall is rebuilt flush with the main exterior plane. The old bay cavity is insulated, sheathed, and finished on both sides. Inside, the room gains a flat wall where the angled alcove used to be, which can improve furniture placement and simplify the space.
Can I just replace the glass in the bay instead of removing it?
Replacing the glass or the individual window units in a bay is a different project from flattening it. A bay’s units are typically mulled together as a single assembly, so replacing one section is difficult and often compromises sealing. If the structure is sound and you want to keep the bay, a like-for-like window replacement is the appropriate path, but it does not deliver the maintenance and space benefits of a flat conversion.