If you have ever tried to hang a custom door on an IKEA cabinet frame, you know the hinge cup is the make-or-break detail. The frame is pre-drilled, the hinge is engineered to a tight tolerance, and a hole that is a few millimeters off can leave the door crooked, rubbing, or unable to close. This is where an IKEA hinge drilling template earns its keep. It converts a freehand drilling job into a repeatable, accurate process.
The challenge is that “IKEA hinge template” can mean several things. It might refer to a factory-made jig, a printable 3D model, a shop-made MDF pattern, or a generic concealed-hinge jig that happens to fit. Each option has trade-offs in cost, accuracy, and setup time. This guide explains the dimensions that matter, how to use a template correctly, and the mistakes that cause most drilling errors.
Why IKEA Hinges Need a Dedicated Drilling Template
IKEA cabinet systems use the European concealed hinge standard, not a proprietary mechanism. That is good news for anyone building custom doors, because standard hardware fits. The bad news is that the standard is unforgiving. The hinge cup must sit at a specific depth and distance from the door edge, and the two screw holes must align with the cup at a specific spacing. A template removes the guesswork.
The cabinet frame side is equally demanding. IKEA frames are drilled on the System 32 grid, which means the mounting plate holes are spaced at fixed intervals. If the door-side holes are not positioned to match the frame-side pattern, the hinge will not sit square, and the door will not hang correctly. A template that references both the door edge and the frame pattern keeps those two sides in agreement.
There is also a practical reason to use a template rather than measuring each door individually. Most kitchens and wardrobes have multiple doors of the same height. Once the template is set for one door, it can be reused for every door in the run. That consistency is what separates a professional-looking install from a collection of slightly mismatched doors.
Standard IKEA Hinge Dimensions You Need to Know
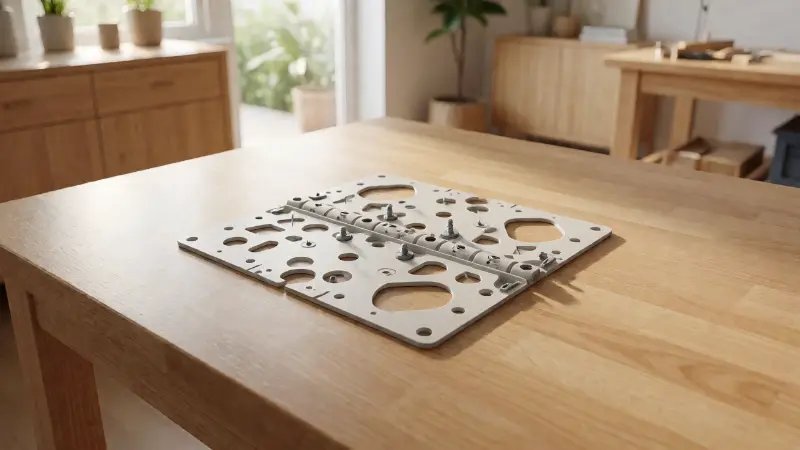
Before you choose or make a template, confirm the dimensions for your specific IKEA system. The table below summarizes the published standards for the most common families. Always verify against the hinge you are actually using, because slight variations exist between production runs and between IKEA’s in-house hinges and third-party replacements.
| Dimension | Faktum / Pax | Sektion / Utrusta | Notes |
|---|---|---|---|
| Cup diameter | 35 mm | 35 mm | Universal European standard |
| Cup depth | 11.5–12.5 mm | 11.5–13 mm | Depends on door thickness |
| Cup edge distance (K) | 3–6 mm | 3–6 mm | Affects door gap and overlay |
| Screw hole spacing | 45 mm or 52 mm | 45 mm, 48 mm, or 52 mm | Center-to-center of the two cup screws |
| Frame hole pattern | System 32 | System 32 | 37 mm from front edge, 32 mm vertical spacing |
| Hinge position from door edge | Varies by door height | About 46.5 mm from top or bottom edge | Confirm with the door’s pre-drilled reference |
| Door thickness | 16–19 mm typical | 16–22 mm typical | Thinner doors risk blow-through |
Two numbers cause the most confusion. The first is the cup edge distance, often called the K-dimension. It is measured from the side edge of the door to the edge of the 35 mm hole. A smaller K-dimension moves the door closer to the cabinet, which tightens the gap. A larger K-dimension opens the gap. The second is the screw hole spacing. If your hinge has a 45 mm pattern and your template is drilled for 52 mm, the screws will not line up, and the cup will not seat.
Option 1: Use an IKEA-Specific Template or Jig
The most straightforward path is a template designed specifically for IKEA hinges. These range from simple marking guides to full drill jigs with hardened bushings. A basic template may be a flat plate with holes for a pencil or a center punch; a full jig includes a guide for the 35 mm Forstner bit and bushings for the screw holes.
A dedicated IKEA template has an advantage: it references the door edge and the hinge position in the same setup. That reduces the chance of a cumulative error, where the cup is correct but the screw holes drift, or vice versa. It also usually includes a stop or fence that registers against the door edge, so you do not have to measure the K-dimension for every door.
If you are buying a jig, check that it matches your hinge generation. IKEA has used several hinge designs over the years, and the Utrusta system used in Sektion and Metod cabinets is not identical to the older Faktum system. A jig labeled for one system may not be correct for the other. When in doubt, compare the jig’s hole pattern with the actual hinge cup and screw holes before drilling a test piece.
Option 2: Make a Shop-Made Template from MDF or Plywood
A shop-made template is often the most practical choice for a one-time project. The idea is simple: take one factory door that fits the cabinet, or measure the hinge positions from an existing door, and transfer those positions to a piece of 1/2-inch or 3/4-inch MDF. Cut a hole for the 35 mm cup and drill the screw holes at the correct spacing. Then clamp the template to each new door and use it as a guide.
The critical step is establishing the reference edges. Your template needs a straight fence that registers against the top edge and the hinge-side edge of the door. If the template can shift, the holes will shift with it. Glue a strip of hardwood or MDF to the template to create a fence, or use a square clamped to the door as a guide. Mark the template clearly with “top” and “hinge side” so you do not flip it by accident.
For the cup hole, a 35 mm Forstner bit is the correct tool. It cuts a flat-bottomed hole, which is important because the hinge cup needs a clean seat. A hole saw can work in a pinch, but it tends to leave a rougher bottom and may tear the door’s veneer. If you use a hole saw, finish the bottom with a chisel or a router to flatten it. The template itself can serve as a guide for the bit if the hole is cut accurately; otherwise, use the template to mark the center and drill freehand with a depth stop.
Option 3: 3D-Printed IKEA Hinge Templates
3D printing has made specialized templates accessible to hobbyists. Several free models exist for IKEA Utrusta, Pax, Komplement, and Hjalpa hinges. These models typically include a guide for the 35 mm cup, holes for the screw pattern, and a fence or alignment wedge that registers against the door edge or the frame.
The quality of a printed template depends on the printer and the material. A template printed in PLA can work for a few doors, but it may wear quickly if the drill bit rubs against it. PETG or ABS is more durable, and a template with replaceable bushings is better still. If the template is only for marking hole centers rather than guiding the bit, durability matters less because the drill does not contact the plastic.
Printed templates are a good fit for DIYers who already own a printer or have access to one. They are less suitable for a production environment where speed and repeatability are critical. If you go this route, print a test piece and check the dimensions against your hinge before committing to a door. A small scaling error in the print can throw off the hole spacing by a millimeter or more.
Option 4: Use a Generic Concealed-Hinge Jig
Generic concealed-hinge jigs are widely available and are often cheaper than IKEA-specific templates. The catch is that they are designed around the most common hinge patterns, which may not match your IKEA hinges exactly. Some generic jigs allow you to adjust the screw hole spacing, while others are fixed at 45 mm or 52 mm.
A generic jig can work well if its pattern matches your hinge. Check the cup diameter, the screw spacing, and the K-dimension before you buy. If the jig has an adjustable fence, set it to the correct K-dimension for your door and lock it down. If the jig is not adjustable, measure the actual hole pattern on the hinge and compare it with the jig’s pattern. A mismatch of even a millimeter can make the screws bind or the cup sit off-center.
One advantage of a generic jig is that it often includes a depth stop for the Forstner bit, which helps prevent blow-through on thinner doors. That is a useful feature for IKEA doors, which can be on the thinner side. If you are drilling many doors, a jig with a clamp and a depth stop will be faster and more consistent than a shop-made template.
The Drilling Sequence: Cup First, Then Screws
The order of operations matters. Drill the 35 mm cup hole first. Then use the cup as a reference for the screw holes, or use a template that references the cup. Drilling the screw holes first and then trying to align the cup to them is harder, because the cup is the larger feature and it dictates the hinge’s position.
Set the Forstner bit depth to match the cup depth for your hinge and door thickness. A common range is 11.5 mm to 13 mm. If the door is thin, err on the shallow side and test-fit the hinge. You can always remove a little more material, but you cannot put it back. Use a depth stop on the drill or a piece of tape on the bit as a visual guide.
For the screw holes, use a bit sized for the screws that came with the hinge. Many IKEA hinges use 5 mm or 8 mm holes, depending on the design. A brad-point bit or a dowel bit leaves a cleaner entry than a standard twist bit, especially in melamine or veneered doors. Mark the depth with tape so you do not drill through the face.
Clamp the template firmly before drilling. Hand pressure is not enough, especially with a Forstner bit, which can grab and spin the template. Use at least one clamp, ideally two, and check that the template has not shifted after the first hole. If the template moves between the cup and the screw holes, the hinge will not seat correctly.
Common Mistakes That Ruin the Hole Pattern
The first mistake is using the wrong screw spacing. IKEA hinges come in 45 mm, 48 mm, and 52 mm patterns. If you drill for one and use a hinge with another, the screws will not align, and the cup will not sit flush. Always measure the hinge, not the old door, because old doors may have been drilled for a different hinge generation.
The second mistake is ignoring the K-dimension. A cup that is too close to the edge can cause the door to rub against the cabinet. A cup that is too far from the edge can leave an uneven gap. The K-dimension is usually between 3 mm and 6 mm. If you are unsure, drill a test door and check the fit before committing to the full set.
The third mistake is drilling through the door face. This happens when the cup depth is set too deep, or when the screw holes are drilled without a depth stop. IKEA doors are often 16 mm to 19 mm thick, and the cup depth is a significant fraction of that. A drill-through is visible and difficult to repair invisibly. Use a depth stop and check your setup on a scrap piece first.
The fourth mistake is letting the template shift. A template that is not clamped securely can rotate or slide between holes. The result is a pattern that looks correct at a glance but is out of alignment when the hinge is installed. Clamp the template, drill one hole, check the alignment, and then continue.
The fifth mistake is mixing hinge generations. An older Faktum hinge and a newer Utrusta hinge may have different cup depths or screw patterns. If you are replacing hinges on an existing door, match the new hinge to the existing holes rather than redrilling the door. If you are drilling a new door, match the template to the hinge you will actually install.
Template Setup and Alignment Tips
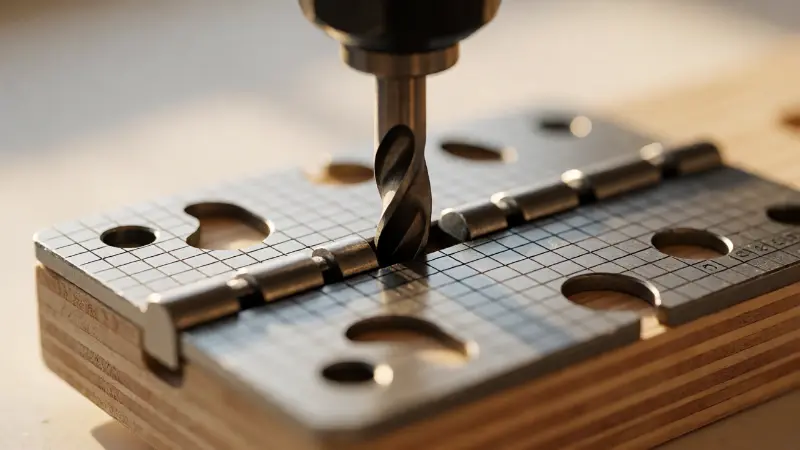
Set up the template on a sacrificial piece of the same door material before you touch a finished door. This test cut reveals whether the cup depth, screw spacing, and edge distance are correct. It also lets you check the hinge fit and the door gap before you commit. A scrap piece of melamine or MDF is close enough to an IKEA door for this purpose, though the actual door is the best test.
Use a square to align the template’s fence with the door edge. If the template has a printed line or a notch, make sure it is parallel to the edge. A small error in the template’s angle translates to a large error at the hinge. Check the setup with a combination square or a machinist’s square, and re-check after clamping.
Mark the hinge positions on the door before drilling. For a Sektion door, the hinge is typically positioned about 46.5 mm from the top or bottom edge, but this can vary with door height and hinge type. IKEA’s instructions and the hinge packaging usually specify the position. If you are reusing an existing door, measure the old hinge positions and transfer them to the template.
When drilling multiple doors, keep the template in the same orientation for every door. It is easy to flip the template by mistake, especially if the door has a grain pattern or a pre-drilled handle hole that makes one end look like the other. Label the template “top” and “hinge side” with a permanent marker, and check the label before every cut.
When a Template Is Not Enough
Some situations call for more than a template. If the door is warped, if the cabinet frame is out of square, or if the floor is uneven, a perfectly drilled hinge will still produce a poorly hung door. In those cases, the hinge’s adjustment features can compensate to a point, but they cannot fix a structural problem. Check the frame and the door before drilling.
If you are replacing hinges on an existing IKEA door, the old holes may be worn or stripped. A template will not fix a damaged hole. You may need to fill the old holes with wood filler or a dowel and redrill, or use a hinge repair plate. The article on Jessica Charles furniture reviews may seem unrelated, but it reinforces a useful principle: the quality of the hardware and the installation determines how the finished piece performs, regardless of the brand on the label.
For projects that involve other types of home improvement, the same attention to measurement and sequencing applies. The guide on portico gutters and home protection shows how small details in water management prevent larger problems, and the article on gas line rough-in for a dryer demonstrates how precise planning and code awareness keep a project safe. Hinge drilling is less hazardous, but the discipline of measuring twice and testing on scrap is the same.
FAQ
What size hole does an IKEA hinge need?
Most IKEA concealed hinges use a 35 mm diameter cup hole. The depth is typically between 11.5 mm and 13 mm, depending on the door thickness and the specific hinge model. The two screw holes next to the cup are usually 5 mm or 8 mm, and their spacing varies between 45 mm and 52 mm.
Can I use a regular hinge jig for IKEA cabinets?
A generic concealed-hinge jig can work if its cup diameter, screw spacing, and K-dimension match your IKEA hinge. Many generic jigs are adjustable, but some are fixed at a specific pattern. Check the jig against the actual hinge before drilling. If the pattern is wrong, the hinge will not seat correctly.
Where is the hinge placed on an IKEA Sektion door?
The hinge cup is commonly positioned about 46.5 mm from the top or bottom edge of the door, but this can vary with door height and hinge type. IKEA’s instructions and the hinge packaging usually specify the position. If you are reusing an existing door, measure the old hinge position and transfer it to your template.
Do I need a Forstner bit for the hinge cup?
A Forstner bit is the better choice because it cuts a flat-bottomed hole, which allows the hinge cup to sit flush. A hole saw can work, but it may leave a rougher bottom and can tear the door’s veneer. If you use a hole saw, finish the bottom with a chisel or a router to flatten it.
How do I avoid drilling through the door face?
Set a depth stop on the drill or wrap tape around the bit at the correct depth. Test the setup on a scrap piece of the same material before drilling the finished door. IKEA doors are often 16 mm to 19 mm thick, and the cup depth is a significant fraction of that, so a drill-through is a real risk if the depth is not controlled.
Can I 3D print an IKEA hinge template?
Yes, several free models exist for Utrusta, Pax, Komplement, and Hjalpa hinges. Print a test piece and check the dimensions against your hinge before drilling a door. A template printed in a durable material such as PETG or ABS will last longer than PLA, especially if the drill bit contacts the template.