A Craftsman snowblower leaking gas is more than an inconvenience. Fuel can pool inside the frame, soak into debris around the engine, and create a fire risk near a hot muffler or a spark. The leak also wastes fuel, can foul the carburetor, and may leave the machine hard to start when you need it most. The good news is that most leaks trace back to a handful of predictable components, and many of them are accessible to a homeowner with basic tools.
This guide walks through the likely sources in a sensible order, starting with safety and diagnosis before any wrench turns. It covers the fuel shut-off valve, primer bulb and fuel lines, carburetor float needle and bowl gasket, tank fittings, and the operating habits that make leaks more likely. It also explains when a rebuild is worthwhile and when replacement makes more sense.
Safety First: Stop the Leak and Remove Ignition Sources
Before you inspect anything, move the machine outdoors or into a well-ventilated area away from pilot lights, water heaters, furnaces, and anything that can spark. Gasoline vapor is heavier than air and can travel along a floor to an ignition source. Do not smoke, and do not use a shop vacuum to clean up fuel unless it is rated for flammable liquids.
Shut off the fuel valve if the machine has one, and disconnect the spark plug wire so the engine cannot start while you work. Place a drip pan or absorbent pad under the leak area. Clean up spilled fuel promptly with rags, and dispose of them according to local rules. If the leak is heavy or you smell strong fuel odor indoors, stop and ventilate the area before continuing.
Wear nitrile gloves and eye protection. Gasoline can irritate skin and eyes, and carburetor cleaner and other solvents are aggressive. Work on a level surface, and block the wheels so the machine cannot roll while you are reaching underneath it.
Identify Where the Gas Is Coming From
Diagnosis starts with a clean, dry machine. Wipe down the engine, tank, and frame with rags, then let the area dry. Place clean paper or cardboard under the machine and wait. A fresh drip or a damp patch gives you a location to inspect, which is far more efficient than guessing at components.
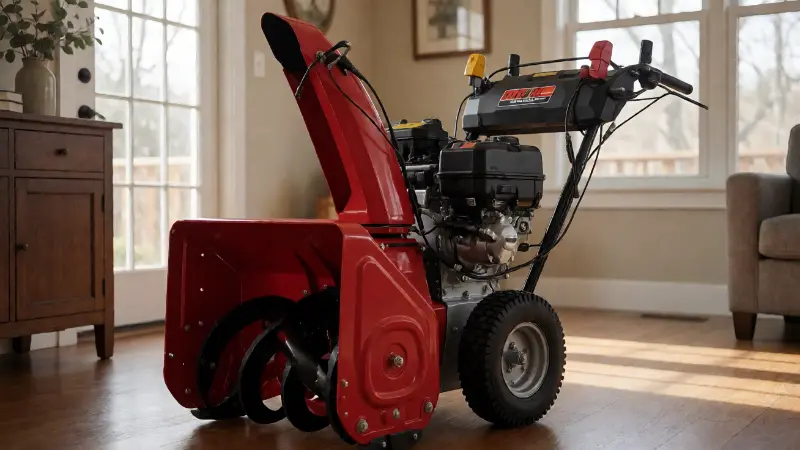
Follow the fuel path from the tank to the carburetor. The tank outlet feeds a fuel line, which may pass through a filter and a shut-off valve before reaching the carburetor bowl. A leak can appear at any joint along that path, and gravity means the actual source may be slightly above the puddle. Trace upward with a flashlight and look for wetness at fittings, clamps, and seams.
Check whether the leak is continuous or only appears when the engine is running, when the machine is tipped, or after storage. A leak that appears only when the engine is off and the valve is open points toward the carburetor needle and seat. A leak that appears only when running may be a bowl gasket or a loose fuel line. A leak after tipping is often a tank vent or cap issue.
If you cannot find the valve that controls fuel flow, the guide to the Craftsman fuel shut-off valve location shows where it sits on common models. Confirming the valve position is a useful first step because a valve left partly open can let fuel seep past a tired carburetor.
Cause 1: Fuel Shut-Off Valve Open or Failing
Many Craftsman snowblowers use a small fuel valve near the tank outlet or in the fuel line. If the valve is left open during storage, gravity can push fuel past the carburetor float needle and into the engine or onto the floor. This is especially common on machines that sit for months between seasons. Closing the valve after each use is a simple habit that prevents a surprising number of leaks.
A valve can also fail internally. Sediment can keep it from sealing, the packing can wear, or the valve body can crack. If fuel drips from the valve itself, or if the valve lever feels loose and does not stop flow, replacement is usually inexpensive. Shut off the fuel supply, drain the line, and swap the valve using the correct part for your model.
Some machines use a fuel valve integrated with the tank outlet or a sediment bowl. Inspect the bowl gasket and the outlet threads. A cracked bowl or a hardened gasket can leak steadily. Tighten fittings gently, since over-tightening plastic or pot metal parts can cause new cracks.
Cause 2: Primer Bulb and Fuel Lines
Primer bulbs and fuel lines are among the most common leak points on small engines, especially after several seasons of ethanol-blended fuel. Ethanol can degrade certain rubber compounds over time, leaving lines hard, cracked, or sticky. A cracked line can weep fuel onto the frame, and a failed primer bulb can leak from its body or from the base where it mounts to the carburetor.
Inspect the entire fuel line from tank to carburetor. Bend it gently and look for cracks, especially near clamps and where the line passes close to a hot surface. Check the primer bulb for tears, a loose fit, or fuel visible inside the bulb body. If the bulb is leaking, the detailed guide to gas leaking from a primer bulb covers the common fixes and replacement steps.
Replace fuel lines with line rated for fuel and the correct diameter. Use clamps that fit without cutting into the hose, and route the new line away from the muffler and sharp edges. If the tank outlet has a filter screen, clean or replace it while the line is off. A partially clogged screen can cause running problems that are easy to confuse with a carburetor issue.
Cause 3: Carburetor Float Needle and Bowl Gasket
The carburetor is the most common source of a steady leak when the engine is off. Inside the carburetor bowl, a float and needle valve regulate fuel level. If the needle is worn, the seat is dirty, or the float is stuck or saturated, fuel can overflow the bowl and run out through the vent or the air intake. This often shows up as a strong fuel smell and a puddle under the machine after storage.
The bowl gasket is another frequent culprit. A hardened or flattened gasket can seep fuel, especially after a machine has been stored dry or exposed to temperature swings. A bowl that is loose or cross-threaded can also leak. Removing the bowl, cleaning the internals, and replacing the gasket and needle is a common repair that addresses both issues at once.
Carburetor work requires care with small parts. Work over a tray so the float pin, needle, and springs do not disappear. Clean passages with carburetor cleaner and compressed air, and avoid probing jets with wire that can enlarge the opening. If the carburetor body is corroded or the throttle shaft is worn, a complete replacement may be more reliable than a rebuild.
Cause 4: Fuel Tank, Cap, and Outlet Grommet
The tank itself can leak at seams, around the outlet fitting, or at the cap. Plastic tanks can crack from impact or from age, and metal tanks can rust through. A leak that appears near the top of the tank may be a cap vent issue. A cap that does not vent correctly can allow pressure to build and push fuel past seals, or it can leak when the machine is tipped.
Inspect the tank outlet where the fuel line attaches. Many tanks use a rubber grommet or a threaded fitting, and both can deteriorate. A grommet that is hard or cracked can seep fuel slowly. Replace the grommet rather than sealing it with adhesive, since fuel-resistant repair compounds are limited and a proper replacement is more dependable.
Check the tank cap gasket and vent. A missing or damaged gasket can let fuel splash out during use or transport. If the cap is cracked, replace it with the correct part. Avoid substituting a cap from another machine unless it is listed for your model, since venting behavior varies.
Cause 5: Overfilling, Tip-Overs, and Ethanol Fuel
Not every leak is a failed part. Overfilling the tank leaves no room for expansion, and fuel can escape through the cap or vent as the machine warms up. Filling to the base of the filler neck rather than to the brim reduces this risk. Transporting the machine on a trailer or in a vehicle with a full tank can also cause spillage through the cap.
Tip-overs are another common cause. If the machine is laid on its side for service, fuel can run out of the carburetor vent or the tank cap. Check the owner’s manual for the approved service position, and drain fuel before tipping if the manual calls for it. After a tip-over, let the machine sit upright and clean up any fuel before starting it.
Ethanol-blended fuel attracts moisture and can degrade fuel system materials over time, especially in machines that sit for long periods. Using fresh fuel, adding a fuel stabilizer for storage, and running the carburetor dry before off-season storage reduce the chance of varnish and corrosion. These habits do not fix an existing leak, but they slow the deterioration that creates new ones.
Step-by-Step Troubleshooting and Repair
Work from the simplest and least expensive checks toward the more involved repairs. A methodical approach avoids replacing parts that are still serviceable and helps you confirm the repair actually solved the leak. Keep a rag and a drip pan handy, and reconnect the spark plug only when you are ready to test the machine.
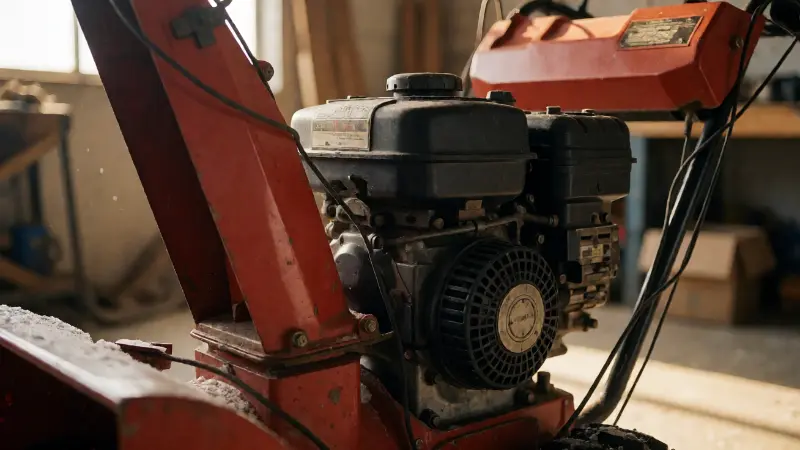
- Clean and dry the area. Remove debris and wipe down the tank, lines, valve, and carburetor. Place paper underneath and watch for fresh drips to locate the source.
- Close the fuel valve and observe. If the leak stops when the valve is closed, the issue is downstream, often the carburetor needle or bowl. If it continues, inspect the tank, cap, and valve itself.
- Inspect fuel lines and primer bulb. Look for cracks, soft spots, and loose clamps. Replace degraded line and any leaking bulb with fuel-rated parts of the correct size.
- Check the carburetor bowl. If fuel drips from the bowl area, remove the bowl, inspect the gasket, and check the float and needle. Clean or replace as needed.
- Inspect the tank and cap. Look for cracks, a damaged outlet grommet, and a worn cap gasket. Replace damaged parts rather than sealing them.
- Reassemble and test outdoors. Refill with fresh fuel, open the valve, and watch for drips before starting. Run the engine briefly and check again after it cools.
- Confirm starting behavior. If the engine is hard to start after the repair, check the Craftsman snowblower choke position before assuming the carburetor is still leaking.
Comparison of Common Leak Sources
The table below summarizes the typical symptoms, likely fixes, and difficulty for the most common leak points. Use it to narrow down the source, then confirm with a visual inspection before ordering parts.
| Leak source | Typical symptom | Likely fix | Difficulty |
|---|---|---|---|
| Fuel shut-off valve | Drip at valve body or with valve open | Close valve after use; replace if it will not seal | Easy |
| Primer bulb | Fuel visible at bulb or base; hard starting | Replace bulb and check mounting surface | Easy |
| Fuel line and clamps | Cracked or sticky line; wet spots along hose | Replace with fuel-rated line and correct clamps | Easy to moderate |
| Carburetor bowl gasket | Fuel seep at bowl seam; strong fuel smell | Replace gasket; clean bowl surface | Moderate |
| Float needle and seat | Leak when engine is off and valve open | Clean or rebuild carburetor; replace needle and seat | Moderate |
| Tank outlet grommet | Slow seep where line meets tank | Replace grommet or outlet fitting | Moderate |
| Tank crack or cap gasket | Leak near top or when tipped; fuel at cap | Replace tank or cap; check vent | Easy to moderate |
When to Rebuild vs Replace the Carburetor
A rebuild kit is often the economical choice when the carburetor body is clean and the throttle shaft is tight. Kits typically include gaskets, a needle and seat, and sometimes a float. If the leak is confined to the bowl gasket or needle, a rebuild can restore reliable operation at modest cost. Take photos as you disassemble, and keep parts organized by step.
Replacement makes more sense when the carburetor body is corroded, mounting surfaces are damaged, or the throttle shaft has noticeable play. A worn shaft can leak air and cause running problems that a rebuild will not fix. Replacement also makes sense if the carburetor has been rebuilt before and the passages remain clogged. Match the replacement to the engine model and serial number rather than relying on appearance alone.
If the machine has other running issues after the leak is fixed, address them one at a time. A clean fuel system and correct choke operation solve many hard-start complaints. Persistent surging or rough running points to a lean condition or a partially clogged passage, which is a separate diagnosis from the leak itself.
Preventing Future Fuel Leaks
Storage habits do much of the preventive work. Close the fuel valve after every use, and run the carburetor dry before long storage if the manual recommends it. Use fresh fuel and a stabilizer, and avoid leaving ethanol-blended fuel in the machine for months. Inspect fuel lines and the primer bulb at the start of each season, and replace parts that are stiff or cracked before they fail.
Keep the machine under cover and out of standing water. Moisture accelerates corrosion in the tank and carburetor, and temperature swings stress gaskets and lines. Check the cap and tank outlet periodically, and clean debris from around the engine so a small seep does not soak into flammable material. A quick visual inspection after each use takes a minute and can catch a problem before it becomes a puddle.
FAQ
Why is my Craftsman snowblower leaking gas when it is off?
A leak with the engine off usually points to the carburetor float needle and seat, a bowl gasket, or a fuel valve left open. Gravity feeds fuel to the carburetor, and a worn needle cannot stop the flow. Close the valve and inspect the bowl area first.
Can I use a fuel shut-off valve to stop a carburetor leak temporarily?
Closing the valve after each use can limit leakage and is a reasonable short-term measure. It does not repair the underlying cause, and fuel left in the bowl can still seep. Plan to fix the needle, seat, or gasket rather than relying on the valve indefinitely.
Why does my snowblower leak gas only after I tip it?
Tipping can let fuel escape through the carburetor vent or the tank cap. Check the owner’s manual for the approved service position, and drain fuel before tipping if instructed. Inspect the cap gasket and tank vent for damage.
Is ethanol fuel causing my fuel lines to leak?
Ethanol-blended fuel can degrade some rubber lines and gaskets over time, especially during long storage. It is one factor among several. Replacing old lines with fuel-rated hose and using fresh, stabilized fuel reduces the risk.
Should I rebuild or replace a leaking carburetor?
Rebuild when the body is sound and the leak is limited to gaskets or the needle and seat. Replace when the body is corroded, mounting surfaces are damaged, or the throttle shaft is worn. Match the part to your engine model and serial number.