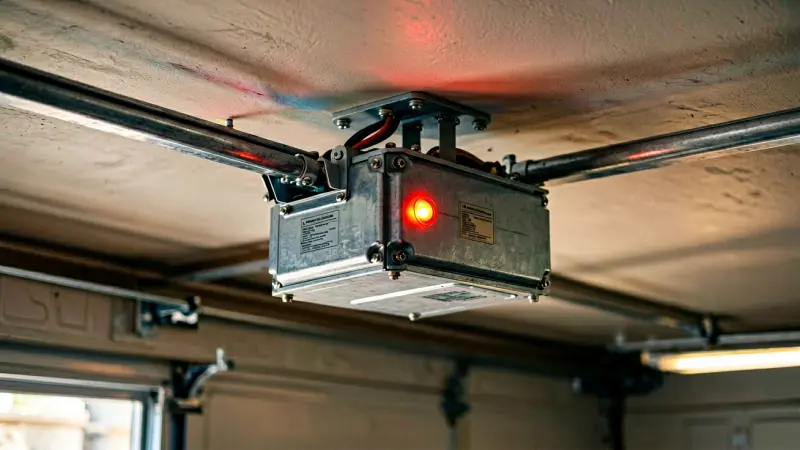
A flashing 4-1 code on a LiftMaster opener usually shows up at the worst possible moment, with the car trapped inside. The good news is that this fault is rarely fatal to the unit itself.
Most 4-1 codes trace back to a door that binds, a photo-eye that lost alignment, or travel limits that drifted. This guide walks through every cause and the exact fix, in the order a technician would check them.
What Does LiftMaster Error Code 4-1 Actually Mean?
On LiftMaster and Chamberlain openers with a diagnostic LED, 4-1 is a travel-and-obstruction fault. The control board counted four flashes on the up arrow and one flash on the down arrow.
In plain terms, the motor ran but the door did not reach its programmed limit within the expected time. The board then stopped the cycle and logged the error.
It is not a single-component failure code. A binding door, a dirty sensor, a stiff gear case, or a tired logic board can all produce the identical 4-1 flash pattern.
How to Read the Flash Pattern Correctly
The up arrow LED flashes the first digit, and the down arrow LED flashes the second. So 4-1 means four up flashes, a short pause, then one down flash.
Watch a complete cycle before touching anything. The pattern repeats every few seconds, and the code is wiped from memory the moment you cut power.
Newer MyQ models also archive the last fault in the app under Settings, then Diagnostics. Note the timestamp, because it tells you whether the fault started with a weather shift or with a mechanical change.
The Six Most Common Causes of a 4-1 Fault
1. A Door That Is Out of Balance or Binding
Pull the red emergency release cord and lift the door by hand. A healthy door rises with one hand and stays put when you let go at mid-travel.
If it crashes down or needs two hands to lift, the springs, cables, or rollers are the real problem. The opener is simply reporting the symptom.
Check the balance at the exact midpoint of travel, where torsion force is most neutral. A door that tests fine at the bottom but fights you halfway up usually has a worn spring or a bent vertical track.
2. Misaligned, Dirty, or Sun-Blinded Safety Sensors
The photo-eye pair sits on the bottom of the tracks, no more than six inches above the floor. One lens sends an invisible beam and the other receives it.
Both indicator lights should glow steady, typically amber on the sender and green on the receiver. A flickering or dark light means the beam is broken or the lens is clouded.
Low-angle sunlight can blind the receiver at the same time every afternoon, which is why some 4-1 codes appear only in late winter. A short piece of PVC pipe or a sensor shield fixes glare for good.
3. Travel Limits and Force Settings That Drifted
Vibration slowly loosens the limit carriage, so the opener thinks the door is still moving after it has stopped. The board interprets that mismatch as an obstruction.
Reprogramming the open and close limits is the fix on most models. On newer openers, press and hold the up arrow until the door reaches the desired open position, then confirm.
If the door only fails at the very top or the very bottom, the limit setting is almost always the culprit rather than the motor.
4. Cold Weather and Thickened Lubricant
Cold stiffens grease inside the gear case and shrinks metal across the rail. That extra resistance can push the opener past its force threshold and trigger a 4-1.
This is the same cold-weather stress that leaves an Ariens EFI snowblower refusing to start on the first freezing morning of the season.
Use a lithium-based grease or a silicone spray on rollers, hinges, and the rail. Never use standard WD-40 as a lubricant, because it evaporates and leaves rollers drier than before.
5. A Worn Drive Gear, Chain, Trolley, or RPM Sensor
The plastic drive gear inside the opener shreds with age, letting the motor spin while the door stays still. Listen for a running motor with no movement and a light grinding tone.
A loose chain, a tight belt, or a trolley jammed on a burred rail all create the same false travel reading. Check the trolley by hand with the door released.
There is also an RPM sensor on the motor shaft that reads a small magnet. Dust or grease on that magnet causes erratic travel counts and repeat 4-1 codes.
6. Control Board, Wiring, or Power Problems
Staples driven through low-voltage wire, rodent chewing, and corroded terminals all interrupt the sensor circuit. A brownout or surge can also scramble the board’s memory.
Trace the two sensor wires from the photo-eyes back to the opener and look for pinches. If you are adding an outlet or a new wall control while you are up there, it helps to know what size hole saw fits a round electrical box before you cut drywall.
Step-by-Step: How to Fix LiftMaster Error Code 4-1
Step 1: Capture the Code Before You Cut Power
Write down the flash pattern, the time of day, and whether the door was opening or closing. Fault memory on these boards is volatile and clears on reset.
Run the opener once more and count how many failed attempts happen before the code locks in. Two consecutive failures usually trigger the logged fault.
Step 2: Test the Door by Hand
Pull the emergency release cord and move the door through its full travel. Note any scraping, popping, or spots where the door feels heavy.
Inspect the tracks for dents and the rollers for flat spots. Wipe out the track channels, where grit, sawdust, and small debris tend to pile up.
While clearing that debris, do not be alarmed if you sweep out clusters that resemble brown rice-shaped bug eggs. Vacuum them out and check the door seals for gaps.
Step 3: Clean and Align the Safety Sensors
Wipe both lenses with a microfiber cloth and check the indicator lights. Loosen the mounting wing nuts and aim each sensor until both LEDs burn steady.
Confirm the brackets are at matching heights and pointed straight across the opening. A phone camera in selfie mode can reveal the infrared beam when the eye cannot see it.
Step 4: Reprogram Travel Limits and Force
Follow the model-specific sequence using the up and down arrow buttons. Set the open limit first, then the close limit, and let the door complete a full cycle.
If the door slams or reverses on contact, reduce the force setting one step at a time. The goal is a door that closes firmly without straining.
Step 5: Reset the Logic Board
Unplug the opener for a full 30 seconds, then restore power. This clears the fault and forces the board to re-read the limit and force values.
On some models, holding the learn button for six seconds performs the same reset. Pressing the square test button afterward confirms the board responds.
Step 6: Service the Mechanical Side
Lubricate rollers, hinges, and the rail with a lithium grease, and tighten every bolt on the door hardware. Leave torsion springs, cables, and drums to a trained technician.
Check chain or belt tension by hand and adjust it to the manufacturer’s slack spec. A chain that slaps the rail is too loose and will keep throwing travel faults.
Step 7: Re-Test and Run a Safety Reversal Check
Cycle the door three or four times and watch for any flash pattern. Then place a two-by-four flat on the floor in the door’s path.
The door must reverse within two seconds of contact. If it does not, the force setting or the sensor alignment still needs attention.
Quick Reference: Matching the Symptom to the Fix
| Symptom | Most Likely Cause | DIY Fix | Time Needed |
|---|---|---|---|
| Motor hums, door does not move | Stripped drive gear or binding door | Release door, test balance, inspect gear | 1 to 2 hours |
| Door reverses before touching floor | Sensor misalignment or dirty lens | Clean and realign photo-eyes | 10 minutes |
| Door stops short on the way up | Open travel limit drifted | Reprogram limits | 15 minutes |
| Code only on cold mornings | Stiff grease and added resistance | Lubricate rail, rollers, and hinges | 30 minutes |
| Code only in late afternoon | Sun glare in the receiver lens | Shield or reposition the sensor | 20 minutes |
| Code right after a power outage | Scrambled board memory | Power cycle and reset limits | 5 minutes |
| Grinding noise with no travel | Worn gears or dirty RPM sensor | Install a gear and sprocket kit | 2 to 3 hours |
| Receiver light never turns green | Broken or chewed sensor wire | Trace wire and splice the break | 30 minutes |
When a 4-1 Code Means It Is Time to Call a Pro
Torsion springs, cables, and drums store lethal energy and should never be adjusted by a homeowner. If the door will not stay up or you hear a sharp bang, stop and call a technician.
Replace the logic board only after ruling out limits, sensors, and wiring. A board showing burnt traces, a swollen capacitor, or an instant return of the code is genuinely failing.
Expect a service call to run roughly $150 to $250 in most markets. Gear and sprocket kits cost $35 to $60, while replacement boards run $80 to $150 if you install them yourself.
How to Stop Error Code 4-1 From Coming Back
Twice a year, run a balance test and lubricate the moving metal parts. Spring and fall are the ideal windows, right before temperature swings stress the system.
Every month, break the sensor beam with a hand and confirm the door reverses. This takes ten seconds and catches alignment drift before it becomes a fault code.
Tighten the bracket bolts and the rail hardware annually, since vibration loosens them slowly. A door that stays balanced and a rail that stays clean are the two best defenses against repeat codes.
Frequently Asked Questions
What does error code 4-1 mean on a LiftMaster opener?
It is a travel-and-obstruction fault, meaning the motor ran without the door reaching its limit on schedule. The cause is usually mechanical resistance or a sensor problem, not a dead motor.
Can I just keep resetting the opener?
Resetting clears the code but not the cause. If the same 4-1 returns within a few cycles, a real fault still exists and needs diagnosis.
Does 4-1 mean my logic board is dead?
Rarely. Board failure is the last item on the list after limits, sensors, wiring, and the drive assembly have all been tested.
Is a 4-1 code dangerous?
The code itself is not, but the underlying cause can be. A door that fails to reverse on contact is a serious hazard, especially with children or pets nearby.
How much does a professional repair cost?
Typical repairs range from $120 for a sensor or limit adjustment to $400 or more for a gear and board replacement. Full opener replacement runs $500 to $1,200 installed.
Final Thoughts
A 4-1 code is best treated as a message rather than a malfunction. The opener is telling you that something between the motor and the floor is fighting back.
Work through the sequence in order: capture the code, free the door, clean the sensors, reset the limits, and reset the board. In most homes, the fix lands in the first three steps.
Keep the door balanced, the rail lubricated, and the beams clear, and the 4-1 flash pattern becomes a rare visitor rather than a monthly routine.