Laminate cabinets present a frustrating paradox for painters. The surface looks smooth and easy to coat, yet paint often peels away within months because the melamine or laminate layer is non-porous and slick. Ordinary primers sit on top of that surface rather than bonding to it, and the result is a finish that fails under daily handling.
Extreme Bond Primer from Sherwin-Williams is formulated specifically for this problem. It is a waterborne, urethane-modified acrylic primer designed to grip hard, glossy surfaces with minimal surface preparation. This guide walks through the full process of applying it to laminate cabinets, from cleaning and scuffing to testing adhesion and finishing.
Why Laminate Cabinets Resist Paint
Laminate cabinet surfaces are typically melamine, a thermally fused paper-and-resin product that is hard, non-porous, and smooth. Paint needs a mechanical or chemical key to grip, and a smooth laminate surface offers neither. The topcoat may dry and appear fine, but the bond is weak and fails under impact, moisture, or cleaning.
Kitchen cabinets are also exposed to grease, cooking vapours, and frequent touching. A finish that would survive on a bedroom dresser may fail in a kitchen because of the chemical and physical demands of the environment. That is why adhesion primers are essential rather than optional on laminate.
Extreme Bond Primer addresses this by using urethane-modified acrylic resins that bond to slick surfaces. The manufacturer states that sanding may not be necessary for most clean, paintable surfaces, though light scuffing improves the mechanical key and is a sensible precaution.
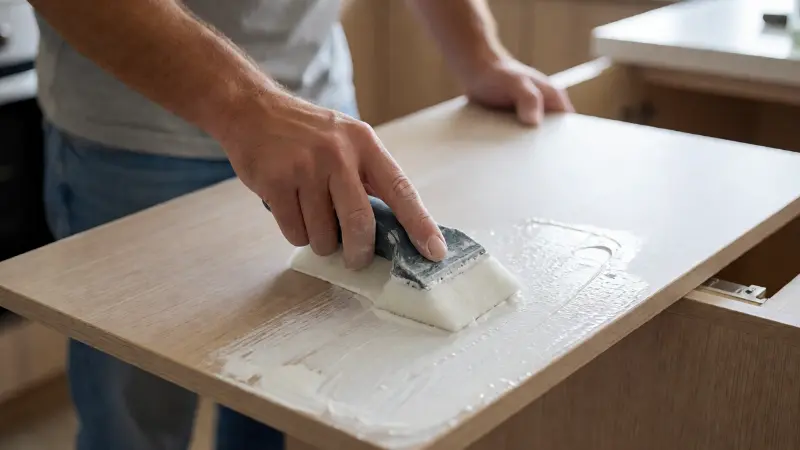
Tools and Materials You Will Need
Gathering the right supplies before starting keeps the project moving and prevents shortcuts. The list below covers a typical cabinet priming job.
- Extreme Bond Primer: Available in quarts and gallons, tintable if needed.
- Degreaser or cleaner: Rated safe for laminate and wood surfaces.
- Scuff sanding pads or sandpaper: Fine grit suitable for dulling a glossy surface.
- Tack cloth or microfiber cloths: For removing sanding dust.
- Mohair roller: Recommended by Sherwin-Williams for smooth application on laminate.
- Quality brush: For cutting in edges and corners.
- Painter’s tape: For masking hinges, glass, and adjacent surfaces.
- Drop cloths: To protect floors and counters.
- Screwdriver or drill: For removing doors, drawers, and hardware.
- Respirator or dust mask: For sanding and painting in enclosed spaces.
- Stir stick: Primer separates and needs thorough mixing.
- Small test area materials: For an adhesion test before committing.
Removing cabinet doors and drawers before priming gives you a flatter, more accessible surface and avoids paint bridging across gaps. Label the hardware and door positions so reassembly is straightforward.
Step One: Clean and Degrease Thoroughly
Preparation is where most adhesion failures begin. Kitchen cabinets accumulate a film of cooking grease that is not always visible, and primer cannot bond through contamination.
Remove doors, drawers, and all hardware. Working on a flat surface is easier and produces a more even finish. Clean every surface with a degreaser formulated for laminate and painted wood. Avoid abrasive cleaners that could scratch or dull the laminate.
Pay attention to the areas around handles, the bottom edges of doors, and the cabinet frames near the range or cooktop. These collect the heaviest grease deposits. After cleaning, rinse thoroughly with clean water and allow the surfaces to dry completely.
A user review of Extreme Bond Primer emphasises this step strongly: clean the surface very well, rinse any cleaner thoroughly, scuff sand, and clean again. Skipping the rinse leaves a cleaner residue that can interfere with the primer.
Step Two: Scuff Sand and Remove Dust
Although Extreme Bond Primer is designed to work with minimal preparation, light scuffing improves adhesion and is a worthwhile precaution. Sanding removes the shine and creates a subtle texture that gives the primer more to grip.
Use a fine-grit sandpaper or a scuffing pad. The goal is not to remove the laminate finish but to dull it. Sanding too aggressively can cut through the laminate layer and expose the particleboard beneath, which creates a different surface with different absorption characteristics.
After sanding, remove all dust with a tack cloth or a damp microfiber cloth. Dust left on the surface can prevent the primer from making contact with the laminate. Allow the surface to dry completely before priming.
Step Three: Test Adhesion in a Hidden Area
Before priming the entire kitchen, test the product on an inconspicuous area. This step is recommended by Sherwin-Williams representatives and is a sensible precaution for any unfamiliar substrate.
Apply a small patch of Extreme Bond Primer to the back of a door or an inside cabinet frame. Allow it to dry fully according to the product data, then try to scrape or peel it with a fingernail or a dull blade. If it adheres firmly, proceed with the full project. If it peels easily, the surface may need additional preparation or a different primer.
The product data sheet lists a dry time of approximately 30 minutes at 77°F and 50% relative humidity, with a recoat window that allows topcoating after about an hour. Actual times vary with temperature and humidity, so consult the label for your conditions.
Step Four: Apply the Primer
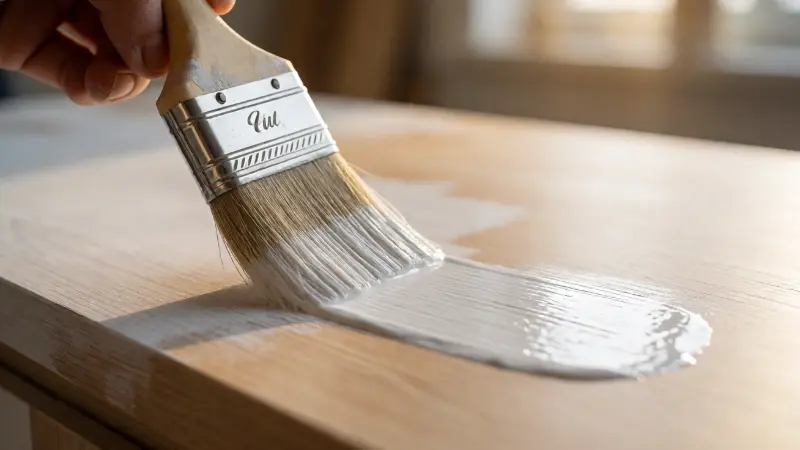
Extreme Bond Primer is a one-coat product, though heavily stained or repaired areas may benefit from a second coat. It can be applied with a brush, roller, or sprayer, but Sherwin-Williams recommends a mohair roller for laminate surfaces because it leaves a smooth, even finish.
Stir the primer thoroughly before and during use. It is a waterborne product, so cleanup is with soap and water, but it still requires good ventilation during application.
Apply a thin, even coat. Thick application can cause the primer to pool, run, or dry unevenly, and it does not improve adhesion. Work in manageable sections, maintaining a wet edge to avoid lap marks. For doors and drawer fronts laid flat, a roller produces a consistent finish quickly.
Allow the primer to dry fully before handling or topcoating. The recoat time is relatively short, but rushing the process can trap solvent and create problems later. If the surface feels cool or tacky, it is not ready.
Step Five: Light Sand and Topcoat
Once the primer has dried and hardened, Sherwin-Williams recommends lightly sanding the surface to provide texture for the topcoat and to remove any dust nibs or imperfections. Use a fine grit and sand gently, then remove all dust.
Apply your chosen topcoat in thin, even coats. Latex and waterborne acrylic enamels are common choices for cabinets because they are durable and clean up easily. Allow proper dry time between coats, typically around four hours for many products, and consult the paint label for specific guidance.
After the final coat has cured, reattach doors, drawers, and hardware. Avoid heavy use of the cabinets for the first few days while the finish continues to cure.
Troubleshooting Common Problems
Even with careful preparation, issues can arise. The table below summarises common problems and their likely causes.
| Problem | Likely Cause | Solution |
|---|---|---|
| Primer peels or flakes | Surface not clean, grease or cleaner residue left behind | Remove primer, clean and rinse thoroughly, scuff sand, reapply |
| Primer beads up or crawls | Silicone or oil contamination on the surface | Clean with a degreaser, sand, and clean again before priming |
| Poor adhesion after drying | Surface too glossy, no scuff sanding performed | Sand to dull the surface, remove dust, and reapply primer |
| Primer dries with visible brush marks | Brush application on a smooth surface, or primer applied too thick | Use a mohair roller and apply thin, even coats |
| Topcoat peels off with primer intact | Primer not fully cured or topcoat incompatible | Allow longer dry time and confirm topcoat compatibility |
| Primer remains tacky after expected dry time | High humidity, low temperature, or coat applied too thickly | Increase ventilation, wait longer, and apply thinner coats |
| Visible staining bleeds through topcoat | Extreme Bond is not a stain blocker | Use a shellac or oil-based stain-blocking primer first |
One user review reports that Extreme Bond did not adhere to their cabinets and peeled and bubbled despite cleaning. Adhesion failures with this product usually trace back to insufficient surface preparation, contamination, or a laminate with an unusual factory finish. A test patch before the full project is the best way to catch this early.
Also Read – Interior Bond Primer Vs Standard Primer
Safety and Ventilation
Even though Extreme Bond Primer is waterborne and has relatively low odour, it still contains solvents and should be used with adequate ventilation. Open windows and use fans to move air through the workspace.
Wear a dust mask or respirator when sanding, especially if you are sanding old cabinets that may have lead paint or unknown finishes. Eye protection is sensible when working overhead or with rollers. Gloves protect your skin from prolonged contact with the primer.
Waterborne products clean up with soap and water, but do not pour excess primer down drains. Dispose of it according to local regulations. Rags and sanding dust should be allowed to dry before disposal.
Comparing Extreme Bond to Other Primers
Extreme Bond is not the only option for laminate cabinets. Understanding how it compares to standard primers and alternative bonding primers helps you choose the right product for your situation.
A standard interior primer is formulated for drywall, bare wood, and clean previously painted surfaces. It is not designed to bond to slick laminate and will likely fail on that substrate. A comparison of interior bonding primers and standard primers explains the difference in adhesion chemistry and where each product performs best.
Other bonding primers, such as Zinsser Bulls Eye 1-2-3 or INSL-X STIX, are also marketed for hard-to-stick surfaces. Each has its own formulation and recommended applications. Extreme Bond is specifically formulated for glossy, hard surfaces and is described by the manufacturer as suitable for wall laminates and kitchen cabinets.
If you are working on a broader cabinet update and want to understand the full range of cost-effective options, a guide to updating kitchen cabinets on a budget covers refinishing, refacing, and painting approaches. It is useful context if you are deciding whether painting is the right path for your cabinets.
FAQ
Do I need to sand laminate cabinets before applying Extreme Bond Primer?
The manufacturer states that sanding may not be necessary for most clean, paintable surfaces. However, light scuff sanding improves adhesion on smooth or glossy laminate and is a sensible precaution. Always remove sanding dust before priming.
How long does Extreme Bond Primer take to dry?
The product data sheet lists a dry time of approximately 30 minutes at 77°F and 50% relative humidity. Recoat time is often around one hour, but actual times vary with temperature, humidity, and coat thickness. Consult the label for your conditions.
Can I apply Extreme Bond Primer over painted cabinets?
Yes, Extreme Bond is designed to bond to previously painted surfaces, including glossy ones. Ensure the existing paint is clean and sound. If it is peeling or flaking, remove the loose material before priming.
What if Extreme Bond Primer does not stick to my cabinets?
Adhesion failures usually indicate contamination, insufficient cleaning, or a laminate finish that is unusually slick. Re-clean, scuff sand, and test again on a hidden area. If it still fails, a different bonding primer or a professional assessment may be needed.
Can I tint Extreme Bond Primer?
The product can be tinted with up to 2 ounces of ColorCast Ecotoner per gallon, according to the data sheet. Tinting can help with topcoat coverage, particularly for darker colours. Do not exceed the recommended amount.
How many coats of Extreme Bond Primer are needed?
It is a one-coat application for most surfaces. Heavily stained, repaired, or porous areas may benefit from a second coat. A thin, even coat performs better than a thick one.
Can I use Extreme Bond Primer on melamine cabinets?
Extreme Bond is suitable for wall laminates and kitchen cabinets, which includes melamine surfaces. The same preparation steps apply: clean thoroughly, scuff sand, remove dust, and test adhesion before full application.
Applying Extreme Bond Primer to laminate cabinets is a preparation-heavy task, and that is where the finish succeeds or fails. Clean thoroughly, scuff sand lightly, test adhesion on a hidden area, and apply thin coats. Do that, and the topcoat will have the grip it needs to survive daily kitchen use.