Choosing between a wet room and a shower tray is one of those decisions that looks like a style preference but is really a question about waterproofing, floor structure, and how much disruption you can tolerate. Both deliver a place to shower, yet they differ in build-up, cost, and long-term risk. Getting the choice wrong can mean water where it should not be.
This guide explains how each option is constructed, where the money goes, and which situations favour one over the other. It also covers the preparation details that determine whether the installation performs for years or fails within months.
What a Wet Room Actually Is
A wet room is a bathroom where the shower area is not enclosed by a tray or a raised curb. The floor of the shower zone is tanked and tiled, and the whole space is designed to get wet. Water drains through a linear or point drain set into the floor.
The defining feature is not the absence of a screen. It is the waterproofing. A wet room relies on a continuous, sealed waterproof layer beneath the tiles, known as tanking, that extends across the shower zone and often the entire floor. That membrane connects to the walls so water cannot escape into the structure.
Wet rooms also depend on floor falls. The substrate must slope gently toward the drain so water does not pool. Creating that fall may involve a pre-formed tray former, a screed, or a recessed joist structure, depending on the floor build-up.

What a Shower Tray Installation Involves
A shower tray is a pre-formed base, usually acrylic, resin, stone resin, or ceramic, that sits within an enclosure or a defined shower area. The tray has a built-in fall toward the waste, and the enclosure walls or screens contain splashes.
Because the tray handles the drainage and the enclosure contains the water, the waterproofing burden is lower than in a wet room. The surrounding floor still needs protection from splashes, but it is not designed to be flooded. A well-sealed tray against tiled walls and a screen can perform reliably with less extensive tanking.
Trays come in many shapes, including square, rectangular, offset quadrant, and walk-in designs with low thresholds. The choice affects accessibility, door swing, and how much space the enclosure occupies.
The Waterproofing Difference That Matters Most
The single biggest distinction between the two options is how much waterproofing the structure requires. In a wet room, the entire shower floor and the adjacent walls are part of the waterproof envelope. That means a tanking membrane, sealed joints, and careful detailing at every penetration.
In a shower tray installation, the tray itself is the waterproof base. The critical details are the seal between the tray and the wall, the waste connection, and the enclosure fixings. There is less area to get wrong, which is one reason tray installations are more forgiving for less experienced installers.
Where both approaches share risk is at junctions. The wall-to-floor joint, the drain connection, and any penetration for a shower valve or pipe are the points where leaks most often begin. In a wet room, those details are under constant exposure. In a tray installation, they are more sheltered but still require proper sealing.
Floor Structure and Build-Up
Wet rooms place greater demands on the floor structure. If the finished floor must fall toward a drain, something has to give: either the floor is raised slightly, or the joists are notched and the subfloor recessed, or a shallow former is used with a linear drain.
On timber floors, recessing the subfloor between joists is common but requires care. Notching or drilling joists can weaken them, and structural limits apply. A linear drain along a wall can sometimes reduce the depth of fall required, which helps on shallow build-ups.
On concrete floors, a screed with a formed fall is a familiar approach. It adds thickness but is straightforward, and the drain can be set into the slab. This is one reason wet rooms are often easier on ground floors and in new build or renovation projects where the floor is already being opened.
Shower trays sit on top of the existing floor, so they raise the finished level less dramatically in some cases and more in others, depending on the tray height. Low-profile trays minimise the step, while standard trays may require a small step up. For upper floors, the reduced structural work is a genuine advantage.
Cost Comparison: Where the Money Goes
Costs vary widely by region, specification, and whether the work is part of a larger renovation. The categories below show where each approach tends to consume budget rather than quoting prices.
- Wet room tanking materials: Liquid membranes, matting, tapes, and primers add material cost and labour time.
- Wet room drainage: Linear drains and channel drains can cost more than a standard shower waste, and the installation is more involved.
- Wet room floor preparation: Forming falls, recessing joists, or building a screed adds structural work.
- Wet room tiling: The whole floor and often the walls are tiled, which increases material and labour compared with a contained enclosure.
- Shower tray and enclosure: The tray, waste, screen, and door are the main purchases.
- Shower tray installation: Faster and less invasive, with fewer waterproofing steps.
- Shower tray tiling: Often limited to the walls inside the enclosure, though surrounding walls may still be tiled for appearance.
In broad terms, a wet room tends to cost more than a comparable shower tray installation because of the tanking, drainage, and floor preparation. However, a high-end tray with a bespoke enclosure and full wall tiling can approach or exceed a modest wet room, so the comparison depends on specification.
Comparing Wet Rooms and Shower Trays
The table below summarises the practical differences across the factors that most often decide the choice. Use it as a comparison framework and confirm specifics with your installer.
| Factor | Wet Room | Shower Tray Installation |
|---|---|---|
| Waterproofing extent | Whole shower floor and adjacent walls tanked | Tray forms the base; limited tanking required |
| Floor build-up | Often needs falls, recessed joists, or screed | Sits on existing floor, low or standard profile |
| Drainage | Linear or point drain set into floor | Standard waste through tray |
| Relative cost | Generally higher | Generally lower |
| Installation complexity | Higher, requires careful tanking and falls | Lower, more forgiving |
| Accessibility | Level access possible, good for step-free use | Depends on tray height; low-profile options reduce step |
| Space perception | Opens up small bathrooms | Enclosure occupies defined footprint |
| Water containment | Relies on drainage and falls; splashes spread further | Screen and tray contain most splashes |
| Maintenance focus | Drain cleaning, re-sealing joints, checking falls | Tray seals, enclosure tracks, waste cleaning |
| Repair access | Leaks harder to trace under tiles | Some issues accessible without removing floor tiles |
| Structural demands | Higher, especially on timber floors | Lower |
| Best suited to | Small bathrooms, accessible design, modern aesthetics | Family bathrooms, upper floors, simpler projects |
Accessibility and Everyday Use
Wet rooms are often chosen for accessibility because they can be built with level or near-level access. A wheelchair user or someone with limited mobility can roll or step in without a raised threshold. This makes a wet room a common choice for adapted bathrooms.
A shower tray can also be accessible if a low-profile or level-access tray is selected. Some trays are designed to be recessed into the floor, which combines the tray’s contained drainage with a step-free entry. That hybrid approach is worth considering if accessibility matters but you prefer the reliability of a tray.
Everyday use differs in other ways. A wet room lets water spread across the floor, so a squeegee or a well-placed drain is part of the routine. A tray and screen contain splashes more effectively, which suits households where multiple people use the bathroom in quick succession.
Space, Layout, and Design
Wet rooms can make a small bathroom feel larger because they remove the visual bulk of a tray and enclosure. There is no door to swing, which helps in tight layouts. The trade-off is that the whole floor becomes part of the wet zone, so storage and fixtures need to be positioned accordingly.
Shower trays define the shower area clearly. That definition is useful in family bathrooms where you want to keep water away from the vanity and toilet. It also allows for a wider choice of enclosure styles, including pivot doors, bi-fold doors, and walk-in panels.
Consider how the door swings and how you enter the space. A wet room with a fixed screen may still need a door for the room itself, and the layout must allow drying and dressing areas outside the splash zone.
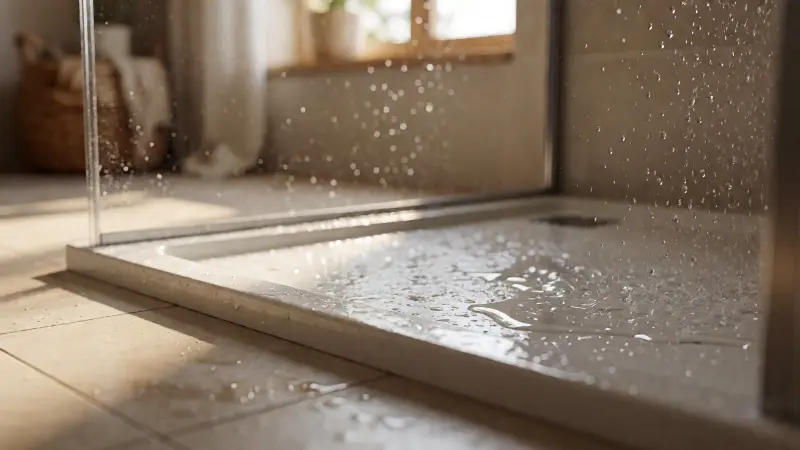
Tiling, Grout, and Surface Finishes
Both options depend on tiling or a comparable waterproof finish, but the demands differ. In a wet room, the floor tiles must provide grip when wet, and the grout and sealant are under constant exposure. Small format tiles can follow the fall more easily, while large format tiles require a very flat substrate and careful slope control.
Grout is not waterproof in itself. It is a porous material that allows some moisture movement, and in wet areas that moisture can lead to discolouration or damp-looking patches. A guide to why grout looks wet in spots explains the causes and how to address them before they become a bigger problem.
Sealant joints at the wall-to-floor junction and around the drain should be inspected periodically. In a wet room, these joints are critical to the waterproof envelope. In a tray installation, the seal between tray and wall performs a similar role and should be checked for cracking or shrinkage.
Wall finishes also matter. Plasterboard and standard drywall are not suitable in a wet room’s splash zone unless they are protected by a proper tanking system and a moisture-resistant board. Even then, the detailing must be correct. Guidance on what to do if drywall gets wet is useful context for understanding how sensitive these materials are to moisture.
Ventilation and Moisture Control
Neither a wet room nor a shower tray eliminates the need for ventilation. Showers produce large volumes of water vapour, and if that vapour is not extracted, it condenses on cool surfaces and can lead to mould, peeling paint, and deterioration of building materials.
An effective extract fan sized for the room volume, ducted to the exterior, and run long enough after a shower is essential in both cases. A humidistat or timer control helps ensure the fan runs when it needs to rather than relying on memory.
Wet rooms can release more moisture into the room because water spreads across a larger floor area. That makes ventilation and drying habits more important, not less. Leaving a window open when weather allows, using a squeegee, and running the fan are simple habits that reduce risk.
Where the fan is positioned matters as well. A unit placed directly over the shower can be exposed to heavy moisture and may not extract as effectively as one positioned away from the immediate spray zone. The considerations around placing an exhaust fan above a shower are worth reviewing before finalising the layout.
Installation Sequence and Quality Control
Both installations follow a logical sequence, and deviating from it creates problems. For a wet room, the order typically runs as follows.
- Confirm the floor structure can support the required falls and drainage.
- Set out the drain position and form the falls in the substrate.
- Install the tanking membrane and seal all joints, corners, and penetrations.
- Flood test the waterproofing where the system allows, before tiling.
- Tile the floor and walls, allowing for movement joints where required.
- Install the shower valve, screen, and any fixed fittings.
- Seal the junctions between tiles and fittings with a suitable sealant.
For a shower tray, the sequence is usually shorter. The tray is set level and sealed to the wall, the waste is connected, the walls are tiled or finished, and the enclosure is fitted. Sealing the tray-to-wall junction correctly is the step most often rushed, and it is the most common source of leaks.
Quality control for both approaches centres on water testing. Running the shower and observing the drain, joints, and the ceiling below for a period is a sensible check before the project is considered complete. Small leaks caught early are inexpensive to fix; ones discovered after the finishes are complete are not.
Which Option Suits Which Situation
A wet room tends to suit small bathrooms where space is tight, accessible bathrooms where level entry matters, and modern designs where a continuous floor is part of the aesthetic. It also suits ground-floor installations on concrete slabs, where forming falls is relatively straightforward.
A shower tray tends to suit family bathrooms where containment matters, upper-floor installations where structural work is limited, and projects where speed and predictability are priorities. It also offers a wider range of enclosure styles and is easier to replace if a component fails.
Hybrid approaches are worth considering. A level-access tray recessed into the floor gives step-free entry with the contained drainage of a tray. A wet room with a small screen reduces splash spread without enclosing the shower fully. These compromises often suit real households better than a purist version of either option.
Cost-Saving Choices and Where Not to Cut
It is possible to reduce cost without undermining performance, but some savings create risk. Choosing a standard tray size rather than a bespoke one, selecting a mid-range enclosure, and tiling only the necessary walls are reasonable ways to manage budget.
Cutting corners on waterproofing is not. Using insufficient tanking, skipping joint tape, or omitting a flood test shifts risk onto the structure, where repairs are far more expensive than the original saving. Similarly, buying a cheap drain with poor flow characteristics can lead to standing water and ongoing cleaning problems.
Where labour is a significant share of the cost, doing preparation and demolition yourself can reduce the bill. Tasks such as removing old tiles and disposing of waste are within reach for many homeowners. Tanking, drainage connections, and tiling falls are best left to experienced installers.
FAQ
Is a wet room better than a shower tray?
Neither is universally better. A wet room suits small or accessible bathrooms and modern designs, while a shower tray suits family bathrooms where containment matters and structural work is limited. The right choice depends on your floor structure, budget, and how the room will be used.
Are wet rooms more expensive than shower trays?
In general, wet rooms cost more because of the tanking, drainage, and floor preparation required. However, a high-specification tray with a bespoke enclosure and full tiling can approach wet room costs. Specification and labour rates drive the difference.
Do wet rooms leak more often than shower trays?
Wet rooms have a larger waterproofed area and more critical junctions, so installation quality matters greatly. A correctly installed wet room can perform well for years, while a poorly installed one can leak. Shower trays have fewer waterproofing details to get wrong.
Can I install a wet room on a timber floor?
It is possible but requires careful preparation. The floor structure must support the required falls, which may mean recessing the subfloor between joists or using a shallow former with a linear drain. Structural limits apply, and professional advice is advisable.
How do I maintain a wet room floor?
Regular cleaning, clearing the drain of hair and debris, and checking sealant joints are the main tasks. A squeegee after showering reduces standing water and helps the floor dry. Ventilation also matters to control humidity.
What is the best drain for a wet room?
Linear drains are popular because they can reduce the required fall depth and handle higher flow rates. Point drains are simpler and often less expensive. The right choice depends on the floor build-up, the tile layout, and the installer’s preference.
Can I convert a shower tray to a wet room later?
Conversion is possible but involves removing the tray, altering the floor to create falls, installing tanking, and retiling. It is essentially a new installation rather than a modification. Planning for wet room drainage from the start is simpler if you think you may want it later.
How important is ventilation for a wet room?
Ventilation is essential in any bathroom with a shower, and a wet room releases moisture across a larger floor area. An extract fan ducted to the exterior, sized for the room, and run long enough after use helps prevent mould and material deterioration.
Wet rooms and shower trays solve the same problem in different ways, and the deciding factors are usually structure, budget, and how the room is used. If you want level access and an open feel, a wet room can deliver it, provided the tanking and falls are done properly. If you want contained water, simpler installation, and easier future repairs, a tray is often the practical answer. In many homes, a hybrid of the two gives the best balance.