Almost every insulation aisle tells the same confusing story. The bag says R-19, the wall cavity only measures 3.5 inches deep, and the two numbers refuse to cooperate.
Many homeowners buy it anyway, stuff it in, and then wonder why the room still feels drafty and cold. This guide explains exactly what happens when you install R-19 insulation in a 2×4 wall and which materials actually deliver that level of performance.
The short answer: standard R-19 batts are engineered for a 2×6 cavity. Compressing them into a 2×4 frame quietly destroys a significant share of their rated value.
The Real Problem: R-19 Batts Are Built for 2×6 Walls
A nominal 2×4 stud measures 3.5 inches deep, while a nominal 2×6 measures 5.5 inches. Batt manufacturers size their products to match those real framing depths, not the names on the lumber.
An R-19 fiberglass batt is roughly 6.25 inches thick before it is installed. It is designed to be gently squeezed into a 5.5-inch cavity, where it fluffs out and still fills the space with plenty of trapped air.
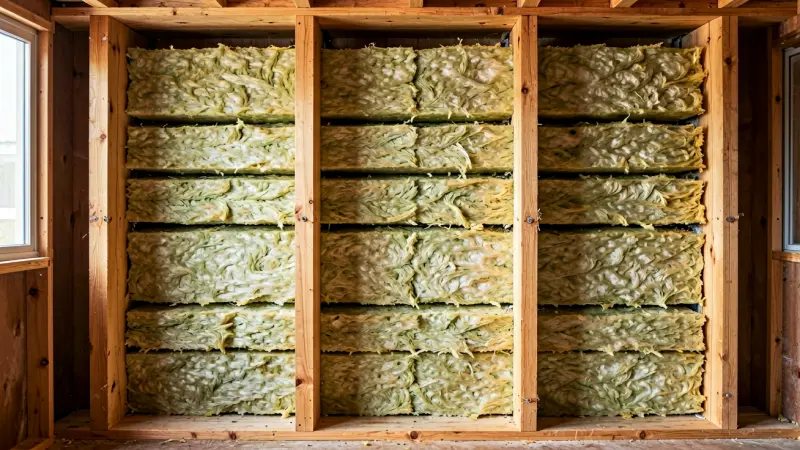
Place that same batt into a 3.5-inch cavity and nearly three inches of lofted glass fiber disappear. The density rises, the air pockets collapse, and the thermal rating falls with them.
Why Loft Matters More Than Thickness
Fiberglass insulation works by trapping still air between millions of tiny glass strands. It is the air, not the glass, that slows heat transfer.
When you compress a batt, you push those strands closer together and squeeze out the air pockets that do the actual insulating. The material gets denser and heavier without getting meaningfully better at stopping heat.
Density does raise the R-value per inch slightly. That small gain never compensates for the thickness you removed, which is why compressed batts always underperform their label.
What Actually Happens When You Compress R-19 Into a 3.5-Inch Cavity
Compressing R-19 batts into a 2×4 wall does not turn them into garbage. It simply turns them into something closer to an R-13 or R-15 product.
Field measurements and manufacturer data generally land a fully compressed R-19 batt somewhere between R-13 and R-15 in a 3.5-inch space. The exact result depends on the original density and how hard you pack it.
The Compression Math
Fiberglass R-values fall in a fairly predictable pattern as thickness shrinks. Cutting a 6.25-inch batt down to 3.5 inches removes about 44 percent of its depth.
Because the loss is not perfectly linear, the performance penalty usually lands closer to 20 to 30 percent rather than 44 percent. That still leaves you well short of R-19.
Here is the unsettling part. The compressed R-19 batt often performs about the same as a proper R-15 batt that fits the cavity perfectly, and it costs more money to get there.
Hidden Penalties Beyond the R-Value
Overstuffed batts push against drywall and can cause bulging, nail pops, and visible seams over time. They also make it harder to seat drywall flat against the studs for a clean finish.
Compression damages the kraft facing on faced batts. Once that facing tears, the vapor-retarding layer becomes inconsistent, which matters a great deal in cold climates.
Packed batts also leave less room for wiring, plumbing, and electrical boxes. Every future cut into that wall risks opening a hidden air channel that bypasses the insulation entirely.
Can Anything Actually Hit R-19 Inside a 2×4 Cavity?
Yes, but only if you change the material rather than force the batt. Spray foam and rigid boards reach far higher R-values per inch than glass fiber.
Closed-cell spray foam is the only widely available cavity insulation that clears R-19 in a 3.5-inch space. Everything else requires help from an exterior layer.
| Insulation Option | Installed Thickness | R-Value in a 3.5-Inch Cavity | Practical Notes |
|---|---|---|---|
| R-19 fiberglass batt (compressed) | 3.5 in | R-13 to R-15 | Wastes material and money; loses 20-30 percent of rating |
| R-13 fiberglass batt | 3.5 in | R-13 | Correct fit, lowest cost, no compression issues |
| R-15 high-density fiberglass or mineral wool | 3.5 in | R-15 | Best batt option for a 2×4 frame |
| Open-cell spray foam | 3.5 in | R-12 to R-13 | Superb air sealing, but low R-value per inch |
| Closed-cell spray foam | 3.5 in | R-22 to R-24 | Only true in-cavity path past R-19; highest cost |
| Polyiso rigid foam board | 3.5 in | R-21 to R-23 | Requires precise cutting and edge sealing |
| Flash-and-batt (2 in closed cell plus R-13) | 3.5 in | R-26 to R-27 | Strong balance of cost, sealing, and performance |
| R-13 cavity plus 1 in exterior rigid foam | 4.5 in total | About R-18 assembly | Reduces thermal bridging through studs |
Option 1: Closed-Cell Spray Foam
Closed-cell foam expands to fill every irregular corner, wire penetration, and stud bay imperfection. It typically delivers between R-6.5 and R-7 per inch.
At 3.5 inches, that translates to roughly R-22 to R-24, which clears the R-19 target comfortably. It also acts as a vapor retarder and adds structural rigidity to the wall.
The tradeoffs are real. Closed-cell foam costs several times more than batts, requires professional installation in most cases, and must be covered with a thermal barrier in living spaces.
Option 2: Rigid Foam Board Cut and Fitted
Polyisocyanurate board delivers about R-6.5 per inch and can be cut to fit snugly between studs. At 3.5 inches, the cavity reaches roughly R-21 to R-23.
The catch is air leakage. Rigid boards cannot conform to imperfect framing, so every edge and corner needs sealing with canned foam or high-quality tape.
Extruded polystyrene and expanded polystyrene are cheaper but land near R-4 to R-5 per inch, which tops out around R-15 to R-17 in a 2×4 bay. They will not reach R-19 alone.
Option 3: Flash-and-Batt
Flash-and-batt combines a thin layer of closed-cell spray foam with a fiberglass or mineral wool batt. Two inches of foam yields roughly R-13 to R-14 and seals the cavity completely.
The remaining 1.5 inches accepts an R-13 batt, pushing the total near R-26 or R-27. That exceeds R-19 while keeping costs far below a full foam fill.
This approach also solves the biggest weakness of batts, which is air leakage around edges, outlets, and top plates. The foam layer becomes the air barrier.
Option 4: Exterior Continuous Insulation
Adding rigid foam to the outside of the sheathing raises the whole assembly’s performance without stealing interior space. One inch of polyiso adds about R-6.5.
An R-13 cavity plus 1 inch of exterior polyiso lands near R-19 for the full assembly. Two inches pushes past R-25 and dramatically reduces thermal bridging.
This is where the smartest money usually goes. Chasing high R-values inside a thin cavity is difficult, while adding continuous exterior insulation is straightforward and highly effective.
The same logic applies when packing high R-values into a shallow 2×8 rafter bay, where thickness limits also force creative layering.
Reframing to 2×6: When It Is Worth It
If the wall is open and the budget allows, switching to 2×6 framing solves the problem permanently. A 5.5-inch cavity accepts R-19 batts, R-21 batts, or even R-23 mineral wool.
Reframing costs more in lumber and reduces interior floor area slightly. It also requires wider door and window jambs, which adds finish carpentry work.
When walls are already open for a renovation, the upgrade is often cheaper than applying spray foam to every 2×4 bay. It pays back for the life of the home.
If mechanicals need to move during the reframe, plan chases early, similar to the planning required for running ductwork between floor joists.
Air Sealing Beats R-Value Every Time
A wall with R-19 cavity insulation and unsealed top plates still leaks enormous amounts of heat. Air movement carries far more energy than conduction through the insulation itself.
Seal the sill plate, the top plate, and every penetration before insulation goes in. Use caulk, canned foam, and rigid air barriers rather than relying on the batt facing.
Electrical boxes deserve special attention. Foam gaskets behind the boxes and careful sealing around cable entries prevent the classic cold-spot drafts that homeowners blame on insulation.
This step costs a few dollars and hours, yet it often matches the performance gain of upgrading from R-13 to R-19 in the cavity.
Moisture, Vapor Retarders, and Cold Climates
Thin walls with high R-values are unforgiving about moisture. The colder the outer sheathing gets, the greater the risk of condensation inside the assembly.
In cold climates, a kraft facing or a smart vapor retarder belongs on the interior side. In hot, humid climates, the priority shifts toward exterior drying and sealed air barriers.
Wet rooms add another layer of risk. In bathrooms and utility areas, a waterproof backer such as GoBoard is often used instead of standard drywall, and questions like whether you can paint a waterproof backer board come up frequently during finish planning.
Spray foam creates a Class II vapor retarder at 2 inches or more. Adding a second interior vapor barrier over foam can trap moisture and cause sheathing rot.
What Building Codes Actually Require
Modern energy codes rarely mandate R-19 cavity insulation for 2×4 walls. Most versions of the IECC require something like R-13 or R-15 cavity plus R-5 or R-10 continuous insulation.
That combination meets the code intent through a different route. Continuous insulation covers the studs, which are the weakest link in any wood-framed wall.
Check the requirements for the specific climate zone before choosing materials. A wall that passes in Georgia may fail inspection in Minnesota with the same materials.
A Step-by-Step Plan for an R-19-Equivalent 2×4 Wall
Start by deciding whether the cavity or the assembly must reach R-19. Many people chase the wrong number without realizing the studs are the real problem.
Second, air seal every joint, penetration, and plate with caulk and canned foam. This step comes before insulation, not after.
Third, choose the cavity strategy: R-15 batts for budget builds, flash-and-batt for balanced performance, or full closed-cell foam for maximum value in a thin space.
Fourth, add exterior rigid foam to break thermal bridging. Even 1 inch of polyiso changes the assembly’s behavior more than any batt swap will.
Fifth, verify the vapor profile for your climate before closing the wall. Get this wrong and the insulation becomes the least of your problems.
Common Mistakes to Avoid
Stuffing R-19 batts into a 2×4 bay is the most common error, and it usually costs more than buying the correct R-15 product in the first place.
Ignoring thermal bridging is the second. Studs occupy roughly a quarter of a typical wall’s surface area, and wood only insulates at about R-1.25 per inch.
That means a 2×4 wall with R-15 cavity insulation may only reach about R-12 as a whole assembly. Pushing that cavity to a theoretical R-19 would barely move the total.
Understanding this changes the entire strategy. The goal is not a number in a cavity. The goal is a wall assembly that performs as a system.
Frequently Asked Questions
Is it OK to compress R-19 into a 2×4 wall?
It is not dangerous, and it will not fail structurally. It simply wastes money, because the compressed batt performs like an R-13 to R-15 product that costs less.
Compression also creates drywall bulge and torn facings, which can cause moisture and finish problems down the road.
Will an inspector fail a wall with compressed batts?
Most inspectors check the R-value printed on the bag rather than measuring installed thickness, so it often passes. That does not mean it performs as labeled.
Some jurisdictions now require blower door testing, which tends to expose air leakage problems regardless of what the bags claim.
What is the cheapest way to get near R-19 in a 2×4 wall?
Install R-15 mineral wool or high-density fiberglass batts and seal the wall carefully. That gets you close without compression losses.
For a true R-19 or better, add 1 inch of exterior rigid foam or use a flash-and-batt approach with 2 inches of closed-cell spray foam.
Final Thoughts
The label on an insulation bag describes a product in ideal conditions, not a squeezed cavity. R-19 batts belong in 2×6 walls where they can breathe and loft properly.
For a 2×4 wall, choose high-density batts that fit, seal the assembly thoroughly, and consider adding continuous exterior insulation. That combination outperforms a crammed batt every single time.
Focus on the whole wall assembly rather than the cavity number. Air sealing, thermal bridging, and moisture control decide how comfortable the room actually feels.