A sweltering attic doesn’t just make your upper floors uncomfortable; it can shorten the lifespan of your roof shingles and force your air conditioner to work overtime. Adding a gable vent is one of the most effective ways to exhaust trapped heat, but for many homeowners, the gable is located at the terrifying peak of a steep roof, inaccessible by a standard extension ladder. Yes, you can install a gable vent entirely from the inside by cutting the opening from the attic, applying a heavy bead of marine-grade sealant to the vent’s flange, passing it through the hole, and using a “wire-pull” technique to seat it tightly against the exterior siding while you secure it.
While traditional installation happens from the exterior to layer flashing under the siding, the “inside-out” retrofit method is a proven workaround for high-up installs where safety is the priority. This guide covers the specific techniques required to ensure a watertight seal and a secure fit without ever stepping foot on a roof.
The Challenge: Why Install From the Inside?
Most professional siding contractors will tell you that vents should be installed from the exterior. This is primarily for waterproofing; it allows the top flange of the vent to slip under the siding or house wrap, creating a gravity-fed water barrier. When you install from the inside, you lose the ability to layer materials in this way.
However, safety often dictates necessity. If your gable peak is 30 feet up or your roof pitch is too steep for safe walking, the interior method is your only DIY option. The trade-off is that you must rely heavily on high-quality chemical bonds (sealants) rather than mechanical flashing to keep water out. Understanding this limitation is key to doing the job right. You aren’t just screwing a vent in; you are creating a compression seal from behind the wall.
Assessing Feasibility
Before cutting a hole in your house, confirm you have physical access to the gable wall from inside the attic. You need a clear workspace free of HVAC ducts or truss webs that block the wall. Additionally, identify your siding type. This method works best with vinyl, aluminum, or wood lap siding. It is significantly harder with stucco or brick, which require masonry tools and are prone to cracking when cut from behind.
Tools and Materials for Interior Retrofit
Since you cannot rely on gravity flashing, your choice of sealant is the most critical material decision you will make. Do not use standard painter’s caulk.
- Reciprocating Saw (Sawzall): With a bi-metal blade for cutting through wood sheathing and siding simultaneously.
- Drill/Driver: For creating starter holes and driving mounting screws.
- Marine-Grade Adhesive/Sealant: Polyurethane or hybrid polymer sealants (like chemically curing 3M 5200 or high-grade construction adhesive) are essential for a permanent waterproof bond.
- Heavy Gauge Wire or Paracord: The “secret weapon” for the pull-back technique.
- Gable Vent: Preferably a vinyl or aluminum vent with a wide face flange. Avoid “flush mount” vents; you need a flange that overlaps the hole on the outside.
- 2×4 Lumber: For framing out the opening if your vent doesn’t align perfectly with existing studs.
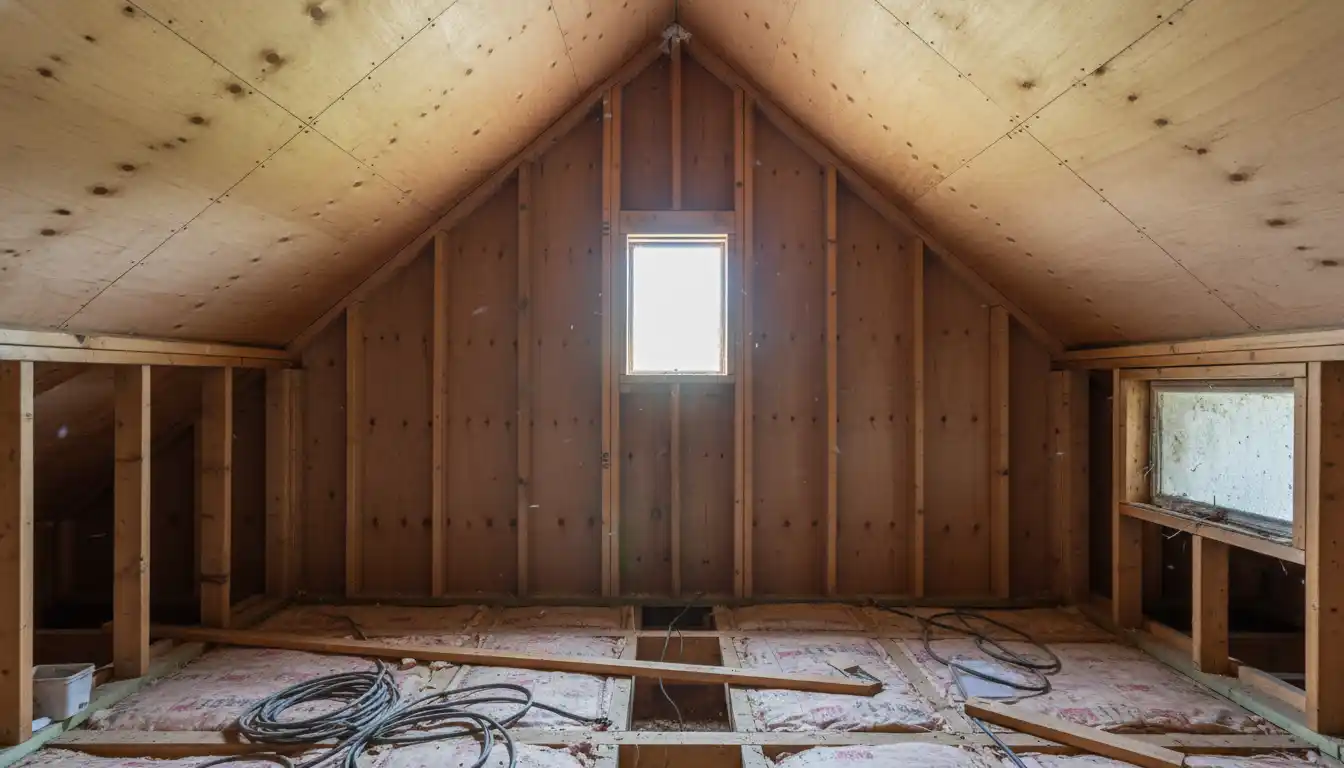
Step 1: Measuring and Locating the Cut
Locate the center of the gable peak. You want the vent to be as high as possible to exhaust the hottest air, but you must leave enough room below the roof ridge for framing. Use a stud finder or look for the nails penetrating the sheathing to locate the vertical studs.
Ideally, you want to fit the vent between two existing studs to minimize framing work. If the vent is wider than the stud bay (usually 14.5 inches), you will need to cut a stud and install a header, which is more complex. For this guide, we assume you are installing a vent that fits between studs or are comfortable framing a simple box.
Marking the Rough Opening
Measure the rear dimensions of your vent (the part that fits into the hole), not the front flange. Transfer these measurements to the plywood sheathing inside the attic. Use a level to ensure your lines are plumb. Double-check for electrical wires running across the studs before you drill. If you find any, you may need to reroute them. If you are unsure how to manage wires in tight spaces, you might want to read about how to run wire through ceiling spaces safely.
Step 2: Cutting the Opening from Behind
This is the point of no return. Cutting from the inside requires care because you can’t see the siding you are cutting. If you have vinyl siding, aggressive cutting can shatter it.
Drill Starter Holes: Drill a 1/2-inch hole in each of the four corners of your marked square. These holes allow you to insert your saw blade and give you a visual check from the ground outside to ensure the placement looks centered.
The Cutting Technique: Insert your reciprocating saw blade into a corner hole. Use a fine-tooth blade (18-24 TPI) to reduce vibration. Cut slowly along your marked lines. If cutting vinyl, the cold can make it brittle; try to do this on a warm day. If you encounter significant resistance, stop and check if you are hitting a hidden nail or brace. Once the square is cut, carefully push the block of sheathing and siding outward to remove it.
Step 3: The Wire-Pull Installation Method
Here is the unique value of this guide: The “Wire-Pull” trick. Since you cannot stand on a ladder outside to push the vent against the wall while someone screws it in from the inside, you need a way to pull the vent tight against the exterior siding from the inside.
Preparing the Vent
Take two long pieces of heavy wire or strong paracord (shoelaces work in a pinch). Loop one piece through the louvers on the left side of the vent and one through the right side. These will act as handles. Next, apply a thick, continuous bead of your marine-grade sealant to the back side of the vent’s face flange. Be generous—this goop is the only thing stopping rain from entering your wall.
Positioning and Seating
Turn the vent diagonally to fit it through the hole you just cut. Pass the entire vent to the outside, holding onto your wire loops so you don’t drop it. Once it’s outside, rotate it to the correct upright position.
Now, pull back on the wires. This will pull the vent’s flange tight against the exterior siding, compressing the sealant you applied. This mimics the pressure of a person pushing from the outside. While keeping tension on the wires (you may need a helper or to tie them off to a truss temporarily), center the vent in the opening.
Step 4: Securing the Vent
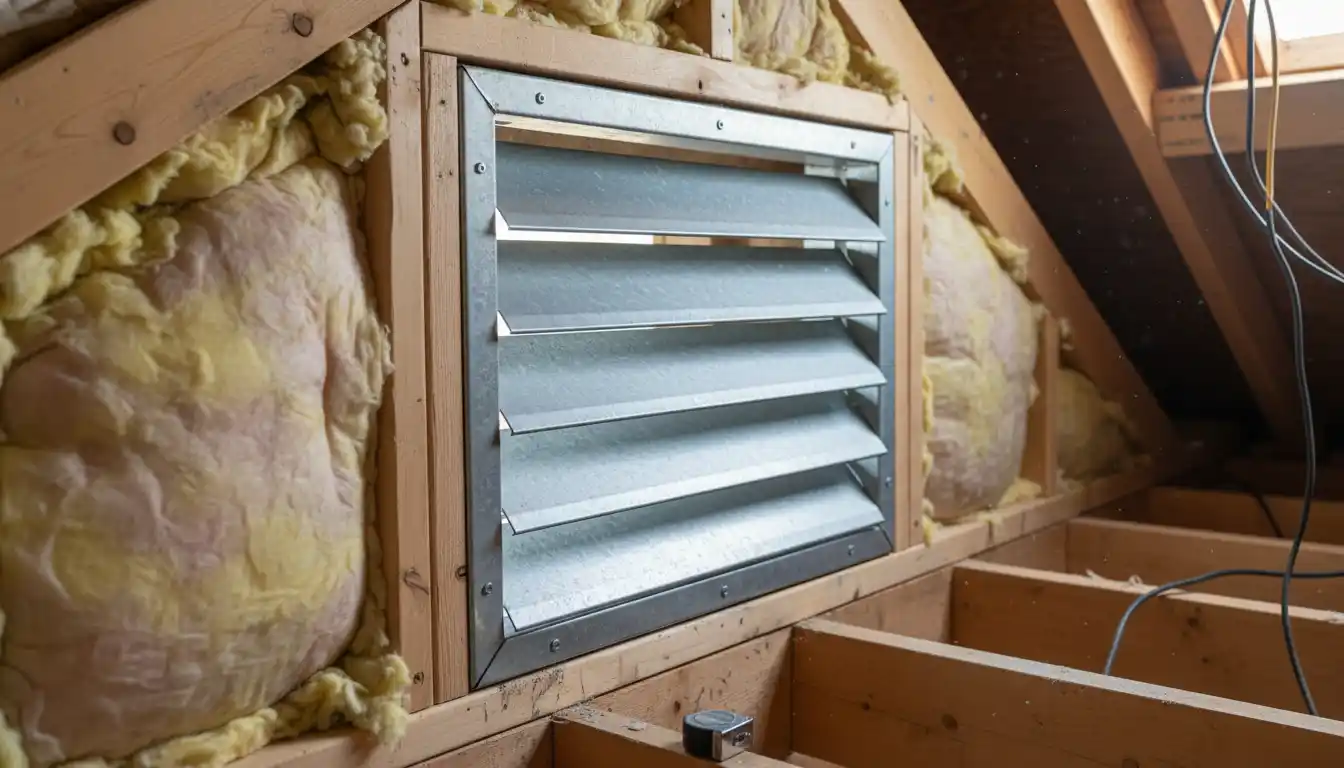
With the vent pulled tight against the exterior wall, you need to fasten it permanently. Most vents have mounting holes on the sides of the inner box frame. Drive corrosion-resistant screws through these holes and into the adjacent studs. If there is a gap between the vent frame and the studs, you must shim it with wood wedges or frame it out with 2x4s to get a solid bite.
Do not over-tighten immediately. Tighten the screws evenly, checking that the sealant is squeezing out slightly around the perimeter outside (if you can see it). Once secured, you can cut and remove the wire loops.
Step 5: Waterproofing and Diagnostics
The “blind seal” you created with the adhesive is your primary defense, but you should add a secondary barrier from the inside. Using a spray foam sealant (like Great Stuff) or more caulk, seal the gap between the vent box and the rough opening in the plywood. This prevents attic air from bypassing the vent and keeps wind-driven rain from migrating into the wall cavity.
Checking for Leaks
After the first heavy rain, inspect the area. Look for dark stains on the wood below the vent. Sometimes, moisture issues can be subtle. For example, if you see discoloration on nearby finishes, similar to how grout looks wet in spots when there is a sub-surface leak, you may have a pinhole gap in your sealant. If this happens, you can try to inject more sealant from the inside or, in a worst-case scenario, use a caulking gun on an extension pole from the ground if the height allows.
Comparison of Sealants for Interior Install
Choosing the right sealant is more important than the brand of vent you buy. Since you cannot mechanically flash the vent, the sealant must withstand expansion, contraction, and UV exposure.
| Sealant Type | Adhesion Strength | Flexibility | Best For |
|---|---|---|---|
| Polyurethane | High | Excellent | Vinyl and wood siding. Hard to tool but lasts 20+ years. |
| Silicone (100%) | Medium | High | Smooth surfaces (metal/glass). Not paintable. |
| Hybrid Polymer | Very High | Good | All-weather application, even on damp surfaces. |
| Acrylic Latex | Low | Low | Avoid. Will crack and fail in exterior gaps. |
Troubleshooting Common Issues
The Vent Rattles: If the vent vibrates during high winds, it likely wasn’t pulled tight enough against the siding during installation. You can retrofit this by driving a screw through the face of the vent flange (from the inside, angled outward) to catch the siding, but this is difficult. A better fix is wedging shims tightly between the vent frame and the rough opening.
Insect Intrusion: Ensure your vent came with a pre-installed screen. If you bought a cheap vent without one, staple a piece of galvanized mesh to the back of the wood framing inside the attic. This creates a barrier against wasps and birds.
Clearance Issues: Sometimes you might find obstructions inside the wall cavity, such as exhaust flues or electrical boxes. Similar to checking depth for a recessed stove outlet, you must verify the wall depth before buying a vent. Some decorative vents are quite deep and may protrude too far into the attic, hitting truss webs.
By following the wire-pull method and using industrial-grade sealants, you can successfully retrofit a gable vent without risking life and limb on a ladder. This upgrade will pay dividends in lower cooling bills and a healthier roof structure for years to come.