A stuck shear pin can turn a simple pre-season check into a frustrating afternoon. The pin is supposed to be the weak link that protects the auger gearbox, so when it breaks or seizes in place, you need to remove it without damaging the auger shaft, the flighting, or the gearbox housing. Forcing it with the wrong tool can enlarge the hole or bend the shaft, which turns a cheap part replacement into a much bigger repair.
This guide covers the practical removal sequence: how to confirm the pin is actually stuck, which tools to reach for first, how to use heat and drilling safely, and when to stop and disassemble the auger. It also explains why pins seize in the first place and what to do after removal so the replacement pin seats cleanly and comes out next time.
What a Shear Pin Does and Why It Sticks
A shear pin connects the auger flighting to the auger shaft. When the auger hits something it cannot clear, the pin is designed to break before the gearbox or drive system takes the load. That sacrificial role is why the pin is made from a softer material than a standard hardware bolt. Once it breaks, the auger can spin freely on the shaft instead of transferring shock into the gearbox.
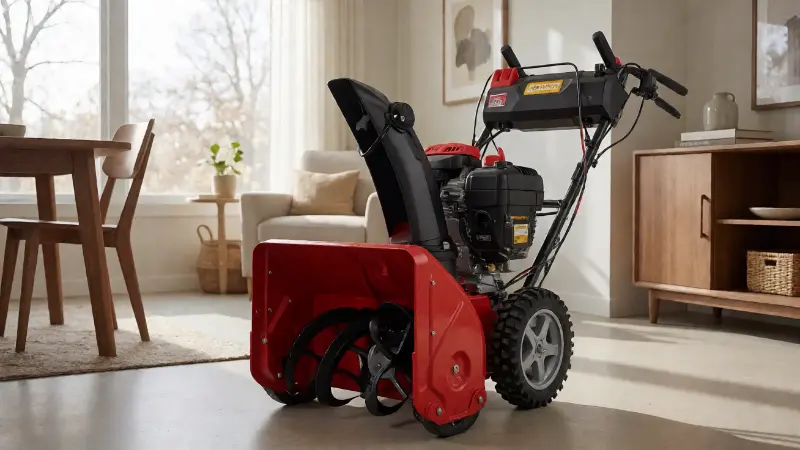
Pins seize for several common reasons. Corrosion is the leading cause on machines that sit outside or in damp sheds. A pin that was installed dry can rust into the shaft and flighting holes until it is effectively welded in place. Impact damage is another cause: a partially sheared pin can bend inside the hole and wedge itself against the shaft. Paint, burrs, and debris from previous repairs can also close up the clearance.
Using the wrong replacement pin contributes to the problem. A hardened bolt or a pin with the wrong diameter can deform the hole or fail to shear as intended. Some owners install a pin that is slightly too long, and the exposed end bends against the housing. After a season of use, that bent end can be difficult to drive out without cutting it flush first.
Safety First: Shut Down and Secure the Machine
Before you touch the auger, remove the spark plug wire and move it away from the plug. On electric-start models, remove the key and disconnect the battery if the machine has one. This step matters because an engine that kicks over while your hand is near the auger can cause serious injury. Work on a flat, stable surface with the machine blocked so it cannot roll.
Wear eye protection and gloves. Rust flakes, metal shavings, and penetrating oil can fly when you drive a punch or drill a pin. If you use heat, keep a fire extinguisher nearby and work outdoors or in a well-ventilated area away from fuel, oil, and dry debris. Avoid using an open flame near the fuel tank, fuel lines, or any plastic components.
Block the auger so it cannot rotate while you work. A wooden block or a strap around the flighting can hold it steady, but make sure the block is positioned so it does not become a projectile if the auger shifts. Keep your hands clear of the shear pin hole when striking a punch, and use a punch that is long enough to keep your fingers away from the impact point.
Diagnose the Stuck Pin Before You Force It
Confirm that the problem is the shear pin and not a frozen auger or a broken drive belt. With the engine off, try to rotate each auger by hand. If one side spins freely and the other does not, the free side likely has a broken or missing pin, while the stuck side may have a seized pin or a damaged shaft. If both sides are locked, check for ice buildup, a jammed object, or a drive issue before assuming the pins are the problem.
Look closely at both ends of the pin. A pin that is flush on one side and recessed on the other may be partially sheared and wedged. A pin with a mushroomed head may have been hammered previously. Clean the area around the hole with a wire brush so you can see the pin clearly. If the pin is covered in rust, apply penetrating oil and let it sit before attempting removal.
Check the parts diagram for your model to see how many pins the machine uses and where they sit. Some two-stage machines use one pin per auger side, while others use a pin and a retainer arrangement. Knowing the correct configuration prevents you from driving on a retaining clip or mistaking a grease fitting for a pin. If the machine also has drive problems, the Cub Cadet reverse fix guide covers a separate set of linkage and friction-disc causes.
Tools That Help Free a Stuck Shear Pin
Gather the tools before you start so you are not searching for a punch with oil on your hands. A set of pin punches in several sizes is more useful than a single nail or screwdriver. A brass drift can help move a stubborn pin without gouging the shaft. Penetrating oil, a wire brush, and rags handle the cleaning and soaking stages.
- Penetrating oil — apply it to both ends of the pin and let it soak; repeated applications over time can help.
- Pin punches and a brass drift — match the punch diameter to the pin as closely as possible.
- Hammer — a medium-weight hammer gives control without excessive force.
- Heat gun or torch — use sparingly and only after removing fuel sources; heat can break corrosion but can also damage seals and paint.
- Drill and cobalt bits — for drilling out a pin that will not move after soaking and punching.
- Screw extractor — useful after a drilled hole is established in the pin.
- Wire brush and files — clean the hole and dress any burrs after removal.
- Correct replacement shear pin — match the manufacturer’s part number rather than substituting a hardware bolt.
Step-by-Step: How to Remove a Stuck Snow Blower Shear Pin
Work through the steps in order and stop when the pin moves. The goal is to free the pin with the least force possible, because repeated heavy hammering can deform the auger shaft or oval the pin hole. If one method fails, move to the next rather than escalating force on the same approach.
- Clean the area. Brush away rust, paint, and debris from both ends of the pin. A clean surface lets penetrating oil reach the gap and lets you see whether the pin is moving.
- Soak with penetrating oil. Apply oil to both ends and let it sit. Some technicians repeat the application over hours or overnight. Tap the pin lightly with a brass drift between applications to help the oil work into the joint.
- Support the auger. Place a block under the auger so the force from the punch goes into the pin rather than flexing the flighting. Make sure the block does not cover the pin hole.
- Drive the pin with a punch. Use a pin punch slightly smaller than the pin diameter. Strike firmly but controlled, and check after each hit whether the pin has moved. If the pin is flush or recessed, start with a smaller punch to avoid peening the end over.
- Apply heat if safe. A heat gun or a torch used carefully can expand the surrounding metal and break corrosion. Keep heat away from fuel, plastic parts, and seals. Let the area cool before applying oil, and avoid heating a pin that may have a plastic retainer nearby.
- Drill out the pin if it will not move. Center-punch the pin, start with a small bit, and drill straight through the pin. Increase bit size gradually. Use cutting oil and clear chips often. Stop before the bit reaches the opposite side of the shaft if the hole is blind.
- Use an extractor if needed. Once a hole is established, a screw extractor may grip and turn the remaining pin. If the pin is badly corroded, drilling may remove most of it, and the remaining shell can be picked out with a pick or brushed clean.
- Clean and inspect the hole. Remove burrs with a file or wire brush. Check that the hole in the flighting lines up with the hole in the shaft. If the holes are misaligned, rotate the auger slightly or inspect for a bent shaft before forcing a new pin.
- Install the correct pin. Fit the manufacturer-specified pin, install any retainer or cotter, and confirm the auger is secure. Grease or lubricate the shaft area according to the owner’s manual so the next pin is easier to remove.
What to Do If the Pin Still Won’t Budge
If soaking, punching, and careful heat have not moved the pin, stop hammering. Continuing to strike a seized pin can mushroom the end and make it wider than the hole, which makes removal harder. At that point, drilling is usually the better path. Use a sharp bit, keep the drill aligned with the pin, and work slowly so you do not wander into the shaft or flighting.
A machine shop or small-engine dealer can remove a severely seized pin and check the shaft for damage. If the pin hole is oval or the shaft is bent, replacing the auger shaft or the affected auger assembly may be more reliable than trying to reuse a damaged hole. On some models, removing the auger assembly from the machine gives better access and reduces the chance of damaging the gearbox housing.
Other snowblower symptoms can complicate diagnosis. If the machine moves poorly or the wheels seem locked, the problem may be in the drive system rather than the auger; a guide to Ariens wheels locked up explains the common traction causes. Cold-start issues can also distract from the pin repair, so if the engine is hard to start, check the Craftsman snowblower choke position before assuming a fuel problem.
Choosing the Right Replacement Shear Pin
Replace the pin with the part specified for your model. Shear pins are engineered to break at a certain load, and a hardware-store bolt with a higher grade can transfer shock into the gearbox instead of protecting it. Match the diameter, length, and material called for in the parts diagram. Some machines use a brass or soft-steel pin, while others use a pin with a specific head shape or retainer.
Keep a few spare pins on hand, along with the correct tools to change them. A pin that breaks in the field is easy to replace when you have the right part and a punch. If you install a pin that is too long, the exposed end may catch on the housing or bend. If it is too short, it may not engage the shaft fully. Check that any cotter pin or clip is seated properly after installation.
Comparison of Removal Methods for a Stuck Shear Pin
The table below summarizes the common removal approaches and when each one tends to make sense. Use the least invasive method that works, and move to the next step only when the pin does not respond.
| Method | Best for | Tools needed | Cautions |
|---|---|---|---|
| Penetrating oil soak | Light corrosion or a pin that is tight but not seized | Penetrating oil, rag, brass drift | May need repeated applications; keep oil away from belts and friction surfaces |
| Punch and hammer | A pin that is visible and has not mushroomed | Pin punch, hammer, support block | Use controlled strikes; heavy hammering can bend the shaft or oval the hole |
| Careful heat | Corrosion-seized pin with no nearby plastic or fuel components | Heat gun or torch, gloves, extinguisher | Keep flame away from fuel and seals; allow cooling before applying oil |
| Drill and extractor | A pin that is seized, mushroomed, or broken below the surface | Drill, cobalt bits, center punch, extractor | Drill straight and stop before damaging the opposite side of the shaft |
| Auger assembly removal | A pin that cannot be reached or a shaft with a damaged hole | Wrenches, snap-ring pliers, parts diagram | More labor; inspect the shaft and gearbox while the assembly is off |
Prevention: Keep the Next Pin From Seizing
After the repair, clean the shaft and pin hole and apply the lubricant specified in the owner’s manual. Some manufacturers call for grease on the shaft, while others warn against certain anti-seize compounds near plastic components. Follow the manual rather than guessing. A light coating that keeps moisture out can make the next removal much easier without attracting abrasive dirt.
At the end of the season, remove and inspect the shear pins before storing the machine. Replace any pin that is bent, corroded, or partially sheared. Store the snowblower in a dry area with the auger housing cleaned out, and avoid leaving the machine sitting in snowmelt or on damp concrete. A cover that allows ventilation is better than a tightly sealed tarp that traps condensation.
Check the auger and shaft for play before each season. A worn bushing or a loose flighting can put side load on the pin and make it bind. If a pin keeps breaking or seizing, look for a bent shaft, a misaligned auger, or an obstruction that is not being cleared. Fixing the underlying cause is more effective than repeatedly replacing the pin.
FAQ
Can I use a regular bolt as a shear pin?
It is not a good substitution. A standard bolt may be stronger than the intended shear pin, which can transfer shock into the auger gearbox instead of protecting it. Use the manufacturer-specified pin or a direct replacement with the same dimensions and material.
How do I know if the shear pin is stuck or already broken?
If one auger side spins freely on the shaft while the other is locked, the free side likely has a broken or missing pin. A stuck pin usually remains visible in the hole and does not allow the auger to rotate independently. Clean the area and check both ends of the pin before deciding.
Should I heat a stuck shear pin?
Heat can help break corrosion, but it carries risks. Keep flame away from fuel, plastic components, and seals, and have a fire extinguisher nearby. Use the least heat that gets results, and let the area cool before applying penetrating oil.
What if the pin is broken off inside the shaft?
A pin broken below the surface often needs to be drilled out. Center-punch the remaining pin, drill with a small bit, and increase size gradually. An extractor may remove the remainder once a hole is established. If the hole is damaged, a replacement shaft or professional repair may be needed.
How often should shear pins be replaced?
Replace any pin that is bent, corroded, or partially sheared, and inspect them at the start and end of each season. Carrying spares is practical because a pin can break during use. Follow the owner’s manual for the correct part and installation details.