Yes, a joint between a butt edge and a tapered edge is acceptable, but it is not a simple tape-and-mud job. The two edges are shaped differently, and that difference creates a finishing challenge you need to plan for. A tapered edge has a shallow recess that lets joint compound and tape sit flush with the face of the board. A butt edge is square and flush, with no recess at all. When the two meet, the tapered side gives you room to bury the tape while the butt side does not, so a standard three-coat finish can leave a visible hump or a shadow line under raking light.
The good news is that the fix is straightforward and well understood by experienced drywall finishers. You build out the butt side with compound to mimic the taper, then feather the joint much wider than you would between two tapered edges. Done correctly, the joint disappears under paint and performs as well as any other seam. Done carelessly, it telegraphs through the finish and can crack if the building moves. This guide explains the geometry, the sequence, and the common mistakes so you can decide whether to tackle it yourself or bring in a finisher.
What Are Butt and Tapered Edges?
Standard drywall panels have tapered edges along their long sides and square-cut butt edges on their short ends. The taper is a slight depression, typically a little over an inch wide on each side, that runs the length of the panel. When two tapered edges meet, the recesses align and form a shallow channel. Tape and compound fill that channel and finish flush with the surrounding face, which is why tapered joints are the easiest to hide.
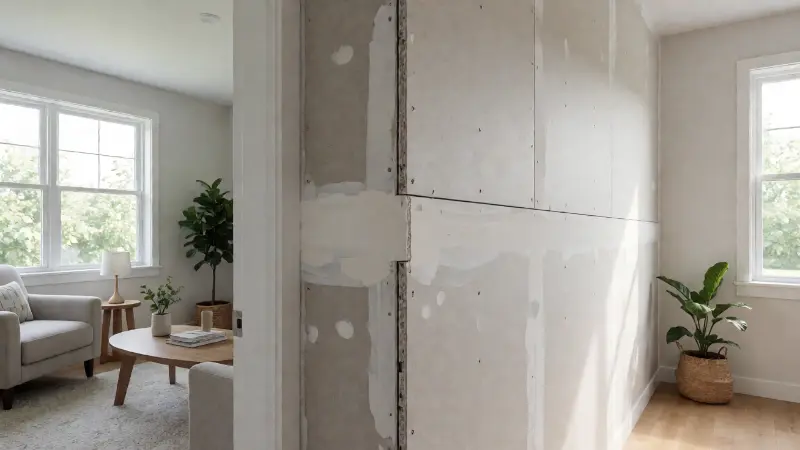
A butt edge is simply the square end of the panel. There is no recess, so the face of the board is flat right up to the cut. When you tape a butt joint, the tape and compound sit proud of the surface. Finishers compensate by feathering the compound outward in a wide, gradual slope so the buildup blends into the wall. A butt-to-butt joint therefore needs a wider feather than a tapered joint, and a butt-to-tapered joint needs the same wide feather on the butt side plus a normal feather on the tapered side.
This mixed joint shows up often in remodeling. You might be patching a section where a new sheet meets an existing wall, or installing boards vertically where a factory end meets a factory edge. It is also common around closets, soffits, and stairwells where full sheets do not fit. The joint is not a defect; it is simply a transition that requires a bit more compound and a bit more patience.
Why a Butt-to-Tapered Joint Needs Special Treatment
The core problem is the mismatch in depth. On the tapered side, the recess might be roughly a sixteenth of an inch deep, though the exact dimension varies by manufacturer and board thickness. On the butt side, there is no recess. If you apply the same amount of compound on both sides and feather evenly, the finished joint will be slightly higher on the butt side. Under a window or a wall wash, that difference reads as a hump or a shadow, even if it feels smooth to the touch.
The solution is to pre-fill the butt side to bring it up to the level of the tapered recess before you tape. You apply a strip of setting-type compound along the butt edge and let it harden, creating a shallow ramp that mimics the taper. Then you tape over the whole joint and feather outward from that built-up edge. The result is a joint that is flat across its width and blends into the wall over a wide distance.
This is a finishing problem, not a structural one. The joint is still mechanically sound when taped and bedded correctly. The risk is cosmetic: telegraphing through the paint, visible ridges, and, if the compound is applied too thickly in one pass, shrinkage cracks. Using the right compound and the right sequence avoids all three.
Is It Acceptable by Code and Standard Practice?
Residential building codes generally focus on structural attachment, fire-rated assemblies, and moisture resistance rather than the aesthetics of a joint. A butt-to-tapered joint does not violate typical code requirements as long as the panels are fastened correctly and the assembly meets the required fire or thermal rating. Where codes do reference finishing, it is usually in the context of fire-rated walls, where the number of layers and the treatment of joints matter for the rating, not the shape of the edge.
Finishing standards are a separate matter. Industry guidance such as GA-214 describes finish levels from Level 1 through Level 5, and each level defines how thoroughly joints and fasteners must be treated. A butt joint requires a wider feather than a tapered joint to achieve the same visual result. For a Level 4 finish, which is typical for painted residential walls, the joint must be coated and sanded so it is not visible under normal lighting. A Level 5 finish adds a skim coat over the entire surface to eliminate any remaining texture or joint shadow, and it is often specified where gloss paint or strong side lighting will highlight imperfections.
In practice, a butt-to-tapered joint is acceptable when it is finished to the level the space requires. In a garage or utility room, a basic finish is fine. In a living room with a critical light source, it deserves the same care as any other joint. The joint type itself is not a red flag; the finishing effort is what determines whether it looks right.
Step-by-Step: How to Finish a Butt-to-Tapered Joint
Work in thin coats and let each one dry before the next. Setting-type compound, often called hot mud, is a good choice for the first pass because it hardens by chemical reaction rather than drying, so it shrinks less and sets faster. Use a wider knife than you think you need; a 10-inch or 12-inch knife for the first coat and a 12-inch or 14-inch knife for the finish coats gives you room to feather.
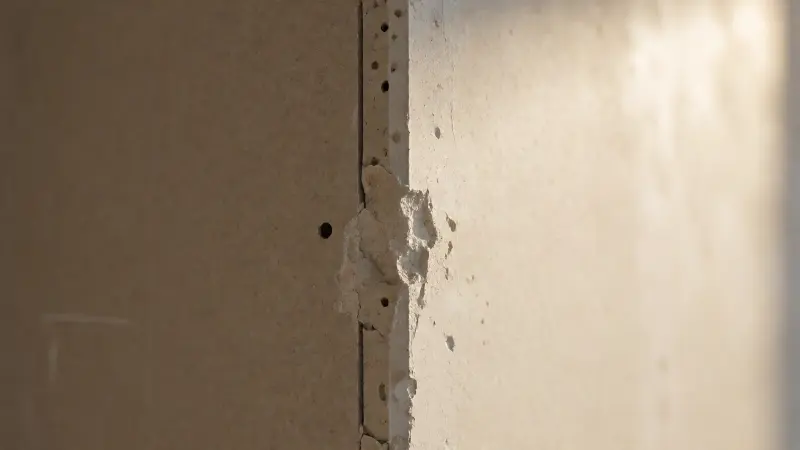
- Prepare the edges. Make sure the butt edge is clean and square, with no crumbled gypsum. If the cut is rough, trim it lightly with a utility knife. Dust off the surface so the compound can bond.
- Pre-fill the butt side. Apply a strip of setting compound along the butt edge, roughly the width of the taper on the opposite side. Press it flat with the knife and let it harden. This creates a shallow ramp that matches the tapered recess.
- Apply the tape. Bed paper tape into a thin layer of compound across the whole joint, pressing it firmly so it follows the contour of the pre-filled ramp and the tapered recess. Avoid wrinkles and air pockets.
- First coat. Embed the tape with a thin, even coat, working from the center outward. On the butt side, extend the compound several inches beyond the tape. On the tapered side, fill the recess and feather to the edge of the taper.
- Second coat. Once the first coat is dry, apply a slightly wider coat. Feather the butt side out roughly 12 to 16 inches and the tapered side out roughly 8 to 10 inches, depending on the knife width and the wall conditions.
- Third coat. Apply a thin finish coat to blend the edges. Keep the knife angle shallow and the pressure even. The goal is a gradual transition, not a thick buildup.
- Sand and inspect. Sand lightly with fine grit, then check the joint under a raking light. Fill any low spots with a thin skim coat and sand again. Prime before painting so the repaired area absorbs paint evenly.
If the joint is on a ceiling, expect the finish to be judged from below with light raking across it. Take extra care with the feather on the butt side and consider a skim coat over the whole area if the lighting is harsh. The same care applies near windows and under cabinets, where side light exaggerates ridges.
Comparison of Drywall Joint Types
The table below summarizes how the common joint configurations differ in difficulty and finishing requirements. Feather widths are general guidance; adjust for the board thickness, the compound you use, and the finish level the space demands.
| Joint type | Difficulty | Typical feather width | Risk of telegraphing | Notes |
|---|---|---|---|---|
| Tapered to tapered | Easy | 8 to 10 inches each side | Low | The recesses align and accept tape and compound flush with the face |
| Butt to butt | Moderate | 12 to 16 inches each side | Moderate | No recess on either side; the joint must be built out and feathered wide |
| Butt to tapered | Moderate | 12 to 16 inches on the butt side, 8 to 10 on the tapered side | Moderate | Pre-fill the butt side to mimic the taper before taping |
| Butt to tapered with skim coat | Moderate to hard | As above, plus full-surface skim | Very low | Best for critical lighting or gloss paint; adds time and material |
Common Mistakes to Avoid
The most frequent error is skipping the pre-fill on the butt side. Without it, the finished joint sits higher on that side, and no amount of sanding will flatten it without cutting through the tape. Another common mistake is using a lightweight all-purpose compound for the first coat on a deep fill. Lightweight compounds shrink more as they dry, which can leave a depression or a hairline crack along the joint. A setting-type compound for the initial fill reduces that risk.
Using too small a knife is another pitfall. A 6-inch knife is fine for tight spots, but it cannot feather a butt joint wide enough to hide it. Step up to a 10-inch or 12-inch knife for the first coat and a wider knife for the finish coats. Also avoid over-sanding. Aggressive sanding can scuff the paper face of the drywall, and those scuffs show through paint as a fuzzy texture. Sand lightly and check your work with a raking light rather than relying on touch alone.
Finally, do not rush the drying time between coats. Applying the next coat over a damp surface traps moisture and can cause the compound to crack or bond poorly. In humid conditions, allow extra time or use a fan to circulate air. Patience between coats is what separates a joint that disappears from one that keeps showing up after paint.
When to Consider Alternatives
In most cases, finishing the butt-to-tapered joint properly is the right approach. There are situations, however, where a different strategy makes sense. If the joint falls in a highly visible location with critical lighting, a full skim coat over the area, or over the entire wall, can eliminate any residual shadow. That is essentially a Level 5 finish and is often specified in high-end work for exactly this reason.
If you are planning the layout from scratch, try to avoid butt-to-tapered joints in the most visible areas by adjusting sheet placement. Sometimes shifting a sheet by a few inches moves the joint to a less prominent spot or allows a tapered edge to meet a tapered edge. In a remodel where the layout is fixed, that is not always possible, and the finishing sequence above is the practical answer.
If the joint is in a wet area such as a bathroom, use moisture-resistant board and the appropriate joint treatment for the substrate. Water damage is a separate concern from joint shape, but a poorly finished joint in a damp location can be the first place moisture finds a path. If you are already dealing with moisture issues, a guide to repair water-damaged drywall ceiling covers the assessment and repair steps before you refinish.
Related Finishing and Installation Considerations
Joint finishing does not happen in isolation. The quality of the substrate and the surrounding wall affect how a repair reads. If the wall has a heavy texture, matching that texture after the joint is finished becomes part of the job. A guide to paint over textured drywall wallpaper is useful when the existing surface has a pattern or texture that needs to be blended or covered.
Layout and fastening also influence whether joints stay tight. Long walls and tall ceilings put more stress on seams, and the way the boards are hung affects how much movement the joint sees. A guide to drywall on 10 foot walls explains how to control seam cracking on taller assemblies, which is relevant if your butt-to-tapered joint is part of a larger installation rather than a small patch.
For small patches, the same principles apply but the scale changes. A butt-to-tapered joint in a patch is often no more than a few inches long, and a wide feather can extend beyond the patch onto the surrounding wall. Feathering onto the existing surface is normal, but it means the repair area grows. Plan for that so you do not end up with a visible outline where the new compound meets the old paint.
FAQ
Can you tape a butt edge to a tapered edge?
Yes, you can tape the joint, but you should pre-fill the butt side with setting compound to mimic the tapered recess before taping. Without that step, the finished joint sits higher on the butt side and can show as a hump or shadow under raking light.
Is a butt-to-tapered joint more likely to crack?
It is not inherently more crack-prone than other joints when taped and bedded correctly. Cracks are more often caused by movement, poor fastening, or thick compound that shrinks. Using setting compound for the first fill and keeping coats thin reduces the risk.
What kind of tape should I use on a butt-to-tapered joint?
Paper tape is generally the better choice for butt joints because it adds strength and handles the wider feather well. Mesh tape can work, but it is less forgiving on a joint that needs a built-up ramp, and it does not add the same reinforcement.
How wide should I feather the compound?
On the butt side, feather roughly 12 to 16 inches from the joint. On the tapered side, 8 to 10 inches is often enough. The exact width depends on the knife you use and the finish level. A raking light check after sanding tells you whether you need to go wider.
Do I need a skim coat over the whole wall?
Not always. A skim coat, which produces a Level 5 finish, is worth considering in rooms with strong side lighting or gloss paint, where any joint shadow becomes visible. For typical painted walls under normal lighting, a well-feathered Level 4 finish is usually sufficient.