Cutting into a string of Christmas lights is one of those jobs that looks simple until you realize the string has three conductors instead of two. Splice it wrong and you get a dead run, a blown fuse, or a connection that fails the first time it rains. Splice it right and you can repair a chewed section, extend a run to reach a distant eave, or rebuild a damaged plug end without buying a whole new set.
This guide explains what the third wire on a Christmas light string actually does, how to identify each conductor before you cut anything, and how to make a splice that holds up outdoors. It also covers the tools worth owning, the waterproofing methods that survive winter weather, and the electrical limits you should respect. Most of the work is preparation and planning rather than technical difficulty.
What 3-Wire Christmas Lights Actually Are
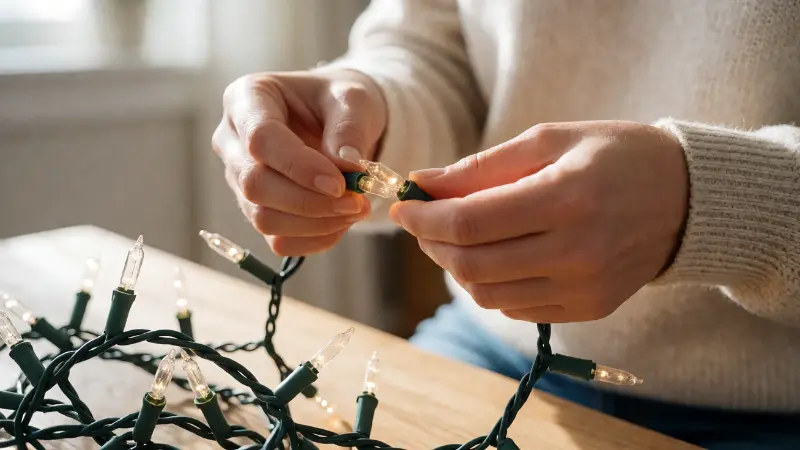
The term “3-wire” gets used for two different products, and knowing which one you have changes how you splice it. The first type is a commercial-grade or heavy-duty string with three conductors arranged as two circuit legs plus a common return. In that design, the lamps are divided into alternating groups, so if one group fails, the rest of the string stays lit. This is why a commercial C9 string can lose a section and still look mostly functional.
The second type is a grounded string where the third conductor is a ground wire, similar to the wiring in your walls. These are common on commercial strings and on some larger decorative sets that use a grounded plug. The ground does not carry current during normal operation, but it provides a path to earth if a fault develops in the cord or a socket.
Retail mini-light sets are usually two-wire, series-wired strings. If you cut one of those and splice it back together, the mapping is simple: one conductor to one conductor, the other to the other. Three-conductor strings demand more care because a swapped pair can create a short, kill half the string, or bypass a section of the circuit entirely.
Why Homeowners Splice These Strings
There are a handful of realistic reasons to splice rather than replace. A string may be too short to reach the far end of a roofline, and joining two sets is cheaper than buying a longer one. A section may be damaged by a lawn mower, a pet, or a rodent. The plug end may be crushed or corroded, and replacing just the plug is far less wasteful than discarding the whole run. In some cases, a homeowner wants to remove a failed section in the middle of a string and rejoin the good portions.
Each of those situations has a slightly different approach. Joining two complete strings end to end is the easiest, because you are mating a male end to a female end. Splicing mid-string, where you cut and rejoin conductors in the middle of a run, requires more attention to which conductor goes where. Repairing a cut near the plug means you also need to preserve the fuse holder that typically sits inside the plug body.
Tools and Materials Worth Having
Good splices come from good materials. You do not need a large kit, but you do need the right small parts. A cheap twist-and-tape repair will usually fail within a season outdoors, and it can create a shock or fire risk if the conductors work loose.
- Wire strippers sized for small-gauge stranded wire, typically 18 to 22 AWG on light strings.
- Adhesive-lined heat shrink tubing, which seals as it shrinks and resists moisture better than standard tubing.
- Heat source such as a heat gun or a small butane torch used carefully at a distance.
- Crimp butt connectors or closed-end crimp sleeves rated for the wire gauge.
- Soldering iron and rosin-core solder if you prefer a soldered joint, which is the most durable option.
- Gel-filled splice connectors, which are pre-filled with sealant and are convenient for outdoor repairs.
- Liquid electrical tape or a comparable insulating coating as a secondary seal.
- Multimeter for checking continuity and confirming which conductor is which.
- Replacement plug or end connector if you are rebuilding a damaged end.
One item that deserves a caution: standard twist-on wire nuts are a poor choice here. They are designed for solid conductor wire in boxes, not for fine stranded wire on a cord that will flex in the wind. Vibration and thermal cycling loosen them over time. If you must use one temporarily for testing, replace it with a permanent splice before the lights go up for the season.
Identifying the Conductors Before You Cut
Never cut a three-conductor string until you know which wire does what. Manufacturers use several identification methods, and they are not consistent across brands. The most common cues are a ribbed or textured insulation on one conductor, a printed stripe or trace line, different colored insulation, or a silver-colored strand mixed into one conductor.
Unplug the string first, then use a multimeter in continuity mode to map the conductors from the plug end. With the plug removed from power, you can trace each conductor back to its source. If the string has a grounded plug, the ground pin connects to the ground conductor, which is usually identifiable by green insulation or a green stripe. If the string uses the dual-circuit design, two conductors will each connect to a different contact in the plug, and the third is the common return.
Photograph the wiring before you disassemble anything. A close-up of the plug interior and the cut ends will save you guesswork when you reassemble. If the string came with instructions or a wiring diagram, keep it with your tools for the duration of the project. For a broader look at what happens when conductors get crossed in lighting circuits, this explanation of the risks of wiring a light wrong is worth reading before you start cutting.
| String Type | Conductors | Splicing Priority |
|---|---|---|
| Retail mini lights, two-wire | Line and neutral, series lamps | Match conductor to conductor; polarity matters at the plug |
| Commercial dual-circuit string | Two circuit legs plus common return | Keep each leg with its matching return; a swap kills half the run |
| Grounded commercial string | Line, neutral, and ground | Preserve the ground path; do not tie ground to a current carrier |
| LED retrofit string with driver | Varies by design, sometimes three conductors for control | Check the manufacturer’s documentation before cutting |
Step-by-Step Splicing Method
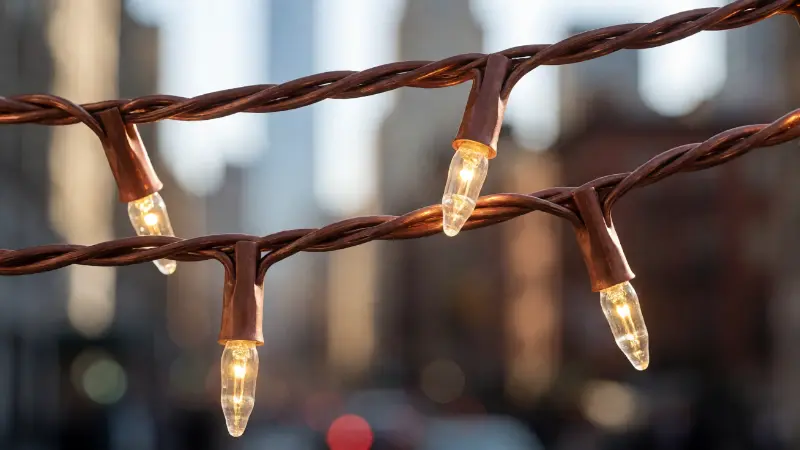
Start by unplugging the string and confirming it is de-energized. Cut the damaged or unwanted section cleanly with wire cutters, leaving enough length on both sides to work comfortably. Stagger your cuts so the joints do not sit side by side, which reduces the chance of a short if insulation fails later. A stagger of roughly half an inch between joints is a common practice.
Strip about a quarter inch of insulation from each conductor, taking care not to nick the strands. Twisted or broken strands weaken the joint and can cause overheating at the connection point. If the wire is heavily oxidized, trim back further until you reach bright, clean copper.
Join the conductors using one of three methods. For a crimp splice, insert both ends into a butt connector and crimp firmly with the correct tool, then tug gently to confirm the connection holds. For a soldered splice, twist the strands together, apply heat, and flow solder through the joint until it wicks in, then let it cool undisturbed. For a gel-filled connector, insert the stripped ends and close the connector according to its instructions.
Slide adhesive-lined heat shrink over each joint before you make the connection, then shrink it in place after the joint is complete. The adhesive should visibly flow out the ends as the tubing shrinks, which indicates a sealed connection. Finish by testing continuity with a multimeter before you apply power. If the string lights fully and no section is dark, the splice is electrically sound.
Waterproofing for Outdoor Use
Outdoor splices face rain, snow, freeze-thaw cycles, and ultraviolet exposure. Adhesive-lined heat shrink is the baseline for a reliable connection because the adhesive fills gaps that plain tubing leaves open. For added protection, coat the shrunk tubing with liquid electrical tape and allow it to cure fully before handling.
Position splices so they do not sit in a puddle or a low spot where water collects. If the splice must sit near the ground, elevate it or house it in a small weather-resistant enclosure. Avoid burying a spliced connection in soil or mulch, since moisture will find its way into even a well-made joint over time.
Use a ground-fault circuit interrupter for any outdoor lighting circuit. A GFCI outlet or an inline GFCI adapter reduces the risk of shock if moisture reaches a compromised connection. If you are running lights where no outdoor outlet exists, this guide to hanging lights without an outdoor outlet covers the practical alternatives and their trade-offs.
Keep in mind that the fine stranded wire used in light strings is more fragile than the solid wire in your home’s electrical system. Bending it sharply at a splice can break strands and create a weak point. Leave a gentle service loop rather than pulling the splice tight against a gutter or clip. The techniques for heavier conductors differ considerably, and this walkthrough of splicing heavy gauge wire shows how larger wire is handled when you move up to main feeder work.
Common Mistakes to Avoid
Mixing up conductors on a dual-circuit string is the mistake that causes the most confusion. The lights may come on partially, or one half of the string may stay dark while the other works normally. If that happens after a splice, recheck your mapping against the plug contacts rather than assuming the string is ruined.
Using the wrong connector size is another frequent problem. A butt connector that is too large for the wire will not crimp down onto the strands, and the joint will pull apart under tension. Match the connector to the actual wire gauge, and if you are unsure, test a scrap piece before committing to the real splice.
Overlooking the fuse is a third issue. Most light strings have a small fuse inside the plug body, and some have a second fuse in the receptacle end. If you rebuild a plug and leave the fuse out, the string loses its overcurrent protection. If the string keeps blowing fuses after a repair, stop and look for a short in the splice rather than installing a larger fuse.
Finally, do not splice a string that is already overloaded. Adding length to a run that is near its current limit can cause the wire to heat up and the insulation to degrade. Check the rating on the tag near the plug and stay within it.
Electrical Limits and Load Considerations
Light strings have a maximum connected wattage, and it is usually printed on a tag near the plug or molded into the plug body. This limit exists because the small conductors and the plug contacts can only carry so much current before they heat up. LED strings draw far less power than incandescent strings, so you can often connect more sets together, but the limit still applies.
Splicing does not increase the capacity of the string. If anything, a splice introduces a slightly higher resistance point, so it is wise to keep total connected load comfortably below the stated maximum. If you are joining multiple strings, add up the wattage of each set and compare it to the limit on the first string in the chain.
Voltage drop also matters on long runs. A very long string with many lamps can experience reduced voltage at the far end, which shows up as dimmer lamps. Splitting a long run across two outlets rather than daisy-chaining everything from one source usually produces more even brightness and reduces strain on the first section of cord.
When to Replace Instead of Splice
Splicing makes sense for a single clean cut, a damaged plug, or a short section that needs to be removed. It makes less sense when the insulation is brittle along much of the string, when multiple sockets are corroded, or when the damage is spread across several feet. In those cases, the repair may work initially but fail again quickly, and a replacement set is the more economical choice.
Be cautious with older incandescent strings that show heat damage near the sockets or discolored insulation. Those signs suggest the string has been running hot, and a repair may not address the underlying issue. LED sets generally run cooler and are more forgiving of repair, though the driver and control circuitry in some sets can complicate splicing.
If a string is under warranty, check the terms before cutting it. Many manufacturers will replace a defective set, and cutting the cord usually voids that coverage. For inexpensive retail sets, replacement is often faster than repair anyway.
FAQ
Can I splice three-wire Christmas lights to a two-wire extension cord?
Only if you understand which conductors are current-carrying and which is the return or ground. On a grounded string, the ground conductor should remain connected to a proper ground path rather than being tied to a current carrier. On a dual-circuit string, joining it to a two-wire cord may leave one circuit leg unpowered.
Why do half my lights stay out after splicing?
On a dual-circuit commercial string, that usually means the two circuit legs and the common return are not matched correctly. Recheck the conductor mapping against the plug contacts and confirm each leg connects to its original return path.
Is soldering or crimping better for light strings?
Both can work well. A soldered joint offers excellent electrical continuity and resists corrosion when sealed, while a properly crimped connection with adhesive-lined heat shrink is faster and holds up well under vibration. The key factor is sealing the joint against moisture.
Can I use wire nuts on Christmas light wire?
Wire nuts are not a good match for fine stranded cord that flexes outdoors. They can loosen with vibration and temperature changes, and they do not seal against moisture. Use a crimp, solder, or gel-filled connector instead.
How do I know which wire is the ground?
On grounded strings, the ground conductor is often green or marked with a green stripe, and it connects to the round pin on a three-prong plug. Confirm with a multimeter in continuity mode before making any connection.
Do I need a GFCI for spliced outdoor lights?
A GFCI is a sensible safeguard for any outdoor lighting circuit, and it is especially important where a splice may be exposed to moisture. It reduces shock risk if a connection becomes compromised.