You trowel on a fresh bed of mortar, press the stone into place, and come back the next day to find it sitting loose or peeling away with almost no effort. Mortar not sticking to stone is one of the most frustrating problems in masonry and stone work, and it rarely has a single cause. In most cases, the failure comes down to what is on the stone, how the stone was prepared, how the mortar was mixed, or how the weather behaved during the first few hours of curing.
The good news is that each of those factors can be diagnosed and corrected. This guide walks through the real reasons mortar fails to bond to stone, how to tell them apart, and how to prep and repair so the next attempt holds. Whether you are repointing an old fieldstone foundation, laying bluestone treads, or resetting a loose cap, the principles are largely the same.
How Mortar Actually Bonds to Stone
Mortar does not glue stone the way an adhesive sticks two pieces of plastic together. The bond is mechanical and chemical at the same time. Cement particles hydrate and grow crystalline structures that interlock with the rough texture and pores of the stone, while the lime content helps the mortar remain slightly flexible and breathable over time.
For that interlock to happen, three conditions need to be met. The stone surface has to be clean and sound, the mortar has to stay in contact with the stone long enough to set, and the mortar has to be compatible with the stone in strength, porosity, and movement. Break any one of those and you get the classic symptom: a mortar joint that looks fine for a season and then crumbles or releases.
It also helps to understand that natural stone is not a uniform material. A dense, polished granite behaves very differently from a porous limestone or a soft sandstone. A mortar that works well on one can fail on another. Matching the mix to the stone is a big part of getting a bond that lasts.
Cause 1: Contamination on the Stone Surface

Dust, dirt, and loose grit are the most common reasons mortar will not stick to stone. Stone dust from cutting is especially sneaky because it looks like part of the surface. When mortar is pressed against a dusty stone, the cement paste bonds to the dust rather than the stone, and the dust layer fails under any movement or moisture cycling.
Beyond simple dust, watch for these contaminants:
- Release agents and form oils on salvaged or manufactured stone, which can leave an invisible film that repels water and cement paste.
- Silicone and acrylic sealers applied to stone years ago. These are designed to shed water, and they also shed mortar.
- Paint, plaster, and old Portland skim coats that are chalky or flaking.
- Biological growth such as algae, lichen, and moss, which is common on damp north-facing walls and shaded steps.
- Efflorescence and soluble salts that form a powdery layer on the surface.
- Oils, grease, and de-icing residue near driveways and garage aprons.
The fix is physical cleaning, not just a wipe-down. Scrub with a stiff bristle brush and clean water, then rinse and let the stone dry. For greasy or waxy contamination, a masonry-safe degreaser followed by a thorough rinse is reasonable. For heavy biological growth, scrape first, then treat, then rinse and allow to dry completely before mortaring. If a sealer is present, it usually needs to be stripped or mechanically removed, since mortar will struggle to key into a coated surface. Note that some mortar-dwelling insects and pests thrive in damp, failing joints, which is one more reason to deal with loose mortar promptly — see this piece on mortar-eating bugs in walls for the warning signs.
Cause 2: The Stone Is Too Smooth or Too Dense
Mortar needs something to grab. A polished or saw-cut face on granite, quartzite, or dense marble offers almost no profile, so the bond relies mostly on adhesion to a flat surface, which is the weakest kind of connection. Similarly, very dense stones with low absorption do not pull cement paste into their pores, so there is little mechanical key.
There are a few practical responses. The first is to roughen the bonding face. You can do this with a chisel, a bushing hammer, or a grinding cup wheel, creating scratches and small divots that give the mortar somewhere to sit. Keep the texture shallow and uniform rather than gouging deep pockets.
The second is to use a mortar designed for low-absorption surfaces. Polymer-modified mortars and thinsets are formulated to grip smoother, denser materials, and the chemistry behind that is worth understanding if you are working over waterproofing membranes or dense tile backers. The principles in this article on choosing thinset over RedGard translate well to stone work, because both situations involve getting cement paste to hold on a surface that does not want to absorb water.
The third is to key the mortar into the stone with a firm, twisting press rather than a light set. Pushing mortar into the texture and then wiggling the stone slightly helps the paste wet the surface. Lifting the stone to check coverage and then resetting it is a standard technique for a reason.
Cause 3: The Stone Pulled the Water Out of the Mortar
Porous stone such as limestone, sandstone, and some cast stone acts like a sponge. If it is bone dry when you apply mortar, it wicks the mixing water out of the mortar almost immediately. Without enough water, the cement cannot complete hydration, and the result is a weak, crumbly layer at the interface that fails later.
The trade answer is to bring the stone to a saturated surface dry condition, often abbreviated SSD. You dampen the stone thoroughly, then let it sit until the surface looks matte rather than shiny. The stone is still holding water internally, but it will not steal water from the mortar or leave a film of free water on the surface.
This step is easy to skip and easy to get wrong in both directions. A stone that is dripping wet dilutes the mortar at the interface and weakens it. A stone that is bone dry robs the mortar. Aim for damp and matte, and if you are working in hot sun, re-dampen as you go.
Cause 4: Mixing and Consistency Problems
Mortar that is too wet is one of the most common culprits behind poor bonding. Extra water makes the mix easier to trowel, but it also increases shrinkage, lowers compressive strength, and can leave a weak, dusty film at the bond line. Adding water to a mix that has begun to set, sometimes called retempering, has a similar effect on strength.
Other mixing issues that show up as bond failure include:
- Over-mixing at high speed, which whips air into the mortar and reduces density.
- Under-mixing, which leaves dry pockets of cement and sand that never hydrate.
- Expired or improperly stored cement, which may have absorbed moisture and lost reactivity.
- Wrong sand — too much silt or clay fines in the sand can interfere with the cement matrix.
- Incorrect ratios, particularly too much cement in a mix meant for soft, historic stone.
Follow the manufacturer’s instructions on water quantity rather than eyeballing it, and mix for the full recommended time. If the mortar stiffens while you work, discard it and mix a fresh batch instead of adding water. A wheelbarrow or mixing tub is fine for small jobs, but keep the batch size matched to how much you can place in about half an hour.
Cause 5: Weather, Movement, and Curing Conditions
Mortar needs time, moisture, and moderate temperatures to develop strength. Hot, dry, windy days pull water out of fresh mortar fast, which can leave a crusted surface over unhydrated material underneath. Freezing temperatures before the mortar has set can disrupt the crystalline structure and leave a permanently weak joint.
Movement is the other silent killer. Stone that shifts because of an unstable base, a settling foundation, or thermal expansion will crack the bond at the interface. If the same joints keep failing in the same area, the problem may not be the mortar at all but the substrate underneath. Checking for a soft or shifting base before you repoint can save you from repeating the job.
Matching the Mortar to the Stone
Compatibility matters as much as technique. Historic and soft stone were often laid with high-lime mortars that are relatively soft, vapor-permeable, and slightly flexible. Repointing them with a hard, high-Portland mix can trap moisture in the stone and cause spalling, even if the bond itself appears sound at first.
For modern work, the common choices are Type N, Type S, and Type O mortar. As a general guide, Type S offers higher compressive strength and is used where some structural capacity is needed, Type N is a middle ground suitable for many above-grade exterior walls, and Type O is a softer mix used in non-load-bearing and historic repointing. For thin bed applications over dense stone or tile, a polymer-modified thinset is the usual choice. For natural stone countertops and similar surfaces, engineered products behave differently again, and reviews such as this Silestone Calacatta Gold review can help you understand how the material handles joints and edges.
| Symptom | Likely Cause | What to Do |
|---|---|---|
| Mortar peels off clean, stone face still visible | Surface contamination, sealer, or dust | Strip coatings, scrub, rinse, and let dry |
| Bond line is powdery and soft | Dry stone stole mixing water; mortar too wet | Dampen stone to saturated surface dry; reduce water |
| Joint crumbles within days | Froze or dried out before setting | Protect from frost and sun; cure damp for several days |
| Bond holds on rough stone, fails on smooth faces | Low absorption or polished surface | Roughen the face; use polymer-modified mortar |
| Recurring cracks in the same area | Substrate movement or unstable base | Repair the base before repointing or resetting |
| Old stone spalling near new hard mortar | Mortar too strong and too dense for the stone | Switch to a softer, more permeable lime-rich mix |
Prepping Stone So Mortar Will Hold
Good prep is boring and effective. Start by removing every bit of loose material from the joint or bedding area. Use a chisel, a pointing trowel, or a grinder with a mortar rake to cut back to sound mortar, and blow or brush out the dust. Joints that are dusty inside will not bond regardless of how good the surface looks.
Rake joints to an appropriate depth, generally at least twice the width of the joint for repointing, so there is enough mortar to key in and hold. Square up the sides of the joint where you can, since a rectangular profile grips better than a V-shaped groove. Then dampen the stone as described above.
If you are bedding flat stone such as treads or caps, check that the base is compact and level before you set anything. A thin, uniform bed of mortar performs better than a thick, lumpy one, because thick beds shrink more and are more prone to cracking. Tapping the stone down with a rubber mallet helps consolidate the mortar and brings it into full contact.
Repairing a Joint That Already Failed
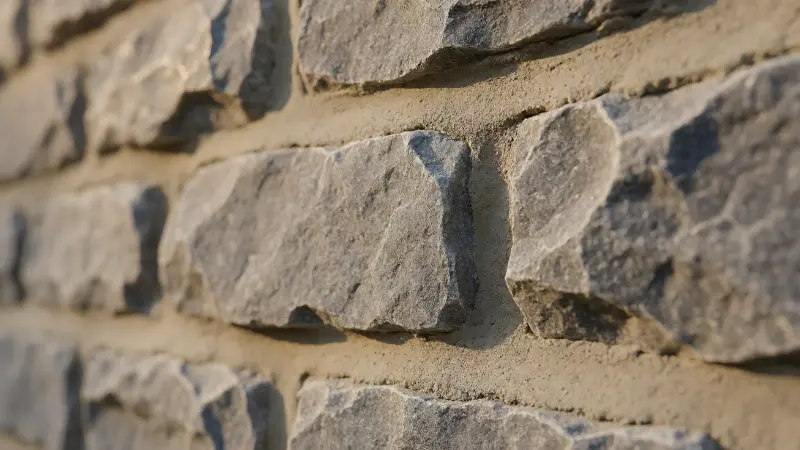
Cut out the failed mortar rather than trying to top it off. New mortar placed over old, crumbly material will bond to the weak layer, not to the stone, and it will fail again. Remove material back to sound mortar or bare stone, clean the joint thoroughly, and rinse.
Then re-dampen the stone, mix a fresh batch to the correct consistency, and pack the mortar in firmly in layers. For deep joints, build up in lifts rather than filling in one pass, letting each lift firm up slightly before adding the next. Tool the joint once it has begun to set — pressing with a jointer or a trowel edge consolidates the mortar against the stone faces and closes small voids.
After tooling, keep the repair damp for a few days in hot weather by misting it or covering it with damp burlap. Avoid letting a new joint dry out too quickly, and protect it from freezing. A slower cure generally produces a denser, stronger result.
Bonding Agents and Slurries: When They Help
Bonding agents, neat cement slurries, and latex additives can improve adhesion in specific situations, such as patching over an existing sound concrete or masonry surface. They are not a substitute for cleaning and prep, and they can cause problems when applied to a dusty or sealed surface because they simply bond to the contamination.
If you use a bonding agent, follow the manufacturer’s directions exactly regarding surface preparation, open time, and whether the agent should be tacky or dry when mortar is applied. A common mistake is applying the agent and then waiting too long, so it skins over before the mortar goes on. For most stone work, careful prep and a well-matched mortar will outperform a chemical shortcut.
Frequently Asked Questions
Why is my mortar falling off the stone in sheets?
Sheet-like failure usually points to a contaminated or coated surface, or to a stone that was too smooth for the mortar to key into. Clean and roughen the stone, remove any sealer, and consider a polymer-modified mortar for dense materials.
Should I wet the stone before applying mortar?
For porous stone, yes — but damp, not dripping. Aim for a saturated surface dry condition so the stone stops pulling water from the mortar without diluting it at the interface.
Can I mortar over old mortar that is still firm?
Sometimes, if the old material is sound, clean, and roughened, and if the new mortar is compatible in strength and permeability. If it is crumbly, chalky, or coated, cut it back instead.
Does adding more cement make the mortar stick better?
No. Extra cement makes the mix stronger, denser, and less breathable, which can damage softer stone and increase shrinkage cracking. Bonding depends more on surface prep, moisture control, and correct mixing than on cement content.
How long should I wait before the joint can get wet?
Keep new mortar protected from direct water for at least a day, and ideally longer in cool or humid conditions. It still needs moisture to cure, so damp curing rather than soaking or drying out is the goal.
Why does mortar stick to some stones and not others?
Porosity and surface texture vary widely between stone types. Rough, absorptive stone gives mortar plenty to grab; polished, dense stone gives it very little, so it needs roughening and a more adhesive mix.