Old kitchen cabinets can make an entire home feel incredibly dark and visually dated. Homeowners often stare at worn wood finishes and dream of a modern aesthetic. Full kitchen renovations easily cost tens of thousands of dollars. These massive projects also disrupt daily family life for several weeks. To effectively update kitchen cabinets on a budget, thoroughly degrease the surfaces, apply a high-quality bonding primer, paint with a self-leveling enamel, and install modern hardware to transform the space for under $200.
Choosing to revitalize existing woodwork preserves your bank account and avoids unnecessary waste. Cosmetic cabinet updates tackle the visual elements without touching structural layouts. Anyone with patience and basic tools can achieve a factory-smooth finish. The secret lies in using specialized products rather than standard wall paint. This comprehensive guide details the exact steps needed for a flawless cabinet transformation.
Most failed cabinet painting projects stem from inadequate surface preparation and incorrect product choices. Kitchens present unique challenges due to constant grease, steam, and food splatters. Paint simply cannot adhere to greasy, shiny surfaces without chemical assistance. Upgrading cabinets successfully requires a methodical problem-solving approach. Let us explore exactly how to solve these common cosmetic issues efficiently.
Why Outdated Kitchen Cabinets Ruin Your Home’s Appeal
Cabinetry occupies the largest visual footprint in any standard kitchen layout. When doors look faded or damaged, the entire room feels neglected and dirty. Dark, heavy wood stains absorb natural light and shrink the perceived space. Outdated designs actively drag down your overall property value during appraisals. Understanding the root causes of cabinet aging helps formulate a better restoration plan.
The High Cost of Full Replacements
Tearing out existing cabinets initiates a domino effect of expensive renovation tasks. New custom cabinetry represents a massive financial investment for any household. Installation labor alone often exceeds the cost of the physical wooden boxes. Countertops usually break during removal, forcing an immediate and expensive replacement. Updating existing cabinet faces eliminates these cascading renovation expenses entirely.
Standard builder-grade replacements often lack the structural integrity of older, solid wood cabinets. Trading sturdy vintage frames for cheap particleboard represents a major downgrade. Refinishing allows you to keep high-quality materials while simply updating their skin. Maintaining the original footprint also preserves your existing flooring layout. This strategy avoids the nightmare of trying to patch missing floor tiles.
Hidden Expenses Add Up Quickly
New installations frequently reveal hidden plumbing and electrical issues behind the walls. Moving base cabinets requires rerouting sink drains and dishwasher water lines. When reconfiguring lower cabinets near plumbing, always inspect the flooring structures carefully. Water damage from old sinks mirrors the subfloor rot found around a 3.5 inch toilet flange. Securing the subfloor ensures base cabinets remain perfectly level.
Environmental Impact of Tearing Out Wood
Landfills currently overflow with perfectly functional wooden cabinets discarded during minor remodels. Destroying solid oak or maple doors generates immense, unnecessary construction waste. Manufacturing new materials requires significant energy consumption and chemical processing. Opting to refresh your current setup serves as an incredibly eco-friendly home improvement choice. Sustainable living involves maximizing the lifespan of all existing household materials.
Many older cabinets feature old-growth wood that is impossible to source today cheaply. This dense timber resists warping and holds hardware screws far better than modern MDF. By keeping the boxes, you honor the original craftsmanship of your home. You merely provide a fresh cosmetic layer to extend their functional life by decades. Modern paints offer incredibly durable barriers that protect this valuable wood from future moisture.
Reducing Toxic Emissions
Brand new particleboard cabinets frequently off-gas formaldehyde and other volatile organic compounds. Bringing these fresh chemicals into your home diminishes your indoor air quality severely. Refinishing older materials prevents the introduction of these aggressive manufacturing toxins. Using modern, low-VOC urethane paints ensures a safe environment for your family. This approach perfectly balances aesthetic upgrades with ongoing household health.
How Cabinet Wear and Tear Happens
Kitchen environments expose wood finishes to a relentless assault of destructive elements. Cooking aerosolizes cooking oils, creating a microscopic, sticky film on every surface. Frequent touching around handles wears away original clear coats and protective lacquers. Steam from boiling water causes lower cabinet doors to warp and peel. Sunlight streaming through windows slowly bleaches natural wood tones into uneven shades.
Gravity also takes a toll on the structural integrity of cabinet hinges. Heavy doors naturally sag over time as hinge screws loosen in the wood. Constant slamming damages the structural joints and misaligns the entire door face. These micro-damages accumulate over years, making the kitchen look exhausted. Addressing these physical defects is just as important as changing the final color.
Identifying Surface Contaminants
Most homeowners severely underestimate the amount of invisible grease baked onto their cabinets. Normal household cleaners simply smear this grease around without actually breaking the molecular bonds. Paint applied over this invisible film will peel off in large strips within weeks. A dedicated chemical degreaser represents the only effective method to strip this barrier. We will cover this critical step in the preparation phase.
Essential Prep Work for Budget Cabinet Makeovers
Before applying any new color, preparation dictates the final longevity of the newly painted finish. Skipping vital preparation steps guarantees peeling paint and a tremendous waste of money. A meticulous prep phase builds the necessary foundation for a professional-looking, durable surface. Gathering the right protective tools initially saves countless hours of frustration later. Proper preparation remains the ultimate secret of every highly paid professional painter.
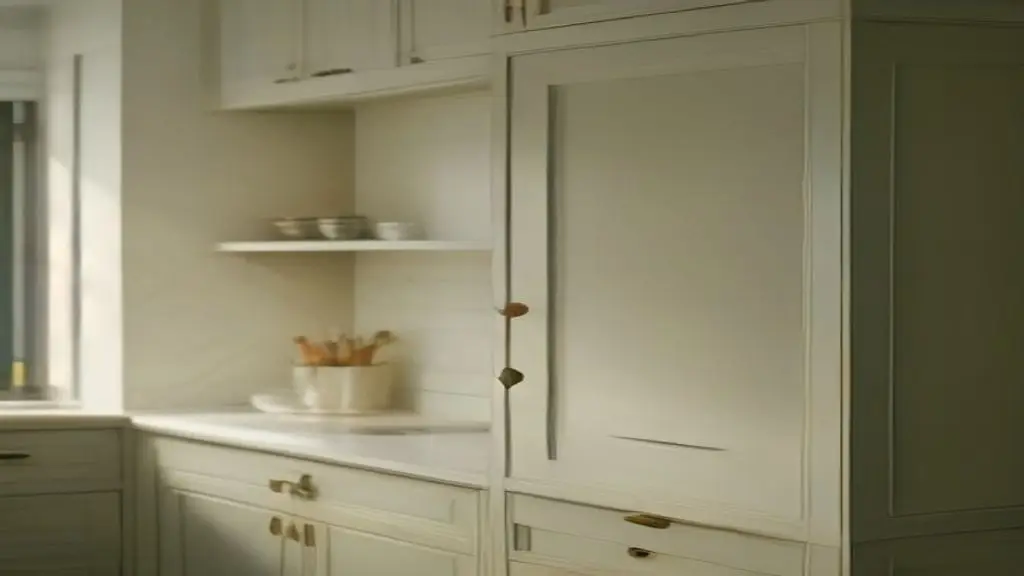
Deep Cleaning with Degreasers
Standard dish soap lacks the chemical strength required for proper cabinet preparation. Trisodium Phosphate (TSP) or a strong TSP substitute serves as the industry standard. Spray the degreaser liberally and let it sit to dissolve the hardened kitchen grime. Scrub the detailed crevices heavily with a stiff-bristled nylon brush or scouring pad. Always rinse the surfaces thoroughly with clean water to remove chemical residues.
An advanced prep trick involves using an automotive wax and grease remover. After the TSP wash, wiping the doors with naphtha removes stubborn silicone residues left by furniture polishes. Silicone completely blocks paint adhesion and causes immediate cratering in the new finish. Wearing chemical-resistant gloves protects your skin during this aggressive cleaning phase. Cleanliness dictates the success of every subsequent step in the makeover.
Sanding for Mechanical Adhesion
Liquid deglossers offer a shortcut, but physical sanding guarantees the absolute best paint bond. Use a 120-grit sanding sponge to lightly scuff every square inch of the wood. You do not need to remove the old finish, only dull the shiny clear coat completely. Vacuum the dust away with a brush attachment to clear the pores. Follow up with a damp microfiber cloth to capture the microscopic leftover particles.
Fixing Structural Sag and Hinge Misalignment
Painting over crooked, sagging doors highlights the flaws rather than hiding them. Remove every door and carefully number them with tape to remember their exact locations. Inspect the screw holes inside the cabinet frame for stripped or widened threads. A loose screw cannot securely hold a heavy wooden door perfectly straight. Fixing these anchor points requires almost zero budget but yields massive visual improvements.
An incredibly cheap fix for stripped cabinet holes involves wooden toothpicks and wood glue. Dip several toothpicks into strong wood glue and jam them tightly into the loose hole. Snap off the excess wood flush with the cabinet frame surface and let it dry. This creates fresh, dense material for the hinge screws to bite into securely. Reinstalling the hardware will now feel incredibly tight and structurally sound.
Adjusting European Hinges
Modern concealed hinges feature adjustment screws that control the door’s final position. Turning the rear screw moves the door closer or further from the cabinet box. The center screw shifts the door slightly left or right to fix uneven gaps. A simple screwdriver can perfectly align a crooked kitchen in under ten minutes. Even gaps between doors create a distinct, high-end, custom cabinetry appearance.
Masking, Taping, and Protecting Surfaces
Paint splatters easily ruin expensive countertops and delicate kitchen flooring materials. Investing in high-quality painter’s tape prevents paint from bleeding onto adjacent walls. Tape off the inside edge of the cabinet boxes to create a crisp, professional paint line. Drape lightweight plastic sheeting over your countertops and secure it tightly with tape. Protecting your environment is much faster than scraping dried paint off granite.
Place heavy-duty rosin paper or drop cloths over the entire kitchen floor. Canvas drop cloths absorb drips instantly, preventing wet paint from tracking through the house. Cover your appliances completely, taking special care around delicate digital control panels. Fumes from shellac primers and oil-based enamels require aggressive ventilation strategies. Open nearby windows and place high-velocity box fans directed outward to clear the air.
Proper Ventilation Strategies
Airflow dynamics dictate how quickly and safely your new paint layers cure. Stagnant air traps volatile solvents indoors and significantly delays the chemical hardening process. The cross-ventilation should mimic the rapid air exchange needed when you install a gable vent from inside. Maintaining a temperature around seventy degrees provides the ideal environment for paint leveling.
Painting and Refinishing Kitchen Cabinets on a Budget
Choosing the correct coating systems defines the durability of your entire kitchen project. Standard latex wall paint remains soft and will easily peel off kitchen cabinets. Professional results demand specific bonding primers paired with hard-drying enamel topcoats. These specialized products cost slightly more but prevent disastrous failures and costly redos. Understanding the chemistry of these paints empowers you to make intelligent purchasing decisions.
Choosing the Right Bonding Primer
Primer acts as the crucial chemical glue between the old finish and the new paint. Shellac-based primers offer the strongest adhesion on slick, previously varnished wooden surfaces. They also block heavy tannin stains from bleeding through light-colored paints. Oil-based primers provide excellent leveling and extreme durability for heavily used kitchens. Water-based bonding primers work well for previously painted cabinets with minor wear.
Shellac primers dry incredibly fast, allowing you to sand and recoat within an hour. They smell quite strong, making a respirator mask absolutely mandatory during application. Roll the primer on smoothly using a high-density foam roller for a flat finish. Never skip the primer coat, even if using a paint-and-primer-in-one product. True bonding requires a dedicated, specialized first layer to succeed.
Sanding Between Primer Coats
Primer naturally raises the microscopic grain of bare wood, creating a rough texture. Lightly block-sand the dried primer with a 220-grit sponge to knock down these fibers. This crucial step ensures the final enamel coats glide on perfectly smooth. Wipe away the white primer dust with a tack cloth before proceeding. A perfectly smooth primer layer guarantees a glass-like finish on the topcoat.
Hiding Deep Wood Grain for a Modern Look
Oak cabinets feature deep, distinct wood grain patterns that instantly date a kitchen. Simply painting over oak leaves these deep valleys visible, betraying the wood underneath. For a truly modern, factory-smooth look, filling this grain is highly recommended. Skim-coating the doors requires extra labor but yields a significantly higher-end final aesthetic. Budget-conscious remodelers can achieve custom looks with cheap patching materials.
A professional secret involves using standard drywall joint compound to fill wood grain cheaply. Smear a thin layer of drywall mud across the entire door using a plastic putty knife. Scrape the excess off tightly, leaving the mud only inside the deep grain valleys. Let it dry completely, then sand it perfectly flush with 120-grit paper. Seal this filled surface with an oil-based primer before applying any paint.
Using Specialized Grain Fillers
If drywall mud seems too fragile, commercial wood grain fillers offer unmatched durability. These thick, heavy-bodied pastes bind aggressively to the wood and will not shrink. Apply them with a squeegee, forcing the product deep into the open pores. Sanding these commercial fillers requires more effort but provides a permanent, rock-hard surface. This extra step truly transforms cheap oak into premium-looking smooth slabs.
Applying Self-Leveling Enamel Paint
Urethane alkyd enamels represent the absolute best choice for durable, budget-friendly cabinet painting. These modern hybrids offer the hardness of oil paints with the easy cleanup of water-based products. They feature incredible self-leveling properties, meaning brush marks magically melt away as it dries. Apply the paint using a high-quality, angled synthetic brush for the detailed recessed areas. Immediately follow up with a foam roller on the large, flat surfaces.
Applying thin, even coats prevents unsightly drips and sagging on vertical cabinet frames. Thick coats of enamel take weeks to cure properly and remain vulnerable to scratching. Wait at least twenty-four hours between color coats to ensure proper chemical hardening. Two thin topcoats provide far better durability than one heavy, thick coat. Patience during the painting phase is non-negotiable for professional-grade results.
Avoiding the Roller Stipple
Foam rollers sometimes leave a microscopic orange-peel texture called stipple on the paint. To eliminate this, gently drag a dry, premium brush over the wet, rolled paint. This technique, called tipping off, pops the tiny air bubbles and flattens the texture. Keep a wet edge constantly to prevent dragging partially dried paint across the door. Practicing on the back of a cabinet door helps perfect this technique.
Hardware and Structural Upgrades Without Breaking the Bank
Fresh paint acts as a blank canvas, but hardware acts as the kitchen’s jewelry. Outdated brass handles immediately ruin the modern illusion of freshly painted cabinets. Swapping hardware provides the highest visual return on investment in any kitchen project. Small structural additions also change the physical profile of the doors for minimal cost. These simple upgrades trick the eye into seeing entirely new, expensive cabinetry.
Swapping Knobs and Pulls for Instant Modernization
Replacing single-hole knobs with sleek, elongated bar pulls instantly modernizes a space. If your new handles require different hole spacing, fill the old holes before painting. Use a high-quality wood epoxy to plug the old holes so they vanish completely. Sand the epoxy flush, prime it, and paint over the repaired area seamlessly. Drilling new holes requires precision to keep all handles perfectly aligned.
Investing ten dollars in a plastic cabinet hardware template jig is highly recommended. This simple tool guarantees perfectly centered, uniform holes on every single door and drawer. Clamping the jig prevents the drill bit from slipping and scratching your fresh paint. Buy cabinet hardware in bulk multi-packs online to save significant money over hardware store prices. Matte black and brushed brass finishes currently dominate modern kitchen design trends.
Updating Exposed Hinges
Older cabinets often feature visible, exterior hinges finished in tarnished antique brass. Buying all-new exterior hinges easily blows a tight remodeling budget quite quickly. Instead, remove the old hinges, degrease them heavily, and scuff them with steel wool. Spray paint them with a durable metallic enamel designed specifically for automotive or metal use. This zero-cost restoration beautifully matches your expensive new knobs and drawer pulls.
Adding Shaker Trim to Flat Panel Doors
Completely flat, slab-style cabinet doors often look cheap and devoid of character. You can convert these flat slabs into high-end shaker-style doors using inexpensive plywood. Buy quarter-inch thick MDF or sanded plywood and cut it into two-inch wide strips. Glue these strips around the perimeter of your flat doors using heavy-duty construction adhesive. Pin them in place with tiny brad nails while the glue dries completely.
Once the trim is attached, use wood filler to hide the nail holes and corner seams. Sand the outer edges perfectly flush so the new trim blends into the old door. Run a tiny bead of paintable caulk along the inside edge where the trim meets the panel. This caulking step hides any gaps and creates a flawless, seamless transition. Painting over this modified door yields a stunning, custom-built shaker cabinet.
Utilizing Decorative Molding
Adding simple crown molding to the top of upper cabinets drastically elevates the kitchen’s status. It bridges the awkward gap between the cabinet boxes and the ceiling flawlessly. Basic pine or MDF crown molding costs only a few dollars per linear foot. Cut the corners with a miter saw, nail it up, and paint it to match the cabinets. This simple architectural addition instantly screams high-end, custom luxury design.
Installing Concealed European Hinges
Replacing visible, exterior hinges with hidden European hinges completely streamlines the cabinet facade. This upgrade requires drilling a large, shallow cup hole into the back of the door. Purchase a 35-millimeter Forstner bit and a concealed hinge drilling jig for accuracy. The jig ensures the massive hole sits at the exact depth and distance from the edge. Test this process on a scrap piece of wood before drilling your actual doors.
Concealed hinges offer the incredible benefit of soft-close technology for a luxury feel. Soft-close mechanisms prevent doors from slamming, extending the life of your new paint job. They also allow for micro-adjustments in all three directions for perfect door alignment. Filling the old exterior hinge holes with wood putty is required before painting the face frames. This structural upgrade makes old cabinets function exactly like modern, expensive installations.
Managing Door Overlays
When buying new hinges, you must measure the exact overlay of your existing doors. Overlay refers to how much the door overlaps the wooden face frame of the box. Common overlays include half-inch, one-inch, or completely inset flush doors. Buying the wrong overlay hinge means your doors will physically not close properly. Take one door and hinge to the hardware store to ensure a perfect mechanical match.
Smart Add-ons to Elevate Your Cabinet Design
Beyond paint and handles, small interior details significantly enhance the overall user experience. Upgrading the inside of the cabinets makes the entire kitchen feel fresh and meticulously clean. These subtle additions provide maximum daily satisfaction for an incredibly low financial cost. Creative storage illusions also break up the visual monotony of endless wooden boxes. Let us explore affordable tricks that push your makeover to the next level.
Peel and Stick Solutions for Cabinet Interiors
The interior shelves of old cabinets frequently suffer from deep scratches and unremovable stains. Painting the insides is notoriously difficult and highly prone to sticky paint failures. High-quality vinyl contact paper provides a durable, washable, and beautiful surface almost instantly. Modern peel-and-stick wallpapers offer realistic wood grains or fun, vibrant geometric patterns. Lining the shelves instantly covers decades of unsightly wear and tear permanently.
Installing contact paper requires a clean, dust-free surface for the adhesive to grip properly. Measure the shelf precisely and cut the vinyl slightly larger than needed. Peel back one corner and slowly smooth it down using a flexible plastic squeegee. Pushing the air bubbles outward prevents wrinkles and guarantees a smooth, factory-like surface. Trim the excess edges precisely with a sharp utility knife for a perfect fit.
Upgrading Drawer Bottoms
Kitchen drawers accumulate crumbs, spills, and scratches from heavy metal utensils constantly shifting. Applying a thick, textured, non-slip drawer liner protects the wood and dampens loud noises. These liners require no adhesive, making them easily removable for deep cleaning in the sink. Matching the drawer liner pattern to the shelf paper creates a cohesive, custom interior aesthetic. This five-dollar upgrade dramatically improves the tactile feel of opening any drawer.
Under-Cabinet Lighting Upgrades
Shadowy countertops make food preparation difficult and make the kitchen feel smaller. Hardwiring professional under-cabinet lighting costs hundreds of dollars in specialized electrical labor. Modern, battery-operated LED puck lights offer brilliant illumination for a fraction of the cost. These lights attach underneath the upper cabinets using simple double-sided mounting tape. Motion-activated light strips also provide seamless, automated task lighting completely wire-free.
For a slightly more permanent but still budget-friendly option, use plug-in LED tape lights. Run the thin tape along the front interior lip of the upper cabinets to hide the bulbs. Route the slim power cord down the corner of a cabinet into an existing backsplash outlet. Smart LED strips allow you to change the color temperature via a phone app. Cool white light enhances modern designs, while warm light creates a cozy, inviting atmosphere.
Enhancing Glass Display Cabinets
If you have cabinets with glass inserts, interior lighting becomes absolutely essential for aesthetics. Placing puck lights at the top of a glass cabinet highlights your favorite dishware beautifully. Painting the back interior wall of the glass cabinet a contrasting accent color adds massive depth. This creates a stunning focal point that draws the eye upward, making ceilings appear taller. It transforms basic storage into a high-end architectural display case.
Removing Doors for Open Shelving Illusions
A continuous wall of dark cabinets often feels heavy and visually oppressive in small kitchens. Removing two or three upper cabinet doors entirely breaks up this heavy visual block. This instantly creates trendy open shelving without the hassle of tearing down the cabinet boxes. Fill the leftover hinge holes with putty, sand them flush, and paint the interiors beautifully. Displaying neat stacks of white plates or colorful bowls adds immense character and charm.
Converting a standard cabinet into a wine rack or cookbook shelf adds custom functionality. You can easily install an X-shaped wooden insert into the open box to store wine bottles. This small woodworking project requires only basic pine boards and a little wood glue. Leaving the doors off forces you to keep the interiors organized and visually pleasing. It represents a zero-cost structural change that modernizes the entire room layout.
Creating a Faux Range Hood
Ugly over-the-range microwaves or basic vent hoods often ruin a streamlined kitchen design. You can build a custom wooden cover that fits directly over your existing ventilation unit. Using cheap plywood and decorative trim, build a box that matches your newly painted cabinets. Paint the hood cover the exact same enamel color for a seamless, built-in appearance. This simple carpentry trick completely hides cheap appliances behind a luxury facade.
Maximizing Overall Kitchen Impact Alongside Cabinets
Cabinet makeovers exist within the broader context of your entire kitchen ecosystem. To maximize the impact, surrounding elements must synergize with the newly painted wood. Small adjustments to appliances, layout plans, and budgets ensure a completely cohesive remodel. Failing to plan these adjacent details can leave your kitchen looking slightly unbalanced. Master these final elements to achieve a truly professional-grade budget restoration.
Addressing Adjoining Appliance Layouts
Upgrading cabinet layouts sometimes forces appliances into slightly new functional positions. Pushing a cooking range just a few inches requires careful handling of utility connections. Moving these heavy utilities demands similar caution to setting up a gas line rough in for dryer. Always verify local municipal safety codes before finalizing new base cabinet placements near stoves. A perfectly painted cabinet means nothing if the adjacent stove cannot plug in safely.
When painting frames, consider the side panels of your refrigerator and dishwasher carefully. If your appliances are dated, applying a stainless steel peel-and-stick vinyl updates them instantly. Alternatively, some homeowners paint their dishwasher panels using specialized appliance epoxy paint. Harmonizing appliance colors with your fresh cabinets ties the entire room together beautifully. Ensure adequate clearance for appliance doors to open fully without scraping the new paint.
Protecting Fresh Paint from Heat
Ovens and dishwashers emit massive amounts of heat and steam during their normal operation. This intense localized heat can easily soften and blister freshly applied enamel paint. Install cheap metal heat shields on the interior edges of cabinets directly touching the oven. Avoid running the dishwasher or the oven’s self-cleaning mode for at least a month. Giving the paint ample time to achieve a full chemical cure prevents heat-related failures.
Ensuring Proper Ventilation During Curing
Paint might feel dry to the touch within hours, but chemical curing takes weeks. During this critical window, the paint remains incredibly susceptible to chips and chemical damage. Proper airflow dramatically speeds up this invisible hardening process by evaporating trapped solvents. Keep windows cracked and exhaust fans running to pull moisture out of the kitchen constantly. High humidity actively fights against the chemical cross-linking of the enamel polymers.
Avoid cooking heavily greasy or boiling foods during the first two weeks after painting. Steam easily re-emulsifies water-based paints that have not fully locked onto the primer. Use a countertop microwave or cook outdoors on a grill to protect the vulnerable surfaces. Leave cabinet doors slightly open to ensure the interior edges dry completely without sticking to the frame. Patience during the curing phase absolutely guarantees a permanent, indestructible finish.
Handling Accidental Scratches
Despite your best efforts, accidental dings might occur while the paint is still soft. Never attempt to wipe or aggressively sand wet, damaged paint to fix a smudge. Let the damaged area dry completely for several days until it is perfectly hard. Lightly sand only the scratch with fine-grit paper and dab a tiny amount of touch-up paint. Blending the touch-up with a small foam brush hides the repair beautifully.
Budget Allocation Strategies
Managing your finances effectively prevents a budget makeover from spiraling out of control. Knowing exactly where to splurge and where to save dictates the overall project success. Spending money on high-quality primer and paint is absolutely non-negotiable for durability. Saving money by buying bulk hardware and skipping new hinges balances the final spreadsheet. A structured budget keeps your mind focused and your wallet perfectly safe.
| Remodeling Item | Estimated Cost | DIY Time Required | Visual Impact Level |
|---|---|---|---|
| Heavy Duty Chemical Degreaser | $10 – $15 | 2 – 3 Hours | Low (But functionally critical) |
| Premium Bonding Primer (1 Gallon) | $45 – $60 | 4 – 6 Hours | Medium |
| Urethane Enamel Paint (1 Gallon) | $65 – $85 | 8 – 12 Hours | Extremely High |
| Modern Handles and Pulls (30 Count) | $40 – $70 | 2 – 4 Hours | Extremely High |
| Wood Filler and Sandpaper | $15 – $25 | 3 – 5 Hours | Medium |
Always keep a small emergency fund of fifty dollars reserved for unexpected supplies. You will inevitably need extra painter’s tape, a fresh roller cover, or extra tack cloths. Tracking these small purchases prevents the frustrating feeling of nickel-and-dime budget drain. By adhering strictly to this financial breakdown, you easily achieve a stunning remodel under $250. Thorough planning guarantees peace of mind throughout the entire messy renovation process.
Final Walkthrough and Inspections
Once the project is complete, perform a meticulous visual inspection of every single door. Check the hardware alignment to ensure every handle sits perfectly level with its neighbor. Ensure the soft-close hinges operate smoothly without binding against the face frames. Wipe away any lingering construction dust with a slightly damp, soft microfiber cloth. Stand back and admire the incredible transformation achieved purely through your own hard work.