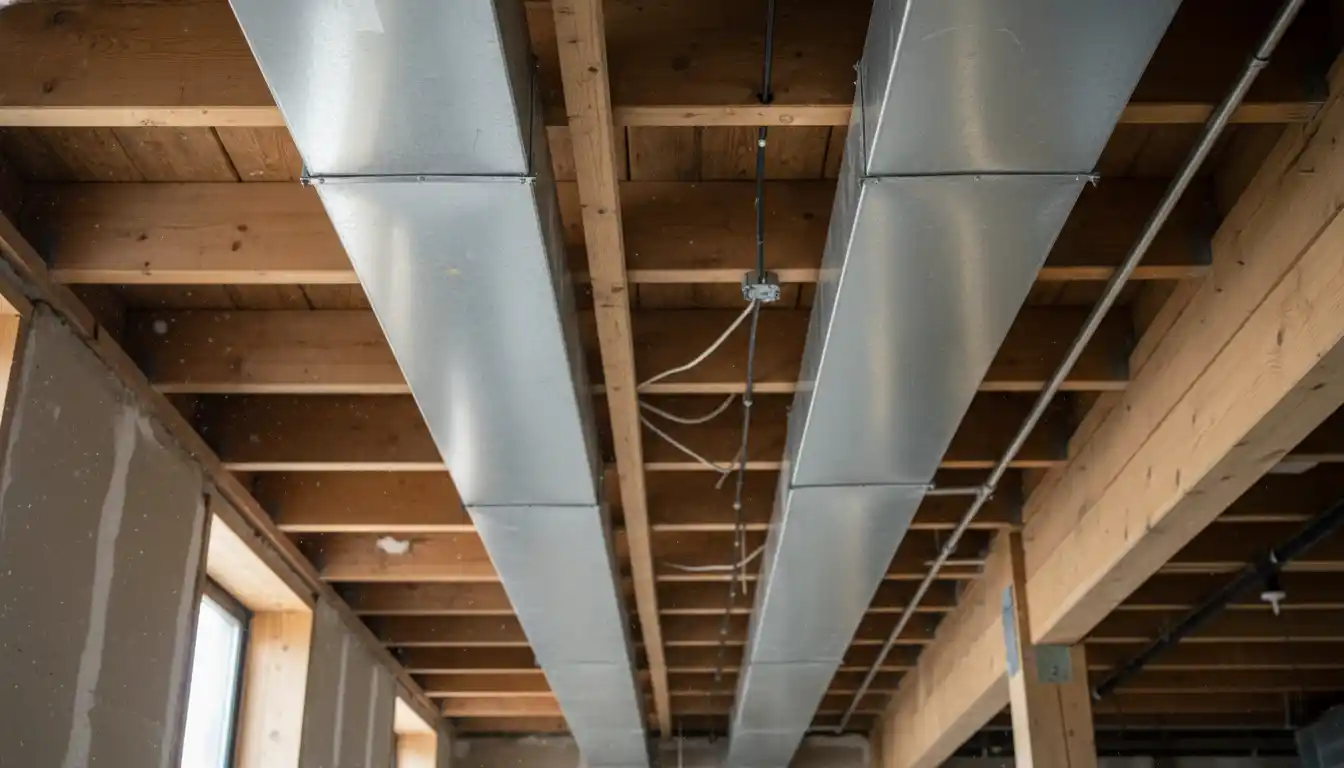
Basement renovations often hit a literal ceiling when HVAC systems enter the picture. You want a sleek, finished space, but bulky metal trunks hanging below the joists force you to build awkward bulkheads, stealing precious headroom. Running ductwork between floor joists is the most effective way to reclaim ceiling height, but it requires strict adherence to structural codes regarding hole boring sizes and placement to avoid compromising the home’s integrity.
This process is not as simple as shoving a pipe into a hole. It involves a careful balance of structural engineering, airflow dynamics, and noise control. This guide covers everything from the “1/3 rule” of drilling lumber to silencing the “oil canning” boom of metal sheets, ensuring your installation is safe, code-compliant, and quiet.
Understanding the Structural Constraints
Before buying a single sheet of metal, you must identify what kind of floor structure holds up your house. The rules for cutting and drilling change drastically depending on whether you have solid dimensional lumber, engineered I-joists, or open-web trusses.
Solid Dimensional Lumber Rules
If your home was built before the 1990s, you likely have solid 2×8, 2×10, or 2×12 joists. The International Residential Code (IRC) is very strict here. You cannot bore a hole larger than one-third of the joist’s depth. For a standard 2×10 (which is actually 9.25 inches deep), your maximum hole size is roughly 3 inches. This creates a significant challenge for running large supply trunks perpendicular to the joists.
Engineered I-Joists
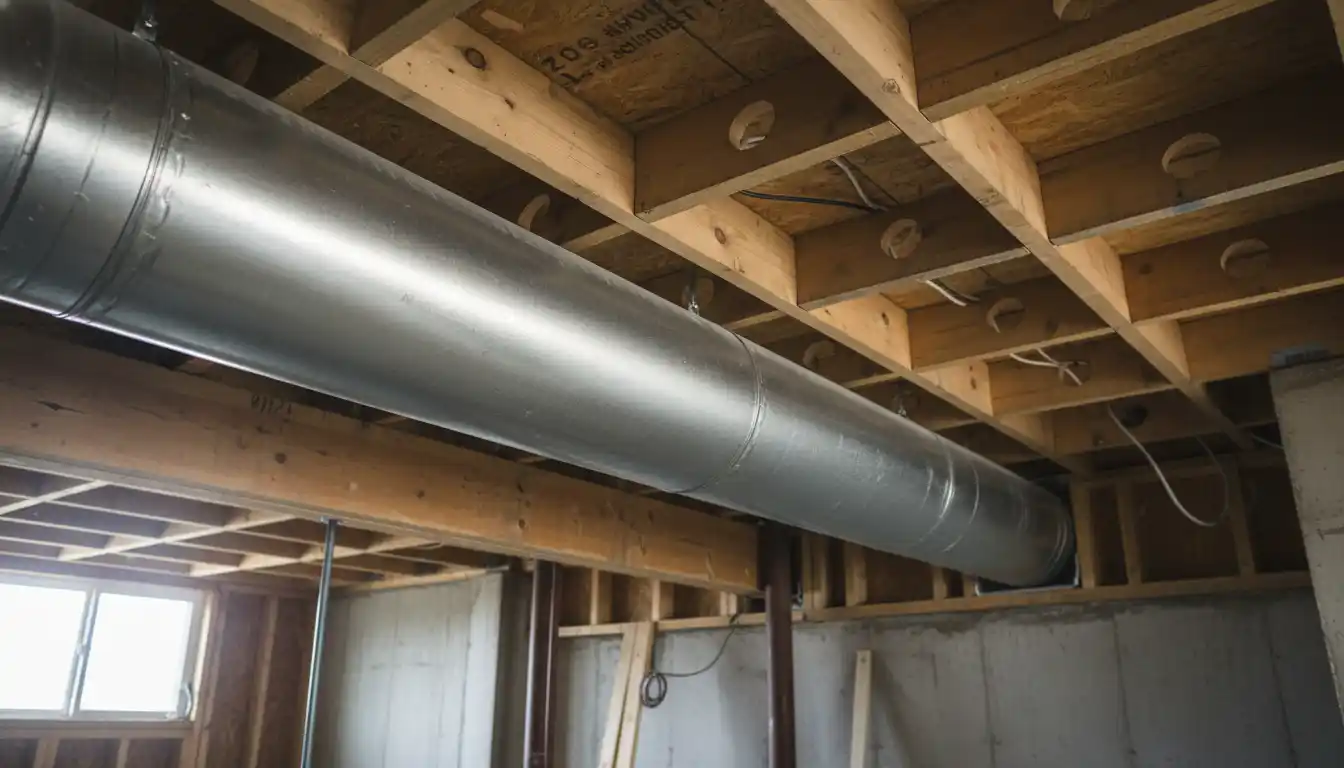
I-joists are common in modern construction and feature top and bottom flanges with a thin OSB web in the center. Never cut, notch, or drill the top or bottom flanges of an I-joist. Doing so destroys the beam’s structural capacity. You can, however, cut significantly larger holes in the central web than you can in solid lumber, provided you follow the manufacturer’s spacing charts. This often allows for 6-inch or even 8-inch round ducts to pass through, making them superior for hidden HVAC runs.
Open Web Trusses
These are the gold standard for running utilities. They are built with open triangles of wood held together by metal plates. There is usually no cutting required. You simply slide the ductwork through the open spaces. If you are building new or doing a massive remodel, opting for open web trusses eliminates almost all headache associated with routing mechanicals.
Planning Your Duct Route
Effective routing minimizes the number of turns, which improves airflow efficiency. Every elbow and bend adds “equivalent length” to your system, increasing static pressure and forcing your blower motor to work harder. The goal is to run the main trunk line parallel to the joists whenever possible.
Supply vs. Return Paths
Supply ducts (the ones blowing air) must be sealed metal or flex duct to prevent heat loss. Return ducts (pulling air back) have historically used the joist cavity itself, known as “panning.” While routing supply ducts between joists is often limited by size, return paths utilize the entire cavity width. However, modern energy codes are moving away from building cavities as ducts because they are notoriously leaky.
Navigating Obstructions
You will inevitably encounter obstacles like plumbing pipes or electrical wires. You cannot simply cut a joist to bypass a drain pipe. In many cases, you must reroute the obstruction. If a PVC drain line is blocking your path, you may need to cut and divert it. Learning how to join PVC pipe with rubber coupling allows for flexible realignment of these drains without gluing rigid fittings in tight spaces.
Similarly, electrical cables often run through the center of joists. If a large bundle of wires or a main service line blocks a critical duct path, you might face a larger project. In older homes, if the main panel placement makes routing impossible, some homeowners opt to replace the load center or move sub-panels to clear the “runway” for the main trunk line.
Installation Methods and Best Practices
Once you have a safe route, the installation technique determines the system’s longevity and noise level. Poorly installed hidden ducts are the primary cause of mysterious ticking and banging noises in floors.
The Oval Duct Solution
When a standard 6-inch round pipe won’t fit through a joist bay vertically, oval ducting is the answer. A 6-inch round duct can be flattened into an oval shape that fits inside a standard 2×4 stud wall or shallow joist cavity while maintaining similar airflow volume. Do not crush round pipe yourself; buy factory-made oval stacks. Crushing it manually ruins the structural integrity of the pipe and creates uneven airflow turbulence.
Stiffening Rectangular Ducts
If you fit a rectangular duct tightly between joists, it is prone to “oil canning.” This is the loud booming noise metal makes when the blower turns on and the pressure changes. To prevent this, the sheet metal must be “cross-broken” (creased with an X pattern) to add rigidity. Since you cannot easily cross-break a duct once it is shoved between joists, ensure this is done during fabrication. Additionally, drive cleats should be tight and taped to prevent rattling.
Modernizing Panned Returns
Old-school “panning” involved nailing a sheet of tin to the bottom of two joists and calling it a duct. This sucks in dust, mold, and radon from the basement through the unsealed wood joints. To do this correctly today, line the entire joist cavity with rigid foam insulation or foil-faced bubble wrap before sealing the bottom. This creates a cleaner, airtight channel that doesn’t pull contaminants from the subfloor.
Addressing Noise and Thermal Expansion
A common complaint after hiding ducts in the ceiling is a rhythmic “ticking” sound when the heat turns on. This is caused by thermal expansion—the metal duct heats up, expands, and rubs against the wood joists.
Stopping the “Tick”
Never wedge ductwork tightly against the wood. Always leave a minimum 1/4-inch gap around the ductwork where it passes through or runs parallel to joists. If the duct must touch a hanger or support, use plastic or nylon webbing hangers rather than metal straps. The plastic allows the metal to slide silently as it expands. If you are running PEX water lines nearby for heating, ensure they don’t rub against the ducts either. If you need to color-code or mark these lines to keep them organized, check if you can paint PEX pipe safely without degrading the material.
Insulation for Acoustics
Metal ducts are echo chambers. Sounds from the furnace room or conversations from the basement can travel up through the vents. To dampen this, wrap the exterior of the concealed ducts with a duct wrap insulation. This not only prevents condensation (sweating) in the summer but also adds mass to the metal, deadening the vibration and reducing sound transmission.
Common Mistakes to Avoid
Even seasoned DIYers make critical errors when attempting to hide mechanicals in the floor structure. Avoid these pitfalls to ensure your home remains safe and comfortable.
Compromising Structural Integrity
The most dangerous mistake is over-cutting. A contractor might bore a 4-inch hole in a 2×10 joist, thinking “it’s just a little bit over.” This significantly weakens the floor, leading to sagging or bounce. If a duct is too big, split it into two smaller runs. Use two 4-inch pipes spaced apart rather than one large pipe that violates the boring code.
Ignoring Airflow Dynamics
Trying to squeeze a main trunk line into a shallow joist cavity often leads to undersized ducts. If your furnace requires 1200 CFM of airflow but you squeeze it down into a flattened duct that only handles 800 CFM, you will kill your blower motor and freeze your AC coil. Always use a ductulator (duct sizing calculator) to ensure the flattened shape still carries the required volume of air.
Sealant Failures
Duct tape is not for ducts. The adhesive dries out and fails within a few years. Use mastic sealant (a paint-on gray paste) or UL-181 foil tape for all connections. This is especially critical for ducts buried in a ceiling; once the drywall goes up, you cannot go back to fix a leak. A leaky supply duct inside a floor cavity can cause moisture buildup, leading to rot and mold hidden from view.
Allowable Hole Sizes for Floor Joists
Use this table as a general reference for boring holes in solid dimensional lumber (Southern Yellow Pine/Douglas Fir). Always confirm with your local building code (IRC R502.8).
| Joist Size (Nominal) | Actual Depth | Max Hole Diameter (1/3 Depth) | Min Distance from Edge |
|---|---|---|---|
| 2 x 6 | 5.5 inches | 1.83 inches | 2 inches |
| 2 x 8 | 7.25 inches | 2.41 inches | 2 inches |
| 2 x 10 | 9.25 inches | 3.08 inches | 2 inches |
| 2 x 12 | 11.25 inches | 3.75 inches | 2 inches |
Running ductwork between floor joists is a labor-intensive project that rewards you with higher ceilings and a cleaner aesthetic. By respecting the structural limitations of your wood framing and prioritizing airtight, quiet installation methods, you can upgrade your home’s comfort without sacrificing its stability.