Newel posts anchor a staircase. They carry the handrail, stiffen the balustrade, and visually terminate the stair in a way that feels intentional. But placement is where most DIY railing projects go sideways. A post set a few inches too far forward can narrow the stair, block the handrail’s continuity, or fail a code inspection. A post set too far back can leave the rail unsupported or create an awkward grab point. This guide walks through the placement decisions that matter most, from the bottom starter newel to the landing post, with the code context and practical layout methods that experienced stair builders use.
Why Newel Post Placement Is a Safety Issue, Not Just a Design Choice
The newel post is the structural anchor of the handrail system. The IRC requires handrails on stairs with four or more risers, and those handrails must be able to withstand a concentrated load and a uniform load without failing[reference:0]. The newel is what transfers that load into the stair framing or the floor structure. If the post is placed where it cannot be fastened securely to framing, the entire railing becomes less effective at doing its job.
Placement also affects handrail continuity. Handrail-gripping surfaces are generally required to be continuous, without interruption by newel posts, except at turns and landings within a dwelling unit[reference:1][reference:2]. A post placed in the middle of a straight run can create exactly the kind of interruption the code is trying to prevent. That does not mean you cannot have a post there, but it does mean the rail must pass around it with proper clearance, or the layout needs to change.
Code Requirements That Shape Placement
Code language around newels is often about where posts are permitted rather than exactly where they must sit. The IRC allows handrails within a dwelling unit to be interrupted by a newel post at a turn or landing[reference:3][reference:4]. It also permits a starting newel, volute, or turnout over the lowest tread, which means the starter post can sit over the first step rather than on the floor in front of it[reference:5]. These exceptions matter because they give you placement flexibility without violating continuity rules.
Guardrail requirements add another layer. Open sides of stairs with a total rise of more than 30 inches need guardrails at least 34 inches high, measured vertically from the nosing of the treads[reference:6][reference:7]. Balusters must be spaced so that a sphere of 4 inches cannot pass through, and some stairs may need three balusters per tread to meet that spacing[reference:8][reference:9]. The newel spacing and baluster layout work together; you cannot finalize one without considering the other.
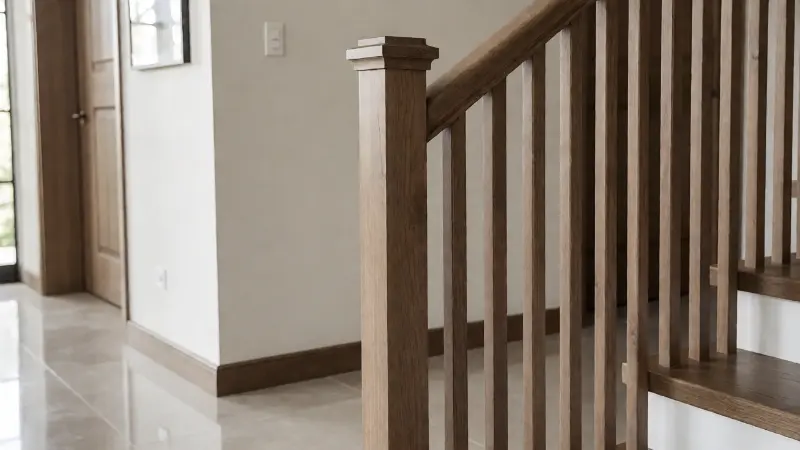
Local amendments can tighten or loosen these rules. Some jurisdictions require a minimum distance between newels to preserve a hand grip, while others focus on the post-to-wall measurement for a 36-inch-wide stair[reference:10]. The practical move is to check with your local building department before cutting anything, because the inspector’s interpretation is the one that matters for your permit.
Bottom Newel Placement: The Starter Post
The bottom newel, often called the starter newel, is the most visible post in the system. There are three common placement strategies, and each has trade-offs. The post can sit on the floor slightly in front of the first step, it can be notched over the first tread, or it can be placed on the second step or second riser[reference:11]. Building inspectors and experienced carpenters tend to favor a post that looks integrated into the stair rather than bolted to the floor as an afterthought[reference:12].
One widely used approach is to center the starter post on the second riser or place it just above the starter step. A seasoned stair builder explains that putting the bottom newel on the second step, just above the starter step, makes it easier to step onto the first tread from the side and turn as you begin going up[reference:13]. Placing the newel on the very front of the bottom tread can produce a narrow, chute-like stair that feels unwelcoming, especially in a tight foyer[reference:14].
Another layout preference is to align the centerline of the newel with both the face of the riser and the face of the stringer[reference:15]. This alignment gives the finish risers, treads, scotia molding, brackets, and return nosings room to die into the post, which helps lock the post in place and produces a cleaner finished look[reference:16]. For a starting step with overhangs, symmetry matters; the newel should relate to both the front and side overhangs rather than crowding one edge[reference:17].
On the Floor vs. On the Stair
A floor-mounted starter post can work in a tight entry where stepping the post up onto the first tread would intrude on walking space[reference:18]. The trade-off is that a floor-mounted post sits outside the stair framing, so it needs solid blocking or a structural anchor to resist rail loads. A post notched over the tread can tie directly into the stringer or tread framing, which is generally a stronger connection. If you choose the floor, confirm what is underneath the finish floor before you drill; a decorative post that only bites into subfloor sheathing is not a reliable anchor.
Top and Landing Newel Placement
At the top of the stair, the newel often sits at the landing or where the stair meets the upper floor. The top edge of the newel block typically needs to land around 37 inches above the finish floor to maintain the proper rail reveal above the landing rail[reference:19]. The bottom end of the landing newel should extend below the face skirt board so it can be fastened into framing rather than just the finished surface[reference:20].
On a landing with a turn, the newel is permitted to interrupt the handrail, which simplifies the layout[reference:21]. The key is that the rail should terminate into the post with a fitting or a return, not run past it with a gap. If the post is set too far from the edge of the landing, the rail may need an awkward horizontal extension to reach it; if it is set too close, the post may interfere with traffic or trim.
Intermediate Newels on Long Runs
Long straight runs need intermediate posts for structural reasons, even when the code does not explicitly require them at a specific interval. Stair system manufacturers commonly recommend a newel every 5 to 6 feet on level runs, and posts should be placed at the beginning, the end, and anywhere the stair changes direction[reference:22]. Some modular balustrade systems publish maximum post centers, such as 3.7 meters on stairs and 2.4 meters on landings, which reflects the structural limits of the rail and fittings[reference:23].
The placement challenge on an intermediate post is that it interrupts the handrail. In a dwelling unit, the code permits interruption at a turn or landing, but a mid-run post on a straight stair is a different situation[reference:24][reference:25]. If a mid-run post is necessary, the handrail should pass around it with proper clearances rather than butting into it and leaving a discontinuous grip surface. In practice, many builders avoid mid-run posts on straight stairs unless the rail system is designed for post-to-post connections at that location.
| Newel Location | Common Placement Approach | Code / Safety Consideration | Practical Watch-Out |
|---|---|---|---|
| Bottom starter newel | Centered on the second riser, or aligned with the riser and stringer faces; sometimes on the floor in tight entries | Starting newel is permitted over the lowest tread; post must be securely anchored to framing | Front-of-tread placement can narrow the stair; floor-mounted posts need solid blocking |
| Top / landing newel | Set at the landing edge or where the stair meets the upper floor, with the block top around 37 inches above finish floor | Handrail may be interrupted at a turn or landing | Post must extend below the skirt board to reach framing |
| Intermediate newel on a long run | Every 5 to 6 feet on level runs; at direction changes | Mid-run interruption on a straight stair is restricted; rail must pass around the post with clearance | Confirm the rail system is designed for post-to-post connections at that point |
| Newel at a winder or turn | Centered on the turn or aligned with the rail centerline | Handrail interruption is permitted at a turn within a dwelling unit | Clearance for the hand grip may require a minimum distance between newels |
Layout Methods: From Full-Scale Drawings to Story Poles
The most reliable way to place a newel is to lay it out full scale before drilling anything. A stair builder with thousands of flights of experience describes making a full-scale drawing on rosin paper that includes four steps, four risers, the centerline of the newel post, the subfloor, and the floor framing[reference:26]. The drawing becomes a template for checking rail height, baluster length, and post location against the actual conditions rather than the blueprints, which often differ from what is on site[reference:27].
For a post-to-post railing, the layout is simpler but still benefits from a story pole or a marked template. Railing height is measured plumb up from an imaginary line tangent to the tread nosings, and the rail pitch is parallel to that line[reference:28]. If you know the rail height and the pitch, you can project where the newel centerline should fall at the bottom and top of the run. A roofing square, not a level, is the tool to use for squaring newels to treads during assembly; a level can be misleading on a sloped stair[reference:29].
Using the Handrail Centerline
The handrail centerline is the reference that ties the whole system together. On a starting step, the newel should be centered on the rail centerline, which is determined by the baluster width and the placement of the balusters[reference:30]. A common aesthetic choice is to align the first baluster on each tread with the face of the riser below, so the balusters appear to grow out of the stair rather than float[reference:31][reference:32]. Once that baluster line is set, the newel centerline follows from it.
Common Placement Mistakes to Avoid
- Putting the starter post on the very front of the bottom tread. This can make the stair feel narrow and chute-like, especially in a small foyer[reference:33].
- Anchoring only into finish flooring. A newel must transfer rail loads into framing; fasteners that only bite into subfloor sheathing or hardwood are not a structural connection[reference:34].
- Ignoring the nosing-to-newel relationship. The tread nosing traditionally dies into the newel, so the post must be wide enough to catch the nosing and the reveal. A newel that is too narrow for the tread overhang will leave the nosing hanging or require an awkward notch[reference:35].
- Placing a mid-run post without checking rail continuity. A straight-run interruption can violate handrail continuity rules unless the rail passes around the post with proper clearance[reference:36].
- Setting the post without checking baluster spacing. The newel location affects how balusters divide the opening; if the spacing cannot meet the 4-inch sphere rule, the layout needs to change[reference:37].
- Trusting the blueprints over the site. Stairwell rough openings and floor heights often differ from the drawings, so layout should be verified against actual conditions[reference:38].
Fastening and Structural Considerations
A newel post is only as good as its connection. When bolting or screwing a newel into place, the fasteners should penetrate the framing or the treads by roughly 3 inches, and screws should be inserted from two directions where possible[reference:39]. After installation, the post should not move; a firm hand hit on the top should produce a deep, solid vibration through the stair framing, not a hollow or loose rattle[reference:40]. If your stair is in a basement or utility area, it is also a good time to handle routine maintenance like a Bryant Plus 90 filter replacement while you have the tools out.
If you are building a deck stair or an exterior stair, the newel connection has to account for weather exposure and wood movement. Carriage bolts through the stringer or blocking are common, and some systems use specialized newel mounting brackets that are fastened to the framing before the post is attached. Regardless of the hardware, the post should be plumb and square to the tread, and any shimming should be structural, not cosmetic. If the stair framing feels flexible before the railing goes on, fix the framing first; a newel cannot stiffen a stair that is already undersupported. For structural splicing of heavy posts, the principles in our guide to extending a 6×6 post apply to how loads transfer through a connection.
When Placement Conflicts With the Space
Not every stair has room for an ideal starter post. A tight foyer, a curved stair, or a landing that doubles as a hallway can force compromises. In those cases, the priority order is safety first, structure second, and aesthetics third. If a floor-mounted post is the only way to keep the walkway clear, invest in the blocking and anchor hardware needed to make it solid[reference:41]. If a mid-run post is unavoidable, choose a rail system designed for that connection and confirm that the grip surface remains usable.
For a curved or winder stair, the newel at the turn may serve as the primary handhold, and the distance between newels can matter for grip clearance[reference:42]. A post that is too close to a wall or another post can pinch the hand, so check the clearance with a mock-up before final installation. The same careful measurement approach applies to other home improvement decisions where small dimensions have big consequences, whether you are installing acoustic panels in a home office or researching Renewal by Andersen window replacement options; placement and specification drive performance more than marketing claims.
FAQ
Where should the bottom newel post be placed?
A common approach is to center the bottom newel on the second riser or align it with the face of the riser and the stringer. Placing it on the very front of the bottom tread can narrow the stair and feel cramped. In tight entries, a floor-mounted post slightly in front of the stair is an option if it can be anchored securely to framing.
Can a newel post be in the middle of a straight stair run?
Handrail-gripping surfaces are generally required to be continuous, and interruption by a newel is typically permitted only at a turn or landing within a dwelling unit. A mid-run post on a straight stair can be acceptable if the handrail passes around it with proper clearance, but it should not create a discontinuous grip surface. Check with your local building department before committing to that layout.
How far should a newel post be from the edge of the stair?
There is no single universal dimension. Layout preferences include centering the post on the second riser, aligning the centerline with the riser and stringer faces, and setting the post to catch the tread nosing with a small reveal. The right distance depends on the tread overhang, the newel width, the baluster size, and the rail centerline. A full-scale drawing or mock-up is the most reliable way to settle the dimension.
Do I need a newel post at the top of the stairs?
A newel at the top or landing provides a secure termination for the handrail and a structural anchor for the balustrade. The code permits handrails to be interrupted by a newel at a turn or landing, so a top newel is common and often necessary for a solid rail connection. The post should extend below the skirt board or into framing so it is not relying on finish trim for support.
How many newel posts does a staircase need?
At minimum, most staircases need a post at the bottom and a post at the top or landing, plus posts at any change in direction. Long level runs may need intermediate posts every 5 to 6 feet, depending on the rail system and the manufacturer’s recommendations. The exact count depends on the stair configuration, the rail system, and local code requirements.
Can I move a newel post after it is installed?
Moving a newel is possible but disruptive. The old fastener holes need to be repaired, the rail and balusters may need to be recut, and the new location must still provide a solid structural anchor. If the post was set in wet concrete or anchored with epoxy, removal can damage the surrounding material. It is far easier to get the placement right before installation than to relocate a post later.