Flat, monochromatic ceilings are often the default standard in residential and commercial construction, yet they frequently leave a room feeling boxy and uninspired. Homeowners often struggle with basement renovations where low-hanging ductwork or plumbing creates awkward height restrictions, forcing a choice between a low ceiling everywhere or unsightly bulkheads. A multi level drop ceiling solves these spatial challenges by creating intentional tiers that conceal mechanical obstructions while maximizing headroom in living areas, adding architectural depth and visual interest to an otherwise flat space.
This architectural solution, also known as a tray ceiling or tiered suspended ceiling, offers more than just aesthetic appeal. It provides a practical framework for advanced lighting designs, improved acoustic management, and easier maintenance access. By manipulating ceiling heights, you can define specific zones within an open-concept room without building physical walls. This guide explores the engineering, design principles, and installation secrets required to execute a flawless multi-level ceiling project.
The Architectural Advantage of Tiered Ceilings
The primary motivation for installing a multi-level drop ceiling extends beyond covering up mess. It is about reclaiming the volume of a room. In many basements or commercial retrofits, a single pipe might run lower than the rest of the joists. Dropping the entire ceiling to clear this one obstruction results in a claustrophobic environment.
A tiered approach allows you to box out only the necessary areas. This creates a “soffit” effect that can run along the perimeter or cut through the center of the room. This technique preserves the maximum possible height in the center of the room, making the space feel larger and more open.
Beyond spatial management, these ceilings serve as massive acoustic dampers. The space between the drop tiles and the floor joists above acts as a sound trap. By varying the levels, you can further break up sound waves, reducing echo and noise transfer between floors. This is particularly vital for home theaters or basement apartments.
Defining Zones Without Walls
Open-concept living is popular, but it often lacks definition. A multi-level ceiling can subtly delineate a dining area from a living room or a kitchen from a hallway. By lowering the ceiling over a dining table or a kitchen island, you create a sense of intimacy and enclosure.
This visual cue is powerful. It suggests a change in function without interrupting the flow of traffic or light. Designers often mirror the floor layout with the ceiling plan. If there is a distinct flooring transition, a corresponding ceiling drop reinforces that boundary.
Advanced Lighting Opportunities
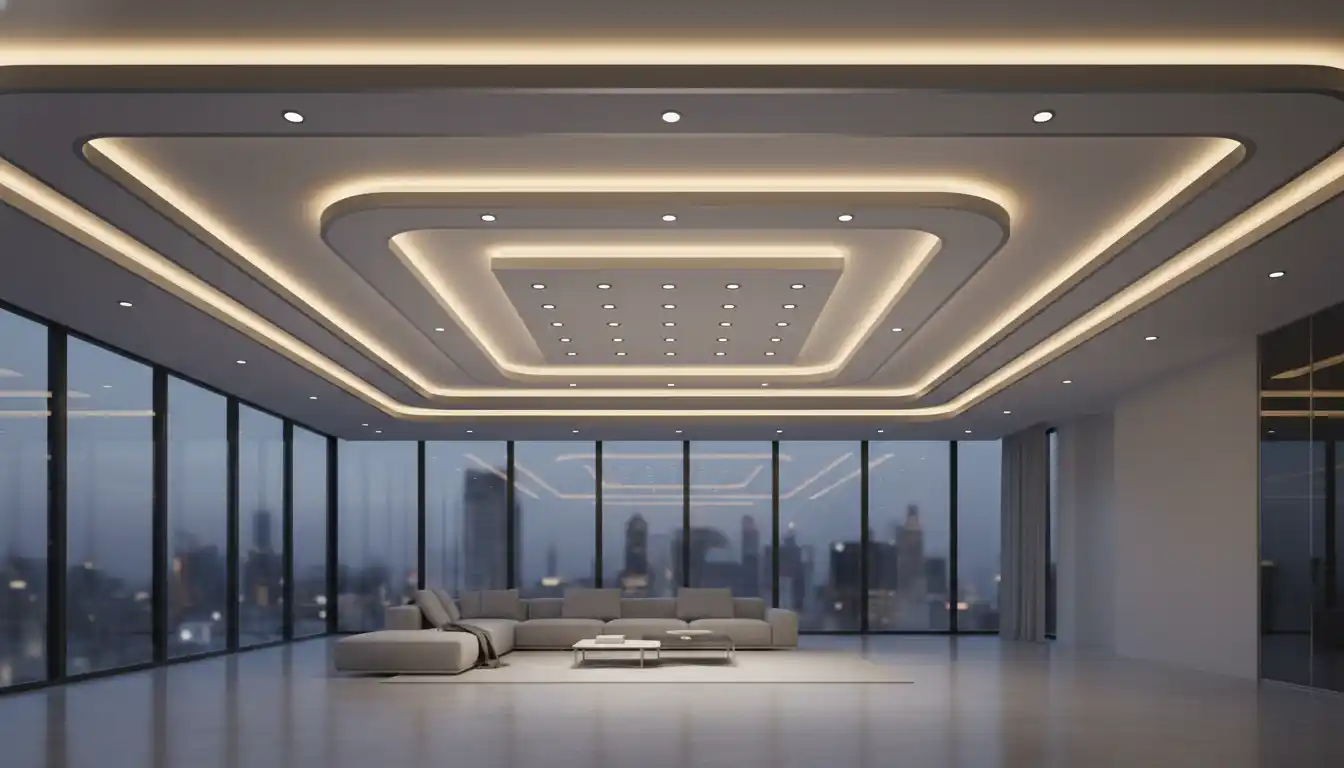
One of the most significant benefits of a stepped ceiling is the ability to integrate complex lighting schemes. The vertical face of the drop, known as the return, is the perfect location for hidden LED strip lighting. This creates a soft, ambient glow that reflects off the upper level, known as cove lighting.
Recessed can lights can be strategically placed in the lower tiers to provide task lighting, while the higher sections can accommodate statement chandeliers or pendants. When wiring these circuits, safety is paramount. In areas near water or damp basements, understanding electrical safety, such as the utility of a switched GFCI, ensures your sophisticated lighting setup is code-compliant and safe.
Critical Planning and Design Considerations
Before purchasing a single grid rail, precise planning is non-negotiable. A multi-level system adds a layer of complexity to the standard grid layout. You are not just calculating a flat plane; you are engineering a three-dimensional structure suspended from above.
The first step is a thorough obstruction map. Identify the lowest point of your mechanicals—ducts, plumbing, and electrical conduits. This lowest point dictates the height of your lower tier. The upper tier should then be placed as high as the joists allow, typically leaving just enough room for tile manipulation (usually 3 to 4 inches).
Calculating Vertical Transitions
The transition between levels is the most challenging aspect of the design. You must decide whether the vertical face will be a drywall bulkhead or a continuation of the grid system. A drywall bulkhead offers a seamless, painted look that mimics traditional framing.
Alternatively, using grid components for the vertical return creates a more industrial or commercial aesthetic. This method is faster but requires specific angled clips and careful tile cutting. The height of this vertical step must be calculated carefully. It should ideally align with the module size of your tiles to avoid awkward, thin slivers of tile at the transition point.
Structural Support and Bracing
Standard drop ceilings hang on wires. Multi-level ceilings, however, require additional bracing to prevent the lower tier from swaying. The vertical transition introduces a pivot point. If not braced diagonally, the lower island can swing independently of the upper section during vibrations or airflow changes.
In seismic zones, this is even more critical. You may need to install rigid vertical struts or compression posts. Just as you would reinforce concrete with vertical rebar in block walls to handle lateral loads, your ceiling grid needs diagonal splay wires to handle lateral movement. Failing to stabilize the lower tier can lead to cracked joints or collapsed grids.
Aesthetic Proportions and Symmetry
Balance is key to a professional finish. If you are creating a center island or a perimeter drop, symmetry matters. The border tiles on opposite sides of the room should be equal in size. A common mistake is starting with a full tile on one side and ending with a tiny sliver on the other.
Consider the relationship between the ceiling drop and vertical elements like windows. You need to maintain adequate clearance above window headers. Just as there is a recommended minimum space between two windows to maintain structural and visual harmony, there must be a proportionate gap between the top of a window casing and the start of a ceiling drop to avoid a cramped appearance.
Installation: The Step-by-Step Breakdown
Installing a multi-level drop ceiling requires patience and adherence to a strict sequence of operations. Unlike a flat ceiling where you can work from the perimeter inward, a tiered system often requires building the transition first.
Accuracy with the water level or laser level is vital. You will be managing two distinct horizon lines. Mark both the high perimeter and the low perimeter on your walls. Color-coding your chalk lines can prevent costly confusion during the framing stage.

Phase 1: The Transition Bulkhead
If you are building a drywall return, frame this first using steel studs or wood. This frame must be rigidly attached to the joists above. The bottom track of this bulkhead will serve as the mounting point for the wall angle of the lower ceiling tier.
If you are using a grid-based return, you will install a specialized “F-molding” or transition clip. This creates a finished edge for the upper tiles while providing a connection point for the vertical grid pieces. This method is faster but requires precise alignment to ensure the grid lines on the upper and lower levels match up perfectly.
Phase 2: The Grid System
Install the wall angles for both levels. Ensure they are perfectly level. Next, install the main runners. This is where the complexity arises. The main runners for the lower level must be suspended from the joists, passing through the plane of the upper level if necessary.
Crucial Tip: Align your main runners so that they run continuous through the transition if possible, or are perfectly inline. If the grid lines shift even a fraction of an inch between levels, the visual effect will be jarring and unprofessional.
Phase 3: Stabilization and Tiles
Once the grid is up, install all hanger wires. For the lower tier, ensure wires are taut. Install diagonal bracing wires at the transition points to lock the grid in place. Once the skeleton is rigid, drop in your lighting fixtures and then the tiles.
Work from the center out. Cut your perimeter tiles last. For the vertical tiles (if using a grid return), cut them to fit snug. You may need to use hold-down clips to keep these vertical tiles from rattling or falling out over time.
Material Comparison: Choosing the Right Finish
The materials you choose for your drop ceiling significantly impact the cost, durability, and acoustic performance. Below is a comparison of common material choices for multi-level applications.
| Feature | Mineral Fiber (Traditional) | PVC / Vinyl Tiles | Metal Tiles |
|---|---|---|---|
| Cost | Low to Medium | Medium to High | High |
| Moisture Resistance | Low (Can sag/stain) | Excellent (Waterproof) | High (If coated) |
| Acoustic Performance | Excellent (Absorbs sound) | Moderate (Reflects sound) | Low (Echoes unless perforated) |
| Installation Ease | Easy to cut, fragile | Easy to cut, flexible | Difficult (Requires tin snips) |
| Vertical Application | Fragile for vertical returns | Durable, good for returns | Requires specific clips |
Overcoming Common Installation Pain Points
Even experienced DIYers encounter specific hurdles with multi-level ceilings. The most common complaint is the “floating island” instability. If you build a lower cloud or island in the center of the room, it has no wall attachment on any side.
To solve this, the diagonal bracing mentioned earlier is mandatory, not optional. You must brace in all four directions (North, South, East, West) to the joists above. Without this, cleaning the tiles or changing a light bulb can cause the entire island to swing, potentially disconnecting the grid.
The “Reveal” Edge Challenge
Standard square-edge tiles sit flat on the grid. Tegular or “reveal” edge tiles hang slightly below the grid, creating a 3D look. When using reveal tiles on a multi-level ceiling, the cut edges at the transition point can be problematic.
When you cut a reveal tile, you lose the stepped edge, and the cut side will sit higher than the factory edges. To fix this, you must “back-cut” the tile or use a specific shadow molding that hides the cut edge. Failure to address this results in an uneven, amateurish perimeter.
HVAC Airflow Balancing
When you drop a ceiling, you change the volume of the room and potentially cover vents. You must extend your HVAC boots down to the new ceiling level. Do not just let air blow into the space above the tiles; this causes condensation and mold.
Furthermore, ensure that return air pathways are not blocked. A multi-level ceiling can inadvertently create air traps. Install jumper ducts or return grilles to ensure air can circulate freely from the room back to the HVAC unit, maintaining the efficiency of your heating and cooling system.
Cost Analysis and Value Addition
A multi-level drop ceiling is more expensive than a standard flat grid, typically costing 20% to 40% more due to the extra hardware and labor involved in the transitions. However, the ROI is significant compared to a flat drop ceiling.
A flat drop ceiling is often viewed as a “basement” feature. A sculpted, multi-level ceiling is viewed as a “design” feature. It lifts the perception of the room from a utility space to a finished living area. This can be a deciding factor in home appraisals, especially for finished basements.
If you are hiring a professional, expect to pay a premium for the layout time. The labor for framing the bulkheads and transitions is time-consuming. For DIYers, the cost increase is mostly in materials—extra wall angles, transition clips, and wire.
Maintenance and Long-Term Care
One of the unsung benefits of this system is serviceability. Unlike a drywall soffit which permanently boxes in pipes, a grid-based multi-level ceiling allows access. However, the transition areas are often tight.
When planning, ensure that shut-off valves and junction boxes are not located directly above the complex vertical transitions where tile removal is difficult. Position these critical access points in the flat, wider sections of the ceiling layout.
Cleaning Tip: The vertical faces of a multi-level ceiling collect dust differently than horizontal surfaces. If you use texture tiles for the vertical return, they will trap dust. Using a smooth vinyl or metal tile for the vertical section can significantly reduce maintenance effort.
By understanding the structural requirements and design potential of a multi-level drop ceiling, you can turn a challenging renovation into a stunning architectural feature. It requires careful math and patience, but the result is a custom look that elevates the entire home.