One of the most common debates in bathroom plumbing—and a source of catastrophic clogs for unsuspecting DIYers—is how the toilet flange connects to the drain pipe. Get this wrong, and you risk sewer gas leaks, wobbly toilets, and frequent blockages.
The short answer is: For a standard 3-inch drain pipe, the flange should always go OUTSIDE the pipe. For a 4-inch drain pipe, the flange can go either INSIDE or OUTSIDE.
While that rule seems simple, real-world bathroom renovations are rarely perfect. You might be dealing with an old cast iron drain, a concrete slab that makes access impossible, or a “hub” fitting that complicates things. This guide will walk you through exactly why these rules exist, when you might be forced to break them, and how to ensure your toilet flushes freely for years to come.
The Golden Rule: Pipe Diameter Dictates the Fit
The decision to install a flange inside or outside the pipe is strictly determined by the diameter of your waste line. In modern residential plumbing, you will almost exclusively encounter two sizes of waste pipes for toilets: 3-inch and 4-inch.
The 3-Inch Pipe: Always Go Outside
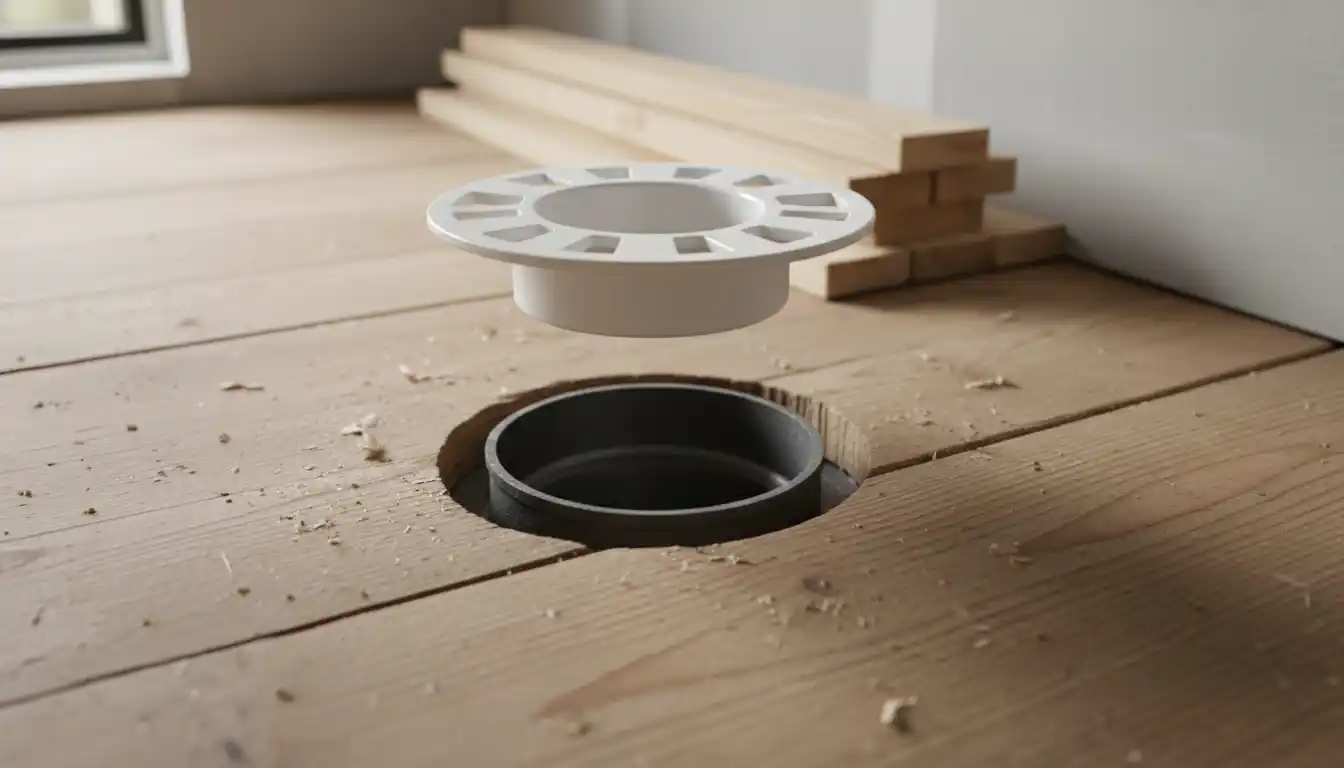
If you have a 3-inch waste pipe (measured by the inside diameter), you must install a “hub” style flange that fits over the outside of the pipe. This is the industry standard and the only method fully endorsed by most plumbing codes.
The reason is simple: flow restriction. The inside diameter of a standard Schedule 40 PVC or ABS pipe is roughly 3 inches. If you insert a flange inside this pipe, the plastic wall of the flange (plus the glue) reduces the opening to approximately 2.5 inches. While the “horn” (the outlet) of a toilet is usually only 2 inches, creates a dangerous “ledge” or lip inside the pipe.
This ledge becomes a catch point. Toilet paper and solid waste can snag on this rim, leading to frequent, stubborn clogs. Furthermore, the sudden reduction in diameter can disrupt the siphon action required for a strong flush.
The 4-Inch Pipe: Inside or Outside Works
If your home has a 4-inch waste line, you have significantly more flexibility. Because the pipe is wider, you can safely install a flange that goes inside the pipe.
When you insert a flange into a 4-inch pipe, the opening is reduced to about 3.5 inches—still wider than a standard 3-inch drain and significantly wider than the toilet’s outlet. Therefore, no flow restriction occurs, and the risk of clogging is negligible. You can also use an “outside” fit flange on a 4-inch pipe, though “inside” fit is often preferred by plumbers because it is easier to glue without excavating the floor around the pipe.
The “Cheater Flange” Debate
You may encounter a product at hardware stores labeled as a “3-inch inside fit” or “repair” flange. Plumbers often derisively call these “cheater flanges.”
These are designed to slip inside a 3-inch pipe. They are marketed as a quick fix for situations where you cannot get to the outside of the pipe—for example, if the pipe is flush with a concrete slab and you don’t want to chip away the concrete.
Should you use one? Only as a absolute last resort. While many DIYers use them successfully, they technically violate the code in many jurisdictions because they reduce the bore of the drain. If you must use one, ensure you are installing a high-efficiency toilet with a strong flush valve to minimize the risk of waste settling on the internal ledge.
Understanding Flange Types: Hub vs. Spigot
To buy the right part, you need to speak the language of fittings. The confusion often stems from not knowing the difference between a “Hub” and a “Spigot.”
- Hub Flange (Outside Fit): This flange has a socket (a cup) that slides over the pipe. This is the standard choice for 3-inch pipes.
- Spigot Flange (Street Fit): This flange has the same outer diameter as the pipe itself. It is designed to fit into a fitting hub (like an elbow or a coupling), not into the pipe itself.
- Internal/Inside Fit: These have a smaller diameter designed specifically to slide inside the pipe wall.
If you are confused about which material to choose, you might want to read our comparison on ABS vs PVC Toilet Flange to ensure you are buying the correct chemical solvent for your pipes.
Detailed Comparison Table: Fitment Guide
Use this table to quickly determine the correct installation method for your specific plumbing setup.
| Pipe Diameter | Recommended Fit | Acceptable Fit | Fit to Avoid (Risky) |
|---|---|---|---|
| 3-Inch Pipe | Outside (Hub Fit) | None | Inside (Reduces flow, causes clogs) |
| 4-Inch Pipe | Inside or Outside | Inside (Most common) | None (Both work well) |
| Cast Iron (Old) | Compression/Gasket Fit (Inside) | Lead/Oakum (Outside) | Glue-in adapters (Often leak) |
| Fitting Hub (Elbow) | Spigot (Fits inside hub) | None | Hub Fit (Will not fit) |
Installation Best Practices
Once you have determined whether to go inside or outside, the installation process requires precision. A flange that is installed incorrectly can lead to rocking toilets and broken wax seals.
1. Proper Height is Crucial
Whether you glue the flange inside or outside, the bottom of the flange ring should sit on top of the finished floor. It should not be flush with the subfloor. If you are tiling, the flange goes on top of the tile. If the flange is too low, you will need extra-thick wax rings, which are prone to blowing out.
2. Primer and Glue
Ensure you are using the correct solvent cement. Use purple primer and PVC cement for white pipes, or yellow ABS cement for black pipes. Do not mix them unless you use a specific “transition” glue. If you are doing a major renovation, such as hanging drywall on 10-foot walls in a new bathroom, always protect your open drain pipes with a rag or test plug to prevent debris from falling in before the flange is installed.
3. Securing to the Floor
The flange must be screwed to the subfloor, not just glued to the pipe. The bolts that hold the toilet down pull up on the flange; if the flange isn’t screwed to the floor, you risk pulling the pipe loose or cracking the glue joint.
Renovation Scenarios: When Things Get Tricky
In a perfect world, you would always have access to the outside of the pipe. But in renovations, you often have to adapt. Just like installing vinyl fence over existing metal posts saves you from digging up concrete, sometimes you need plumbing solutions that work with existing infrastructure.
Scenario A: The Concrete Slab
If you have a 3-inch pipe embedded in concrete, you cannot easily install an outside-fit flange without chipping away the concrete. This is the most common scenario where people use the “inside fit” 3-inch flange.
The Professional Solution: Use a hammer drill and a small chipping chisel to clear about 3/4 inch of concrete around the pipe. This gives you enough clearance to install a standard outside-fit flange. It takes 20 minutes of extra work but guarantees you won’t have clogging issues later.
Scenario B: Pipe Cut Too Short
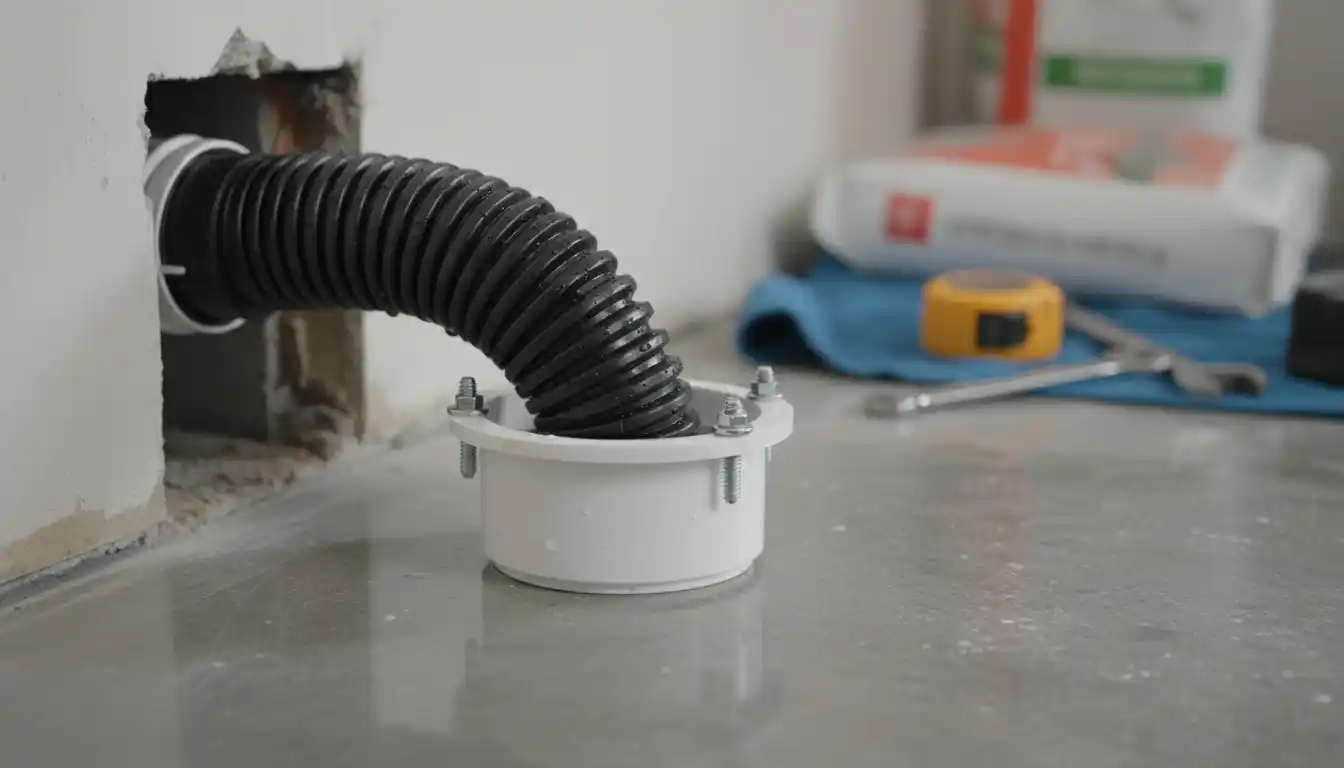
If the pipe was cut below the floor level, an outside-fit flange might not reach deep enough to grab the pipe. In this case, you might need a “deep seal” flange or a coupling to extend the pipe up. Never “dry fit” a flange hoping the wax ring will hold it; the solvent weld is structural.
Frequently Asked Questions: Toilet Flange Installation and Fit
Should a toilet flange generally go inside or outside the waste pipe?
In most standard new construction scenarios, the toilet flange is designed to go over the outside of the pipe. This “hub” style installation allows for the maximum amount of water flow. By placing the fitting on the outside, you maintain the full interior diameter of the waste pipe, ensuring that solids can pass through without catching on the lip of an internal flange.
Can I install a flange inside a 3-inch PVC or ABS pipe?
No, you should generally avoid installing a flange inside a 3-inch pipe. Because the inner diameter of a 3-inch pipe is already the minimum standard for a water closet drain, inserting a flange inside it reduces the diameter to approximately 2.5 inches. This creates a “bottleneck” that violates many plumbing codes and significantly increases the risk of frequent clogging.
Is it acceptable to put a flange inside a 4-inch pipe?
Yes, installing a flange inside a 4-inch pipe is a common and code-compliant practice. Since a 4-inch pipe is larger than the required minimum for a toilet drain, reducing the opening slightly with an internal flange still leaves roughly 3.5 inches of clearance. This is sufficient for waste to pass freely, and many “solvent weld” flanges are designed to fit inside 4-inch pipes or over 3-inch pipes.
How do I handle a flange installation for cast iron pipes?
Cast iron pipes often require different fittings than plastic pipes. While traditional methods involved lead and oakum, modern renovations typically use a compression flange with a rubber gasket that fits inside the cast iron pipe. Alternatively, if the cast iron pipe has no hub, you may need a specialized flange that slides inside and expands to seal against the rough inner walls of the metal.
What is the risk of using an “inside fit” flange incorrectly?
The primary risk is creating a flow restriction and a ridge where debris can accumulate. If a flange sits inside the pipe, the top edge of the pipe creates a step or ledge. Waste paper and solids can snag on this ledge, leading to a buildup that eventually blocks the drain completely. This is why “outside fit” is preferred whenever space allows.
Does the toilet flange need to be glued if it fits outside the pipe?
Yes, if you are working with PVC or ABS plastic pipes, a flange that fits outside the pipe must be solvent welded (glued). You must use the appropriate primer and cement for the material type (PVC or ABS) to create a permanent, watertight, and gas-tight bond. Failure to glue the flange can result in sewer gas leaks and water damage to the subfloor.
What are “offset flanges” and how do they fit?
Offset flanges are specialized fittings used when the rough-in hole in the floor is not at the correct distance from the wall (standard is 12 inches). These flanges usually fit over the pipe but have an angled shape to shift the toilet mounting bolts by 1 to 2 inches. While helpful, they can restrict flow slightly, so they should only be used when moving the pipe itself is impossible.
Should the flange sit flush with the floor or on top of it?
For the best seal with a standard wax ring, the bottom of the flange lip should rest on top of the finished floor level (tile, hardwood, or vinyl). If the flange is mounted flush with the subfloor and you tile around it, the flange will be too low. In this case, you may need to use a flange extender or an extra-thick wax ring to prevent leaks.
Can I use a “push-in” or gasketed flange for repairs?
Push-in flanges with rubber gaskets are excellent for repairs, especially where the old pipe has been cut flush with the floor or where gluing is difficult. These almost always go inside the pipe. As with standard flanges, ensure you are not restricting a 3-inch pipe too severely; however, for 4-inch pipes or cast iron repairs, these are a standard and reliable solution.
How do I know if my current flange is fitted incorrectly?
Signs of an incorrect flange fit include a rocking toilet, odors of sewer gas, or water leaking around the base of the toilet. If you experience frequent clogs despite using “flushable” materials, it may indicate that an internal flange was used on a 3-inch pipe, creating a catch point. If you suspect this, the toilet must be removed to inspect the flange and pipe connection.
Summary
To avoid future headaches, follow this simple hierarchy of decision-making:
- Identify your pipe size (3″ or 4″).
- If 3-inch: Move heaven and earth to install the flange OUTSIDE the pipe. Chip concrete if you have to.
- If 4-inch: Install the flange INSIDE the pipe for ease, or outside if preferred.
- Always secure the flange to the finished floor, not the subfloor.
By sticking to these hydraulic principles, you ensure that your new bathroom handles waste efficiently, keeping your plunger gathering dust in the corner where it belongs.