Installing two windows side-by-side seems like a straightforward way to flood a room with natural light. However, the structural complexity of double window framing is often underestimated, leading to critical errors. A poorly executed frame doesn’t just look bad; it can compromise the entire load-bearing capacity of a wall, causing sagging headers, cracked drywall, and windows that stick or fail to seal properly.
The core problem lies in treating the project like framing a single window, only wider. This approach overlooks the concentrated stress placed on the central point between the two windows and the increased load the header must support. Without proper reinforcement and precise calculations, the wall can develop significant structural problems over time.
Why Standard Framing Fails: Understanding the Unique Stresses
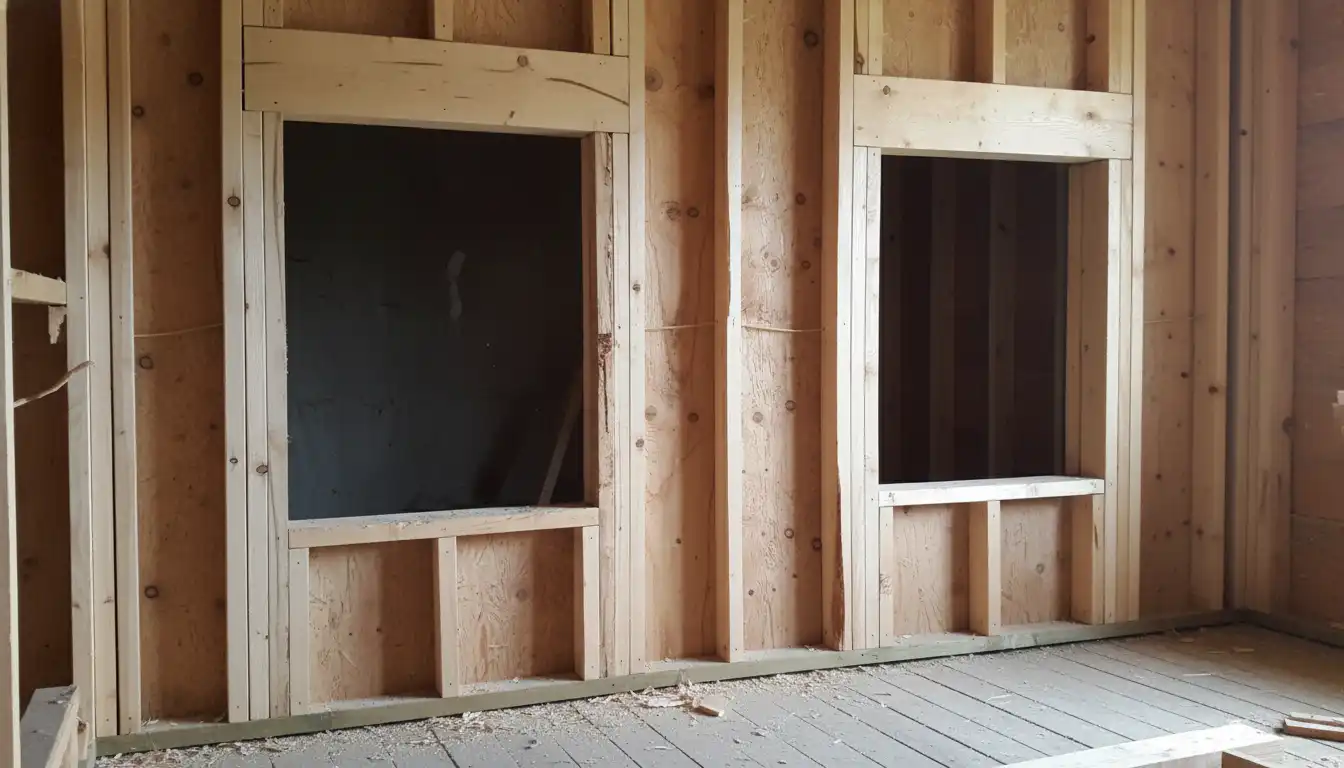
When you cut an opening in a load-bearing wall, you interrupt the vertical path that transfers weight from the roof down to the foundation. A header is installed above the opening to bridge this gap, carrying the load and distributing it to the jack studs on either side. With a double window, this span is significantly wider, and the load is much greater, demanding a more robust framing solution.
A common mistake is failing to properly construct the central support between the two windows, known as the mullion. This vertical post isn’t just a spacer; it’s a structural component that helps transfer load. If the mullion is weak or improperly connected, it can lead to sagging, creating a weak point in the center of the opening that jeopardizes both windows and the wall itself.
Furthermore, air infiltration is a major concern. The increased seam length around two windows and through the central mullion creates more opportunities for drafts. Improper sealing at the framing stage will lead to energy loss, moisture problems, and uncomfortable drafts that are difficult to fix later.
Calculating the Rough Opening: The Foundation of Success
Precision is paramount from the very first step. The rough opening must accommodate both windows, the central mullion, and allow for shimming and insulation. An incorrect rough opening calculation is one of the most frequent and costly errors.
To determine the total width, add the width of each window, the thickness of the central mullion assembly, and an additional 1/2 inch (1/4 inch on each outer side) for shimming and squaring. For the height, the standard formula is to add 1/2 inch to the window’s height. Always measure each window unit, as manufacturing tolerances can vary.
For example, if you have two windows that are 36 inches wide and a central mullion built from two 2x4s (3 inches total), the calculation would be: 36″ (Window 1) + 36″ (Window 2) + 3″ (Mullion) + 0.5″ (Outer Gaps) = 75.5″ total rough opening width. Neglecting any of these elements will result in a fit that is too tight, preventing proper alignment and insulation.
Building a Rock-Solid Double Window Frame: A Step-by-Step Solution
Constructing a durable and structurally sound double window frame involves more than just assembling lumber. It requires a methodical approach that prioritizes strength and precision at every stage. Follow these steps to ensure your framing is robust and perfectly square.
Step 1: Constructing the Header
The header for a double window must be sized to handle the increased span and load. Never guess on header size; consult local building codes or a span table. For wider openings, a double 2×10 or 2×12 is often required. The header is typically made of two pieces of dimensional lumber with a 1/2-inch plywood or OSB spacer sandwiched between them, making its total thickness equal to the 3.5-inch depth of a standard 2×4 wall.
Cut the header to the total width of the rough opening. Nail the three pieces together securely. When selecting your lumber, consider upgrading your fasteners. While standard nails are common, understanding the nuances between different types, like in the comparison of .120 vs .131 framing nails, can make a difference in structural rigidity.
Step 2: Assembling the Side Supports
Each side of the rough opening requires a king stud and at least one jack stud. The king stud runs uninterrupted from the bottom plate to the top plate of the wall. The jack stud (or trimmer) is cut to fit snugly underneath the header, transferring the load from the header down to the bottom plate.
Nail the jack stud securely to the king stud, creating a strong laminated post. For very wide openings or in walls carrying heavy loads, a double jack stud is recommended for additional support.
Step 3: Creating the Center Mullion Post
The center support is a critical component that many get wrong. The most robust method is to build a mullion post by nailing two or three studs together. This creates a solid wood column between the two windows that provides a strong nailing surface and essential structural support.
This mullion post will function similarly to the jack studs at the ends of the opening, supporting the center of the long header. It must be cut to the same height as the jack studs and positioned perfectly in the center of the rough opening.
Step 4: Assembling the Full Frame
With the components built, you can assemble the frame. Install the king and jack stud assemblies at both ends of the opening. Lift the header into place, resting it firmly on top of the jack studs. Secure the header by nailing through the king studs into the ends of the header.
Next, install the center mullion post directly under the header, ensuring it’s plumb and centered. Finally, install the cripple studs below the windowsill and above the header. Cripples transfer weight and provide a nailing surface for sheathing and drywall. This is a good time to consider your finishing materials; for instance, understanding what 3/8″ sheetrock is used for can help you plan for a smoother finish around the complex window assembly.
| Component | Material | Function | Key Tip |
|---|---|---|---|
| Header | (2) 2x10s or 2x12s w/ 1/2″ Spacer | Supports the load above the window opening. | Always consult span tables or local codes for correct sizing. |
| King Stud | 2×4 or 2×6 Lumber | Full-height stud that runs alongside the jack stud. | Ensure it is a single, continuous piece from bottom to top plate. |
| Jack Stud (Trimmer) | 2×4 or 2×6 Lumber | Supports the ends of the header. | Must be cut precisely to ensure the header is level. Use a double jack stud for wider spans. |
| Mullion Post | (2) or (3) 2x4s Nailed Together | Provides central support for the header. | Build as a solid post for maximum strength and stability. |
| Sill Plate | 2×4 or 2×6 Lumber | Forms the bottom of the window rough opening. | Ensure it is perfectly level before installing windows. |
| Cripple Studs | 2×4 or 2×6 Lumber | Short studs below the sill and above the header. | Maintain standard 16″ or 24″ on-center spacing for drywall attachment. |
Beyond the Frame: Advanced Techniques for a Perfect Installation
A well-built frame is only part of the equation. To prevent future problems, you must address air sealing and structural integration with the rest of the wall system. These advanced considerations separate a professional job from a problematic one.
The Unseen Threat: Air and Moisture Management
The space between the window unit and the rough framing is a primary source of energy loss. Do not rely on fiberglass insulation to stop air leaks. Instead, use low-expansion spray foam specifically designed for windows and doors. This foam fills the gap completely, creating an airtight and waterproof seal without exerting enough pressure to bow the window frames.
Pay special attention to the central mullion. This area has multiple seams that must be sealed meticulously. Caulk the joints of the mullion post itself before installing the windows, and then foam the gap between the windows and the mullion post after they are set.
Integrating with Wall Systems
The framing must work in harmony with other wall components. For example, if your project involves an exterior wall, you might need to navigate around existing infrastructure. Knowing how to handle a plumbing vent in an exterior wall without compromising its structure is crucial for complex renovations.
Finally, ensure the exterior is properly flashed. Use self-adhering flashing tape around the entire window opening, starting from the bottom sill and overlapping in a shingle-like fashion. This prevents water from ever reaching the wooden framing, protecting your investment from rot and moisture damage for years to come.